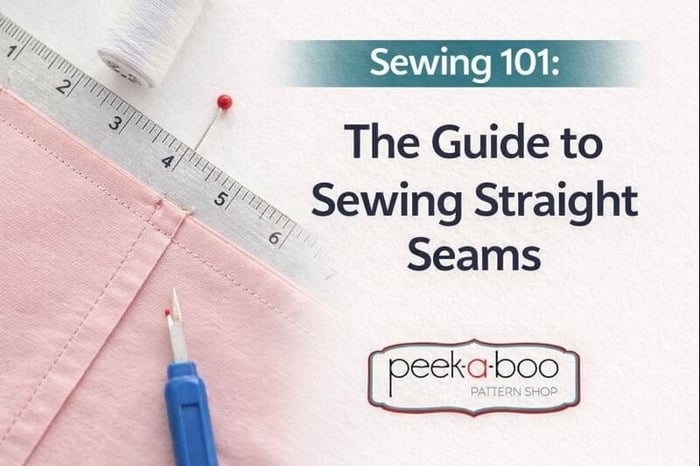
How to Sew Straight Seams | Sewing 101
Table of Contents
- What is a seam?
- Why is it important to sew your seams straight?
- 5 Steps to sewing straight seams
- Step 1: Set up your sewing machine
- 2. Practicing sewing straight seams on a template
- Step 3: Mark and Measure Your Seam Allowance
- Step 4: Fabric support and control
- Step 5: Tools to help you sew straight seams
- How to sew a basic straight seam for beginners
- Sewing tips for How to Sew Straight Seams
- Final thoughts on sewing straight seams
- FAQs
Learning how to sew straight seams is one of the most fundamental skills every beginner sewist needs to master. While it may seem simple, stitching perfectly straight lines requires proper machine setup, good fabric control, and consistent practice. Straight seams form the foundation of every garment, quilt, and sewing project you'll create.
In this comprehensive guide, you'll learn proven techniques for sewing straight seams, discover helpful tools that make the process easier, and get practical tips to improve your sewing accuracy. Whether you're working on your first project or looking to refine your technique, mastering straight seams will dramatically improve both the appearance and durability of everything you sew.
What is a seam?
According to the Merriam-webster dictionary, a seam is defined as:
The joining of two pieces (as of cloth or leather) by sewing, usually near the edge.
Why is it important to sew your seams straight?
Straight, consistent seams are essential for several important reasons:
Proper Fit: Uneven seams alter the dimensions of your pattern pieces, causing garments to fit incorrectly. A seam that wavers even 1/8" can throw off the entire fit.
Professional Appearance: Neat, straight seams make the difference between homemade-looking and professionally finished projects. They create clean lines that are visible both inside and outside your garment.
Structural Integrity: Consistent seam allowances ensure that stress is distributed evenly across stitches. Wavy seams create weak points where fabric can pull apart or pucker under tension.
Ease of Construction: Straight seams make subsequent steps easier, from pressing to adding facings or linings. They also make matching pattern pieces more accurate.
5 Steps to sewing straight seams
Step 1: Set up your sewing machine
Before starting to sew, take some extra minutes to make sure your sewing machine is set up correctly.
1a. Check your needle and thread
Use a new, sharp needle that matches your fabric type. Since a bent or even a dull needle can make your stitches uneven. Choosing the correct sewing machine needle also revolves around two key considerations: the type and weight of the fabric, as well as the type of thread being used for the project.
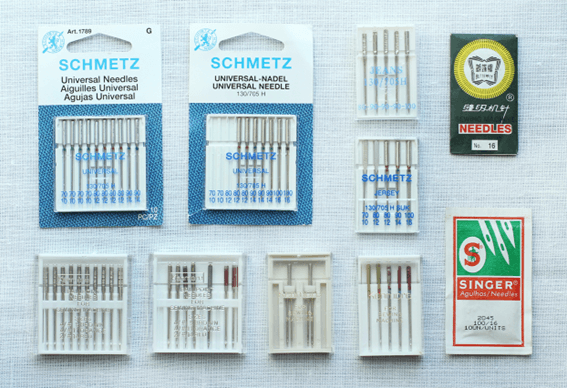
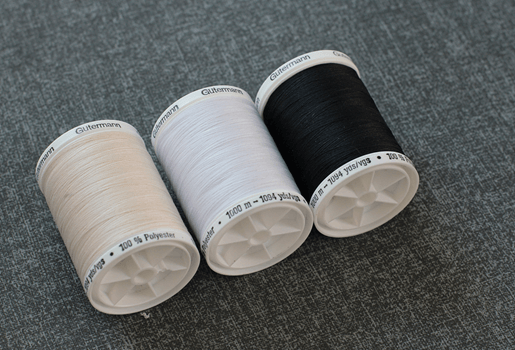
Select a thread based on the requirements of the fabric. Use topstitching thread when working with heavyweight fabrics like wool or denim, as the effect will be noticeable and prominent on the garment. Regular thread works very well in case you want to achieve a neat finish and stitches that provide stability. When doing topstitching on lightweight fabrics, silk or embroidery thread is an excellent choice for topstitching.
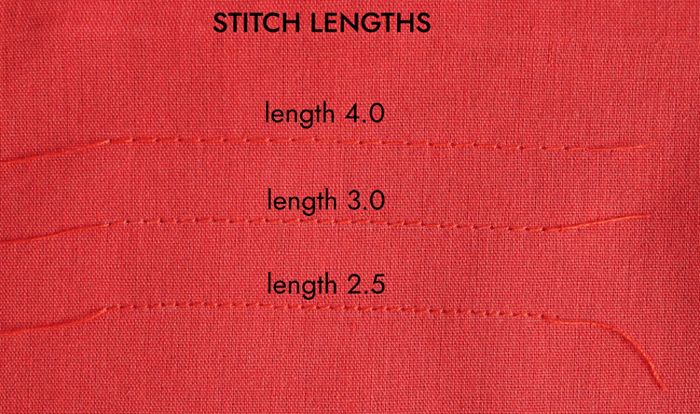
2a. Machine tension and stitch length
As a beginner, aim for a 2.5 mm stitch length unless you’re using delicate fabrics (which need shorter stitch lengths) or heavyweight fabrics (which need longer stitch lengths).
When the stitch length is not adjusted properly, you may experience tension issues and fabric gathering along the seam. For example, if the stitch is too short, the fabric will pucker since the machine is pulling less fabric with each stitch, resulting in a dense, tight seam. It can also cause thread breakage, as it creates tension on the thread.
On the other side, when the stitch length is too long, seams are weak and prone to pulling apart, which makes them look unfinished or like a temporary basting stitch.
3a. Thread your machine according to the manual. You will notice immediately if your machine is not threaded properly since it causes tension issues, gathers thread under the fabric, and the stitching is not smooth.
4a. Wind and insert the bobbin correctly
Check the sewing machine’s manual for step-by-step winding and inserting a bobbin the right way. When the bobbin is uneven or not placed correctly causes thread tension and uneven stitches.
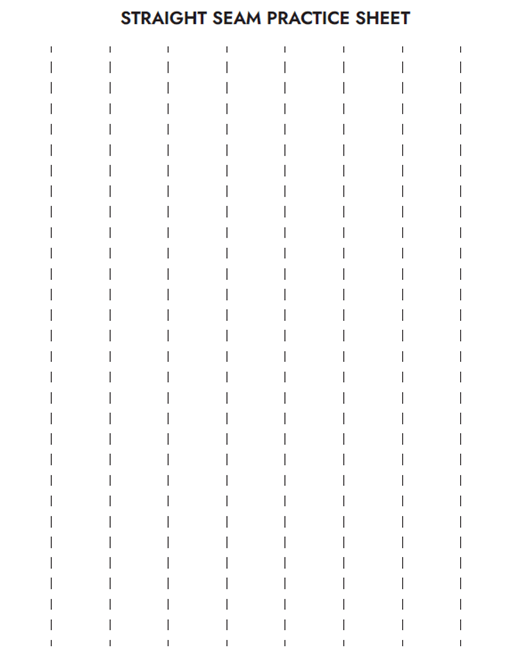
2. Practicing sewing straight seams on a template
When new to sewing, it’s desirable to practice stitching straight seams on paper or fabric. Simply use a ruler to transfer the lines on paper or fabric. During this exercise, you can also practice using shorter or longer stitch lengths and go at a speed you feel comfortable with.
Tip: If practicing on paper, try to use dull or old sewing needles that you don’t need, since the paper ruins good sewing needles.
Download our FREE straight seam practice sheet HERE
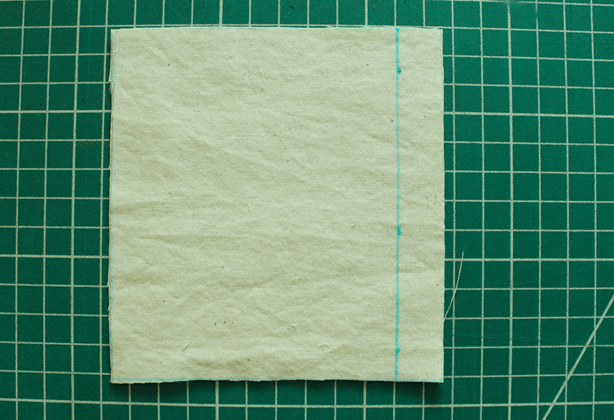
Step 3: Mark and Measure Your Seam Allowance
Seam allowance is what keeps clothes together. If we were to sew the very edges of fabric together, there would be no seam stability, and the pressure close to the stitching line would be so high, resulting in holes and frayed seams.
To add seam allowance to your project, you will need: a water-soluble pen or chalk,a transparent straight ruler, and define the amount of seam allowance you plan to add.
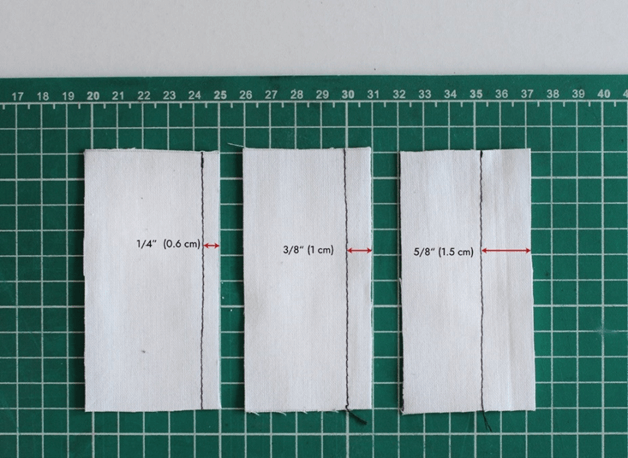
Use a ruler or a sewing gauge to measure your seam allowance (commonly ¼", ⅜", or ½") and draw clear lines on the fabric edges. Marking the seam allowance on your fabric helps to keep a consistent straight stitch.
Step 4: Fabric support and control
Avoid pushing or pulling the fabric while sewing. The feed dogs under the presser foot are designed to move the fabric smoothly for you. Simply guide the fabric with both hands, applying gentle, even pressure to keep it straight.
It may take some practice to get comfortable, but that practice truly makes a difference! Once you’ve learned to support the fabric correctly, experiment with your sewing speed. Always begin slowly, especially when sewing around corners. Starting at a slower speed helps you to build control, and as your confidence grows, you can gradually increase the machine’s speed.
Step 5: Tools to help you sew straight seams
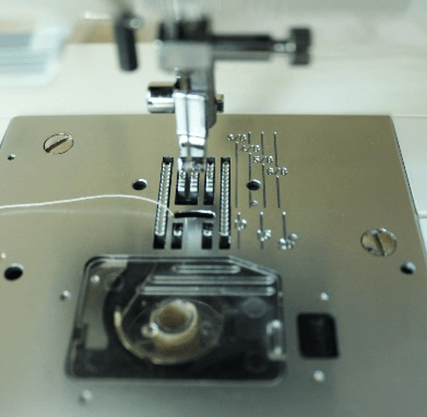
5a. Needle plate
Familiarize yourself with seam allowance markings on the throat plate under the needle. While these markings may vary between sewing machines, they typically include markings from ¼ to 1 inch (0.6 to 2.5 cm).
Align the raw edge of the fabric with the marking (let’s take as an example 5/8 inch (1.5 cm) seam allowance). Remember that these markings on the needle plate are accurate only when the needle is in the center position.
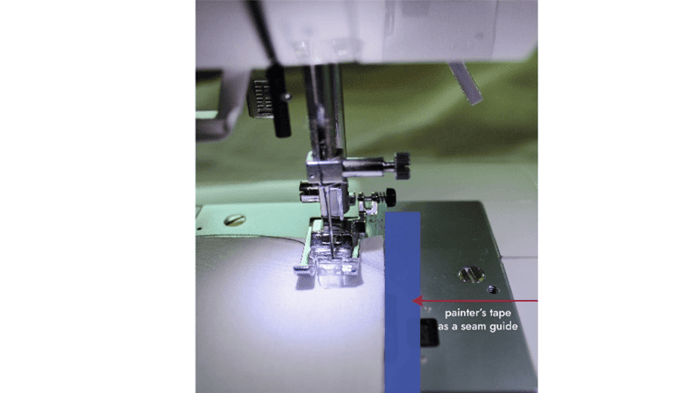
5b. Create a seam guide on the plate using painter’s tape, a rubber band, and line up the fabric to the edge of your guide while sewing.
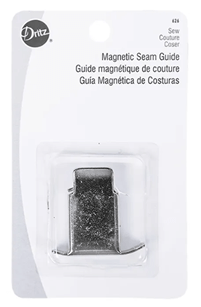
5c. Magnetic seam guide
The magnetic seam guide is a beginner-friendly tool that attaches to the sewing machine’s metal plate. This tool helps to keep a uniform seam width when stitching straight seams.
Simply line up the fabric edge against the magnetic seam guide as you sew to aid you in perfect, straight seams.
5d. Use of the specific presser feet quarter-inch quilting foot
The quarter-inch foot is essential for quilters, as it helps sew precise 1/4-inch seam allowances. It often has a guide to help maintain accuracy, ensuring perfectly aligned and straight stitches.
This foot has a built-in guide that helps to maintain accuracy and keep the fabric in line to keep a consistent ¼ “seam allowance. In addition to sewing accurate seams, it also works very well for topstitching.

How to sew a basic straight seam for beginners
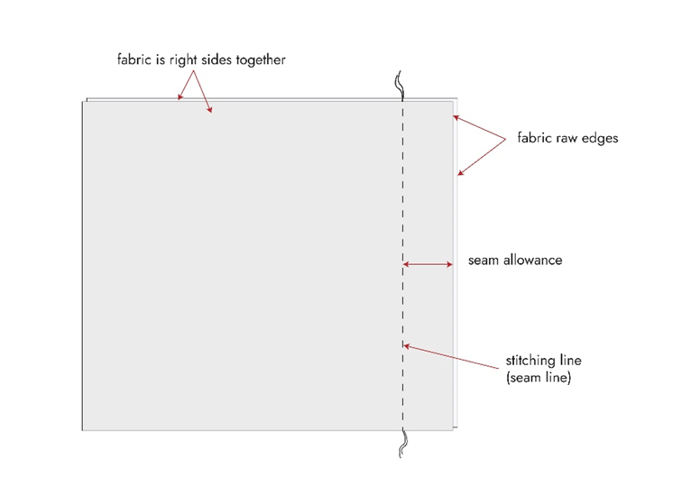
- Lay both fabric panels with right sides facing together. Make sure the fabric edges meet and match any notches you may have on the edge of the fabric. Mark the seam allowance.
- Secure the fabric panels in place with pins or a basting stitch. This step is optional but recommended for sewing beginners. Insert the pin perpendicular to the fabric's raw edge and make sure the pin’s point points toward the stitching line. This way, you can grab the pin’s head and remove it with your right hand as you stitch.
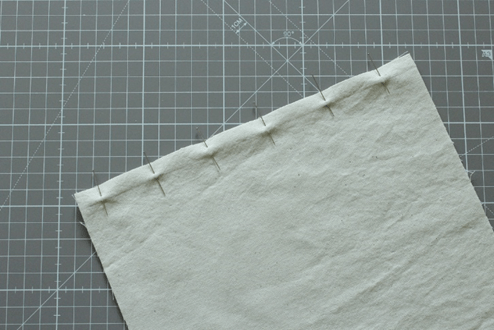 If parallel pinning, place the pins directly on the stitching line with the pinheads facing towards you as you sew. This orientation allows for easy removal of the pins as you stitch.
 - Next, align the raw edge of the fabric with the marking (let’s take as an example 5/8-inch (1.5 cm) seam allowance. Although it can be challenging as a beginner, keep an eye on the edge of the fabric to ensure that it is always lined up with the seam guide.

- Stitch through the marked seam allowance line, and once the stitch is complete, backstitch on your sewing machine to lock in the seam and to prevent unraveling.
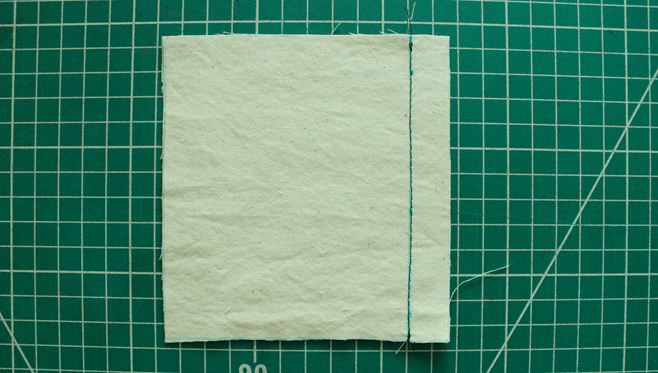
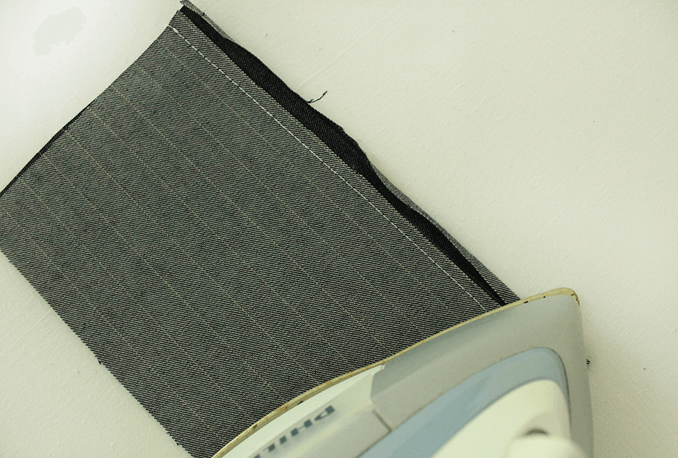
- Press the seam allowance flat to one side (this helps to set the threads and gives the seam line a neat finish). Next, press the seam allowance open and finish the seam using your chosen technique.
Sewing tips for How to Sew Straight Seams
- When you are just starting to sew, try not to push the fabric through the sewing needle but let the machine do the work instead. Guide the fabric and try to keep it as straight as possible as it feeds under the needle.
- Press your seams as you go. Pressing is a crucial step during sewing since it helps to set and shape the seams. At the same time, it gives the garment a neat and professional look.
- Keep a seam ripper close. This tool is specifically designed to remove stitches without damaging the fabric.
- Maintain and clean your sewing machine. Consult the machine’s manual regarding maintenance schedules and oiling/lubricating parts.
- Always use the correct type of needle on your sewing machine. For example, universal needles work for many fabrics, such as cottons, linens, and cotton blends, but if you were to sew with a knit fabric, you need to have a knit needle to have a good quality stitch.
- Sewing needles don’t last forever, and they cause skipped stitches, thread breaks, and holes in the fabric due to the tip of the needle becoming dull. Avoid these issues by regularly changing your sewing needles.
- Stay away from slippery fabrics until you get the hang of the sewing machine.
Final thoughts on sewing straight seams
Learning how to sew straight seams is a foundational skill that opens the door to countless sewing projects. While it requires preparation, proper machine control, and consistent practice, every sewist started exactly where you are now—and with dedication, you'll master this essential technique.
The tools and techniques outlined in this guide will help you develop accuracy and confidence at your machine. Remember to start slowly, let your feed dogs do the work, and keep your eyes on the fabric edge rather than the needle. Practice makes progress, and each seam you sew builds your muscle memory.
Ready to put your new skills to work? Start by practicing on paper with our free straight seam practice template, then move on to stable cotton fabric. Once you feel confident, try one of our beginner-friendly sewing patterns designed specifically for new sewists. These patterns feature simple straight seams and clear instructions that build your skills step by step.
For practice fabric, we recommend starting with quality quilting cotton or knit fabrics from our shop that are forgiving and easy to handle. Having the right materials makes learning more enjoyable and successful.
Continue your sewing education with these related guides:
- Sewing for Beginners: Complete Guide to Getting Started - Master the fundamentals before your first project
- How to Read a Sewing Pattern - Decode pattern instructions with confidence
- How to Sew Side Seam Slits - Level up with this stylish finishing technique
Join our vibrant community in the Peek-a-Boo Pattern Shop Facebook Group, where thousands of sewists share their projects, ask questions, and support each other's sewing journey. You'll find encouragement, troubleshooting help, and inspiration for your next project.
Happy sewing, and remember—every expert sewist once struggled with their first straight seam. You've got this!
FAQs
Sewing Straight Seams FAQ
Frequently Asked Questions About Sewing Straight Seams
What is the easiest way to learn to sew straight seams?
Start by practicing on paper using straight line templates before moving to fabric. This helps you develop muscle memory and machine control without worrying about wasting fabric. Once comfortable, practice on inexpensive cotton fabric, which is stable and easy to handle. Focus on watching the fabric edge, not the needle, as it aligns with your seam guide.
What seam allowance should I use when learning?
Most commercial patterns use a 5/8" (1.5 cm) seam allowance, making this a good standard to practice. However, quilters often use 1/4" seam allowances. Choose one measurement and practice consistently with it until you develop muscle memory for that distance.
Why are my seams wavy instead of straight?
Wavy seams typically result from pulling or pushing fabric through the machine rather than letting the feed dogs do the work. They can also occur from incorrect tension settings, using a dull needle, or sewing too quickly before you've developed proper control. Slow down and focus on guiding (not pulling) the fabric.
Should I watch the needle or the fabric edge when sewing?
Watch the fabric edge as it aligns with your chosen seam guide marking on the throat plate. Many beginners make the mistake of watching the needle, which actually makes it harder to sew straight. Your eyes should focus on keeping the fabric edge aligned with the marking 1-2 inches ahead of the needle.
How do I keep my seam allowance consistent throughout a long seam?
Use a magnetic seam guide or create a tape guide on your throat plate at the exact seam allowance measurement. These tools provide a physical edge for your fabric to follow. Additionally, pin or clip fabric layers together before sewing to prevent shifting that can affect your seam allowance.
Do I need special presser feet to sew straight seams?
While not required, specialty presser feet can help significantly. A 1/4" quilting foot is excellent for precise narrow seams, while an edge-stitching foot helps with topstitching. However, you can sew perfectly straight seams with a standard presser foot and the seam allowance markings on your machine.
How do I fix crooked seams?
If you notice a seam going off course, stop sewing immediately with the needle down, lift the presser foot, realign the fabric with your seam guide, lower the presser foot, and continue. For seams that are already sewn crookedly, use a seam ripper to carefully remove the stitching and sew again. Pressing crooked seams won't fix them.
What's the best sewing machine speed for beginners?
Start at the slowest speed your machine allows. Most modern machines have a speed control slider or setting. Sewing slowly gives you time to make corrections and maintain control. As your confidence and accuracy improve, you can gradually increase speed. Remember, accuracy is more important than speed.
Why do I need to backstitch at the beginning and end of seams?
Backstitching locks your stitches in place and prevents them from unraveling when the fabric experiences stress or washing. Without it, even perfectly straight seams can pull apart. Backstitch about 1/4" to 1/2" at each seam end by using your machine's reverse lever or button.
Can I sew straight seams on stretchy or slippery fabrics?
Stretchy fabrics like knits require a ballpoint or stretch needle and often benefit from a walking foot to feed fabric evenly. Slippery fabrics like satin or silk can be sandwiched between tissue paper or stabilized with a tear-away stabilizer. However, beginners should start with stable cotton fabrics before advancing to challenging materials.
How often should I change my sewing machine needle?
Change your needle after every 8-10 hours of sewing time or after completing 2-3 projects, whichever comes first. Dull needles cause skipped stitches, uneven stitching, and can damage fabric. If you hear a popping sound as you sew, your needle is definitely too dull and needs immediate replacement.
What thread tension should I use for straight seams?
For most straight seams on medium-weight fabrics, your tension should be set between 4-5 (on machines numbered 0-9) or at the "AUTO" setting. Your stitches should look identical on both sides of the fabric with no loops or puckering. If you see bobbin thread on top, tension is too loose; if you see top thread on the bottom, it's too tight.
Is it better to pin or clip fabric when sewing straight seams?
Both methods work well. Perpendicular pinning (pins pointing toward the stitching line) allows you to sew over pins safely, while parallel pinning requires removing pins as you sew. Clips work well for thick fabrics or when you don't want pin holes. Choose based on fabric type and personal preference, but always secure your layers somehow.
How can I practice sewing straight seams without wasting fabric?
Use paper printables with straight lines to practice (unthread your machine or use an old needle on paper). Practice on fabric scraps left over from other projects. Muslin is an inexpensive practice fabric. Save all your practice pieces—they can become cleaning rags, pot holders, or stuffing material for future projects.
What's the difference between seam allowance and seam line?
The seam line is where your stitches go—the actual line of stitching. The seam allowance is the distance between the seam line and the raw edge of your fabric. For example, with a 5/8" seam allowance, your stitching line is 5/8" away from the fabric edge, and that 5/8" strip is your seam allowance.