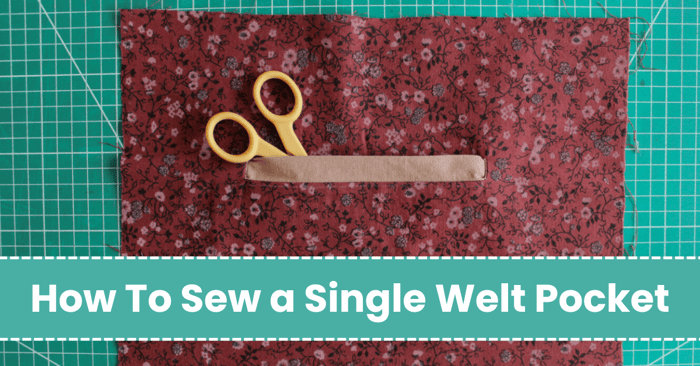
How To Sew a Single Welt Pocket
Today we're going to learn how to sew a single welt pocket. Welt pockets have quite the reputation for being challenging to master since they need precise measurements and accurate placement on the garment. However, just like with any other sewing technique, with enough practice, you will be able to sew professional-looking welt pockets.
In this step-by-step article, we’ll dive into everything you need to know about sewing a basic single welt pocket, starting with its placement on a garment, welt pocket anatomy, pocket types, and tips on how to sew the perfect pocket depending on the fabric choice.
Where are welt pockets used?
Welt pockets serve both practical and aesthetic functions in a wide range of garments and bag designs. They’re commonly found as a breast pocket style on the left side of a jacket or a coat and are traditionally used on the front of waistcoats. Nowadays, they can be found as back pockets on different styles of pants and skirts. Welt pockets are usually placed horizontally on garments, but they can also be placed vertically and at an angle as well depending on the garment type.
The placement of the welt pocket is decided based on the garment that is being constructed. Placing it in a comfortable position while elevating the garment is always the goal. For example, upper garments aim for the breast level just above the waist. When following a sewing pattern, the welt pocket placement is marked on the pattern piece.
If you’re not sure where to place a welt pocket, pick a garment from your wardrobe that has one and measure the placement from the shoulder or the waist. This will help and give you an idea for better placement of the pocket.
Welt pocket types
Single welt pockets are inset pockets created by cutting an opening in the garment fabric. Welt is the fabric strips used to cover the edges of pocket openings.

Double welt pockets – these type of pockets uses two welts to create an opening rather than a single fabric strip.

Zippered welt pocket uses a zipper to secure the pocket opening. Depending on the style the zipper can be exposed or hidden using a welt fabric strip![]()
Decorative (non-functional) welt pockets are sewn on garments for decoration rather than functionality and are usually found on mass-produced garments.
Anatomy of a single welt pocket
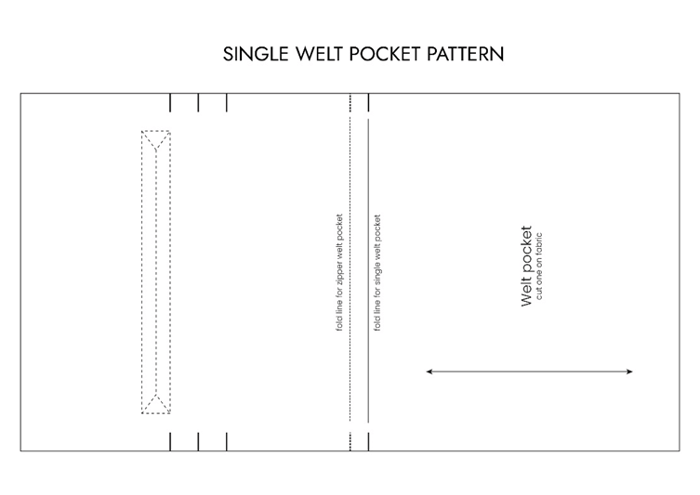
The single welt pocket may consist of a few pattern pieces such as the pocket bags and the welt strip separately or as just one pattern piece which consists of both the pocket and the welt pocket.
To clear any confusion the welt pocket pattern provided in this article has the pocket and the welt strip in one single pattern piece.
Single welt pocket pattern
If you've never tried to sew a welt pocket before, download for free our single welt pocket pattern and follow the step-by-step instructions below.
Get the pattern HERE
How to Sew a Single Welt Pocket
Although there are many methods for sewing welt pockets, the one below provides step-by-step instructions on how to sew a basic single welt pocket. As you gain confidence, you can attempt increasingly challenging methods to sew neat and professional-looking welt pockets.
For sewing a single welt pocket, you will need:
- The garment or a piece of fabric large enough to practice sewing the pocket
- Fusible interfacing
- Welt pocket pattern cut on your chosen fabric
· Now, let’s sew a single welt pocket!
Carefully choose the welt pocket placement on the garment since once the opening is cut, the fabric can’t be mended.
Apply the interfacing strip to the wrong side of the garment, approximately over the location where the welt pocket will be sewn. The fusible interfacing helps to stabilize the fabric once the opening is created.

Draw the welt pocket opening rectangle on the interfacing with the same measurements as the one provided on the pattern.

Hand baste the rectangle so it is seen on the right side of the fabric.

Cut the welt pocket on your chosen fabric. Mark the notches and the rectangle on the wrong side of the welt pocket pattern piece.

Place the welt pocket piece with the wrong side facing up onto the garment. Align the marked rectangle on the garment with the marked rectangle on the welt pocket piece and pin it in place.

Stitch the rectangle (that will serve as an opening) and be extra careful around the corners.

- Cut through the center line of the welt pocket and stop 1.25 cm ( ½ inch) on both ends. Cut on a diagonal towards each corner, as close to the stitching lines but not through the stitching.


- Use the created opening to push the welt pocket toward the wrong side of the garment. Once on the wrong side give the welt pocket piece a good press.


- Place the garment on the wrong side and bring the second notch on both sides together to create a fold over the opening. Carefully align the folded edge to the top edge of the opening, press, and pin in place.


To keep the welt strip in place, uncover the sides of the welt by folding over the garment. You will see a little triangle of fabric on top of the fold. Stitch as close to the base of the triangle as possible through all layers except the garment. Repeat for the other side of the welt pocket.


*Optional Turn the garment on the right side and edge stitch 0.5 cm (1/4 inch) around the opening.
Next, place the garment on the wrong side and bring the bottom raw edge of the pocket up to the top edge.

Pin in place the sides and the top of the pocket and stitch 1 cm (3/8 inch) from the raw edge (make sure to sew only around the pocket and not the garment). Give the welt pocket a final press. Finish the raw edges with a serger or zig-zag stitch.


Similarly, you can sew a welt pocket with a zipper following the below steps:
- Repeat steps 1 to 9. Create the opening and push the welt pocket toward the wrong side of the fabric.
- Give the welt pocket piece a good press and turn the garment on the right side.

- Center the zipper under the welt opening and topstitch on the right side of the fabric 0.3 cm (1/8 inch) from the opening edge and press. Trim away the extra zipper tape, leaving 0.5 cm (1/4 inch) on both ends.
- Bring the bottom edge of the pocket up to the top edge. Pin in place the sides and the top of the pocket and stitch 1 cm (3/8 inch) from the raw edge (make sure to sew only around the pocket and not the garment). Finish the raw edges with a serger or zig-zag stitch.

- Give the pocket a final press.

Extra tips on how to sew a single welt pocket
- Choose a medium-weight fabric when practicing sewing welt pockets. This ensures that the fabric is managed more easily and there’s less fabric bulk to deal with. Medium-weight fabrics such as linen, wool, and some cotton work very well for welt pockets.
- Skip using lightweight or see-through fabrics to sew welt pockets because these fabrics do not provide the necessary structure to keep the welt pocket stable.
- Precisely determine the placement of the welt pocket. Once you cut the opening on the fabric there’s no turning back.
- Always sew the welt pocket first before sewing the rest of the garment. This way in case of any mistakes, you can recut the fabric piece and start over.
Final thoughts on sewing single welt pockets
Pockets are a must-have for they provide a space to keep small items such as keys, coins, and tissues but at the same time give garments depth and character.
Even though sewing a professional looking welt pocket has its own challenges, including several details sewing steps and precise measurements you can easily experiment with different fabrics until you get the hang of the construction.
This article has already laid out the most important considerations when it comes to learning how to sew a single welt pocket so it’s now up to you to give them a try. Among many details, preparation is the key to sewing a neat and good-looking pocket. Thus, a smart start when sewing a welt pocket is to carefully select the fabric, interface the welt pocket area, and mark precisely on the garment.
Thank you for joining us today to learn how to sew a single welt pocket! Before you leave, make sure to sign-up for our newsletter below. You can also join our Facebook Group or follow us on Instagram. Happy Sewing!

