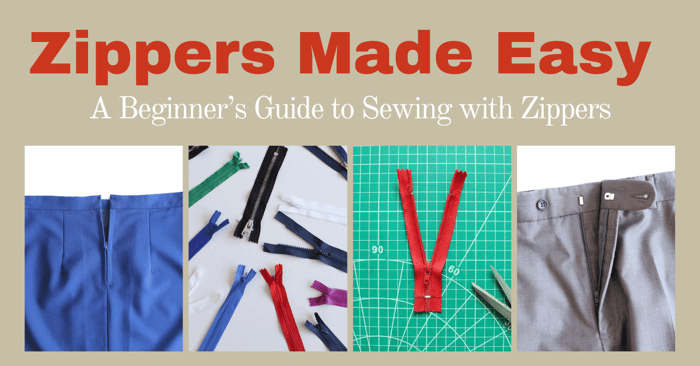
How to Sew a Hem: 3 Beginner Techniques (Step-by-Step)
Hemming is one of the most essential sewing skills you'll use on almost every project — from dresses and pants to skirts and tops. A clean hem gives your garment a professional, finished look and prevents raw edges from fraying.
In this guide, we'll walk through three beginner-friendly hemming techniques with step-by-step photos, explain how to choose the right hem for your fabric and garment, and share practical tips for getting neat results every time.
Guide to Hemming
What is Hem Allowance?
Hem allowance is not the same as seam allowance, so it's important to understand the difference.
Hem allowance is the width between the hemline and the fabric's raw edge. It gets folded to the wrong side of the fabric, and depending on the garment type, it can range from ¼ inch up to 2 inches (0.5 to 5 cm). The hem allowance creates a clean, finished edge at the bottom of your garment.
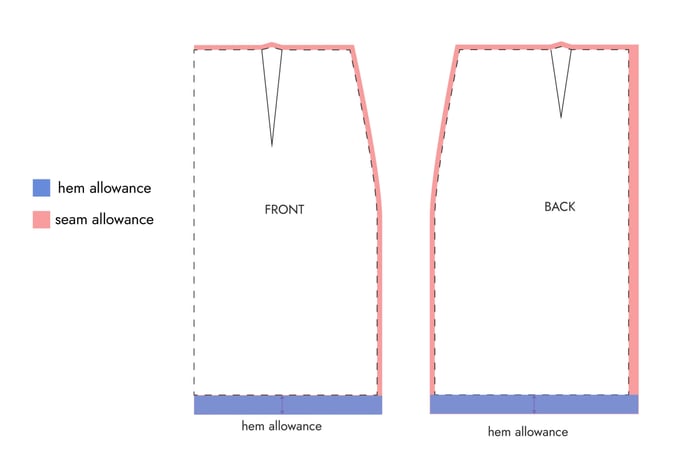
Seam allowance, on the other hand, is the space between the stitching line and the raw edge where two pieces of fabric are joined. The seam allowance holds your garment together, and the amount depends on the pattern, fabric, and seam finish.
How Much Hem Allowance Do You Need?
The right hem allowance depends on your fabric and garment design. Lightweight fabrics used in shirts and summer dresses need a smaller hem allowance (¼" to ½") to minimize bulk. Heavier fabrics like denim and canvas need a larger hem allowance (1" to 2") to provide structure and stability to the hemline.
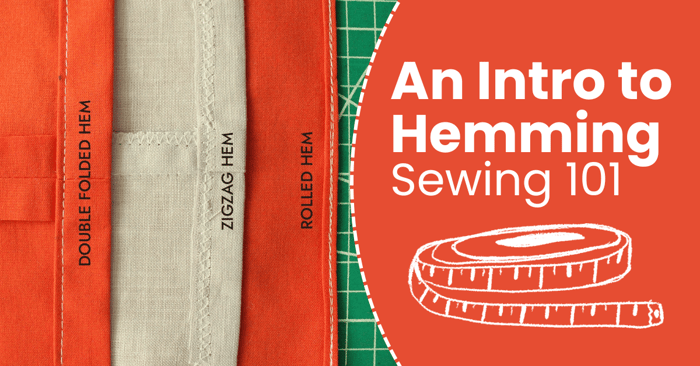
Three Types of Hems for Sewing Beginners
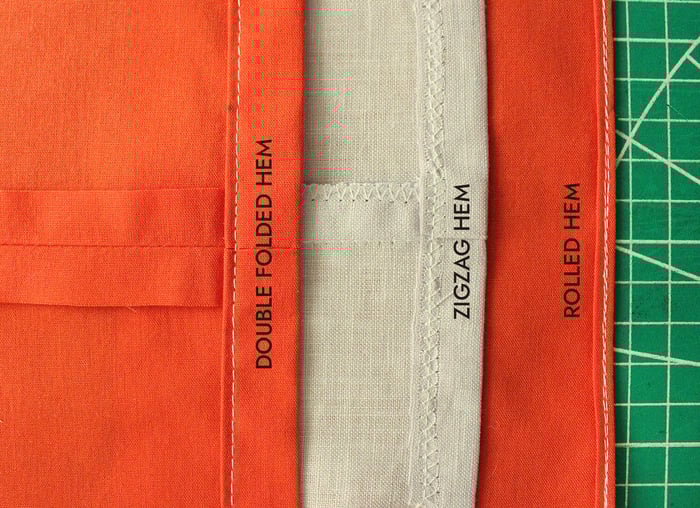
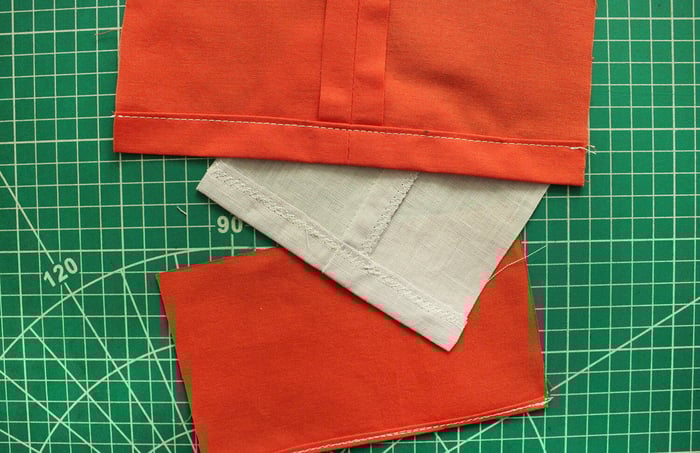
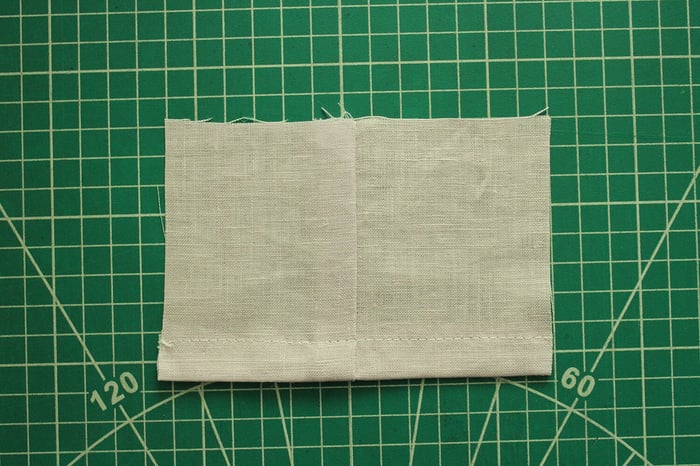
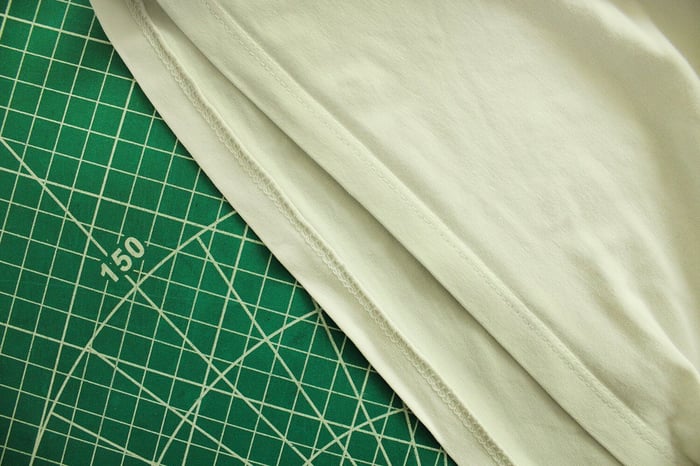
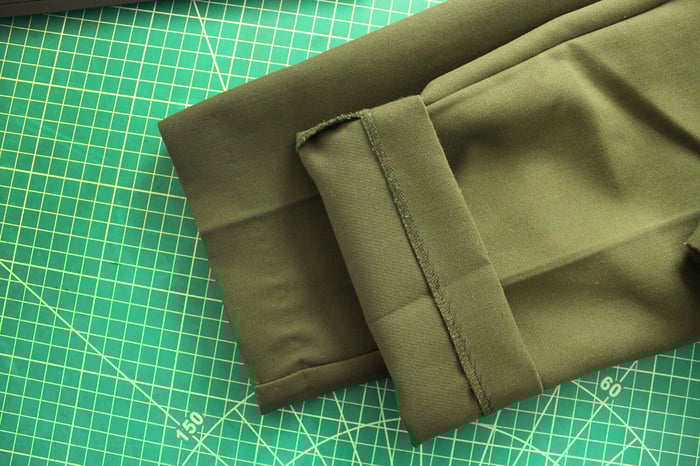
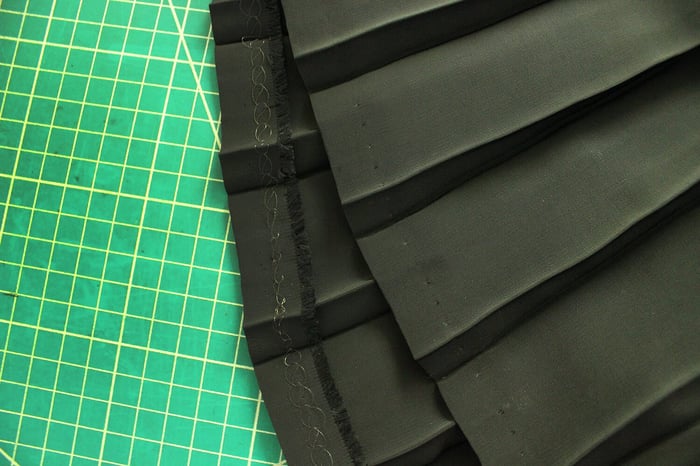
Double fold hem: The most common hem in sewing. You fold the fabric up twice on the wrong side, pressing each fold, then secure with a topstitch close to the inner folded edge. This hides the raw edge completely and creates a clean, durable finish. Double-fold hems are used on everyday garments like dresses, pants, and activewear.
Zigzag hem: The zigzag stitch adds flexibility, making it ideal for stretch fabrics where the hem needs to move without breaking the thread. It's also used as a raw-edge finish on a single-fold hem. Quick and beginner-friendly.
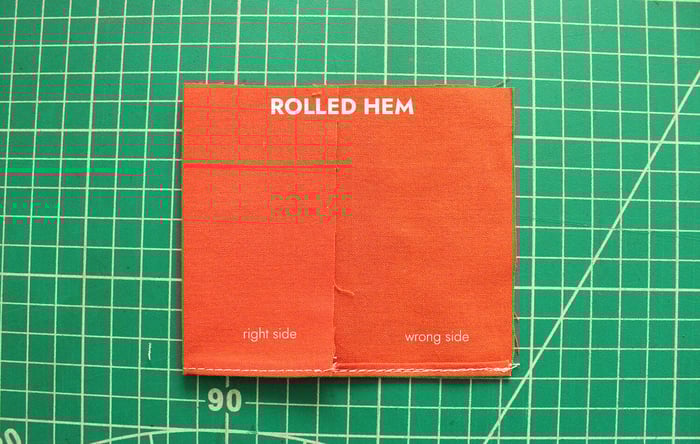
Rolled hem: A narrow, delicate hem ideal for lightweight fabrics like chiffon, organza, and voile. It creates a thin, elegant finish on curved hemlines, blouses, bias-cut skirts, and scarves.
How to Sew a Double Fold Hem
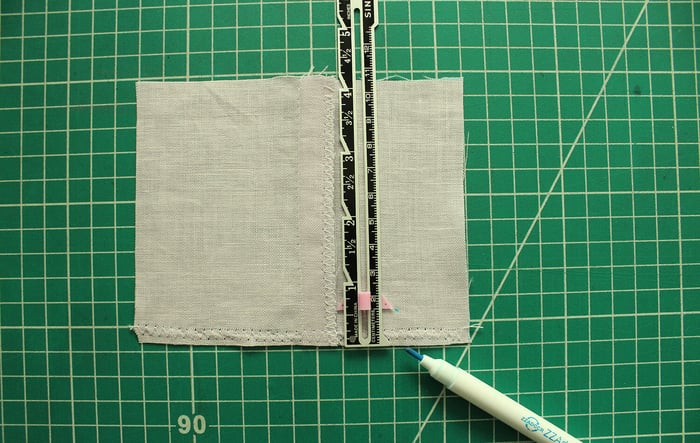
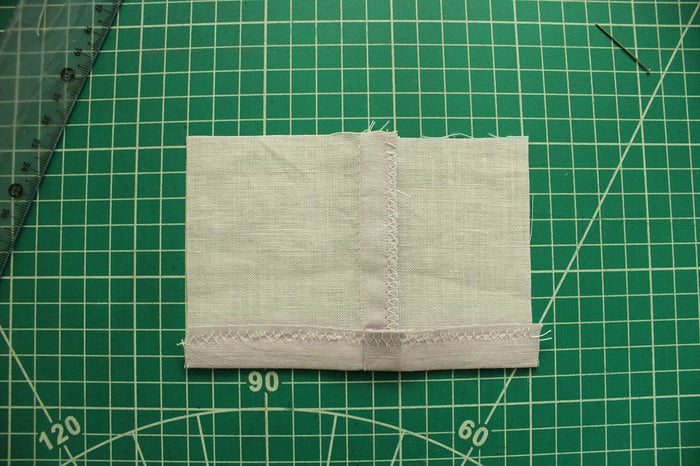
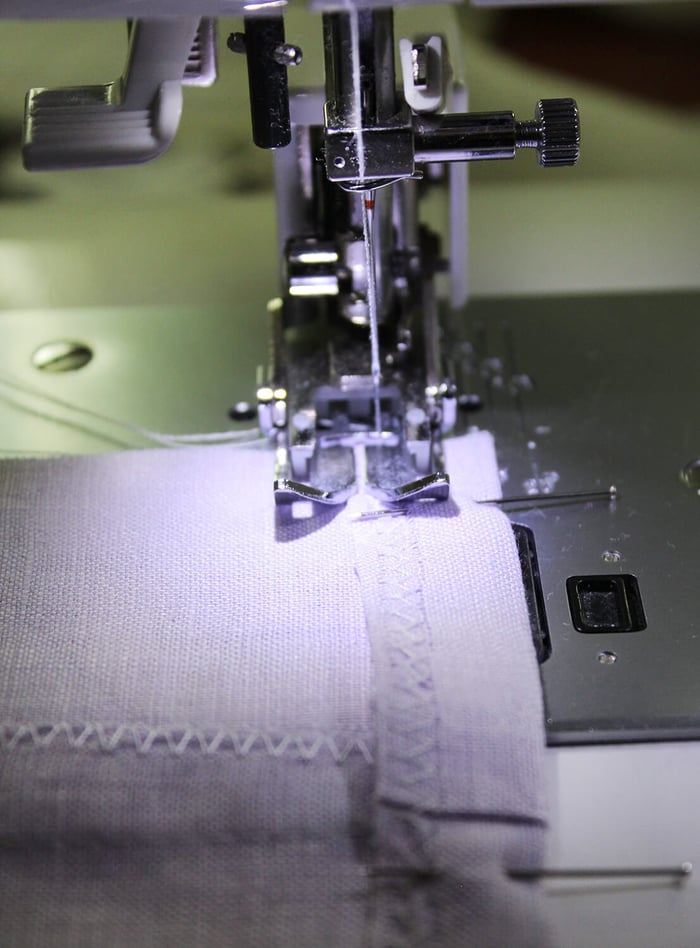
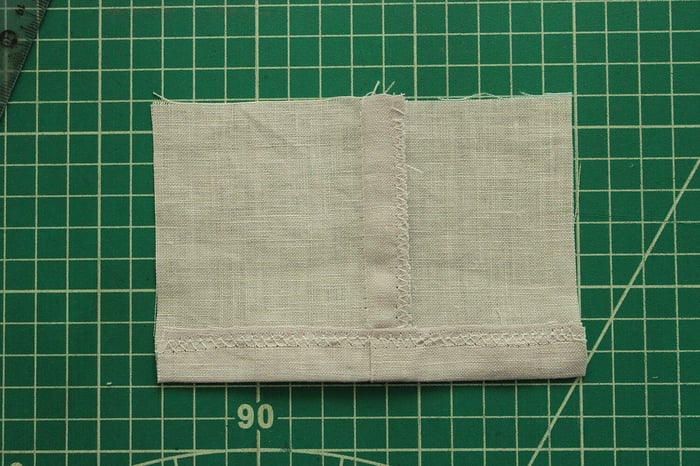
- Turn your fabric to the wrong side and mark the hem allowance.
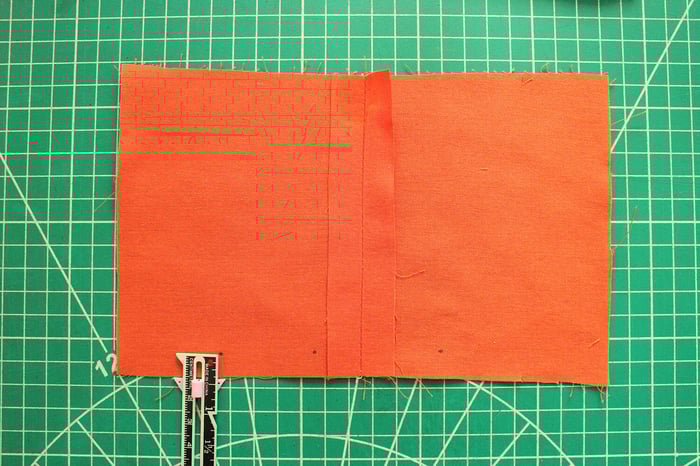
- Press the raw edge to the wrong side by 1 cm (3/8") all around the hem.
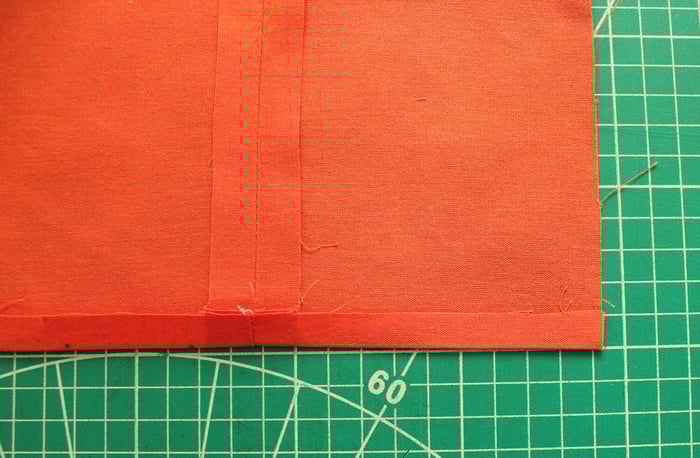
- Press up again all around by 2 cm (3/4"). Pin in place or hand baste.
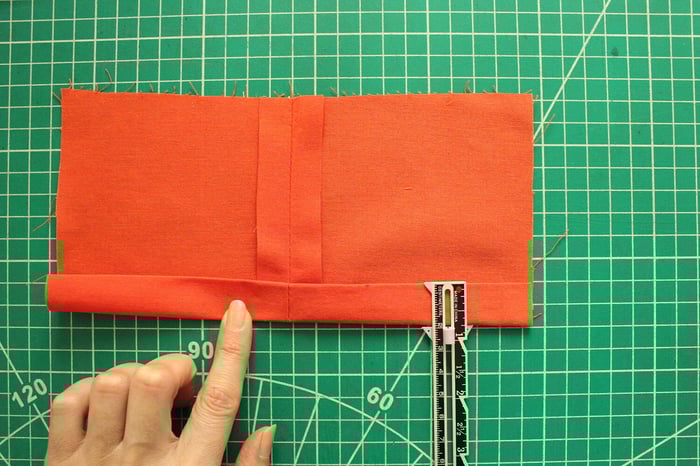
- Stitch all around the folded edge, about 3mm (1/8") from the inner fold.

- Give the finished hem a final press.
Pro Tip: There's no strict rule for dividing the hem allowance between folds. The first fold can be 1 cm and the second 2 cm, or they can be equal. Most sewists fold equally for narrow hems and unequally for wider hems to reduce bulk.
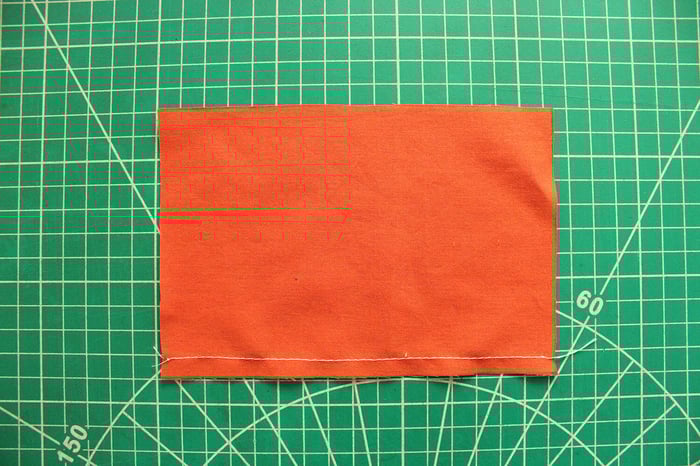
How to Sew a Zigzag Hem
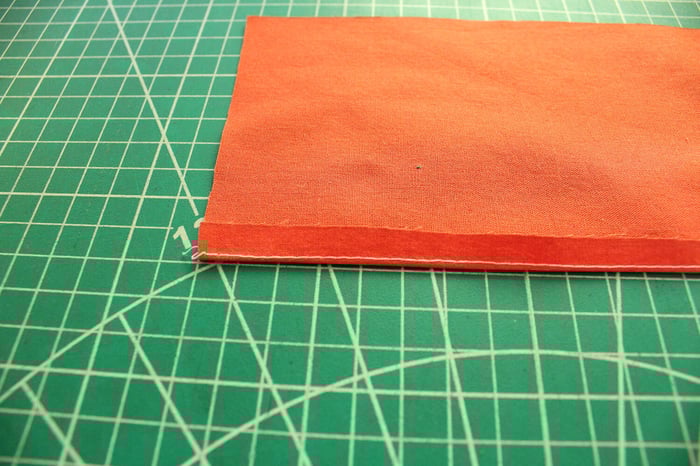
- Set your machine to a zigzag stitch. Sew about 0.5–1 cm (1/4"–3/8") from the raw edge, then press.
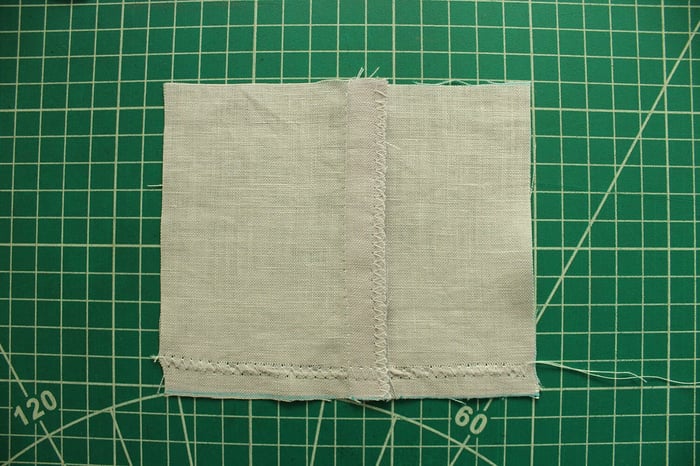
- Trim the excess fabric close to the zigzag stitch, being careful not to cut through the stitches.
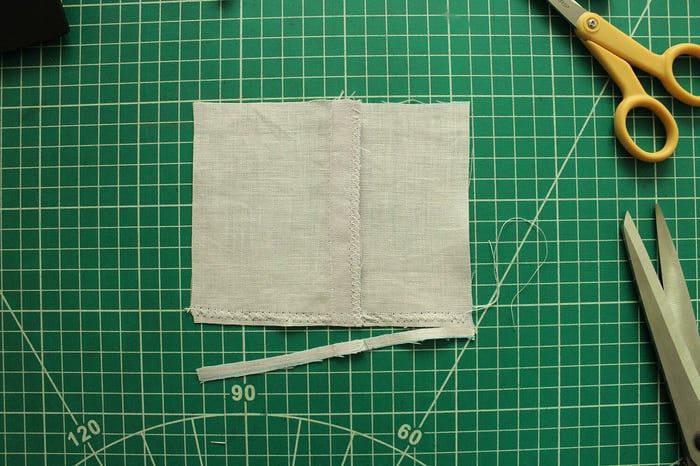
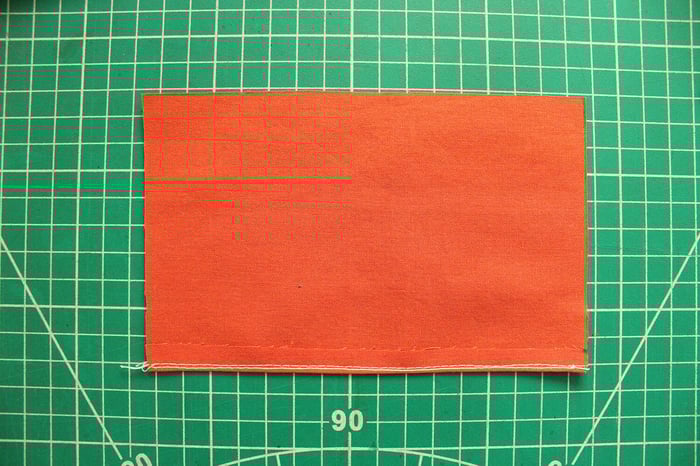
- From the zigzagged edge, mark the hem allowance using a sewing gauge.
- Fold the fabric to the wrong side by the hem allowance (for example, 1.5 cm / 5/8") and press all around.
- Pin the hem and secure with a straight stitch just below the zigzag stitching.
- Give the hem a final press.
This hem finish is quick and beginner-friendly — great for home projects and crafts. However, it's not ideal for garments where the hem is visible on the right side, or if the fabric unravels easily.
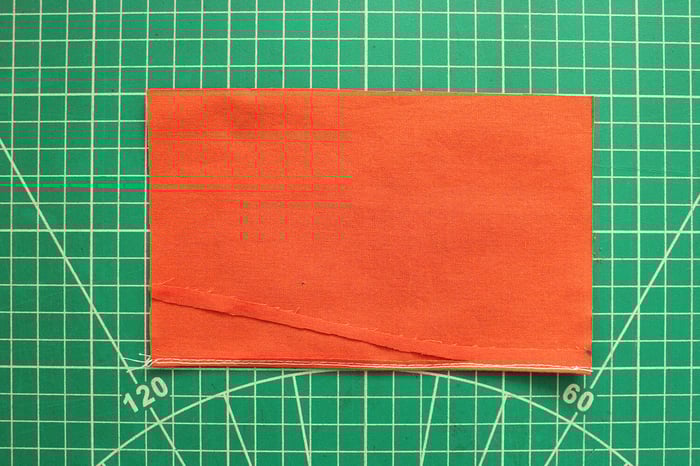
How to Sew a Rolled Hem
The rolled hem is usually sewn with a special rolled hem foot, but a standard presser foot works just as well.
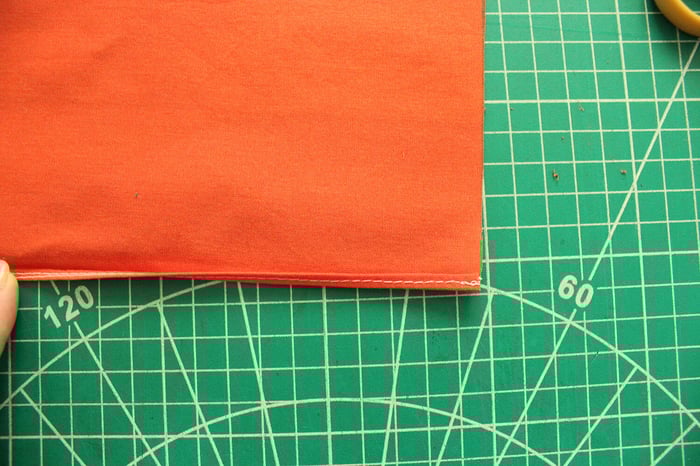
- Using a straight stitch, sew a line 0.6 cm (1/4") from the raw edge all around the hemline.
- Fold the hem along the stitching line toward the wrong side and press.
- Stitch a second line as close as possible to the first one.
- Trim the excess raw edge as close to the stitching as possible without cutting through it.
- Fold the hemline just enough to enclose the raw edge. Press carefully and pin in place.
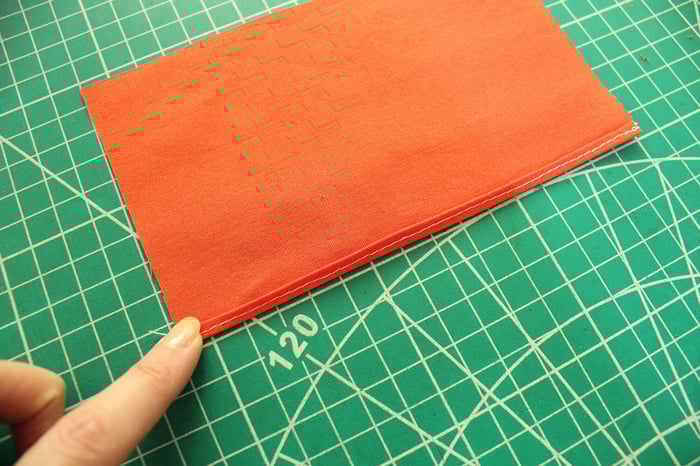
- Stitch the folded edge down along the center of the fold. The finished hem is usually 0.3 to 0.5 cm (1/8"–1/4") wide.
How to Choose the Right Hem for Your Garment
Fabric Type and Weight
Your fabric is the single biggest factor in choosing a hem technique. Lightweight fabrics need gentle handling, thin thread, and narrow hems to prevent bulk. Heavyweight fabrics need stronger thread, longer stitch lengths, and hem styles that avoid creating bulky folds — tiny hems don't work well on heavy fabric.
For stretch fabrics like knit fabrics, use stretch stitches such as zigzag, serger, twin needle, or coverstitch. These allow the fabric to stretch without breaking the thread or causing tension issues.
Garment Use
Everyday clothing — pants, t-shirts, casual dresses — typically uses a straightforward machine-stitched double fold hem. Formal wear often calls for rolled, blind, or hand-stitched hems that create a refined, elegant appearance with minimal visible stitching.
Garment Style
The overall style of your garment impacts the hem choice. Casual garments like jeans, shirts, and t-shirts work well with a visible double fold hem — it's fast and appropriate for the fabric. Formal garments like gowns, blouses, and tailored suits avoid visible stitches and typically use invisible or hand-sewn hems.
Tools and Skill Level
Most garments can be hemmed by hand using techniques like the whip stitch, slip stitch, or catch stitch. These create neat, discreet finishes with just a needle and thread. Machine hems are faster but may require special presser feet (like a rolled hem foot or blind hem foot) depending on the technique.
Choose a hem finish that matches the tools you have available and your current skill level. As you gain experience, you can explore more advanced techniques.
Time
Hemming can be time-consuming, especially on fuller garments like circle skirts or gowns. A hand-stitched hem can take hours, while a machine hem takes minutes. Plan accordingly — and know that rushing a hem is the fastest way to end up with puckers and uneven edges.
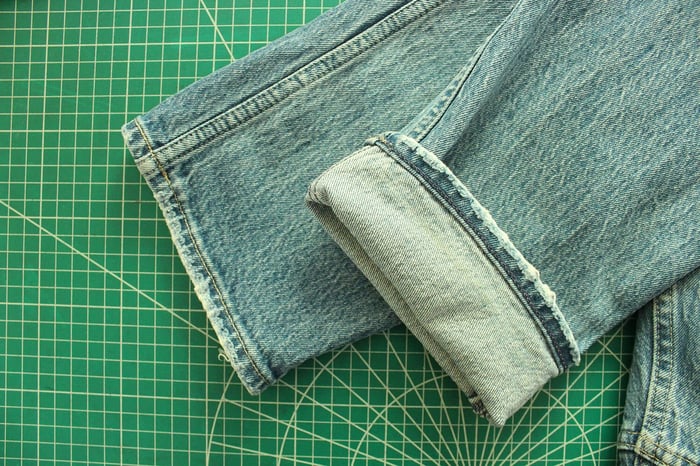
Hemming Jeans
Fabric weight, needle choice, and heavy-duty thread are the keys to smooth, durable jean hems.
Start with a jeans needle — these have an extra-sharp tip for penetrating thick denim and a bigger eye to accommodate thicker thread.
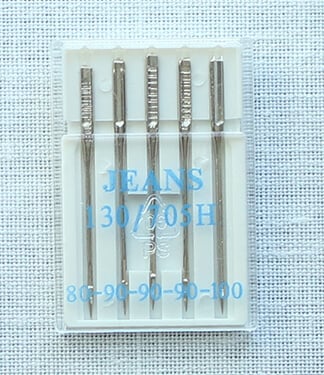
Thread matters just as much. A weak thread will result in broken stitches sooner or later, but a good topstitching thread or jean thread will hold up for years.
Hemming Formal Attire
Hemming formal gowns requires attention to detail and comfort with delicate fabrics like satin, silk, and lace. The hem should be invisible from the right side to maintain the garment's elegance.
These garments often require fine thread, delicate needles, and more time since many gown hems are finished by hand. Common techniques for formal wear include blind hem, horsehair hem, rolled hem, faced hem, and baby hem.
Tips for Sewing Perfect Hems
Always mark your hem allowance accurately. Use a sewing gauge (not just a ruler) to measure — it's the most precise tool for consistent hem width all the way around.
Match your thread and needle to your fabric. Lightweight fabric needs a fine needle and thin thread. Denim needs a jeans needle and heavy-duty thread. When all three are matched, the stitch strength is excellent.
Press after every step. Just like with seams, pressing your hems after each fold makes a huge difference in the final result. Don't skip this — it's the difference between a homemade-looking hem and a professional one.
Fix puckering by adjusting tension. If your hem is puckering, try loosening the thread tension on your machine to achieve a more balanced stitch. In some cases, switching to a new needle can help too.
Test on scrap fabric first. Before hemming your garment, practice the technique on a scrap of the same fabric. This lets you adjust stitch length, tension, and foot pressure without risking your project.
Final Thoughts
Hemming is a crucial finishing step that elevates both the look and durability of every garment you sew. Different projects call for different hems, and the choice might seem overwhelming at first. But as long as you consider your fabric type and weight, how the garment will be worn, and the tools you have available, the right hem becomes clear.
Start with the double fold hem — it works on almost everything and builds good habits for pressing and measuring. Once you're comfortable, try the zigzag hem on your next knit fabric project, and tackle a rolled hem when you're ready for lightweight fabrics.
Ready to put your hemming skills to work? Browse our beginner-friendly sewing patterns — every pattern includes hem allowance and finishing instructions. And for more sewing fundamentals, check out our Guide to Sewing Pockets, our Beginner Guide to Sewing Curves, and our How to Sew a Zipper tutorial.
Stay connected by following Peek-a-Boo Pattern Shop on Pinterest, Instagram, and Facebook, and sign up for our email newsletter for more sewing tutorials and project ideas. Happy sewing!
Frequently Asked Questions
What is the easiest hem for beginners?
The double fold hem is the easiest and most versatile hem for beginners. It only requires folding the fabric twice, pressing each fold, and sewing a straight stitch close to the inner folded edge. It works on most fabric types and is used on dresses, pants, skirts, and nearly every everyday garment.
What is the difference between hem allowance and seam allowance?
Hem allowance is the extra fabric at the bottom edge of a garment that gets folded under to create a finished hem — typically ¼" to 2" depending on the garment. Seam allowance is the extra fabric between the stitching line and the raw edge where two pieces are joined together. Hem allowance finishes an edge; seam allowance joins two pieces.
How do I hem stretchy or knit fabric?
For stretch and knit fabrics, use a stitch that stretches with the fabric — a zigzag stitch, twin needle, serger, or coverstitch. A regular straight stitch will pop and break when the fabric stretches. The zigzag hem technique in this guide is a great beginner-friendly option for knit fabrics.
What hem should I use for lightweight fabric like chiffon?
A rolled hem is the best choice for lightweight fabrics like chiffon, organza, and voile. It creates a very narrow (1/8" to 1/4"), delicate finish that doesn't add bulk. You can sew it with a standard presser foot or a special rolled hem foot, which automatically turns the edge as you sew.
How do I prevent my hem from puckering?
Hem puckering is usually caused by thread tension that's too tight. Try loosening your machine's upper thread tension slightly and test on a scrap of the same fabric. Also make sure you're using the correct needle for your fabric type — a dull or wrong-size needle can cause puckering. Pressing the hem carefully before stitching also helps prevent uneven fabric feeding.
How wide should my hem be?
Hem width depends on the garment and fabric. Lightweight shirts and blouses typically use a ½" to ¾" hem. Pants and skirts usually use a 1" to 1½" hem. Jeans and heavier garments may use a 1" to 2" hem. Rolled hems on delicate fabrics are just 1/8" to 1/4" wide. Always check your pattern instructions — most specify the hem allowance included.
Do I need a special presser foot to sew a hem?
No — you can sew all three beginner hems (double fold, zigzag, and rolled) using a standard all-purpose presser foot. However, specialty feet can make the job easier: a rolled hem foot automatically turns a narrow edge for you, and a blind hem foot helps guide invisible stitches. These are nice to have but not essential when starting out.
Can I hem jeans on a regular sewing machine?
Yes, most home sewing machines can hem jeans if you use the right setup. Switch to a jeans needle (size 90/14 or 100/16) which has a sharp tip for penetrating thick denim, and use heavy-duty topstitching thread. Sew slowly over thick seam intersections, and use the hand wheel to walk over the thickest spots. If your machine struggles, try reducing the number of fabric layers by trimming the seam allowances in the hem area.