Top 3 Easy Seam Finishes For Beginners
Today we have the top 3 easy seam finishes for beginners. Some fabrics, such as knits or fleece, are quite forgiving, but seam finishing is a must for most wovens. We recommend not viewing seam finishing as an additional sewing step but rather as the final step that enhances the quality and durability of your garments.
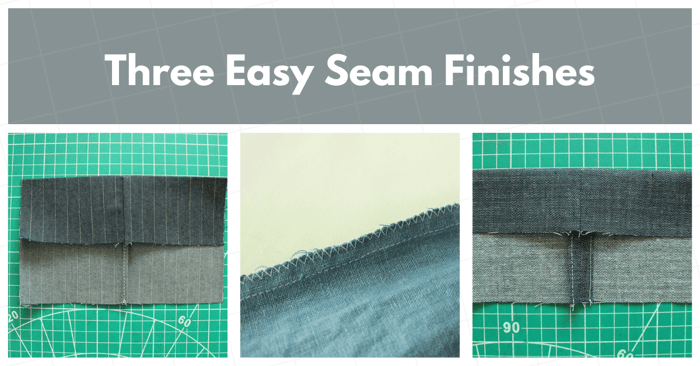
In this comprehensive article, we will explore three very easy seam finishes, where to use them, step-by-step tutorials for each seam finish, and many other tips on perfecting the inside of your garments: (1) The Self Bound Seam Finish; (2) The Turned and Stitch Seam Finish; and, (3) The Zig Zag Seam Finish.
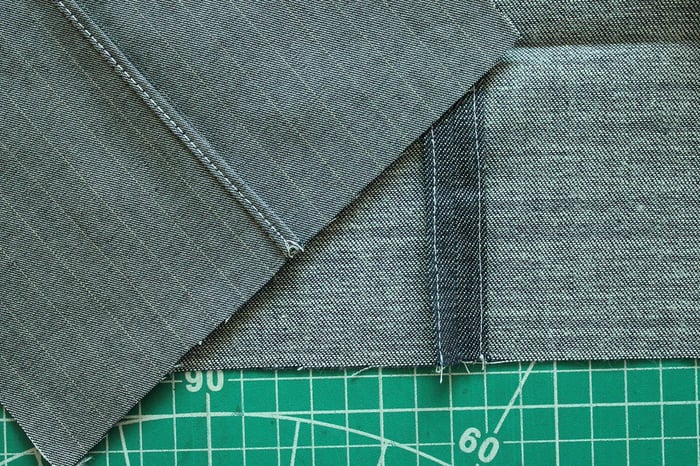
Top 3 Easy Seam Finishes for Beginners
#1 | The self-bound seam finish
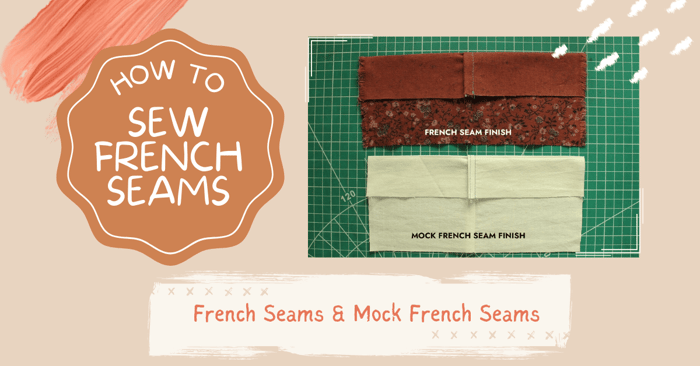
This self-enclosed finishing technique is mainly preferred for lightweight fabrics. Even though at first sight it looks like the French seam finish, the self-bound seam is achieved in no time with minimal ironing.
For this type of finish, one of the seam allowances is trimmed down to 1/4-1/8” and the other seam allowance layer is folded to enclose the trimmed one. The raw edges are enclosed, thus creating a clean finish. The seam is then secured with a second stitch, close to the folded edge, either by hand or machine.
Where to use the self-bound seam finish
The self-bound seam is well recommended to be used on lightweight sheer fabrics with low fraying properties. Garments with high-low design features or openings can benefit from this type of seam finish, considering that the wrong side is exposed from time to time.
Is there a difference between the self-bound and bias-bound seam finish?
The role of both of these techniques is to enclose raw edges and create a neat finish, but they differ in construction and appearance.
The bias-bound seam finish is known as a method to finish seam allowances, where each fabric raw edge is enclosed in a double-folded bias binding strip. On the other hand, the self-bond seam is way simpler and does not require bias binding. One side of the seam allowance is trimmed, and the other side is double-folded to encase the fabric's raw edges.
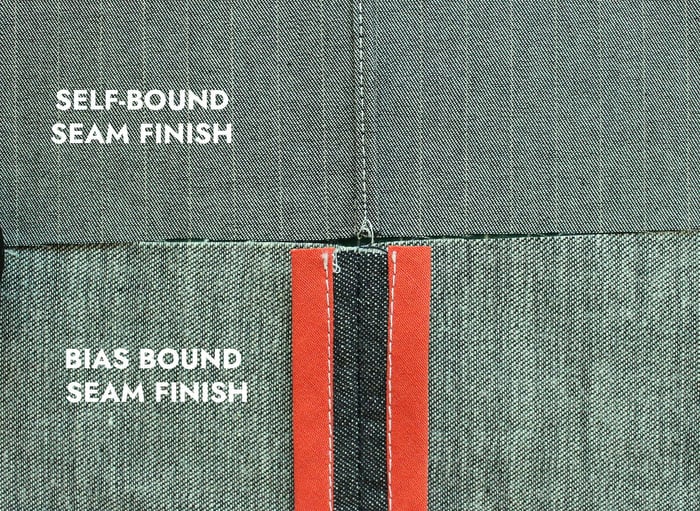
How to sew a self-bound seam finish
The tutorial shows how to create a bias-bound seam finish with a 5/8″ (1.6 cm) seam allowance.
- Place both corresponding fabric layers with the wrong sides together and stitch 1.6 cm (5/8”) from the fabric's raw edge. Press.
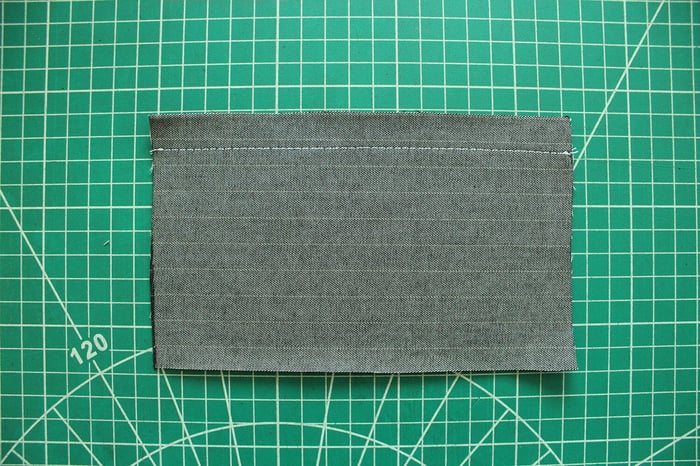
- Trim down to 0.3 cm (1/8”) one of the seam allowance edges.
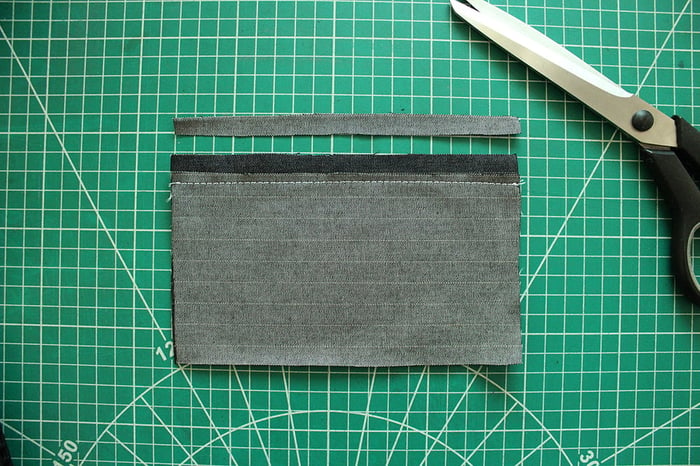
- Fold the other seam allowance approximately 0.3 cm (1/8”) and press through the folded edge.
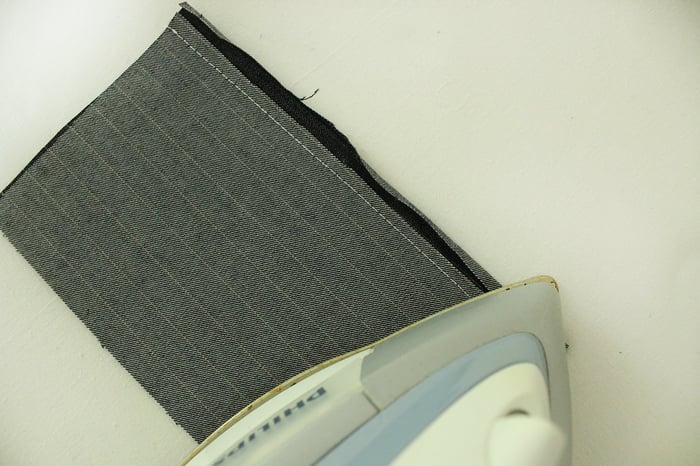
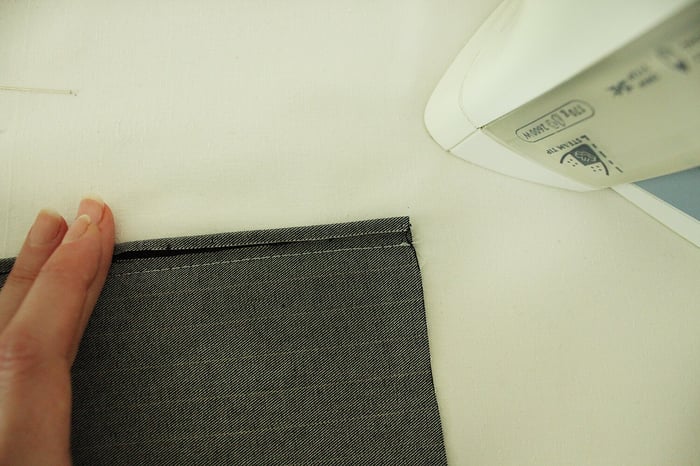
- Fold over again to encase the trimmed edge and press. This step results in enclosing the fabric's raw edges. Secure with pins in place.
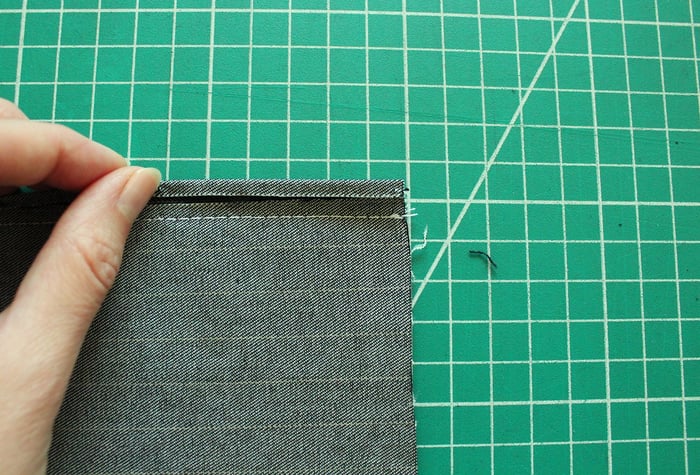
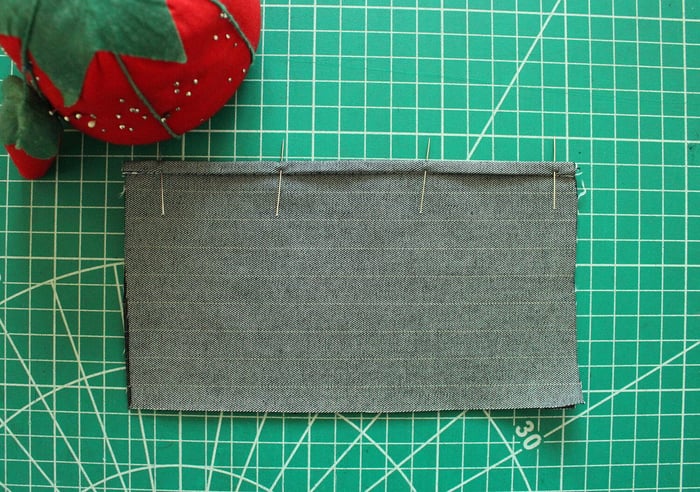
- Stitch close to the folded edge and the first line of stitching.
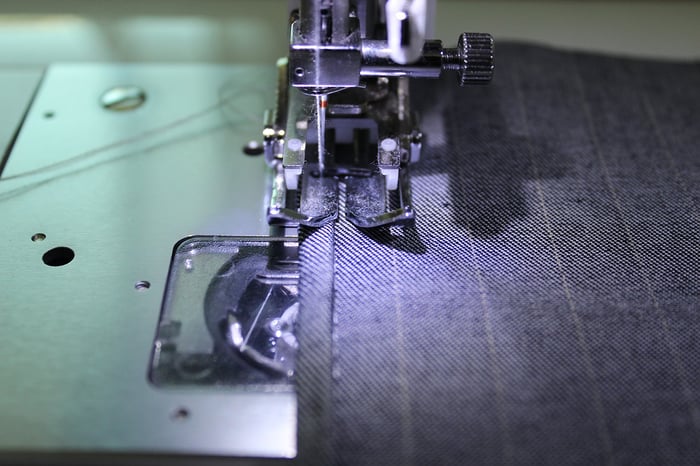
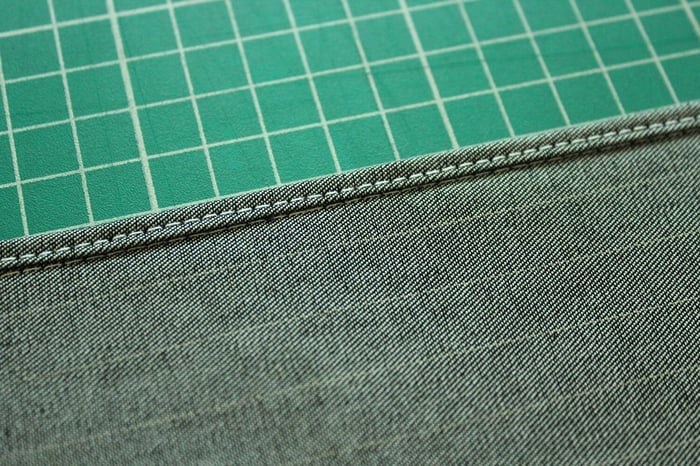
- Give the seam a final press pointing the self-bound finish toward the back of the garment.
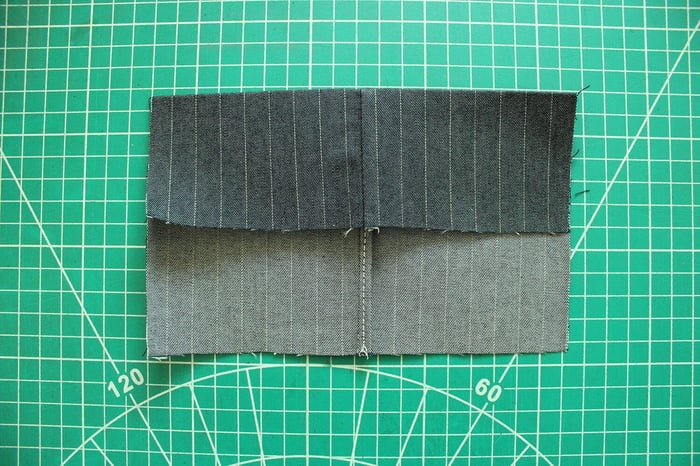
TIP: Stitch as close as you can to the folded edge. Do not pass the existing seam stitch since it may distort the garment seamline.
#2 | The turned and stitch seam finish
The turned and stitch seam finish is one of the simplest seam finishes, especially in handy for the ones that may have only a straight stitch sewing machine. As with any other seam finish, this one offers a neat finish where the seam allowances are folded toward the wrong side of the fabric and topstitched to be secured in place.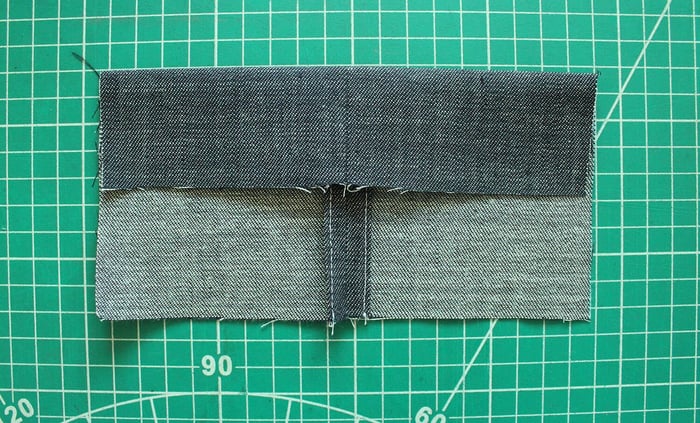
Where to use the turned and stitch seam finish
This is a great finish for light to medium fabrics that are not prone to fraying and hold the crease well. You can easily finish the side or center seams using this technique, while curved seams may be more challenging.
Presser foot choice
The all-purpose foot is all you need for the turned and stitch seam finish, but there are other alternatives as well. On the other side, if a ¼” quilter’s foot guide is one of the sewing machine accessories you may have, then this foot ensures a consistent and neat seam finish.
How to sew the turned and stitch seam finish
The tutorial shows how to create the turned and stitch seam finish with a 5/8″ (1.6 cm) seam allowance.
- Place both corresponding fabric layers with the wrong sides together and stitch 1.6 cm (5/8”) from the fabric's raw edge. Press.
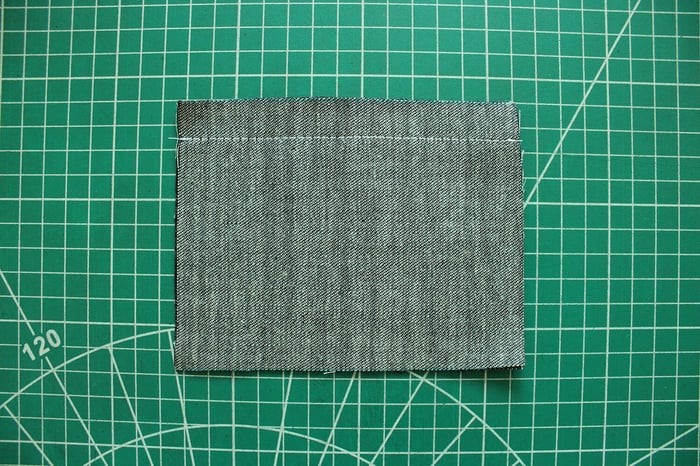
- Press the seam allowances open.
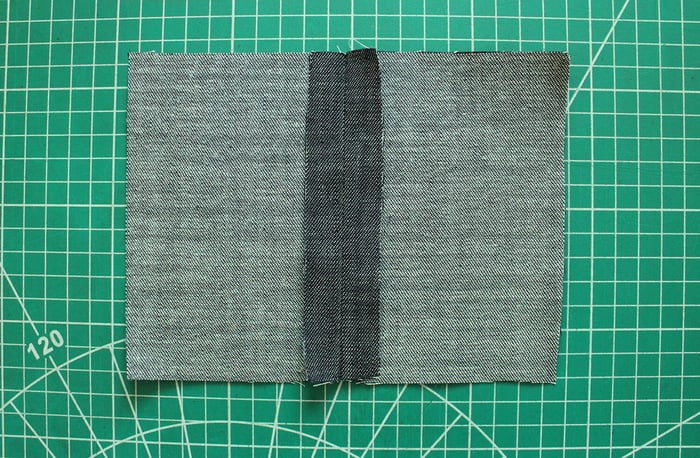
- Turn each seam allowance edge in towards the wrong side of the fabric 0.6 cm (1/4”) and press on both sides.
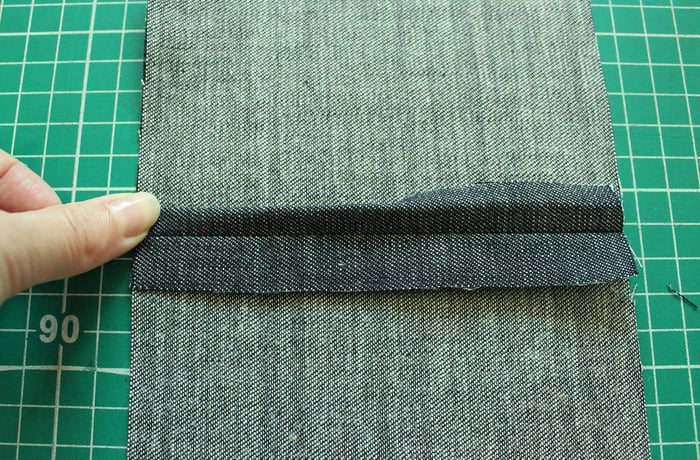
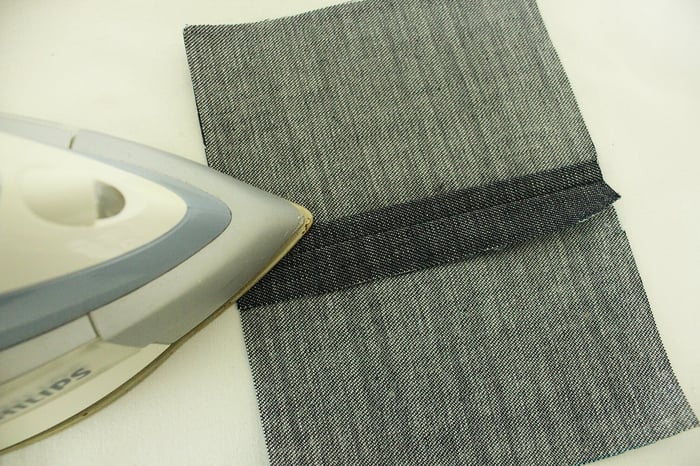
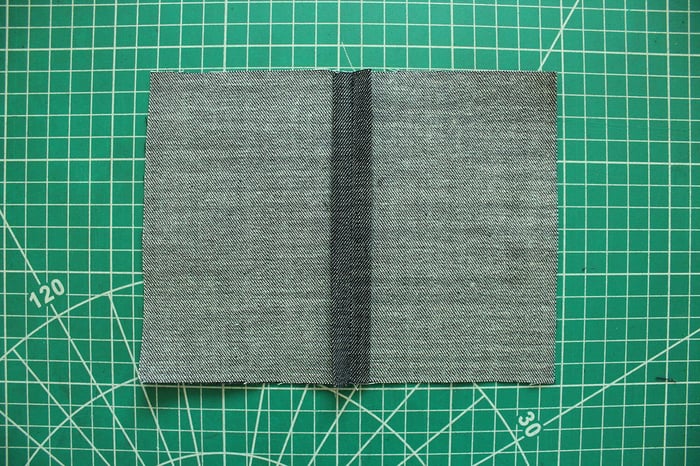
- Arrange that all of the garment fabric layers are positioned on the left, and only the folded seam allowance is under the foot.
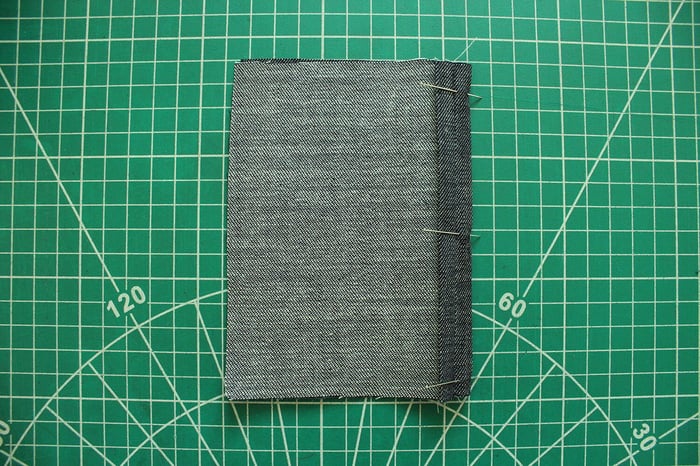
- Stitch along the seam allowance folded edge, 0.3 cm (1/8”) from the fold line.
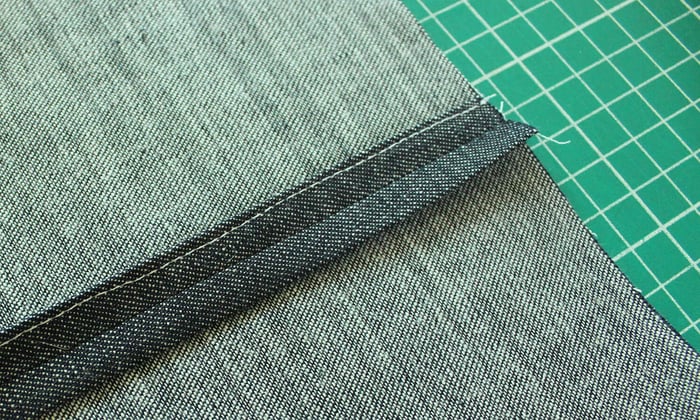
- Repeat for the other folded edge and give the seam a final press.
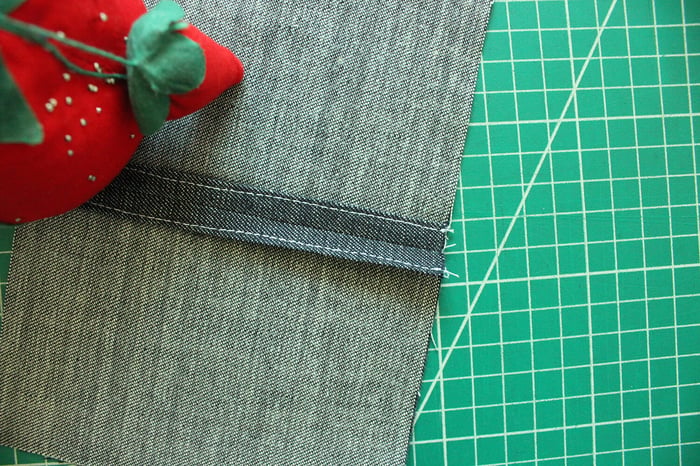
TIP: To add to the longevity of the garment and prevent the fabric's raw edges from fraying, zig-zag the seam allowances before you fold and edgestitch in place.
#3 The zig-zag seam finish
Among many uses, the zigzag stitch can also be used to finish fabric raw edges. 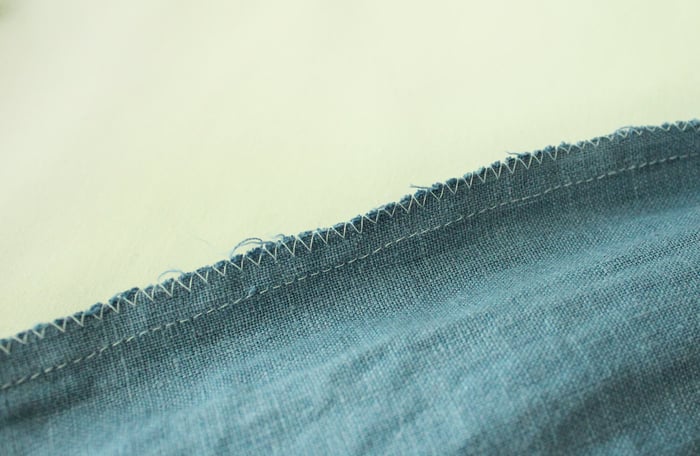
Where to use the Zigzag finish
For medium to heavy-weight woven fabrics, a suitable needle and high-quality thread can do wonders when used in the zigzag stitch.
On lightweight fabrics, zigzag stitches might not be the best option, particularly if the width is on the bigger side. This causes rolling inside or bunching up because the fabric is not thick enough to hold the stitch's width. To achieve a neat and stable stitch, it is recommended to either zigzag 1 cm (3/8”) away from the raw edge of the fabric, choose a shorter stitch width, use a stabilizer when possible, and finish trimming close to the zigzag stitch.
Stitch length and width
The zigzag stitch width and length can be adjusted to change the desired appearance of the stitch. The length is the distance between the stitches, and the higher the length, the zigzag is longer. On the other side, the width indicates the width of the stitch, and the higher the number the zigzag is wider.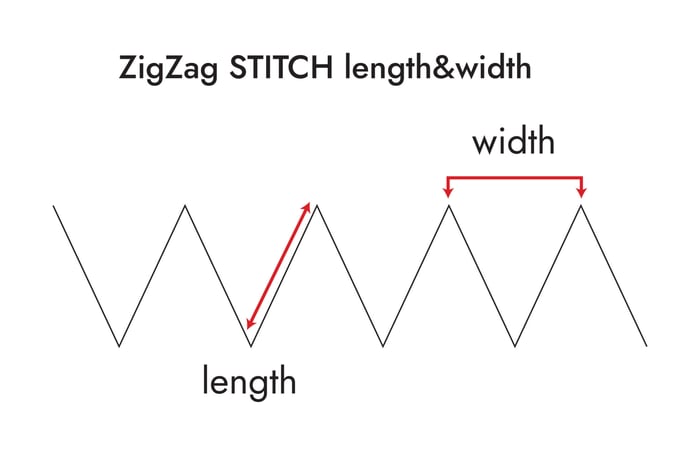
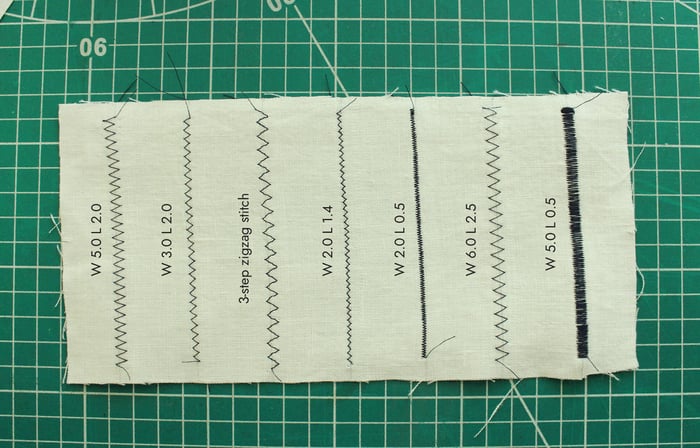
Examples of various zigzag stitch lengths and widths
Presser foot choice
The all-purpose foot is a good place to start, but there are other alternatives as well. Occasionally, using satin or appliqué feet simplifies the process because these feet are constructed of transparent plastic or feature an opening that allows you to see the stitching process clearly.
How to zig zag stitch fabric raw edges
- Depending on the project you can finish the seam allowance together, or open the seam, pressing and finishing each raw edge separately.
- When finishing seam allowances together stitch the seam, trim down to 1 cm (3/8”), and press. Set your machine to the zigzag stitch setting. Select your chosen length and width. For example, 2.4-2.5mm in length and 3-3.5mm wide works well with most woven fabrics. Feel free to experiment as you sew to see how different zig zags look at different widths and lengths.
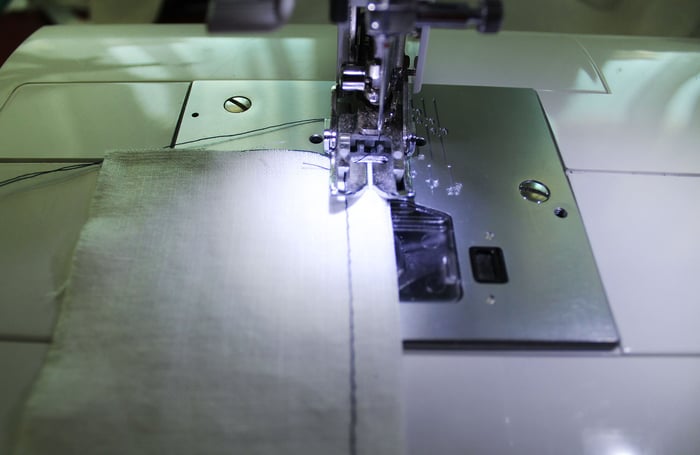
- Zigzag both layers of fabric together for a neat finish.
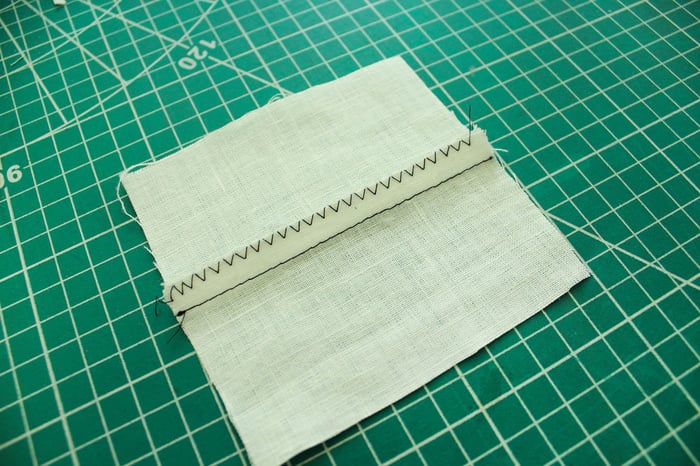
- If fabric edges are to be finished separately, then apply the zigzag stitch along each edge first. Apply a zigzag stitch at about 0.5- 1 cm (1/4- 3/8”) away from the raw edge on both fabric panels.
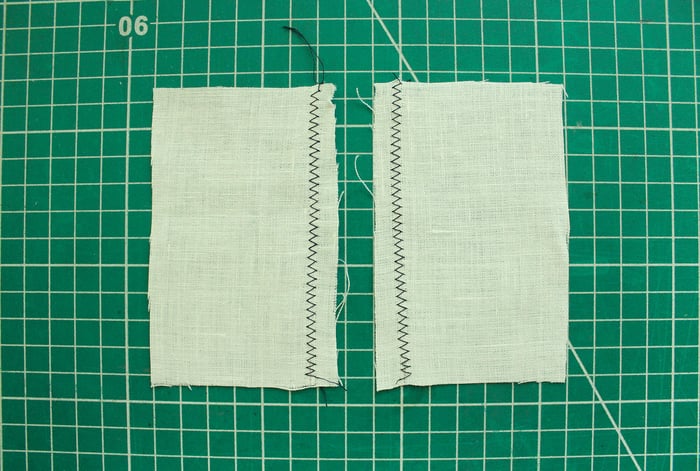
- Place both fabric panels together with the right sides facing together and align the zigzag stitches. Secure with pins and sew the seam at the designated seam allowance.
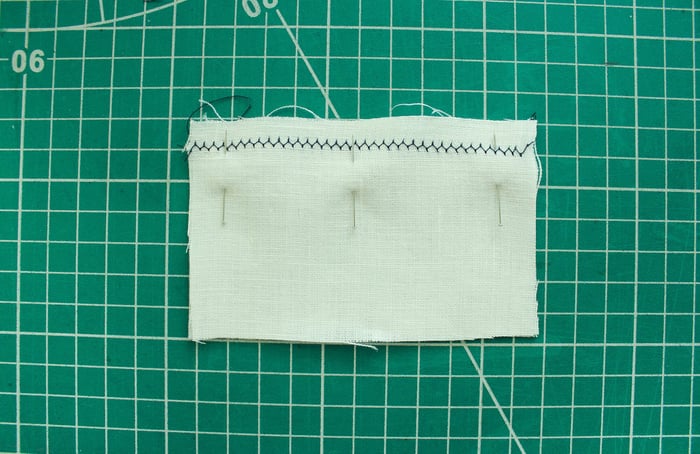
- Press the seam open. Trim the raw edge excess fabric close to the zigzag stitch while being careful not to cut the stitches.
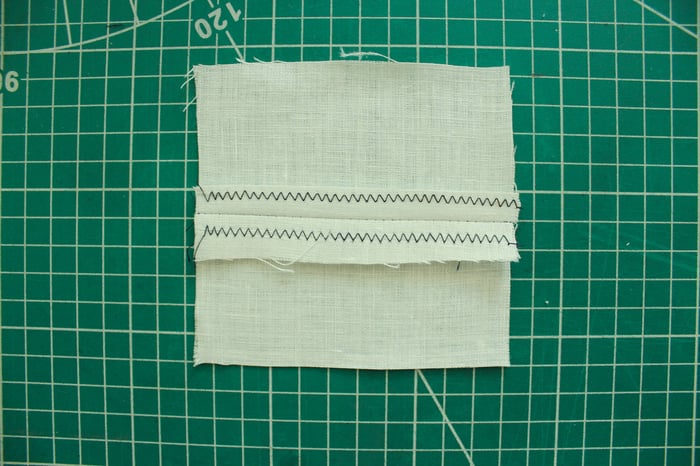
- Press the seam and you're finished.
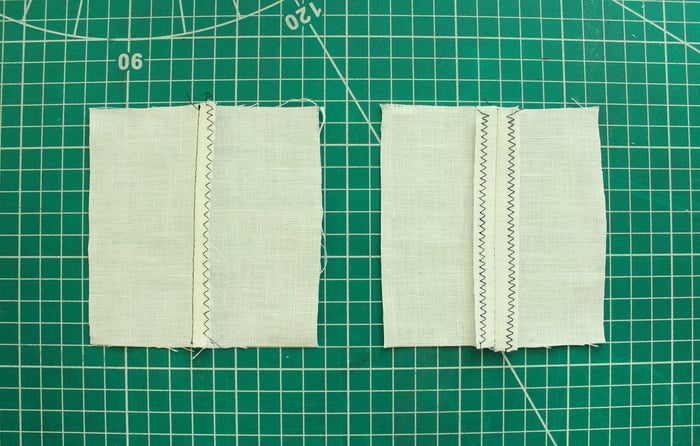
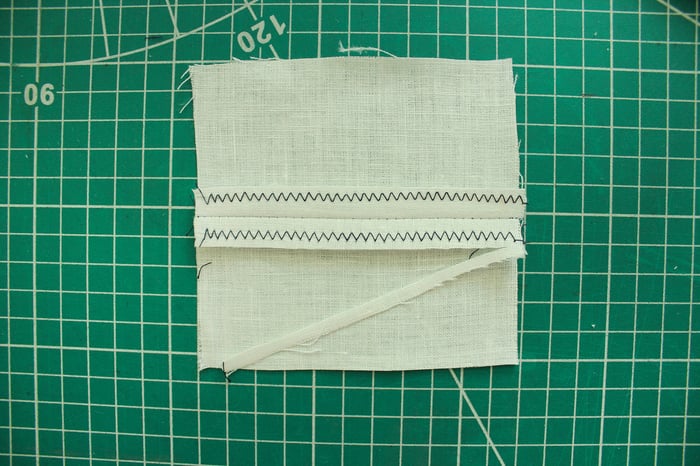 Note the difference between zigzagging both fabric layers together and zigzagging them separately.
TIPS
- Using the tool of your choice (a ruler or a sewing gauge), always be sure to mark the seam allowance correctly.
- Depending on the fabric choice, keep in mind to choose the right thread and needle size. If all three are in line, then the strength will be impeccable.
- As with any other sewing technique, pressing is a must, and in order to get a neat finish, press your seams after every step.
Final thoughts
Each seam finish technique has its purpose depending on the fabric weight and the location of the seam finish. This is why it’s important to choose a seam finish that is in line with the fabric, garment type, location of the seam, and the tools that are available to you.
The self-bound, turn-and-stitch, and zigzag seam finishes are beginner-friendly and have a wide application, especially when a serger is missing from your sewing equipment. Among many other seam finishes, we recommend you start practicing these specific seam finishes. We all know, the key to a well-constructed garment is a neat professional finish that helps to keep the garment shape and prevents raveling and curling of the fabric's raw edges.
Thank you for joining us today for our top 3 easy seam finishes for beginners. Before you leave, make sure to sign-up for our newsletter below. You can also join our Facebook Group or follow us on Instagram. Happy Sewing!

