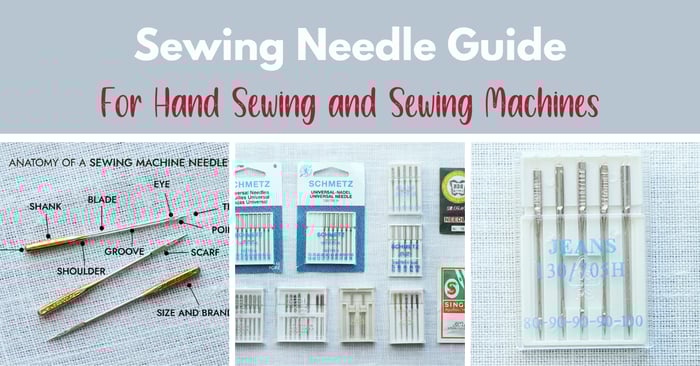
Beginner Guide To Sewing Curves
Sewing curves on seams can be somewhat intimidating to stitch, especially for novice sewers. Then why learn how to sew curved fabric edges? Because it’s always great to have another skill under your sleeve, especially with curved seams. Nowadays, almost every garment has a curved seam incorporated, and knowing how to properly sew one makes a huge difference in how professional your sewing looks!
So, in this step-by-step article, we’ll dive into everything you need to know about sewing basic curved seams, starting with curve types, how to sew the perfect curved seams, templates to practice, and lots of tips for sewing perfect curved seams.
Curve types
If you’re fairly new to sewing, then you must know that there are two types of curves in sewing:
Convex curves or curves that face outwards. They are commonly found on scallop hem edges, sleeve caps, pocket edges, princess seams, totes, and more.
Concave curves or curves that face inwards. They are commonly found on garment necklines and garment armholes.
Practicing sewing curves on a template
Before sewing curved seams, practicing stitching curves on paper or fabric is desirable. Download our free template sheet to practice sewing curves. Transfer the lines to fabric or stitch directly on the printed template. Start with the larger curves using a shorter stitch length and go at a speed you feel comfortable with.
On sharp curves, you will need to lift the presser foot many times to maneuver the fabric but as you do, try to keep the sewing needle down on the fabric. Keep lifting the presser foot as necessary to maneuver the fabric, put the presser foot down, and stitch. Repeat as many times as needed to sew the curve.
Tip: If practicing on paper, try to use dull or old sewing needles that you don’t need since the paper ruins good sewing needles.

Download the practice sheet HERE
How to sew a curved Seam
There is no right or wrong way to sewing curves, but the key is to find a technique that works for you and gives desirable results. You may use a lot of pins or none, but that comes later after you define your favorite technique for sewing curves.
Some techniques used to sew curved seams include using pins, basting the fabric layers then sewing the curve, and not using pins at all. Also, there’s no presser foot specifically for sewing curves, but some sewers use the blind hem foot and swear that it makes stitching curves easier and smother.
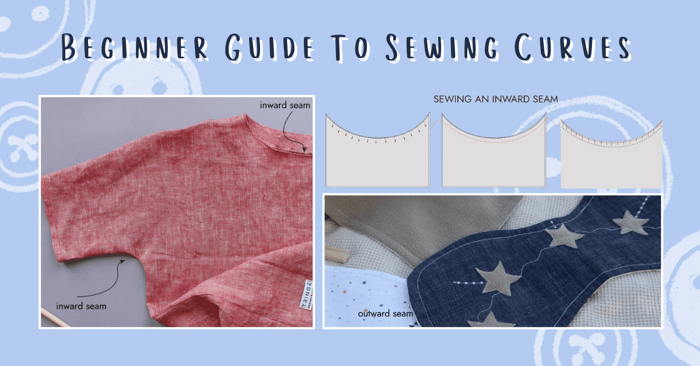
Sewing inward curves
- Define if your pattern pieces have a seam allowance. If not, add 6 mm to 10 mm seam allowance and mark it on the fabric. It can be hard to visualize the curved seam line and predict when to turn with the seam allowance line, so it’s better to have it there, especially when you just started sewing curves. As recommended by sewers, a seam allowance of 6 mm makes it easier to sew the curves together.
- Place both fabric pieces with right sides together and pin them vertically.
- Place the pinned fabric under the sewing foot and stitch slowly along the curve. Remove the pins as you go and regularly check that the fabric is not caught underneath. Give the fabric piece a press.
- Once you have sewn the inward curve, make snips about 1.5cm (1/2 inch) from each other around the curve. A flat curve might need snips further apart, and a sharper one might need more closer together. Be careful not to cut the stitching line. The snips will let the seam release some of the tension and lay flat when turned on the right side.


Sewing outward curves
The steps for sewing an outward curve are almost the same as those for sewing an inward curve. The sole distinction is that tiny triangles are cut along the curved seam allowance instead of small cuts. Cut the small triangles every 1.5 cm (1/2 inch), or further apart when the curve is not that sharp.
By doing this, extra fabric can be trimmed away, ensuring that the outward curve remains smooth and flat when the fabric is flipped to the right side.


However, sewing curves that face opposite directions is quite a challenge, and it can only be mastered with lots of practice.
Sewing opposite curved fabric edges together
- Define if your pattern pieces have seam allowance. If not, add 6 mm to 10 mm seam allowance and mark it on the fabric. As recommended by sewers, a seam allowance of 6 mm makes it easier to sew the curves together.
- Mark the center of the inward and outward curves. A small clipping in the center works great too.

3. Lay the inward curved fabric piece right side up. Place the outward curved fabric piece right side down, align both pieces, and pin in center.

4. From the center, starting from the left side, pin both curved fabric edges together. You may need to maneuver and orient the fabric edges to align together, so be patient with this step. Take it slow and pin every 1.5 cm (1/2 inch) or even 1cm (3/8 inch) if that works for you.


5. Hand baste close to the seamline for extra stability during stitching. This step is only optional but is preferred for those that are sewing curved seams for the first time. Once you finish stitching the curved seam, then you remove the basting thread.
6. Place the pinned piece under the sewing foot and stitch slowly along the curve. Remove the pins as you go and regularly check that the fabric is not caught underneath.


7. Press the seam allowance to one side. Curved seams are not usually pressed open since it’s too difficult to achieve a neat finish afterward. But depending on how deep a curve may be, those that are on the flat side can be easily pressed open using a Tailor’s ham.


TIP: If the seam is not laying flat after sewing, clip the inward curve for tension release.
Trimming the seam allowance on curved seams
Curved seams have their specific ways of trimming to release tension so the seams lay flat but also for a neat finish.
It is recommended that the inward seams be snipped close to the stitching line (but not through it) every 1.5 cm ( ½ inch). On the other side for the outward curves, it’s recommended to cut small triangles along the curved seam allowance. Depending on how sharp the curve may be more or fewer triangles can be cut.

As for opposite curves sewn together depending on how sharp they may be, they usually are pressed to one side and the inward curve is snipped to release some of the tension.
How to finish a curved seam?
As with any other seam, finishing a curved seam is a must in most cases. You can neaten the raw edges of curved seams using a serger or a zigzag stitch on your sewing machine. This will undoubtedly prevent the fabric from fraying and make it look neater on the wrong side. Bias binding is another additional technique that gives the fabric's raw edges a neat, professional finish.
Tips for sewing curved seams
- When practicing sewing curves, start with a larger curve so it is easier to handle. As you feel more comfortable, continue sewing sharp curves.
- Mark your seam allowances on the fabric before sewing.
- Press using an up-and-down motion. Pressing back and forth motion can cause the fabric to stretch around the seam.
- Use a shorter stitch length. A shorter stitch length provides more control when curving the fabric edges under the presser foot.
- Pins aid your sewing and come in handy, especially when sewing curves. Use as many as you need to hold the curved edges in place.
Final thoughts on sewing curves
So, how do we sew a neat curve? As with any other sewing technique, it takes a lot of patience. As laid out in the article, the four most important elements to sewing curved fabric edges include pining, sewing slowly, using shorter stitches, and pivoting a lot, so pay attention.
Start practicing your curves with this article's provided template before sewing a curved seam. You’ll notice how easily you can manage the fabric and pivot when moving on to your sewing project. As with any other detail in sewing, curves can uplift your garment when sewn correctly.
Thank you for joining us today! Before you leave, make sure to sign-up for our newsletter below. You can also join our Facebook Group or follow us on Instagram. Happy Sewing!