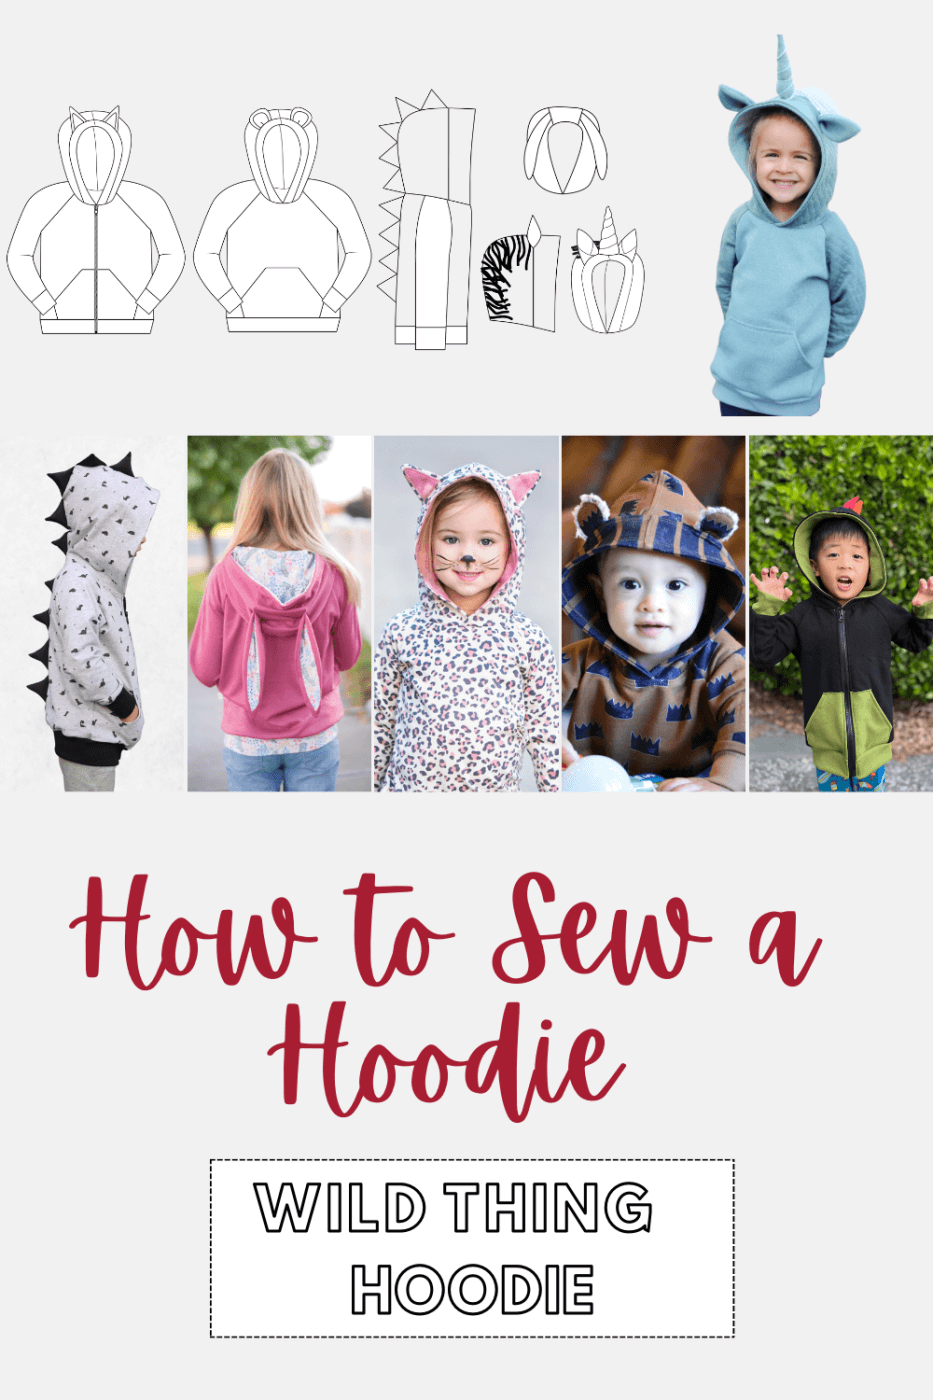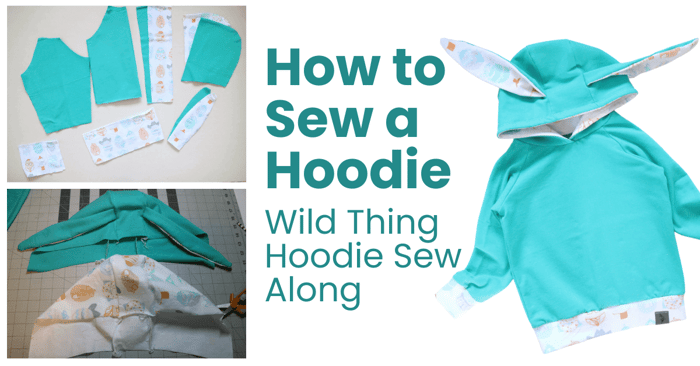
How to Sew a Hoodie | Wild Thing Hoodie Sew Along
Learning how to sew a hoodie is a great beginner sewing project. Today we'll learn how to sew a hoodie with the Wild Thing Hoodie Pattern from Peek-a-Boo Pattern Shop:
Fall & Spring are my favorite times as it’s the perfect season to live in hoodies. If hoodies are your jam but you are unsure on how to make one or you think it is too complicated, follow along while we create a hoodie.
Spring or Easter time is also the perfect time to create a hoodie that also has a bunny ear added to it. The idea behind the construction is the same for a hoodie regardless of whether it has the animal ear add on or not.
I have chosen this beautiful seafoam French Terry for the body of the hoodie this cute Easter Egg print fabric I had on hand. I am making this for my youngest boy and thought the eggs would be an amazing detail. 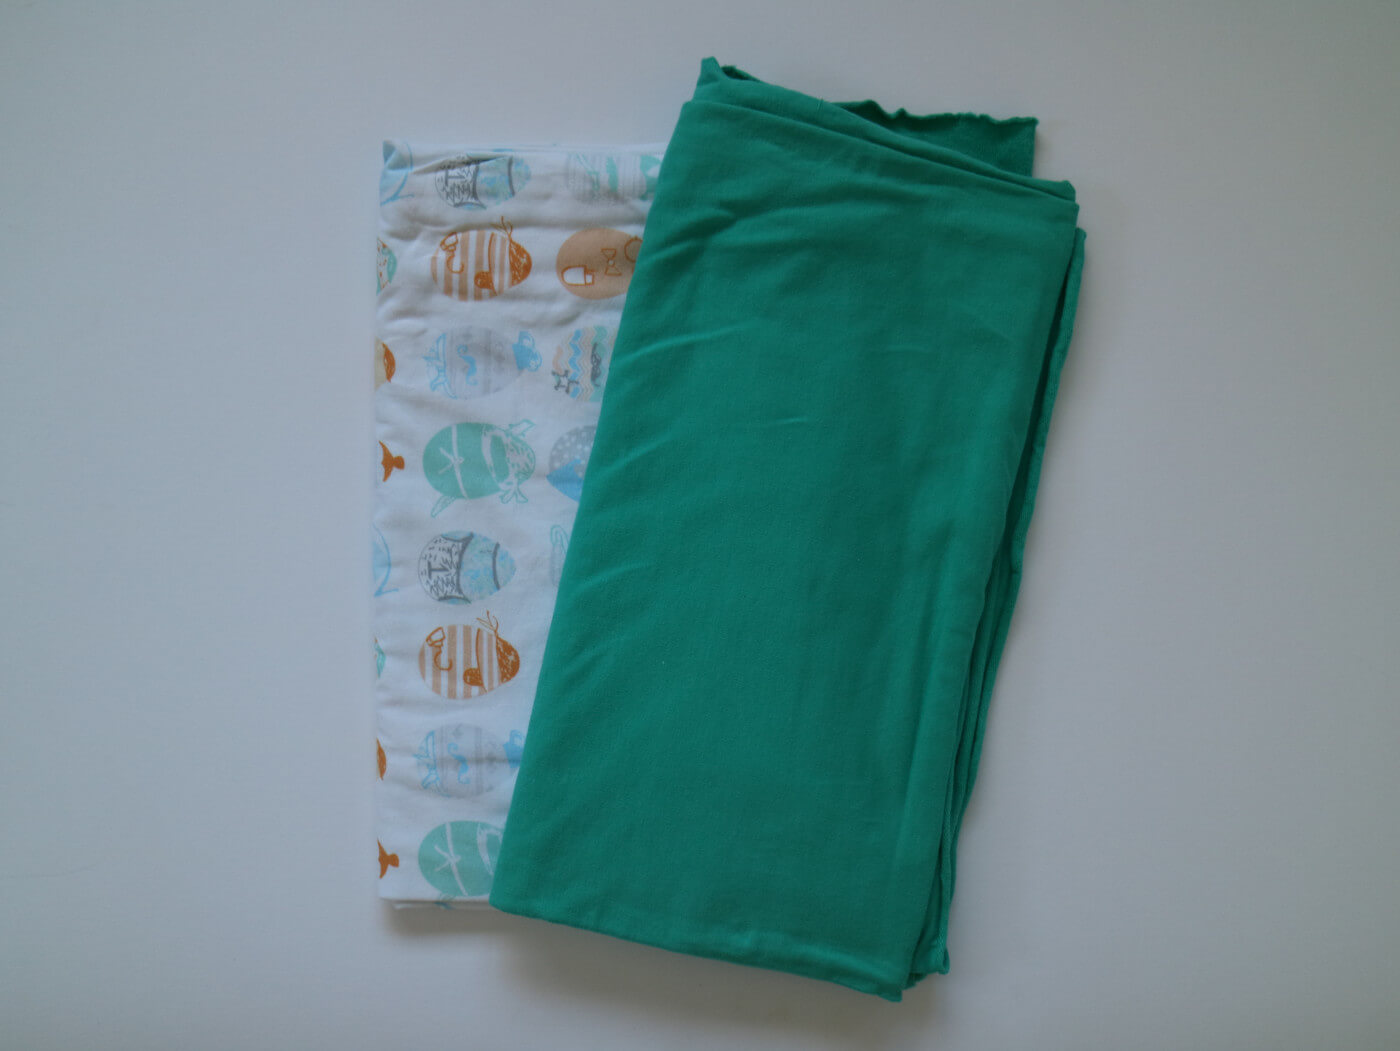
Types of Hoodies
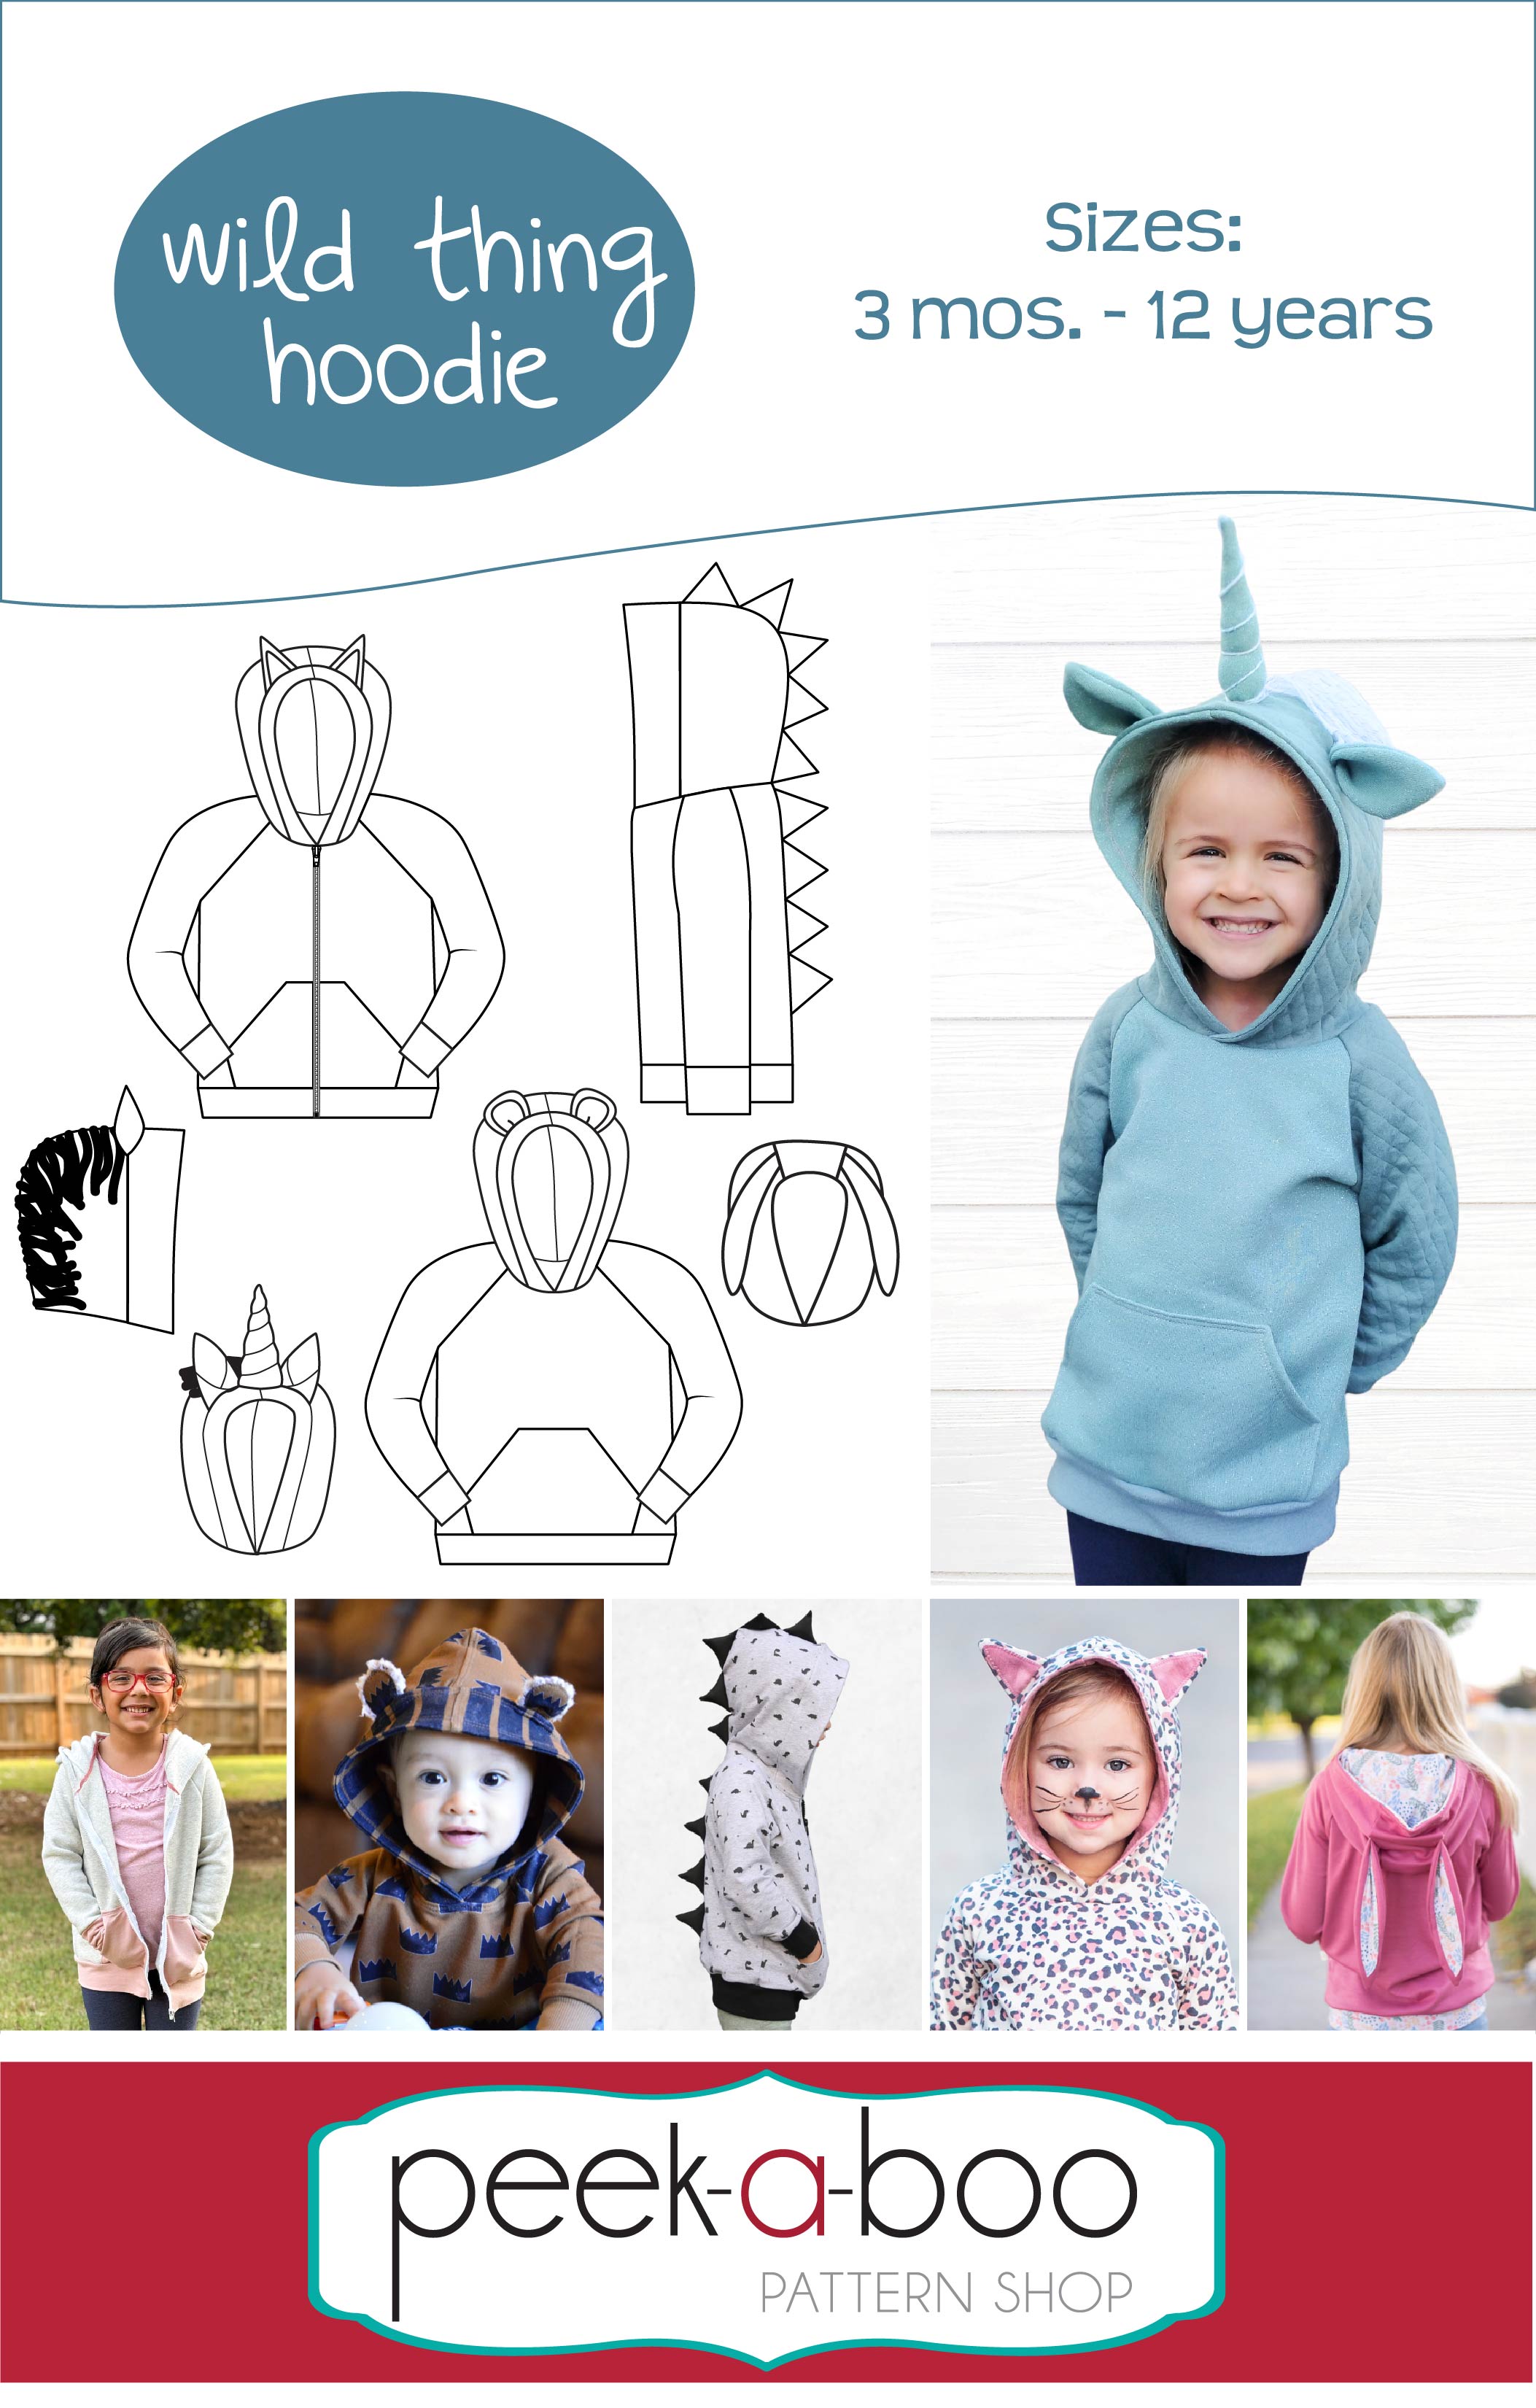
We have soooo many Hoodie Patterns here at Peek-a-Boo. We even have another blog post on our Top 15 Hoodie Patterns to check out.
You can make a lined or unlined hoodie, finish edges differently, alter the shape of the hood, or add or alter one of the various options - standard hood, overlapping hood, or scuba style.
How to Sew a Hoodie | Wild Thing Hoodie
Let us get started by assembling everything we need. We will need our pattern of choice, fabrics of choice and our usual sewing supplies.
1. Assembling the pattern pieces
I am using the wild thing hoodie pattern for this project and using a projector to project the pattern on to my cutting mat. If you are not using a projector, print out the pattern and get the pattern pieces ready to cut.
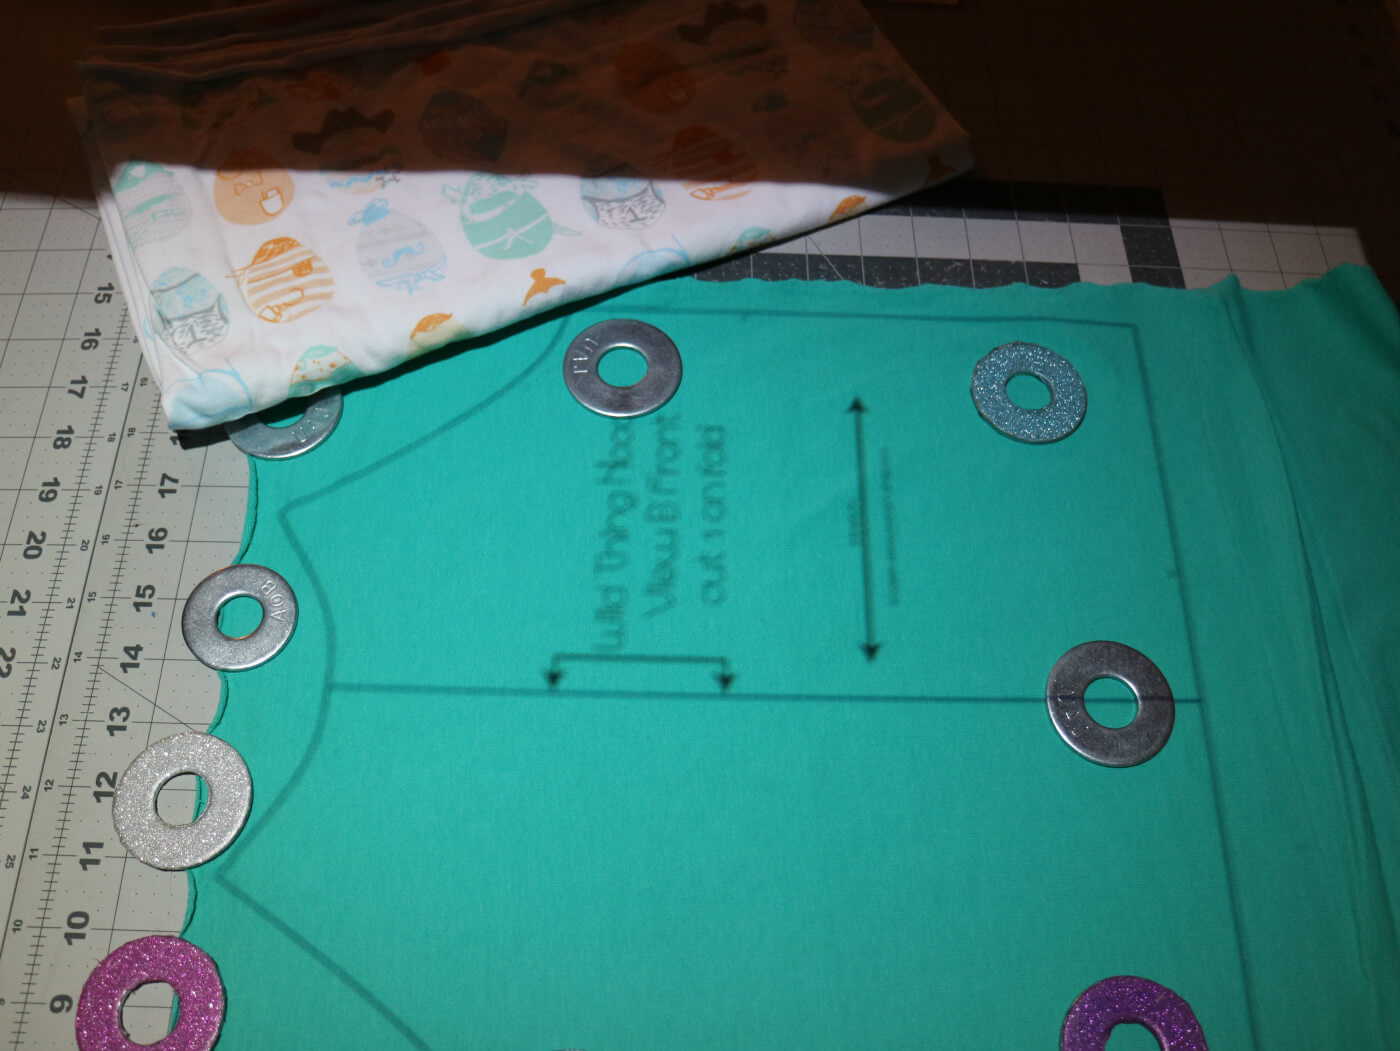
2. Cutting out the pattern pieces
We will cut out all the appropriate pieces based off of the pattern instruction. The hoodie pieces always consist of atleast one set of mirror image pieces. So make sure you are cutting out the main hoodie pieces as a mirror image.
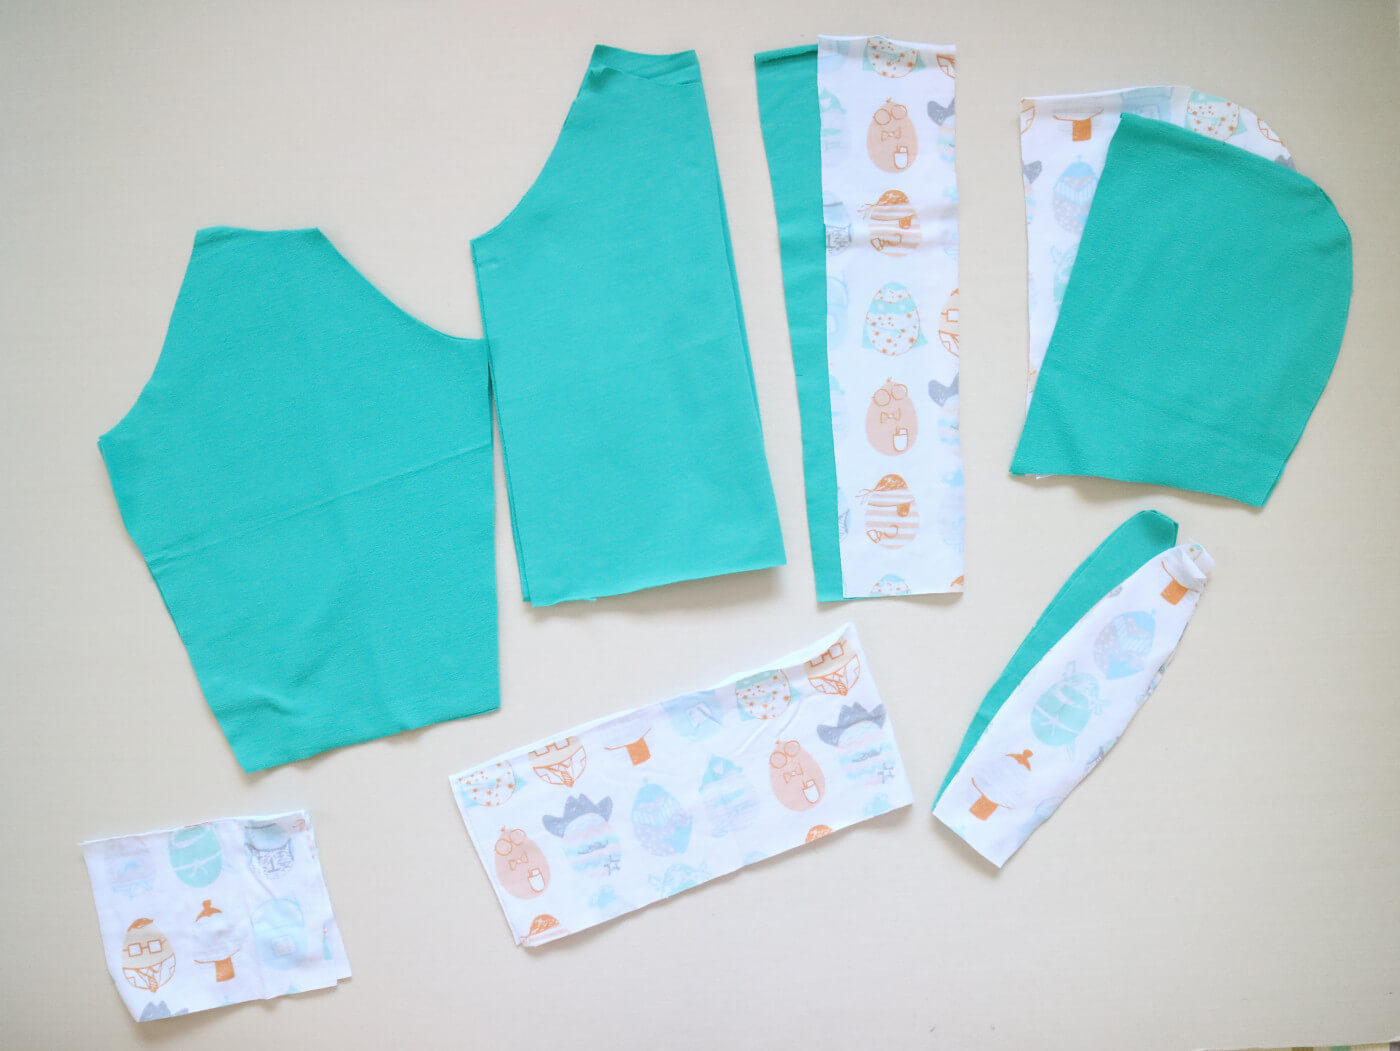
Since I am making a hoodie that has the bunny ear add on, I’ve cut out the three piece hoodie. There are two sets of mirror images of the hoodie side panel in both the main and lining fabrics. There is also the center panel in both main and lining fabrics. And of course the bunny ears in main and lining fabrics.
The cut pieces also include the front and back bodices, mirror images of the sleeves and the bands.
3. Sewing the sleeves
The first step is to sew the sleeves on to the bodice for this raglan style. Making sure to match the front sleeve to the front bodice, sew the sleeves on.
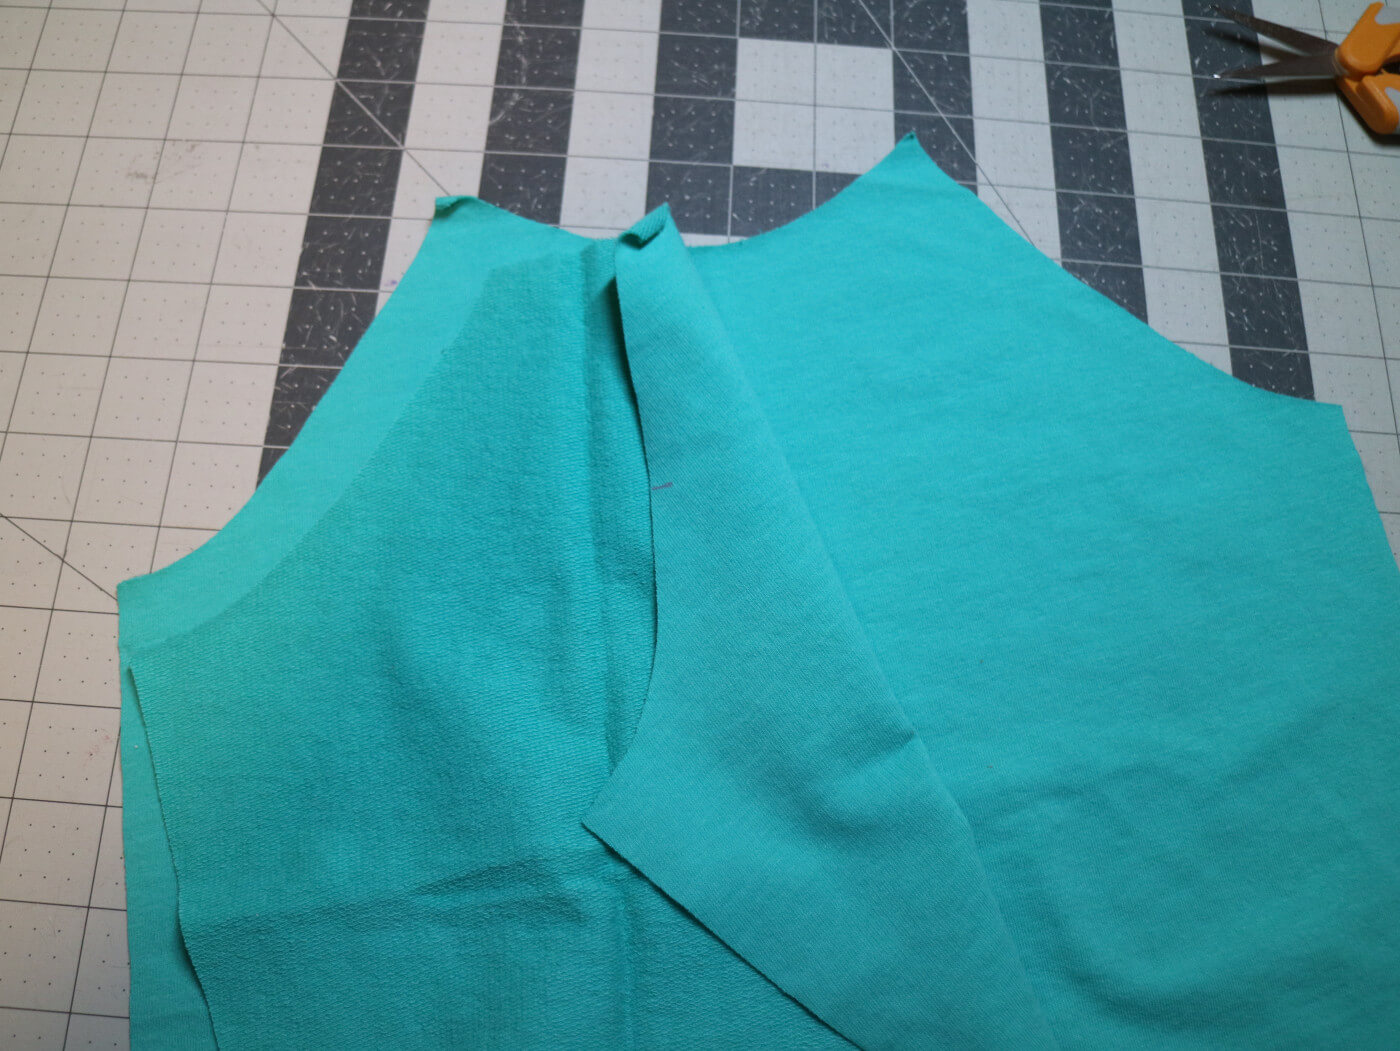
Next up, match the back bodice to the back of the sleeve. There is a notch on the back sleeve. Sew the sleeves on to the back bodice matching the notches.
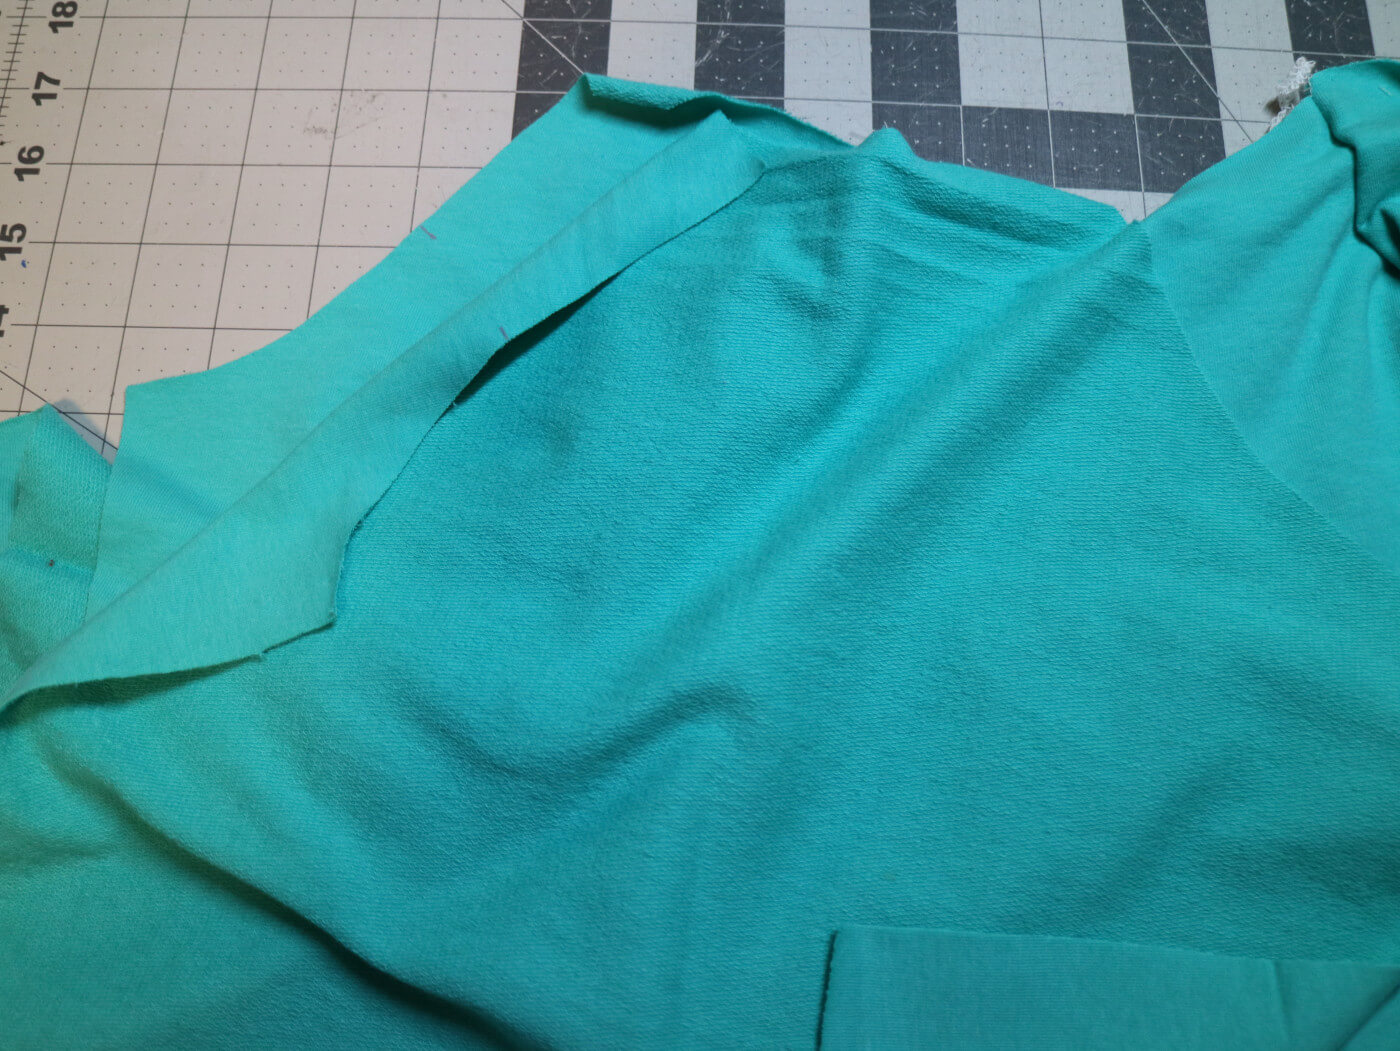
4. Sew the side seams
Matching the sleeves and front and back bodice at the raw edges, sew down to finish the side seam. I like to match them at the sleeve hem, at the sleeve seam and bodice hem and then match the raw edges before sewing them down.
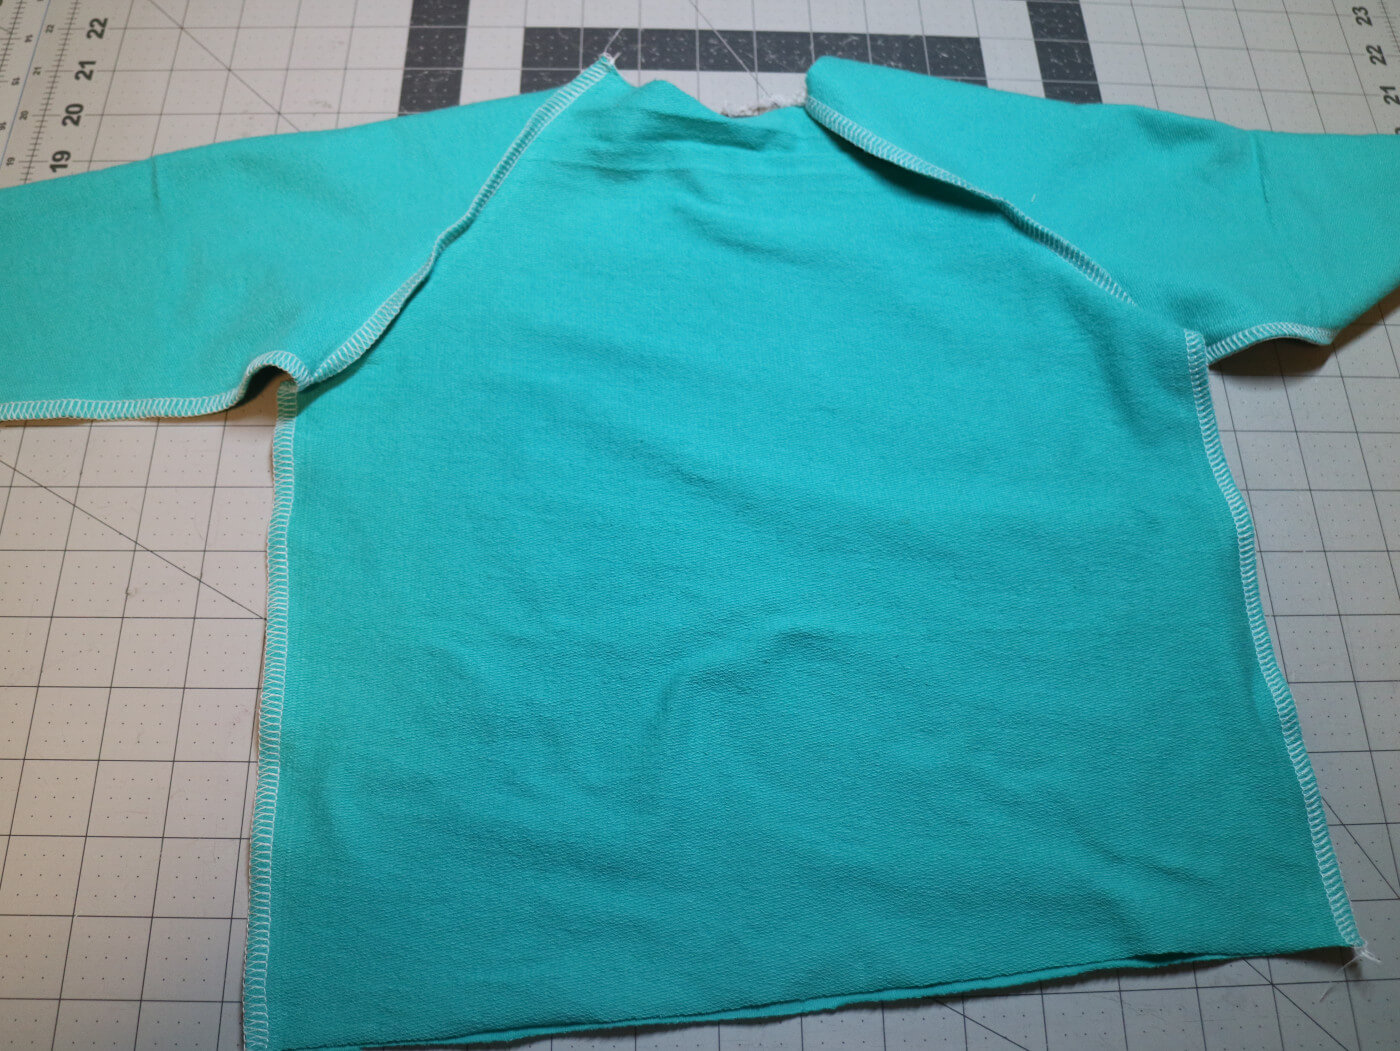
Now we will set aside this piece and prep our bunny ears and Hoodie piece.
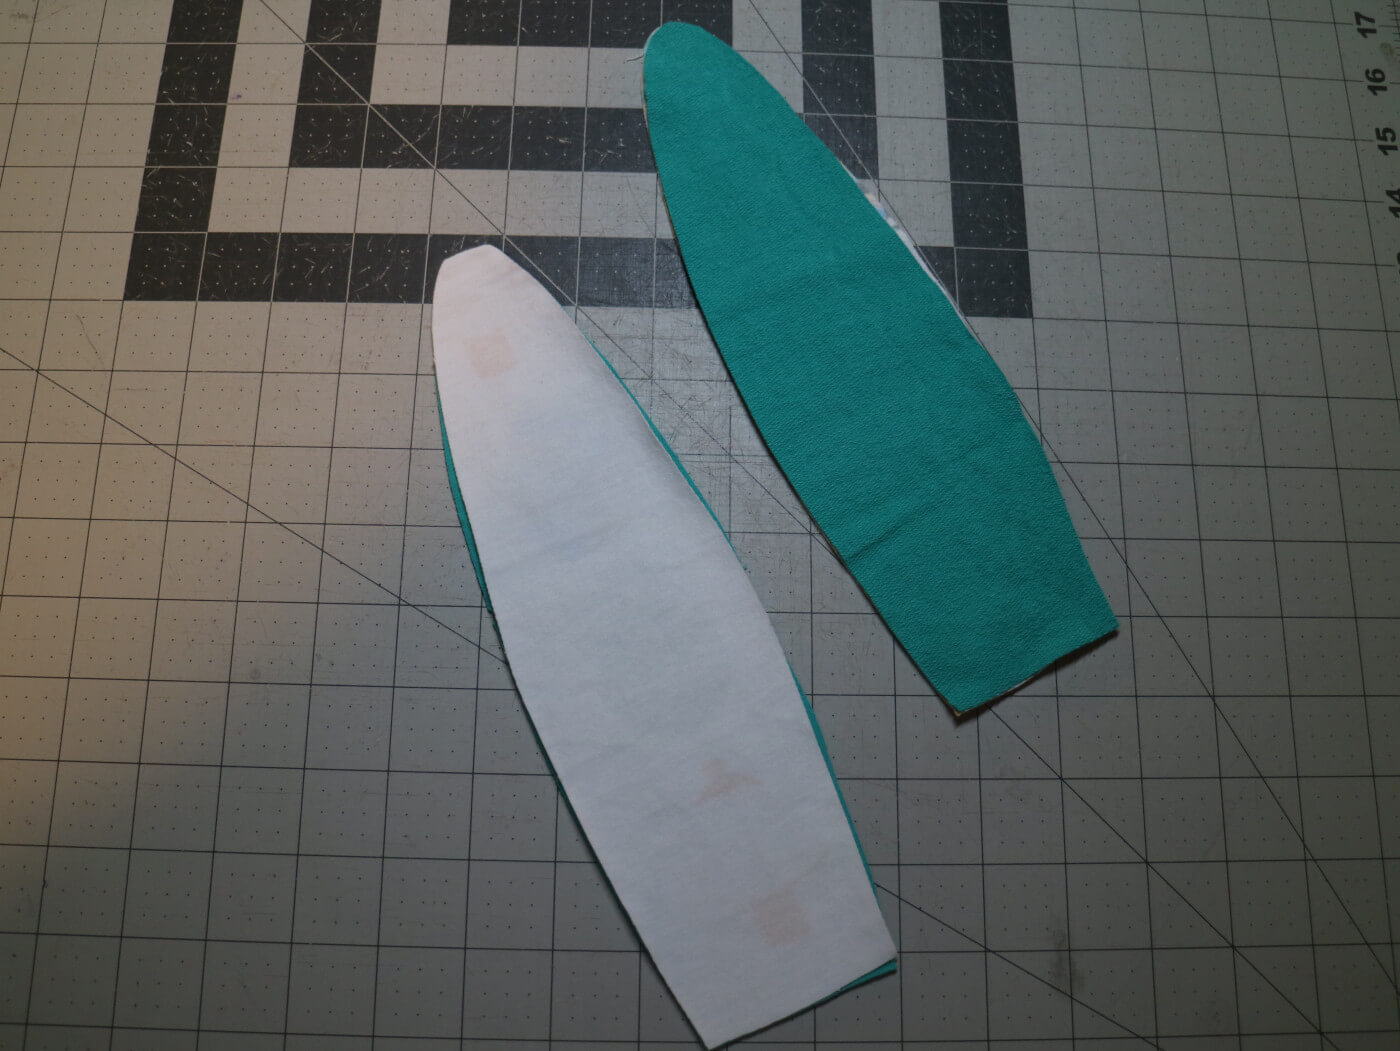
5. Prepping the Bunny Ears
Start by laying out the main and lining pieces of the ears right sides together. Keep in mind we are matching one main piece and one lining piece. If you are adding an inner ear, remember to sew them on to the lining piece before his step. Sew around the ear.
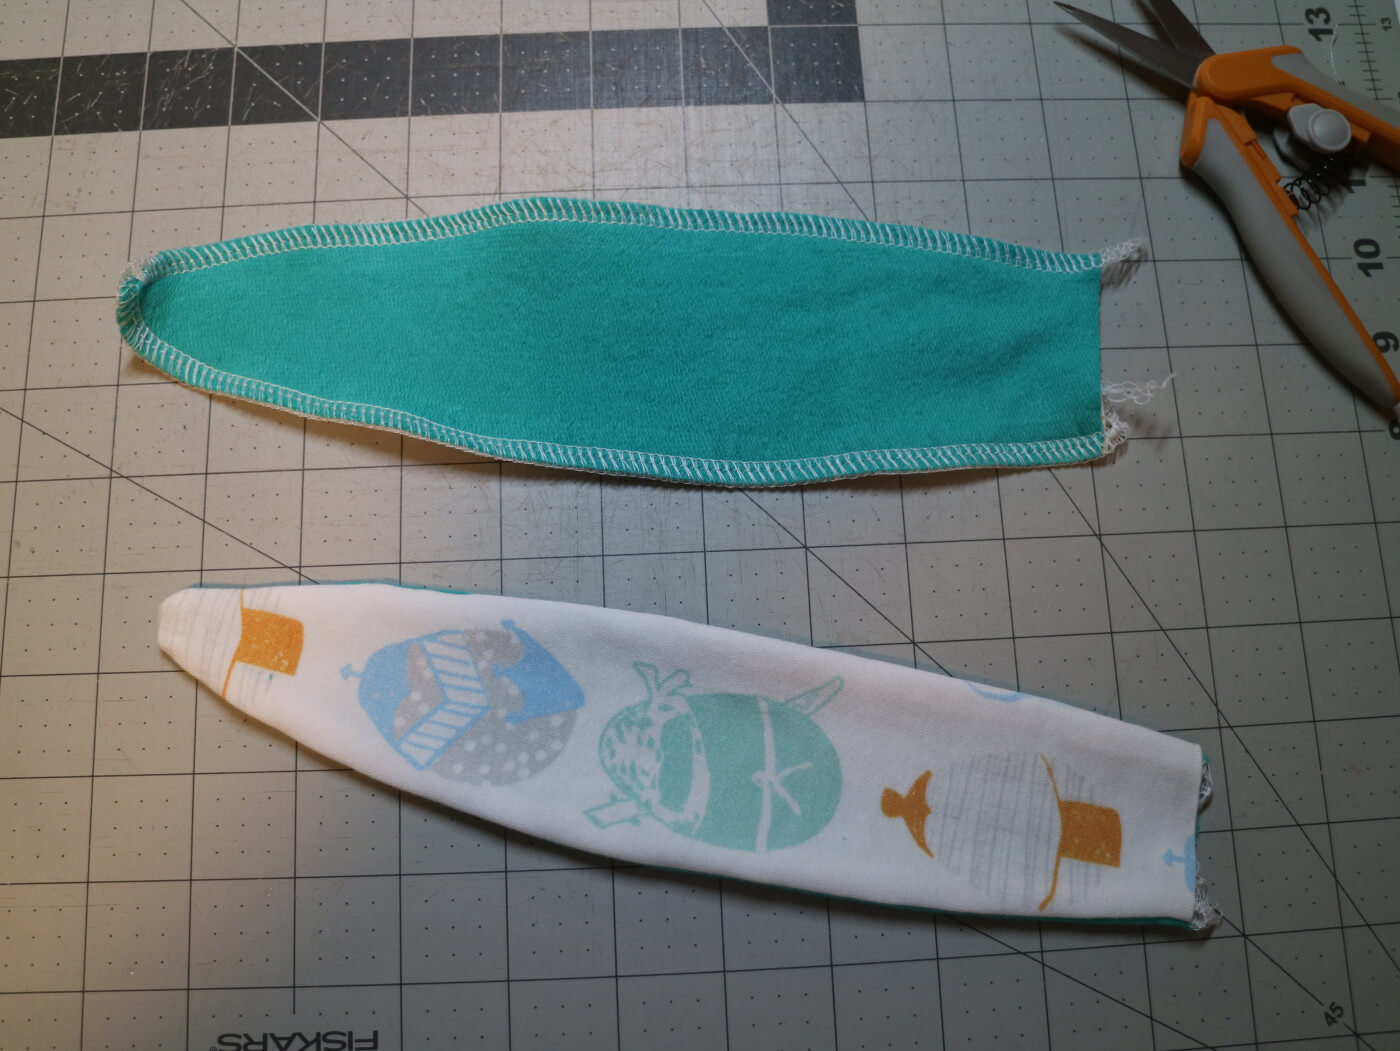
Turn the ears right side out carefully and give it a good press. It would help a lot if you trim down the seam allowance and clip the curves. I have serged the raw edges instead of using a sewing machine, so I did not clip the curves. I did not mind that the ears do not have sharp curves.
Fold the base of the ears in half with lining sandwiched between and baste it. Repeat this to the other ear. This will help in the ears lying in the correct angle when sewing on. 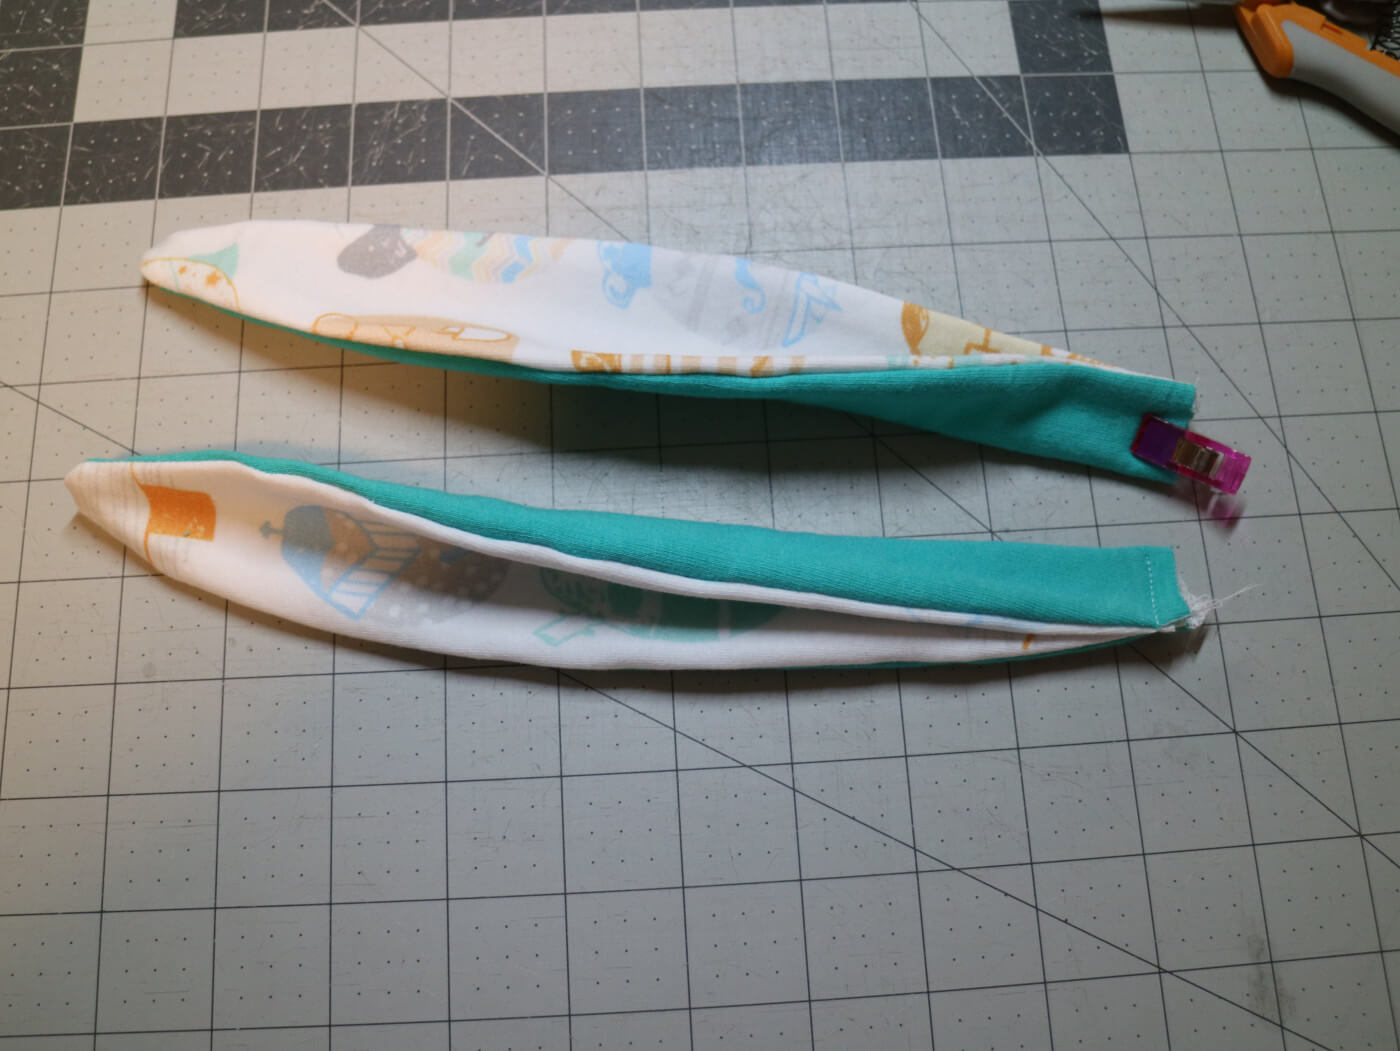
6.Attaching the ears to the hood
Lay the hood main piece right side up. Locate the marking on the hood for the ears. Align the ear with the mark, making sure that the ears face the front of the hood.
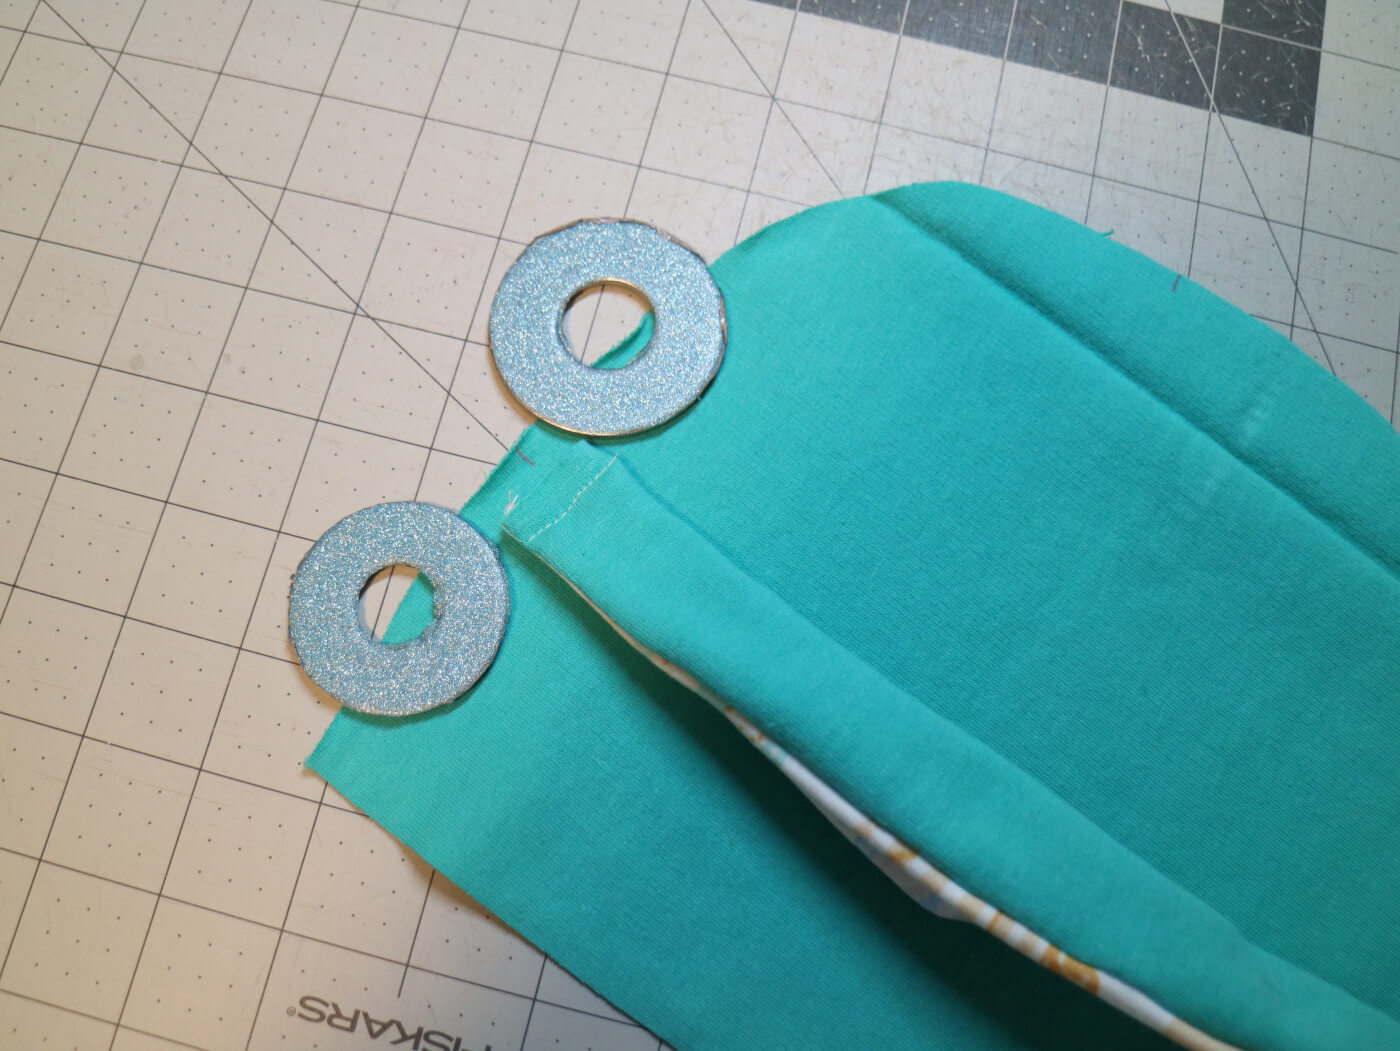
Baste the ear on place. Repeat this step with the other ear an hood piece. Set aside one of the sets.
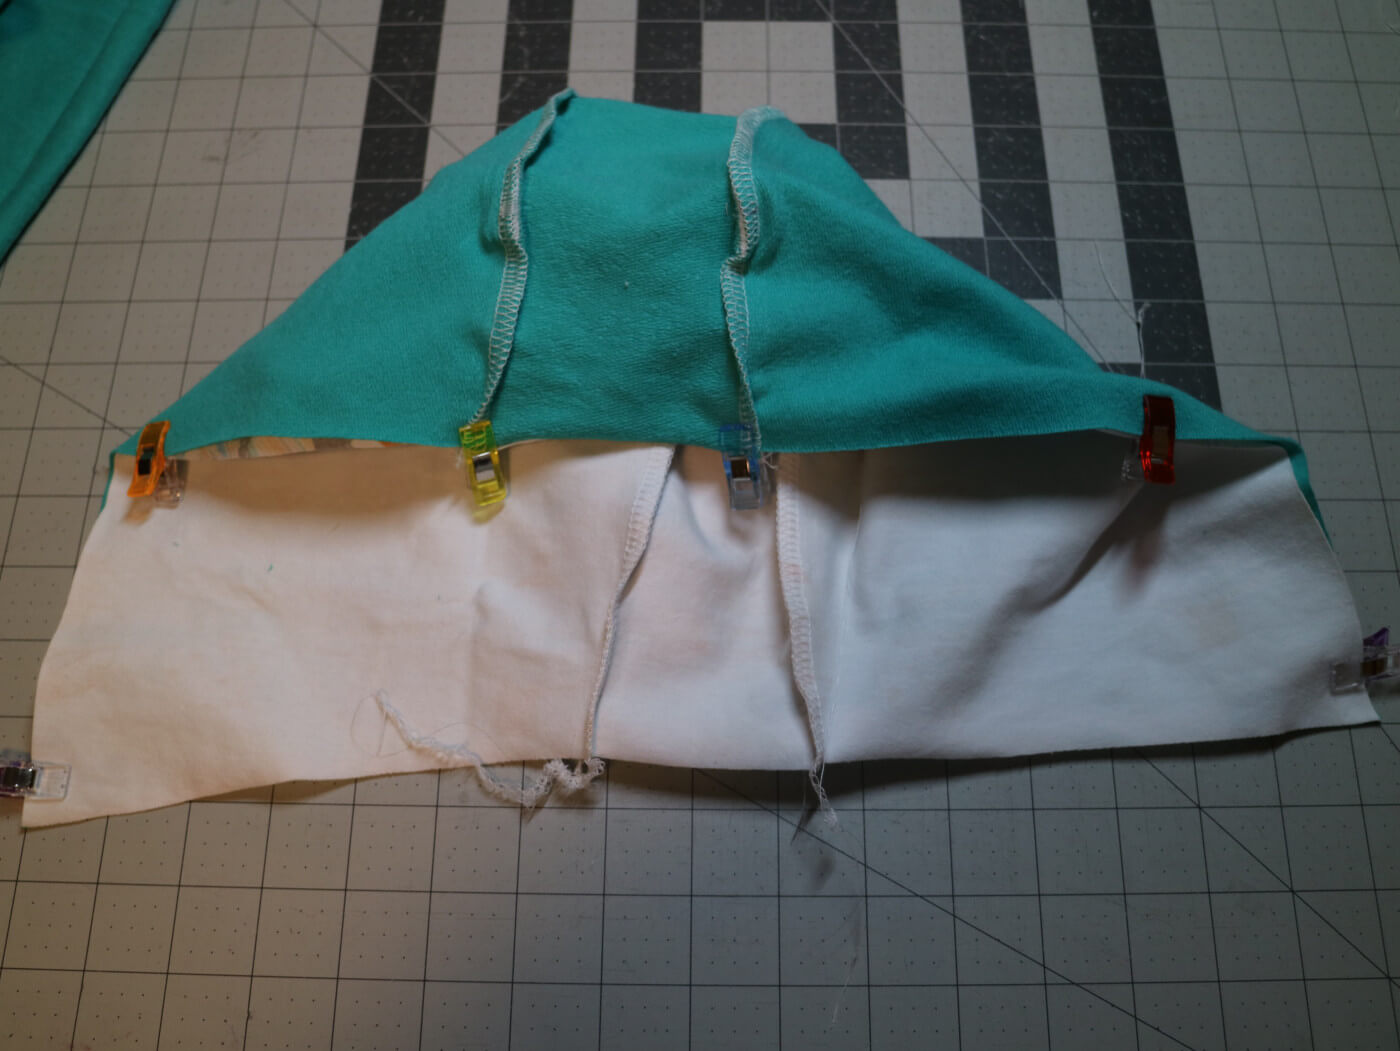
7. Prepping the Hood
Locate the center piece of the hood. Matching the notches on the center piece with the notch on the back of the hood piece, pin them right sides together. Make sure that the bottom center notch of the center piece points to the bottom back of the hood.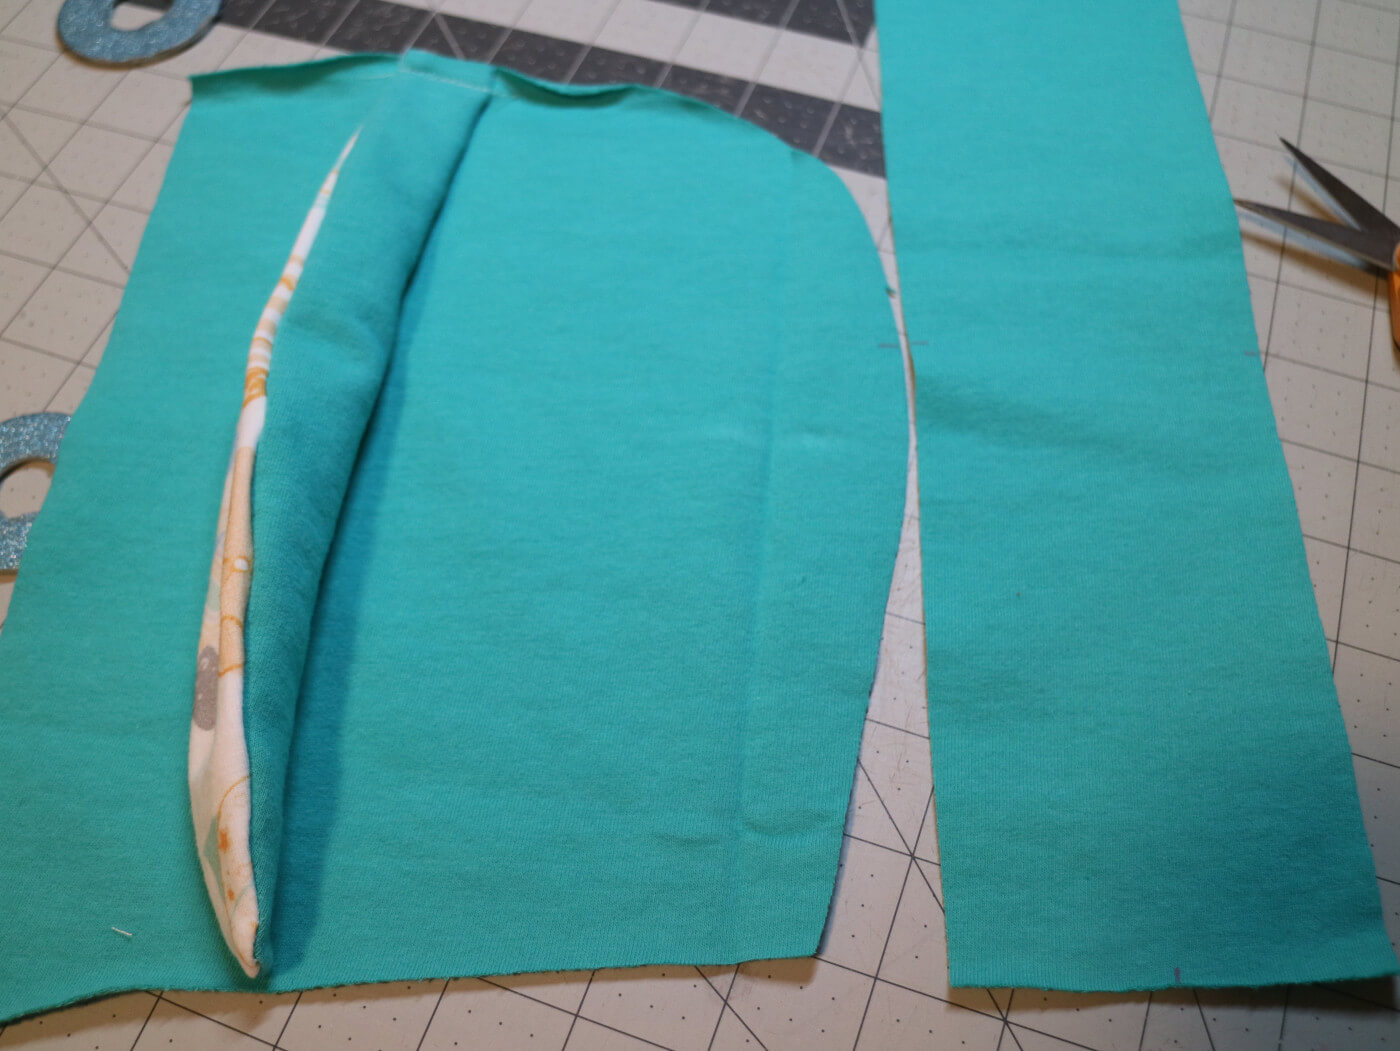
Sew the right sides together. The ear will be sandwiched between the hood main and center pieces.
This creates the curve for the hood to fit the head and its curve. Repeat this step with the other side of the hood, matching the center piece and the hood. 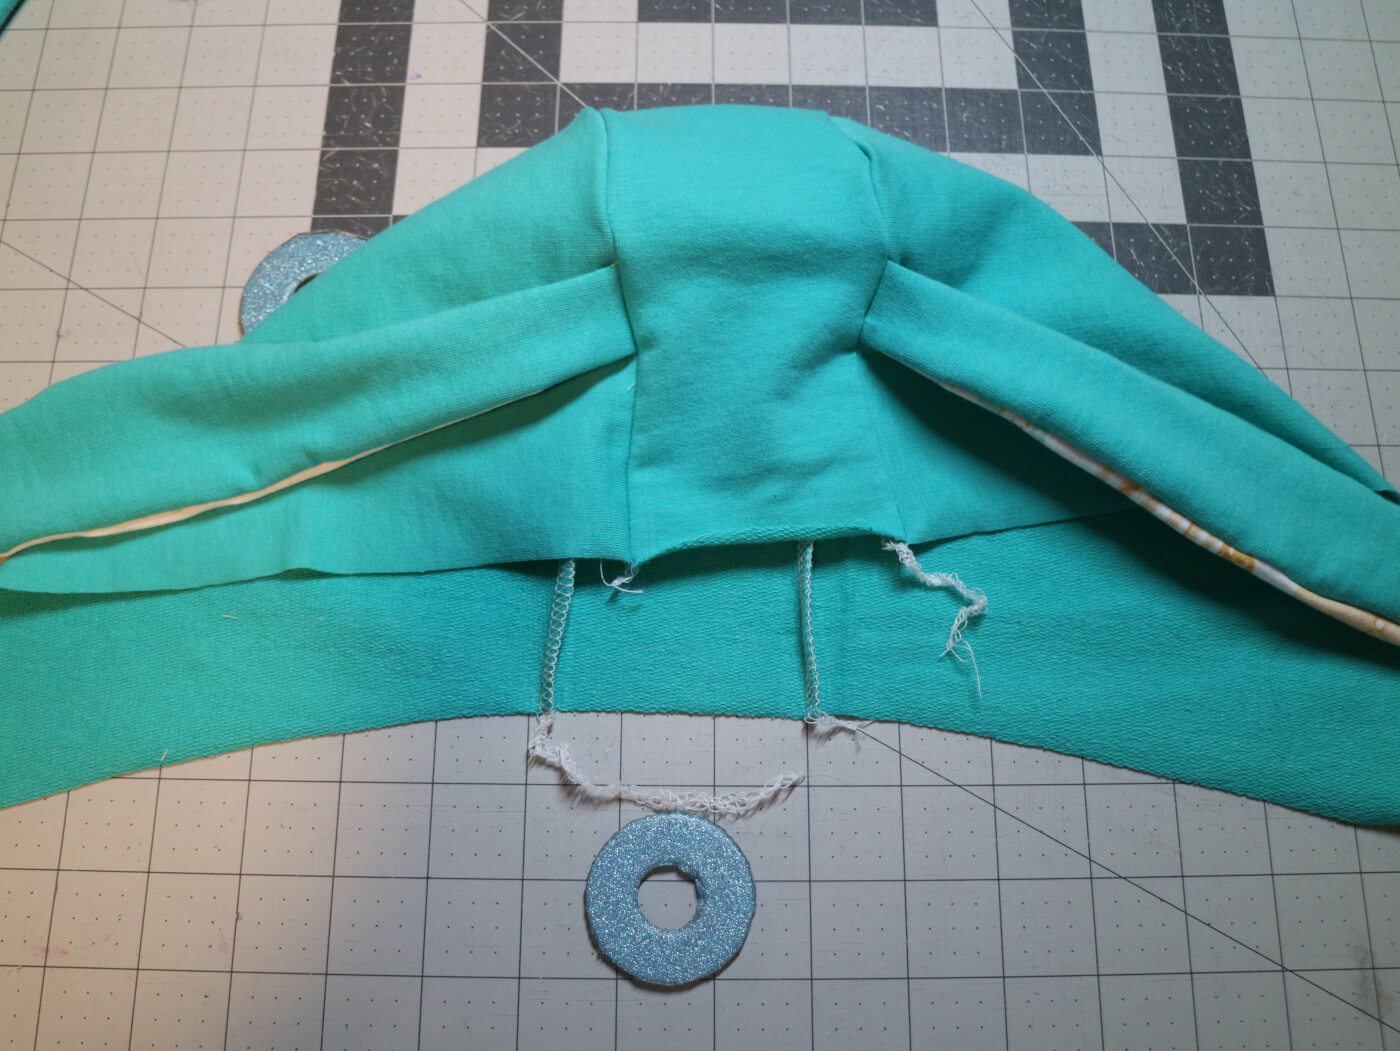
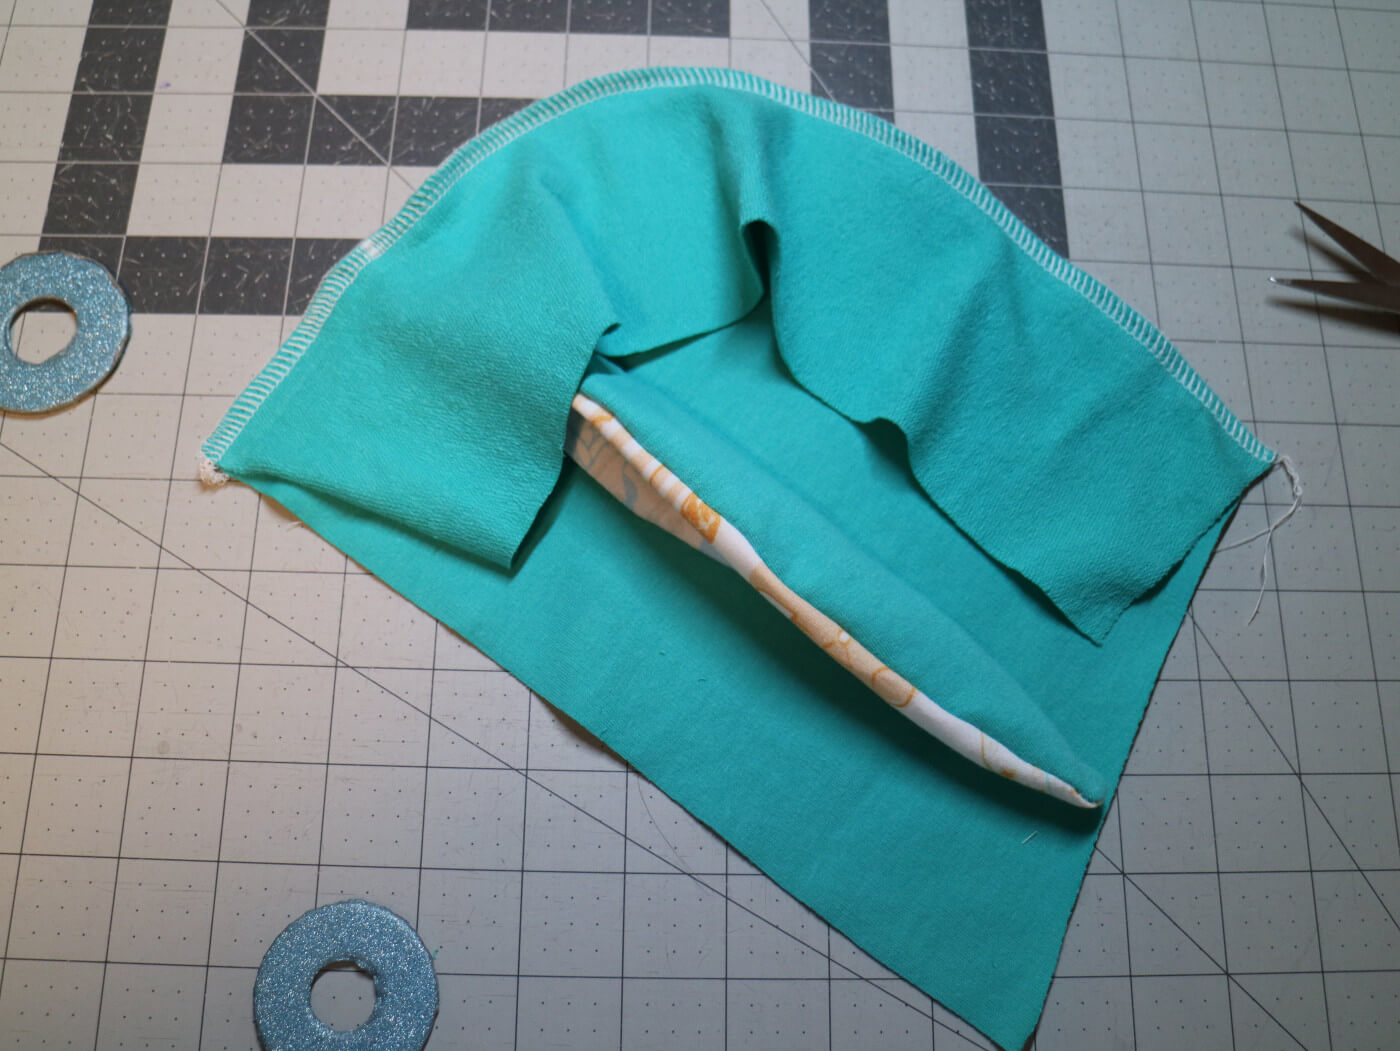
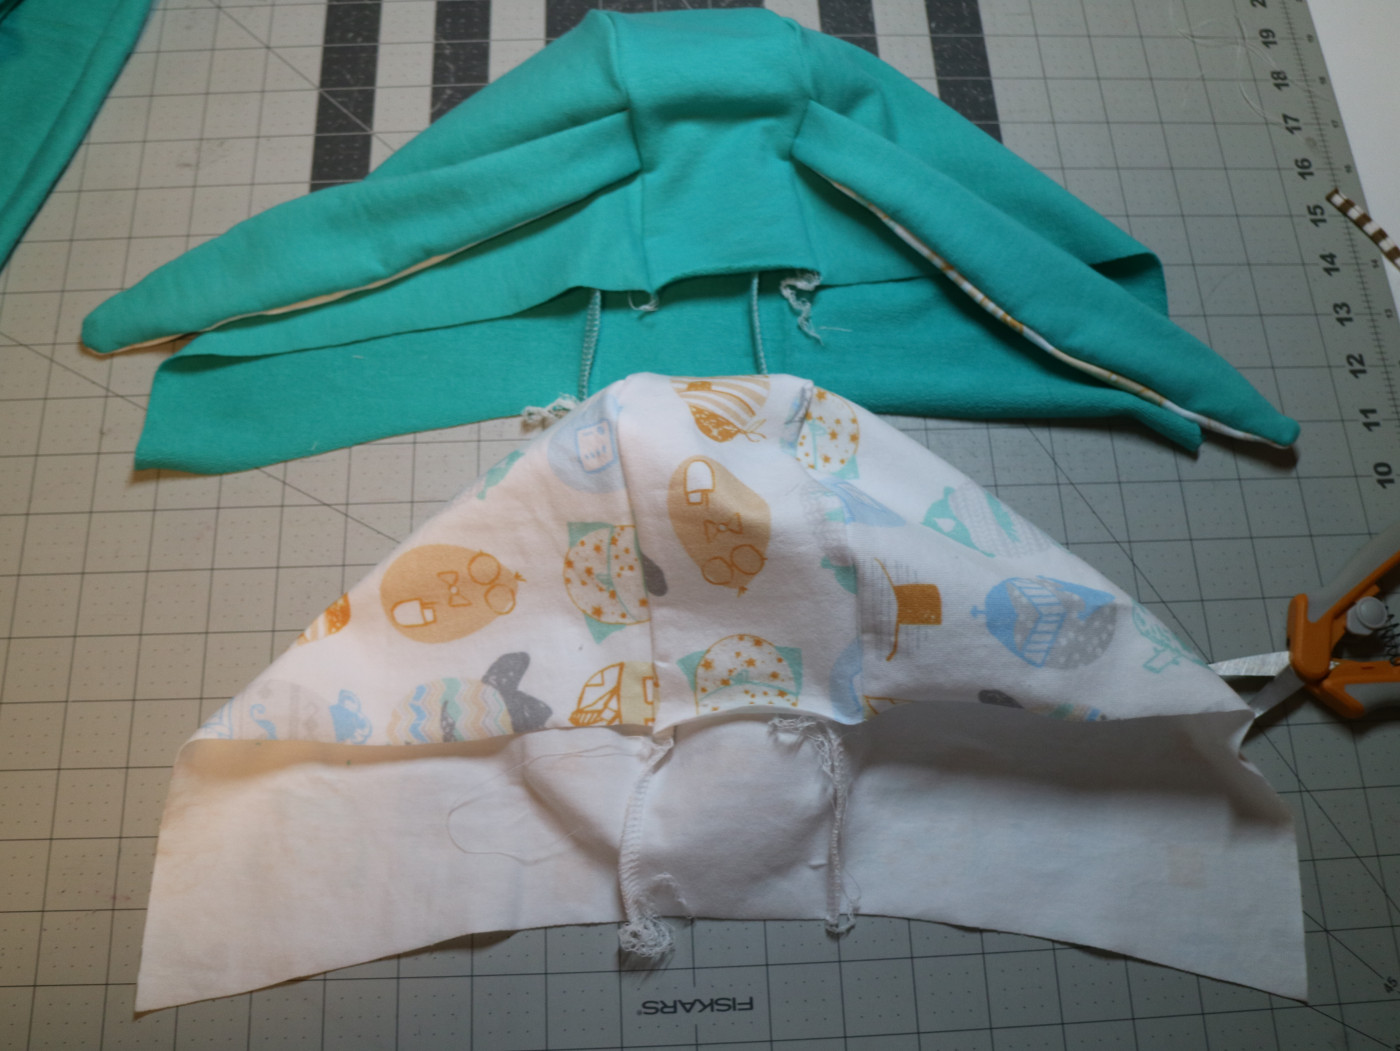
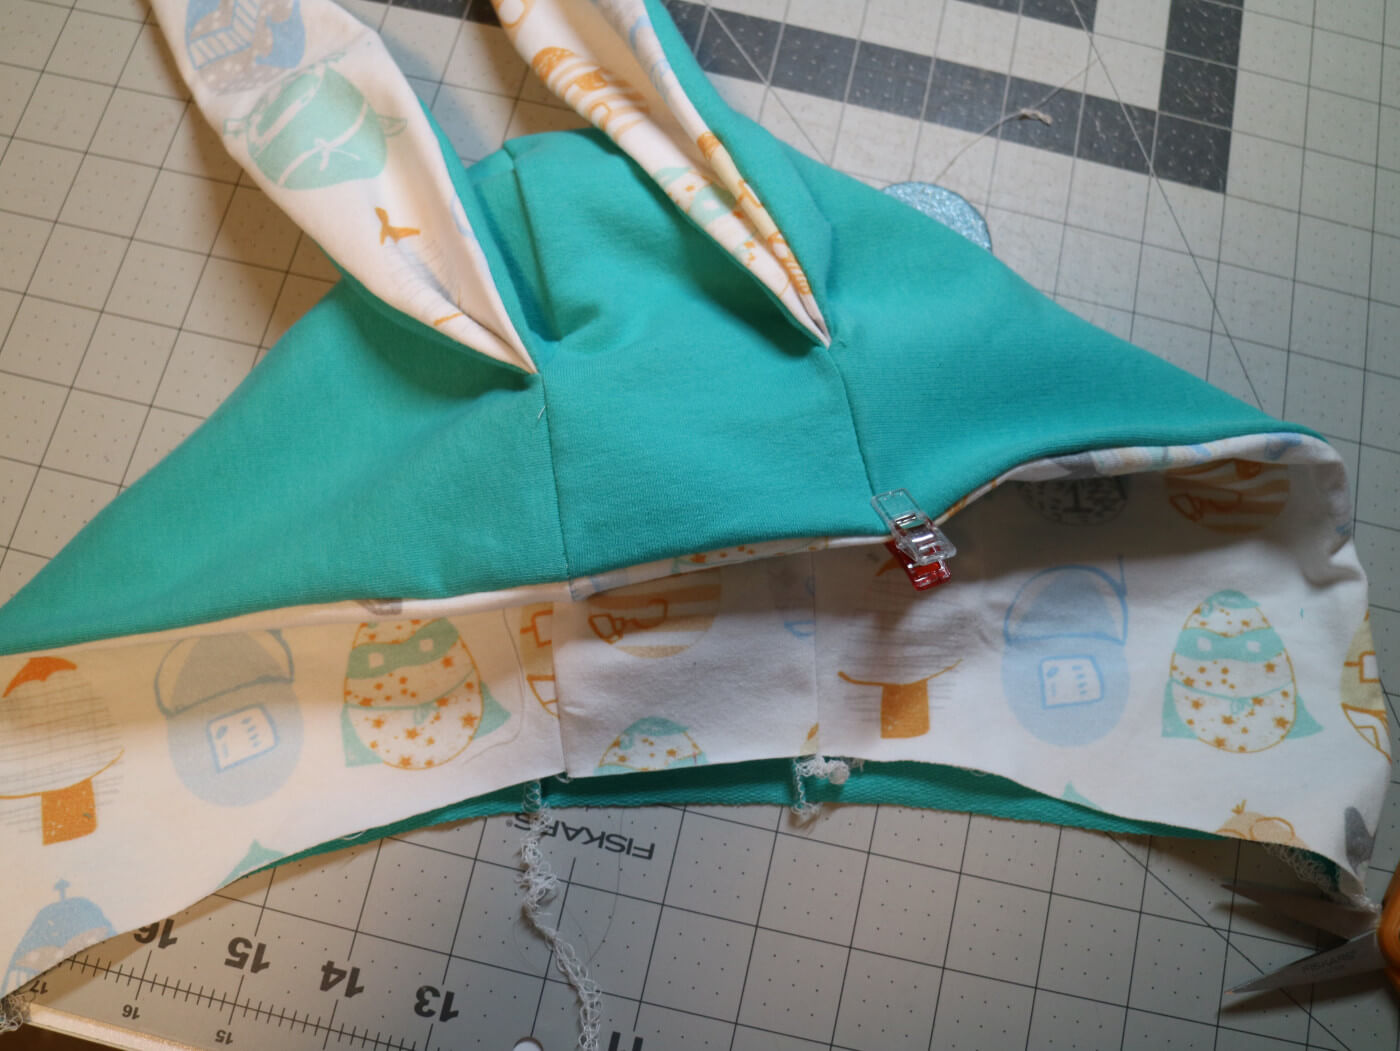
Repeat this step for the lining pieces as well. The lining piece won’t have the ears to be added to it. If you are making a 2 piece hood, you will lay both the hood pieces right sides together and sew along the curved raw edges. You will end up with a piece similar to the above picture, without the ears.
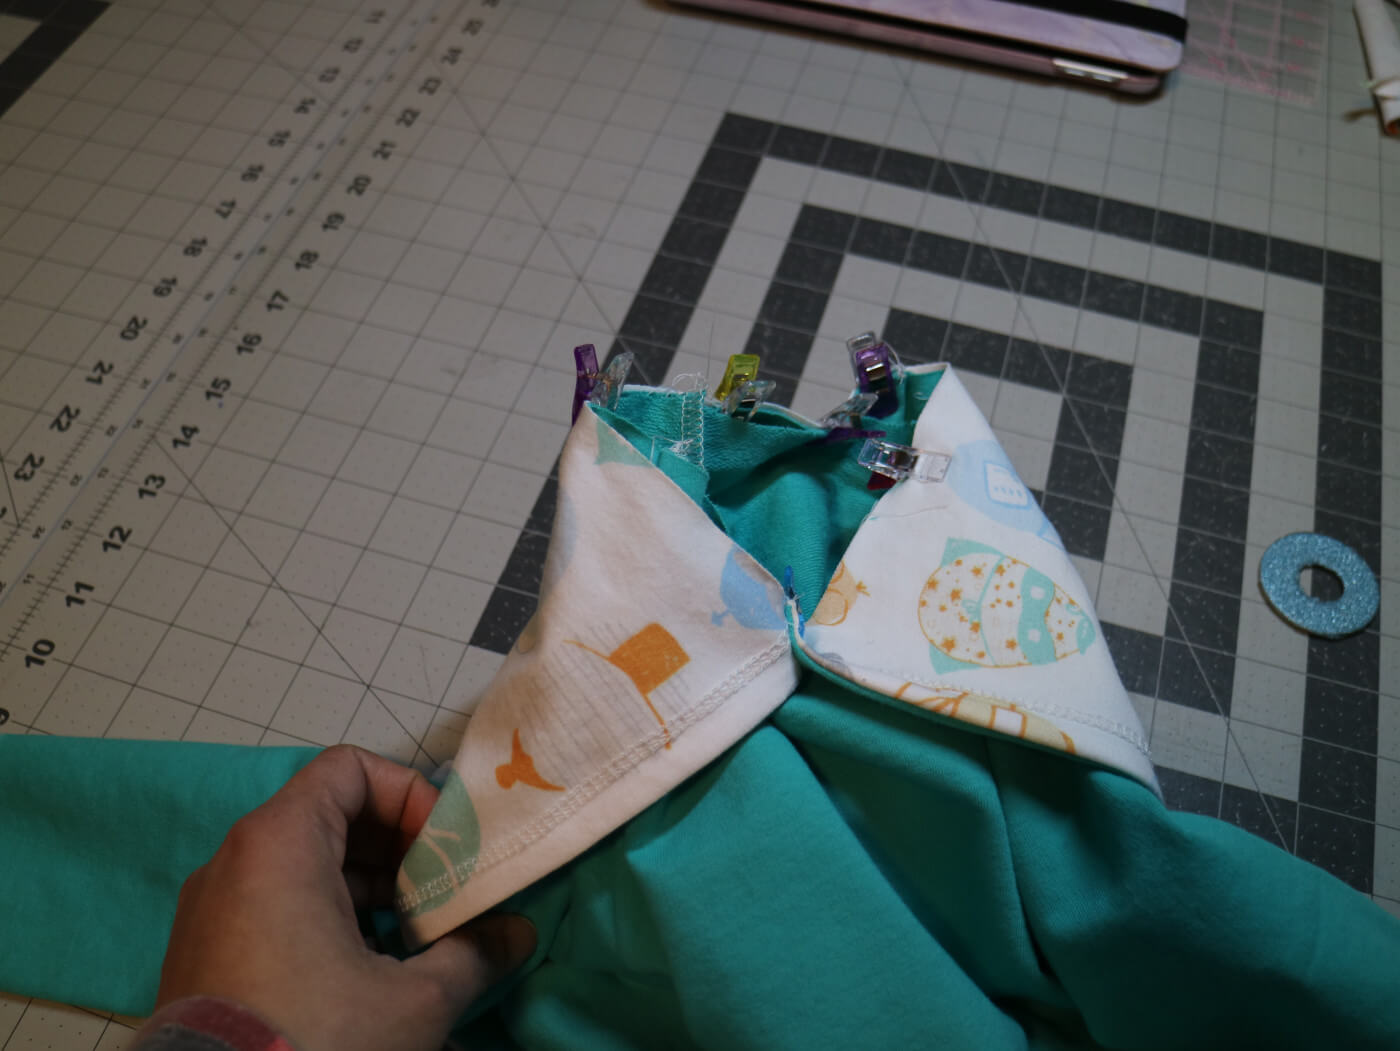
8. Finishing the Hood
Place the lining hoodie and main hoodie with right sides together. Turn one of the wrong side out and slide the other piece inside to match the hood pieces right sides together. I like to nest the seams so that there will less bulk at the seams and it is also easier to align the seams. Sew along the raw edge on the front of the hoodie.
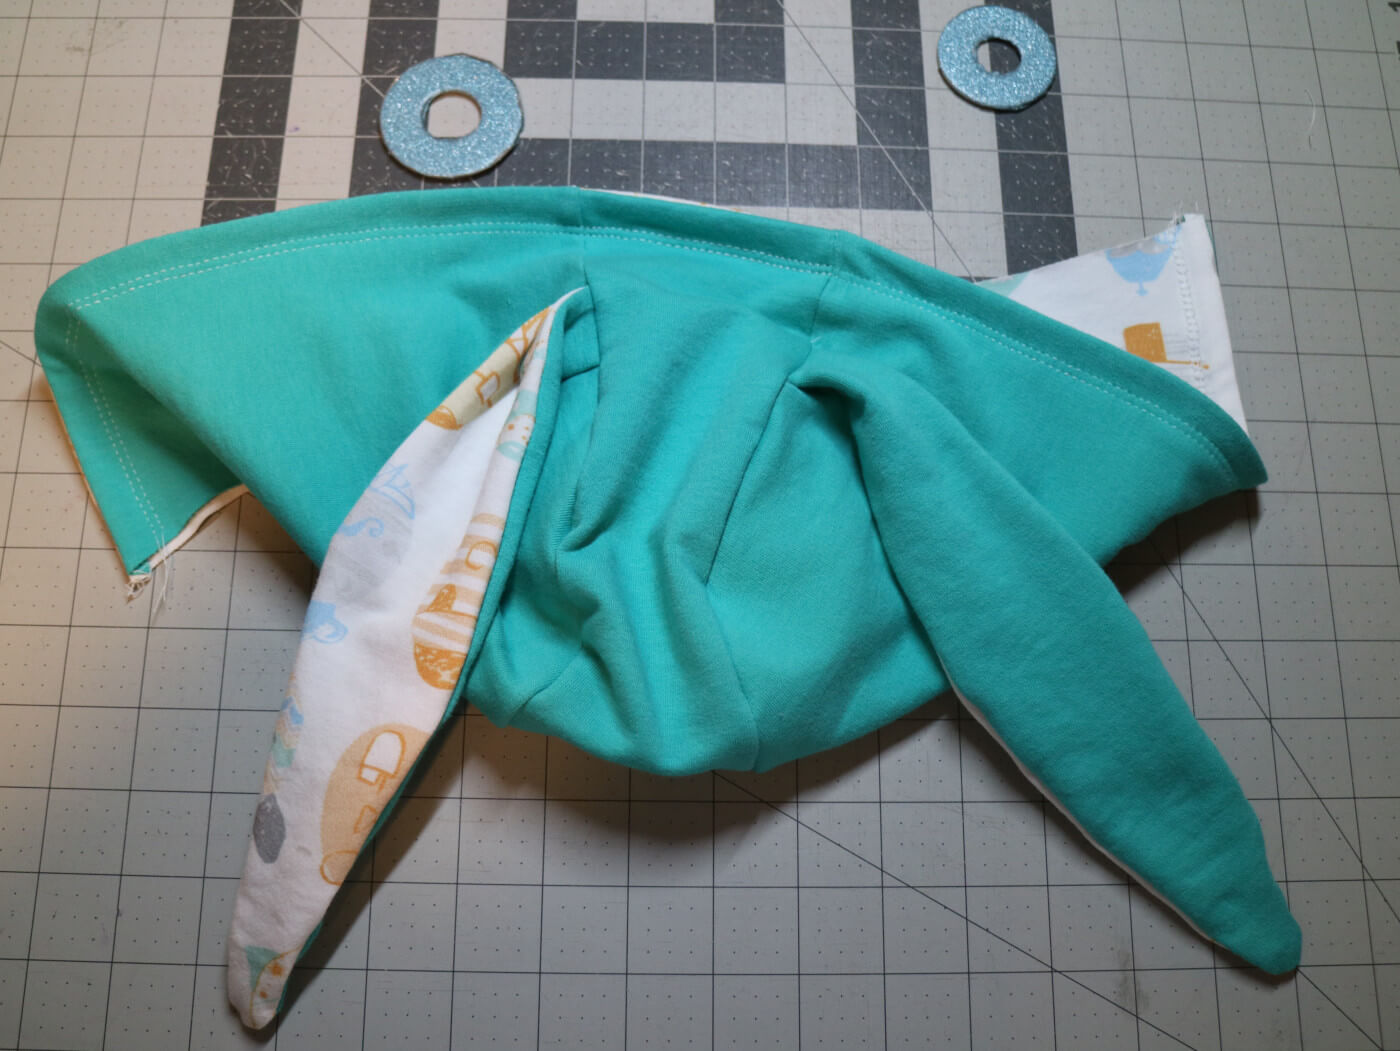
Once the front of the hood is sewn together, turn the hood piece right side out and give it a good press. As you can see the nesting of the seams made it easier to match and align the seams.
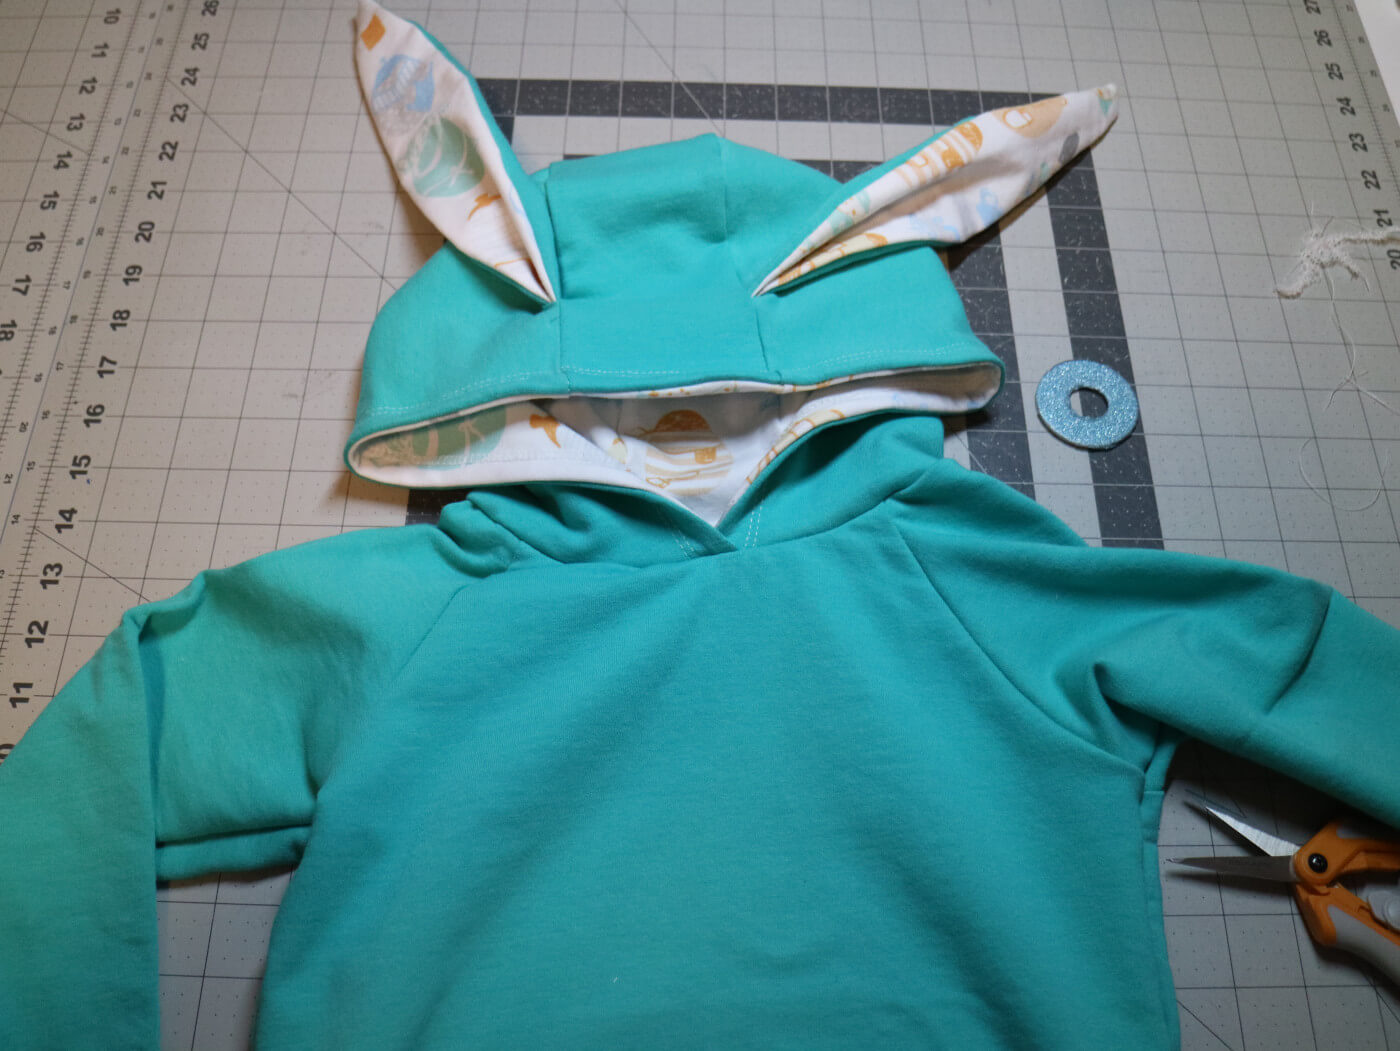
Top stitch the hood front half an inch from the front seam that we just finished sewing. Give it a good press.
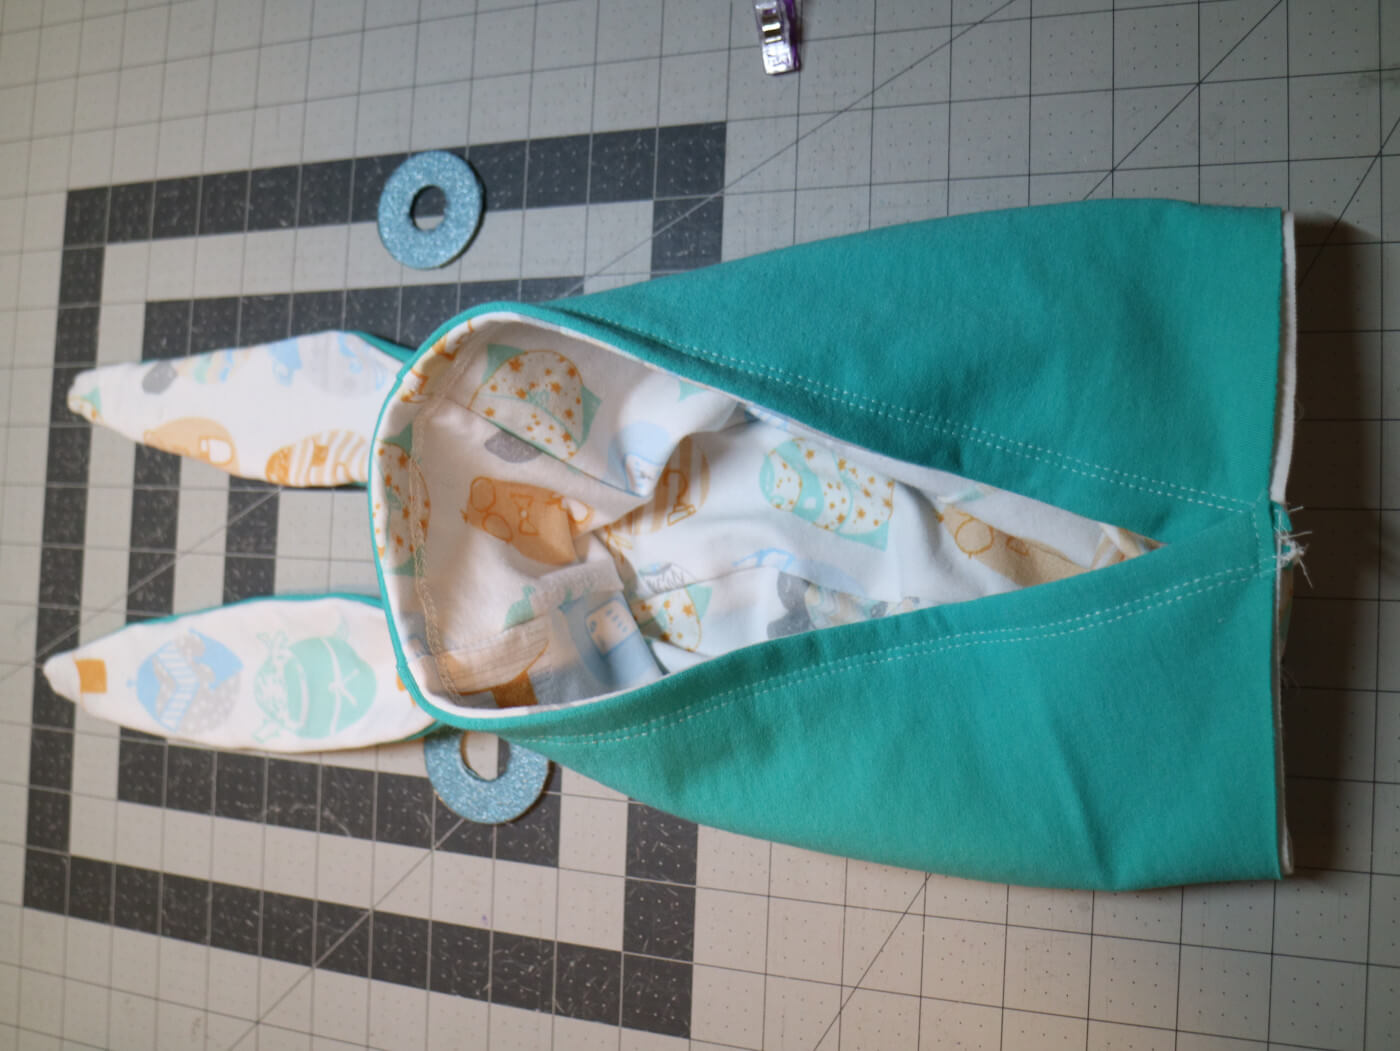
Overlap the hood front ends half an inch and baste it in place. This will create the neckline for the hood piece. This is the perfect time to do a fit test of the hood if that is possible.
9. Attaching the Hood to the Pullover
We are going to attach the hood to the body like we do with a neckband. Divide the neckline into equal quarters. Repeat the same with the hood piece too. Making sure that you are matching the front of the body to the front of the hood and otherwise attach the hood to the body, right sides together. Sew them together.
10. Attaching the Cuffs and Waistband
The only thing left to do is attaching the sleeve cuffs and Waistband to the pullover. Locate the cuffs and waistband pieces and fold them right sides together matching the short sides. Sew along the short side creating loops.
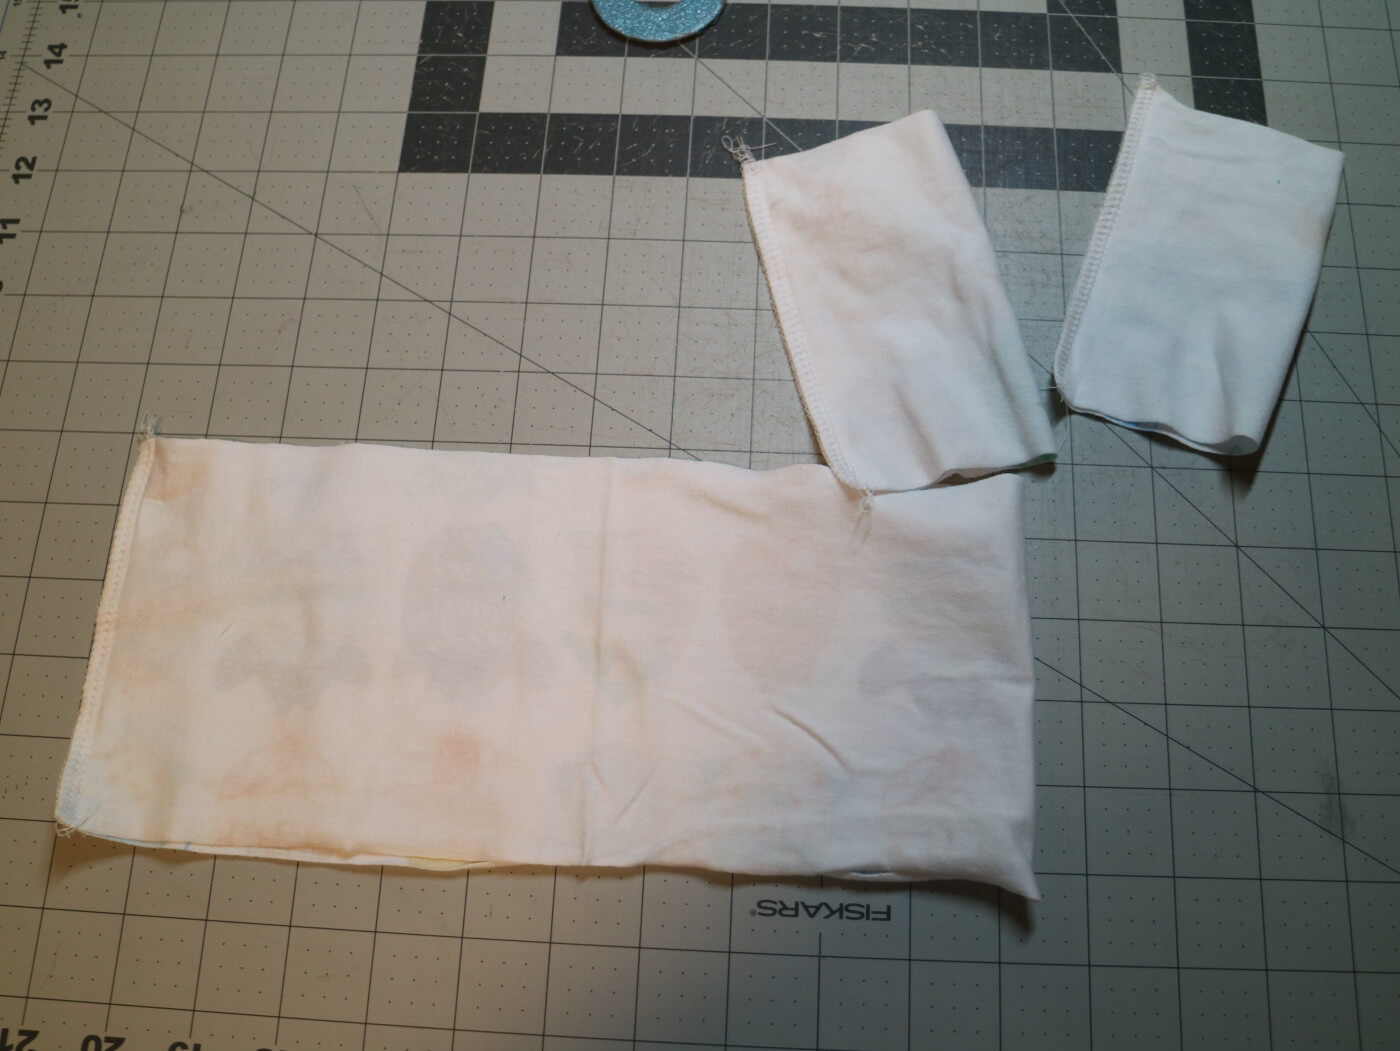
Turn the loops right side out and fold the cuffs wrong sides together along the length. This will enclose the seams inside and create the cuffs and waistband. Quarter the waistband into four equal parts and the cuffs into two equal parts.

Slide the cuff over the raw edge of the sleeve matching the seams. Since this is a directional print, make sure that the cuff is going to be in the right direction when we flip them down. Sew the cuffs on to the sleeve and flip it down. Again, I like to nest the seams so that the seam lines will be aligned and the bulk is reduced at the seam.
Repeat the same steps for the Waistband. The seam on the waistband will be matched with the center back of the hoodie. Top stitch the waistband seam if you prefer and we are done!!
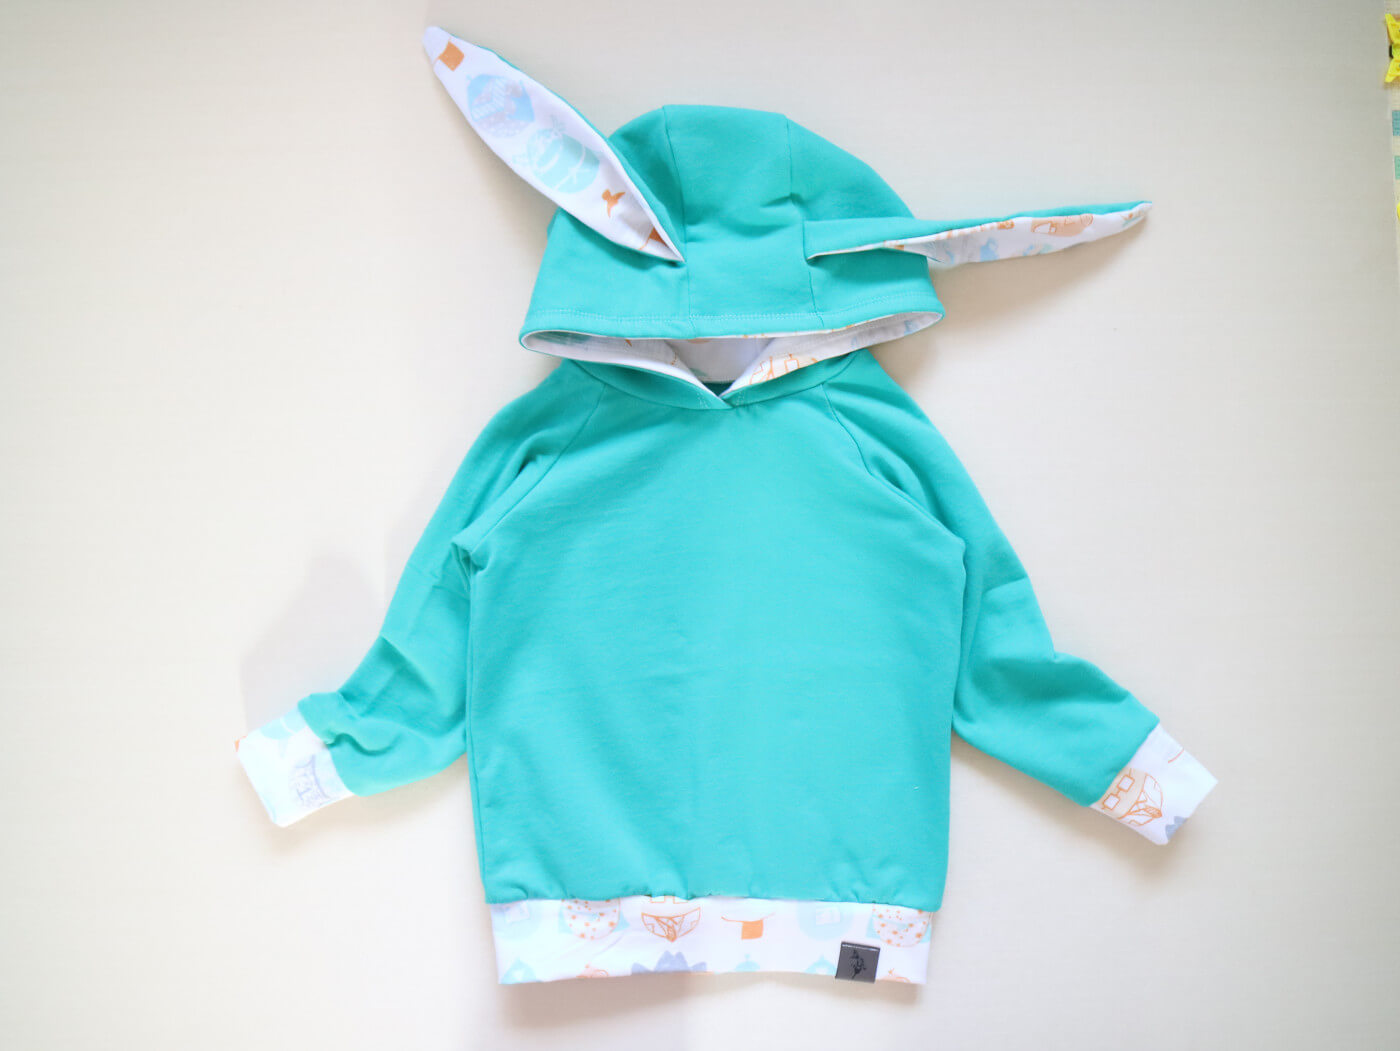
There you have it, you have made a hoodie with a bunny ear add on. How cute is that! I added a leatherette tag to the waistband of mine for an added detail.
Hoodies are so fun! Choosing different fabric combinations can easily make each one unique. Just using a different fabric for the lining of the hoodie can add more details, or using a panel or a unique embroidery or transfer for the front of the hoodie can change up the same hoodie pattern into many different pieces.
Thank you for joining us today to learn how to sew a hoodie! We hope we've given you some inspiration. If your still searching for inspiration, then make sure to join us on Instagram, join our Facebook Group, or sign up for our e-mail newsletter below. Happy Sewing!