How to Sew Darts Guide
Today, we will learn the basics of how to sew darts. Once you're ready to start practicing, you can try the dart options on the:
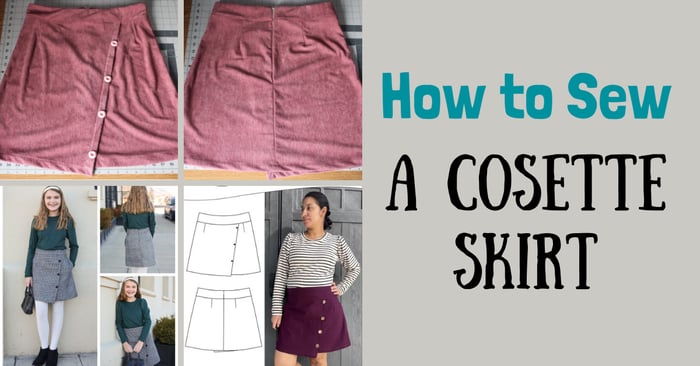
- Womens and Girls Cosette Patterns
- Friday Harbor Blouse and Dress
- Bristol Button-Up
Darts are the ultimate shaping tool in garment construction that can elevate the fit and the aesthetics of clothing. Despite many dart types and sizes, they are crucial in shaping fabric to create 3-dimensional flattering silhouettes. In this comprehensive guide, we’ll dive into everything you need to know about sewing darts, starting with understanding their purpose, dart types, dart anatomy, and tips to sew the perfect dart, depending on the fabric choice.
What is a dart, and why does it matter?
In essence, darts are wedge-shaped folds in fabric, stitched to remove excess fabric and, in exchange, to give a garment shape so it fits the body's natural curves in a flattering way while at the same time providing comfort and style. Darts are commonly found in areas such as the bust, waist, hips, shoulder, and elbow, where shaping is necessary for a tailored fit.
In other words, darts are important because they provide a garment structure and, depending on the design selected, allow for professional-looking clothing that accentuates both men's and women's body types through volume and fabric manipulation.
Besides garments, darts are commonly found in bags at corners, and depending on the location, darts may have different lengths and widths. Knowing how to sew darts will add depth and dimension to your sewing.
Dart anatomy
A dart has two basic parts: the point and the legs. The dart legs must be identical in size, and when folded, they form the fold line, which also serves as a stitch line.
In addition, there is also the dart base which is the widest part of the dart, and the dart intake which refers to the amount of fabric that is between the dart legs.

How to Sew Darts: Dart types
Basic darts are triangular and feature two dart legs and a center fold line. They are always stitched from the widest part (dart base) towards the dart's point. One of the most common basic darts is the horizontal bust dart.

Contour darts, also known as diamond-shaped but also double-pointed, can be seen on coats, fitted dresses, and jackets. They provide garments with a fitted intake at the waist with two points that extend and vanish in opposite directions, one point toward the bust and the other toward the hip. In some cases, when the dart intake is quite wide, clipping is done right in the center to release tension and allow the dart to lay flat.

French darts emerge from the side seam and are only found on the front of the garment. They can be either curvy or straight, and depending on the garment's construction, they can be clipped to release tension.

How to Sew Darts: Step-by-Step
Sewing a dart starts with accurate marking, and several methods can be used to mark a dart on fabric perfectly. These methods include Taylor’s chalk, tracing paper and a tracing wheel, basting, clipping leg darts at the base, and marking the dart point.
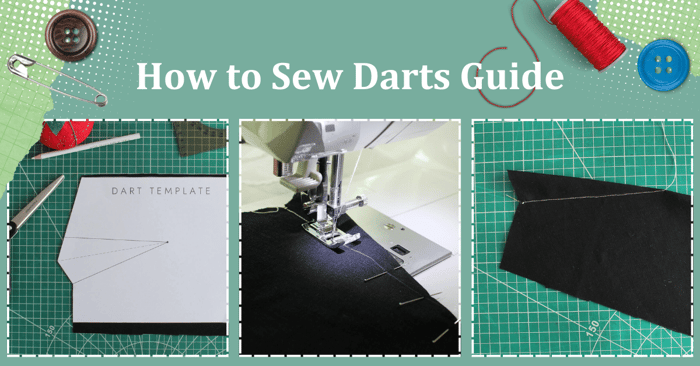
Sewing dart template
The template below is a great way to start practicing sewing darts using fabric scraps. This will give you plenty of practice before sewing a dart on an actual garment.

Sewing a basic single-point dart

How to Sew a Dart Step 1:
Transfer the legs and the dart point by snipping the fabric at the edges, where the dart legs are, only half of the seam allowance is on the wrong side of the fabric. Next place a pin into the dart point, lift the pattern slightly, and mark the point where the pin enters the fabric. This is the dart point marked on the fabric.


How to Sew a Dart Step 2:
Using a ruler connect the dart snips at the base with the point. Remember that dart legs should be the same length and mirror each other.

How to Sew a Dart Step 3:
Fold the dart in half, right sides together, and match the dart legs up to the point. Use a pin to confirm that the leg darts match. matching the marked lines. Pin or baste them through the stitch line (the aligned dart legs). Especially for beginners, basting the dart helps to keep the fabric in place and gives more control during stitching (when the dart is sewn the stay stitching is removed).

How to Sew a Dart Step 4:
Set the machine to a straight stitch setting and choose the stitch length depending on the fabric type and weight.
How to Sew a Dart Step 5:
Always start stitching at the widest part of the dart (or the dart base). Backstitch to secure the seam and stitch along the stitch line. Slowly stitch along your drawn line using a medium stitch length. As you get close to the dart point, change the stitch length to 1.0-1.5 and stitch as close as to the fold edge. This will make the dart stronger and smoother.

How to Sew a Dart Step 6:
When at the finish point do not backstitch but leave long enough threads to secure the dart by tying a knot. Cut off the excess thread by approximately 1/4’’(0.5 cm) and press the dart excess to one side toward the side seam or the seat seam.


How to Sew a Dart Step 7:
Turn the garment on the right side of the fabric and place the sewn dart on the tailor’s ham. Press the dart the dart again.

Sewing a contour dart
A contour dart is sewn in two simple steps, starting from the widest area to the top ending point and, once again, from the same wide area towards the bottom ending point. There is no backstitching during the sewing of this dart, so the stitch lines overlap to close and secure the stitch.
Sewing darts in lightweight fabrics
When working with lightweight fabrics, especially those that tend to fray and stretch, consider adjusting the tension according to the nature of the fabric. Use a shorter stitch to reduce the tension and prevent puckering. Practice on scraps before sewing the dart on the delicate fabric. This way, you will get hints on how to make the necessary changes so the dart is smooth and does not have puckers.
On some fabrics, such as sheer fabrics, the dart may show through so the seam allowance can be trimmed up to 1/8’’ (0.3 cm) of fabric on each seam side. End the trimming before the end point of the dart is reached and press open.
Sewing darts in heavyweight fabrics
When working with heavy-weight fabrics, the darts usually do not lay flat and cause extra bulk on the garment. This bulkiness needs to be eliminated so that the darts will lay flat and not cause distortions.
To reduce this dart's bulk, trim off the dart center part, leaving a 3/8’’ (1 cm) seam from the dart legs. Open the dart and press the seam open. Do not trim the dart intake up to the dart's ending point, as this weakens the dart during wear and washing. Overlock or use a zig-zag stitch for the dart’s raw edges.

Pressing darts
After sewing a dart, pressing it for a professional finish is essential. The best way to press a dart is by using a tailor’s ham. When pressing a dart, always avoid pressing past the dart point to prevent the fabric from creasing below this point. Generally, horizontal bust darts are pressed downwards, and vertical darts, such as the ones around the waist, are pressed towards the center front or center back. When following a sewing pattern, it’s usually written in which direction to press the darts. If not just follow the above rules of direction.
Tips for sewing with darts
- Start with cotton and linen fabrics if you've never sewn a dart. Because the fabric doesn't move much, it's perfect for beginners.
- Before sewing, define that the dart is marked accurately and the legs are the same length.
- Baste or use more sewing pins when you’re dealing with difficult fabrics.
- Always press the darts on a curved surface using a pressing or tailor’s ham.
- If puckers are noticed, clip on the widest part of the dart to release some of the tension.
- Decrease the stitch length as you reach the end of the dart point for a smooth finish.
- When finishing the dart with a knot, tie the knot loosely since if pulled too tight, puckering will occur at the point.
Final thoughts on sewing darts
To sew darts accurately requires attention to detail and precision, which requires lots of practice and patience. Once you get the hang of it, darts are pretty basic and pleasing to sew. Sometimes, a dart may seem like a small detail on a garment, but when finished, it really makes the difference in achieving well-fitted garments. Following the correct methods of marking and sewing darts is a step further toward solving fit issues.
However, as one gets better at sewing, one learns that darts are a vital technique, and besides functionality, they also contribute to the aesthetics of the garments. There’s a lot to learn about darts, such as dart manipulation or dart transfer, but for a beginner, our guide provides lots of basics, tips, and a step-by-step photo on how to sew a basic dart.
Thank you for joining us today to learn how to sew darts. Before you leave, make sure to join our Facebook Group and follow us on Instagram. Happy Sewing!