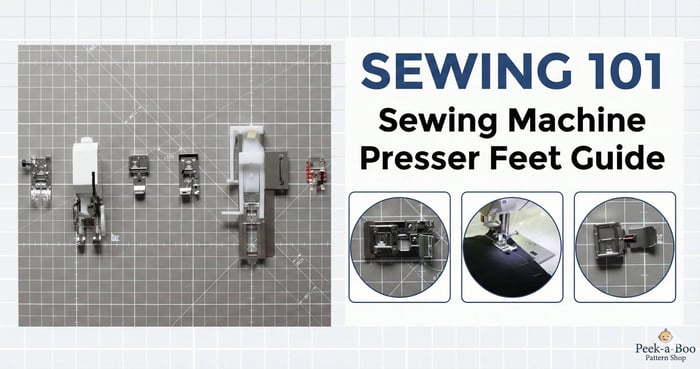
Sewing 101 - Sewing Machine Presser Feet Guide
Table of Contents
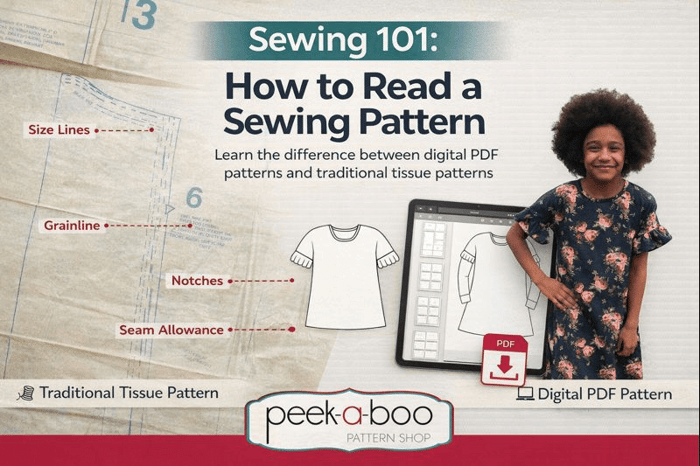
Sewing machine presser feet are essential attachments that transform your sewing capabilities and enable precision techniques you might not achieve otherwise. These specialized feet allow you to create professional-looking garments with different seam finishes, perfect topstitching, and beautiful decorative details. For beginners, the variety of sewing machine presser feet available—each designed for a specific task—can feel overwhelming. However, understanding these essential tools will help expand your sewing skills beyond basic stitching.
In this comprehensive guide to sewing machine presser feet, we'll cover the basics of presser feet, how to choose the right presser foot for your project, and introduce six essential types that every beginner should know. Whether you're working on sewing patterns for beginners or advancing to more complex projects, mastering presser feet is key to achieving professional results.
What is a presser foot?
A presser foot is a metal attachment that presses fabric down onto the machine plate, holding it securely in place as you sew. The fabric is guided through the machine by feed dogs that extend from beneath the plate, working in coordination with the presser foot to create even, consistent stitches.
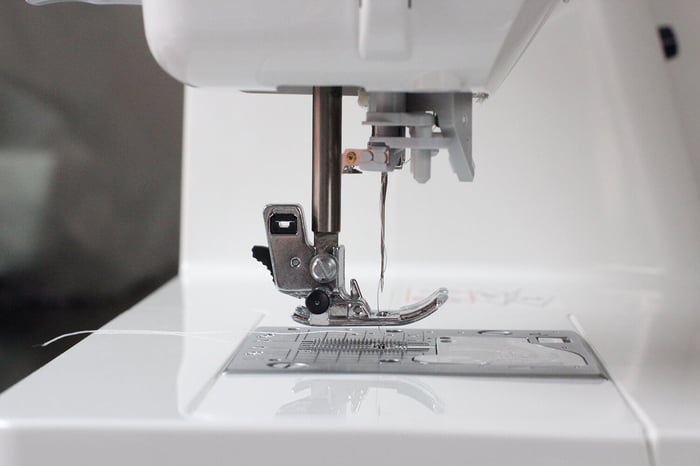
Depending on your sewing machine, presser feet come in two attachment styles: snap-on and screw-on. Most modern manufacturers use the universal snap-on system, which makes changing presser feet quick and easy. Simply snap the foot on and off the presser foot holder without any tools required.
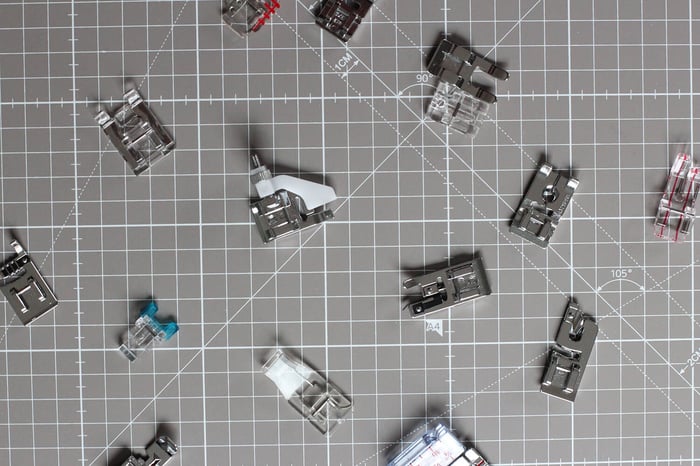
Today's market offers a wide range of sewing machine presser feet, from basic utility feet that master essential techniques to specialty feet that add decorative elements like piping, binding, and various trims to your garments.
Many manufacturers have different names and styles for their presser feet, so it's important to check your machine's compatibility. Keep in mind that quality presser feet are an investment, especially when you're new to sewing. Most sewists start with the standard, zigzag, and buttonhole feet that typically come with new machines. As your abilities develop and you explore different sewing patterns, you'll discover which specialty presser feet your sewing studio needs.
Choosing the Right Presser Foot for Your Project
Most sewing machines come with a basic set of presser feet when purchased. You can expand your collection by purchasing additional specialty feet based on your project needs and fabric types. Here are key considerations:
Plan ahead and identify your project type. Does your project require special seam finishes or decorative details such as zippers, piping, or topstitching?
For example, when making a simple woven dress pattern, you typically only need two types of presser feet: an all-purpose foot for most seams and a zipper foot to attach the closure.
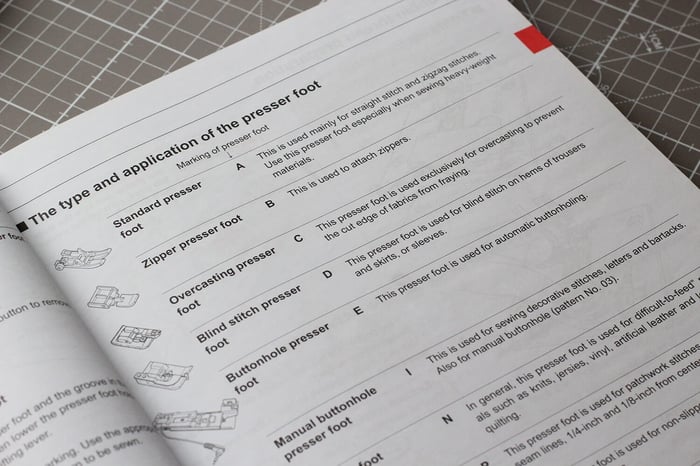
Check your sewing machine's manual. Modern manuals include a presser feet chart with specifications for each foot and guidance on which projects they're best suited for. This is your most reliable reference when deciding which foot to use.
Determine your machine's shank type. Most contemporary machines use the snap-on feet system, but certain specialty feet require screw-on installation to the shank. Before purchasing feet like walking feet or free-motion quilting feet, you must determine whether your sewing machine has a low shank or high shank, then purchase accordingly. Installation is straightforward—you simply remove the presser foot holder and attach the screw-on foot.
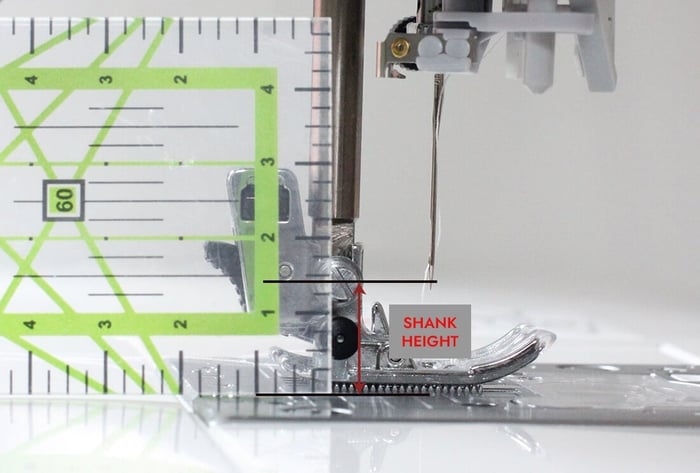
Most domestic sewing machines feature a low shank, but you can measure your machine to be certain:
- Put the presser foot in the down position and measure from the bed of the sewing machine up to the center of the thumb screw.
- If the measurement is ½ inch (1.25 cm), you have a low-shank machine. If the measurement is 1 inch (2.54 cm) or higher, your machine has a high shank.
For example, this sewing machine is a low-shank model and measures approximately 1.25 cm (½ inch) from the bed to the center of the thumb screw.
Note: The shank is the metal rod that the presser foot attaches to.
Some sewing machines use only a screw-on system, meaning you must unscrew one presser foot to attach another. For these machines, the presser foot and its holder form one piece. Fortunately, snap-on adapters can be purchased to convert these machines to use snap-on feet. After installing the snap-on adapter, you can use any compatible snap-on presser foot.
Be aware that this conversion only works if your screw-on machine has a low shank.
6 Essential Sewing Machine Presser Feet for Beginners
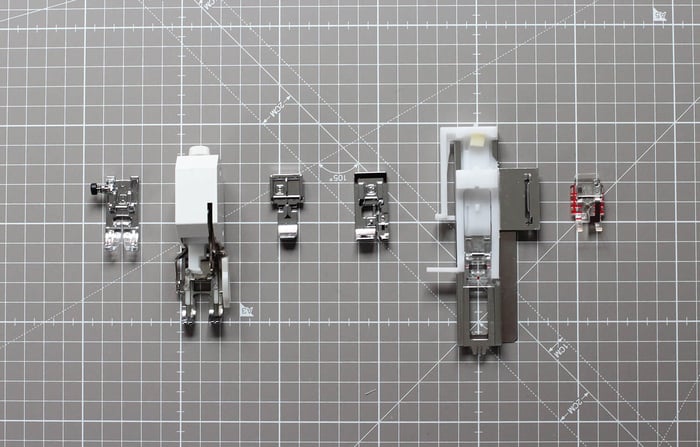 1. All-Purpose Presser Foot
The all-purpose presser foot is the standard foot that comes with most sewing machines and serves as your workhorse for everyday sewing. This versatile foot works well for straight stitches, zigzag stitches, and most basic sewing projects. If you're just starting your sewing journey, this foot will likely be your go-to attachment for general sewing needs.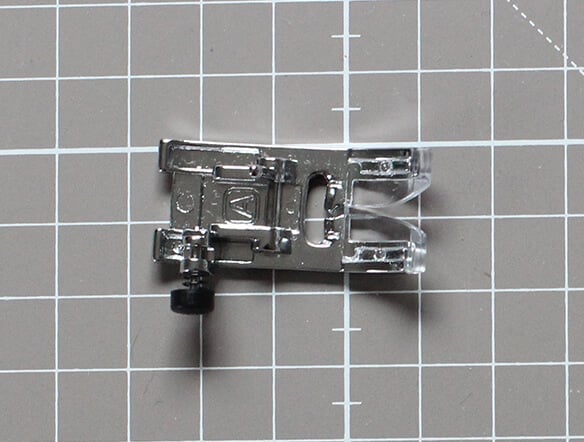
Best for:
- Straight stitches on any fabric weight
- Zigzag stitches for finishing edges
- General construction sewing
- Basic garment assembly
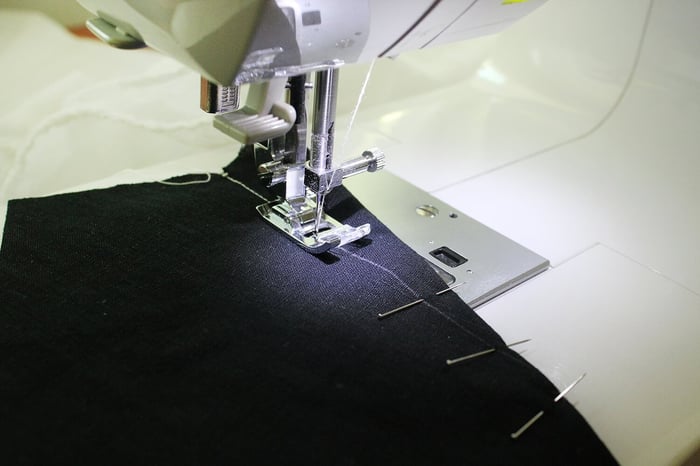 2. Walking Foot
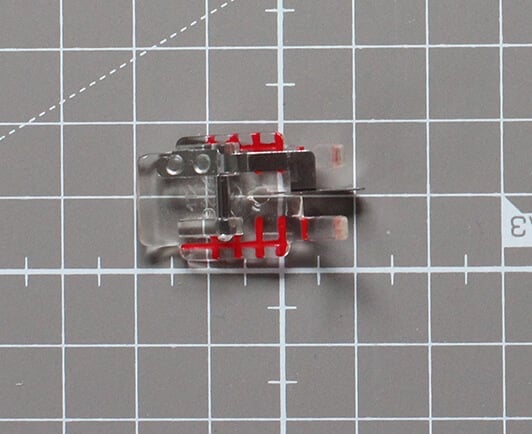
A walking foot is particularly valuable when sewing multiple layers of fabric, quilting, and working with stretchy or slippery materials. This specialized presser foot features built-in feed dogs that work in perfect synchronization with your sewing machine's feed dogs to prevent fabric from shifting or puckering. This makes it essential for quilting projects, working with knit fabrics, leather, and matching patterns on plaid or striped fabrics.
Using a walking foot is straightforward—once attached, you sew the same way as with a regular foot, but with dramatically improved control and results.
Remember, before purchasing a walking foot, you must determine whether your machine has a low or high shank to ensure proper fit.
Best for:
- Quilting projects and multiple fabric layers
- Preventing shifting when sewing stretchy knits
- Slippery fabrics like satin or silk
- Pattern matching on plaid and striped fabrics
- Sewing vinyl, leather, or heavy materials
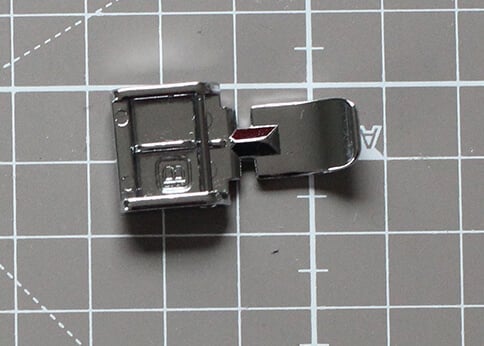
 3. Zipper Foot
The zipper foot allows you to stitch extremely close to zipper teeth, making it essential for installing zippers with professional-looking results. Some zipper feet can be positioned on either the left or right side of the needle depending on which side of the zipper you're sewing, while others are limited to a single position.
Beyond installing zippers on dress patterns and pants patterns, you can use this versatile foot to attach piping, welt cording, decorative trims, and even assist with buttonhole placement.
Best for:
- Installing regular and invisible zippers
- Sewing piping and cording
- Attaching welting and decorative trims
- Stitching close to any raised edge
 4. Buttonhole Foot
Creating buttonholes can seem intimidating for beginners, but it's a skill that becomes much easier with practice and the right presser foot. Don't let fear hold you back from making shirt patterns or other button-closure garments.
Depending on the manufacturer, several types of buttonhole feet exist. Most modern domestic machines feature an automatic buttonhole function that creates perfect 1-step buttonholes. The buttonhole foot simplifies this process tremendously, making it easy to add professional closures to garments like button-up shirts, pants, skirts, and jackets. If your sewing machine has this feature, consult your manual to follow each step for creating perfect buttonholes every time.
Best for:
- Creating automatic buttonholes in various sizes
- Making decorative buttonhole designs
- Different buttonhole lengths and styles
- Professional-looking closures on any garment
If you don't have a buttonhole foot, you can create manual buttonholes using a zigzag foot. This method requires careful marking, precise button measurements, and narrow zigzag stitches, but it's possible with patience.
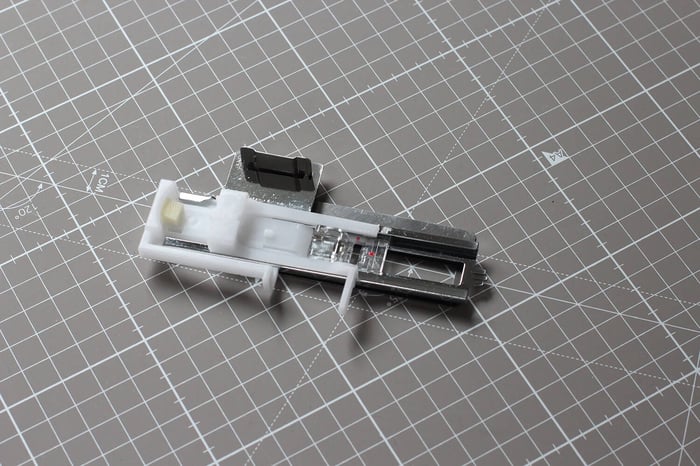 5. Overcast Foot
An overcast foot combines with your machine's overcasting stitch to create beautifully finished seam edges. The finished edge mimics a serger finish, giving your garment interiors a clean, professional appearance that prevents fraying. This specific presser foot has two important features:
- A guide bar on the side to keep fabric perfectly aligned
- A center bar that ensures stitches lay flat and regulates thread tension
Best for:
- Finishing raw edges on medium to heavy-weight woven fabrics
- Preventing fraying on seam allowances
- Creating serger-style finishes without a serger
- Professional interior finishes on garments

6. Quarter-Inch Foot (¼" Foot)
The quarter-inch foot is essential for quilters and anyone who needs to sew precise ¼-inch seam allowances consistently. This specialized presser foot features a built-in guide that helps maintain perfect accuracy, keeping fabric aligned for consistent, straight stitches every time.
Beyond quilting, this foot excels at topstitching because the guide ensures your stitching remains the same distance from the edge throughout the entire project, creating professional-looking details on any garment.
Best for:
- Quilting and patchwork piecing
- Maintaining precise ¼-inch seam allowances
- Professional topstitching on any project
- Creating consistent decorative stitching
 Final Thoughts
Understanding and using different sewing machine presser feet can dramatically improve your sewing skills, transforming your projects from homemade to handmade with professional polish. While the all-purpose presser foot serves beginners well, expanding your presser feet collection as you progress opens doors to more advanced techniques and specialty finishes.
By selecting the right presser foot for each project—whether you're working on beginner sewing patterns or advanced designs—you'll achieve cleaner seams, beautiful decorative finishes, and specialized techniques with confidence. Each presser foot in your collection becomes a valuable tool that helps you create garments you'll be proud to wear and share.
Start with the basics, master these six essential sewing machine presser feet, and gradually add specialty feet as your skills and project complexity grow. Your investment in quality presser feet will pay dividends in the professional results you achieve.
FAQs
Sewing Machine Presser Feet
Q: What is a presser foot on a sewing machine?
A: A presser foot is a metal attachment that holds fabric flat against the machine plate as you sew. It works with the feed dogs underneath to guide fabric through the machine evenly, ensuring consistent stitch quality. Different presser feet are designed for specific sewing tasks like installing zippers, creating buttonholes, or finishing edges.
Q: How many presser feet do I need as a beginner?
A: Most beginners can accomplish 90% of their projects with just three basic presser feet: an all-purpose foot, a zipper foot, and a buttonhole foot. These typically come standard with new sewing machines. As your skills develop, you can add specialty feet like walking feet, overcast feet, and quarter-inch feet based on the types of projects you enjoy most.
Q: Are presser feet universal across all sewing machines?
A: No, presser feet are not universal. Most modern domestic machines use a low-shank snap-on system, but compatibility can vary by brand and model. Always check your machine's shank height (low or high) and attachment style (snap-on or screw-on) before purchasing new feet. Your machine's manual will specify which feet are compatible.
Q: What's the difference between low shank and high shank presser feet?
A: The shank height refers to the distance from the machine bed to the center of the presser foot attachment screw. Low shank measures ½ inch (1.25 cm), while high shank measures 1 inch (2.54 cm) or more. Most domestic sewing machines have a low shank, but it's important to measure your specific machine before buying specialty feet.
Q: Can I use a snap-on presser foot on a screw-on machine?
A: Yes, if your machine has a low shank, you can purchase a snap-on adapter that converts your screw-on system to accept snap-on presser feet. This adapter replaces your current presser foot holder and makes changing feet much faster and easier. However, this conversion only works with low-shank machines.
Q: Which presser foot should I use for knit fabrics?
A: For knit fabrics, a walking foot is highly recommended. It prevents stretching, puckering, and shifting by feeding the top layer of fabric at the same rate as the bottom layer. Some sewists also successfully use a ballpoint or stretch needle with their all-purpose foot for lighter knit projects.
Q: Do I need a special foot for sewing zippers?
A: Yes, a zipper foot is essential for installing zippers properly. This narrow foot allows you to stitch very close to zipper teeth without hitting them with the needle. Many zipper feet can be positioned on either side of the needle, making it easier to sew both sides of the zipper neatly.
Q: What presser foot is best for quilting?
A: For quilting, a walking foot is essential for sewing through multiple layers without shifting, and a quarter-inch foot is crucial for maintaining accurate ¼-inch seam allowances in piecing. Many quilters consider these two feet non-negotiable for achieving professional results.
Q: Can I create a serger finish without a serger?
A: Yes! An overcast foot combined with your machine's overcast stitch creates a finish that closely mimics a serger. While it's not identical to true serged edges, it effectively prevents fraying and gives your garment interiors a clean, professional appearance.
Q: How do I know which presser foot to use for my project?
A: Start by identifying what techniques your project requires. Check your sewing pattern instructions for clues like "install zipper" or "finish seam edges," then match those needs to the appropriate presser foot. Your sewing machine manual should include a presser foot guide showing what each foot does. As you gain experience, selecting the right foot becomes intuitive.
Q: Are expensive presser feet worth the investment?
A: Quality presser feet are definitely worth the investment for techniques you use frequently. While basic feet that come with your machine work fine for most projects, specialty feet for techniques like free-motion quilting, rolled hems, or gathering can dramatically improve your results and save time. Start with basics and add specialty feet as your skills and project types expand.
Q: Can I damage my sewing machine by using the wrong presser foot?
A: Using an incompatible presser foot (wrong shank size or attachment type) could potentially damage your machine or cause poor stitch quality. However, simply choosing the "wrong" foot for a technique—like using an all-purpose foot instead of a zipper foot—won't damage your machine; it will just make the task more difficult and produce less professional results.
Q: How do I clean and maintain my presser feet?
A: Clean presser feet regularly by removing lint and thread buildup with a small brush. For metal feet, you can wipe them with a soft cloth and a drop of sewing machine oil occasionally. Plastic feet should only be wiped with a dry or slightly damp cloth. Store presser feet in their original packaging or a dedicated storage box to prevent damage and keep them organized.
Q: Why does my fabric pucker when I sew even with the right presser foot?
A: Pucking can occur for several reasons beyond the presser foot: tension issues, wrong needle size or type, thread quality, or presser foot pressure. If you're using the correct presser foot but still experiencing puckering, check your upper and lower thread tension, ensure you're using the right needle for your fabric, and adjust your presser foot pressure if your machine has that feature.
Q: What presser foot makes the most professional-looking topstitching?
A: A quarter-inch foot (¼" foot) or an edge-stitching foot creates the most professional topstitching because they have guides that keep your stitching perfectly parallel to the edge. Some machines also offer clear presser feet with marked guidelines that work well for visible decorative stitching.