Sewing Machine Maintenance 101: Free Tutorial
Sewing machine maintenance is crucial for keeping your sewing machine running smoothly and in excellent condition for a long time. Regular maintenance, such as cleaning the machine after each use and paying attention to the tension discs and thread guides, helps prevent any dust or thread buildup over time. This preventative maintenance not only protects your investment but also ensures that your machine will run smoothly for a long time. It only takes a few minutes to perform these maintenance tasks, and they can greatly improve tension issues, stitch quality, and the overall lifespan of your machine. For more information on using or purchasing a sewing machine, click HERE.
How to Perform Sewing Machine Maintenance
We will start by turning off your sewing machine and unplugging it from the wall. This ensures you will not accidentally injure yourself, it only takes a second so go ahead and unplug it.
It is also important to have your sewing machine manual. If you no longer have it (or don’t know where it is) go ahead and search online. Usually, you can find and download it for free. Now let’s gather the needed supplies and get started.
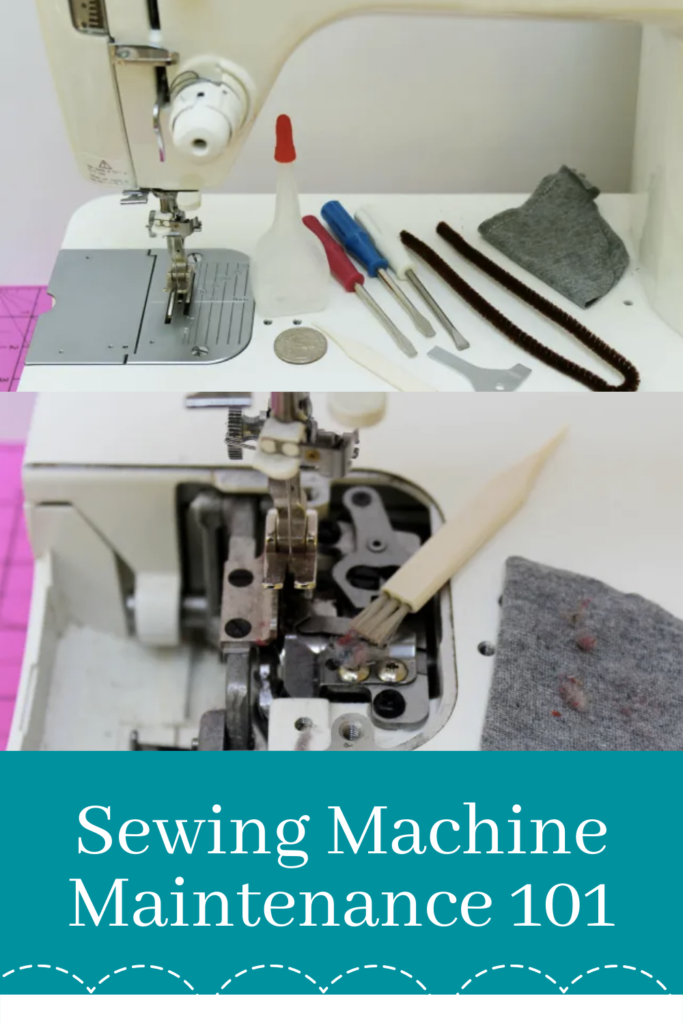
Machine Maintenance: Supplies/Tools Needed
- Screw Driver (Usually one comes with your machine.)
- Lint Brush or Old (Clean) Makeup Brush (A lint brush usually comes with your machine.)
- Soft Rag or Knit Fabric Scrap (It will be thrown away.)
- Sewing Machine Oil
- Sewing Machine Manual
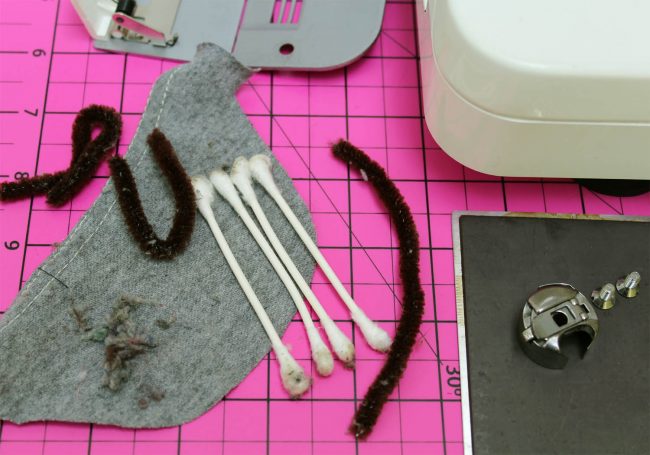
- Optional Items: Pipe Cleaners, Quarter, Q-tips, Magnet and Vacuum Cleaner with Handmade Attachment
Maintenance: Side Loading Bobbin Machine
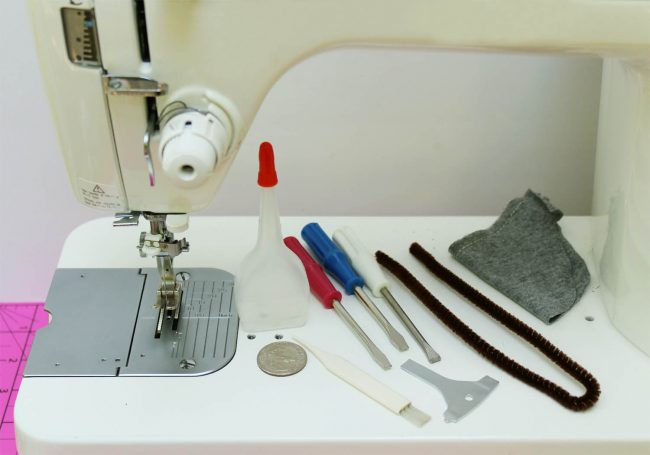
Now that we have gathered our supplies/tools we can start cleaning up this machine which is a side loading bobbin machine that has a removable bobbin case.
Sewing Machine Maintenance: Cleaning the Machine
Cleaning the Machine Step 1: I start by cleaning all of the upper areas of the machine. Wipe the main body down (dusting) with a soft rag or I like to use a knit fabric scrap that was destined for the trashcan anyway.
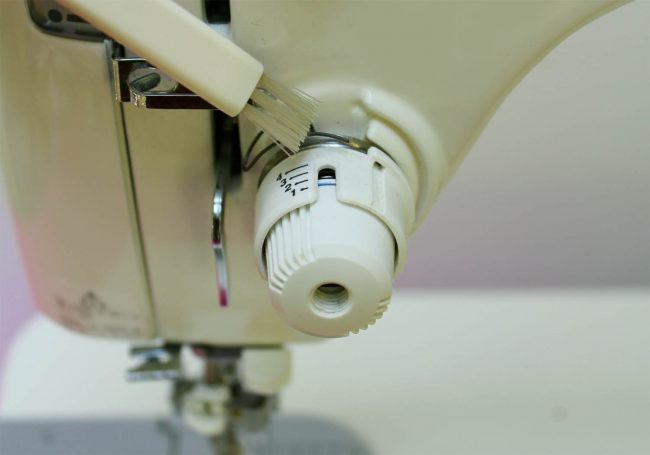
Cleaning the Machine Step 2: After you have dusted your machine, take the lint brush or old makeup brush and clean the upper components of the machine like the tension knobs and needle/presser foot area. When the lint brush accumulates lint, wipe it off on the rag.
In the photo below you can see I am carefully wiping around the tension knob and dusting off the lint that accumulates in this area. The tension spring is delicate so use a gentle hand and brush softly.
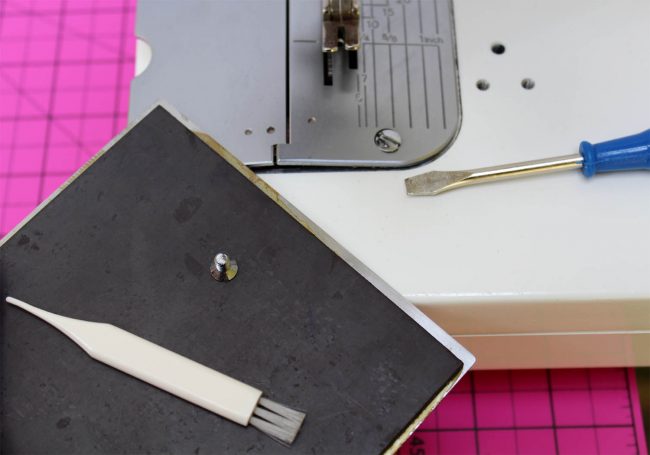
Cleaning the Machine Step 3: Once the upper areas, including the bobbin area, are clean, remove the bobbin case and bobbin from the machine. Take the bobbin case and carefully brush the interior and exterior, wiping away any lint that has accumulated on it, as well as any stray threads. Set it aside. Now take a screwdriver and carefully loosen and remove the screws that are holding down the needle plate. If you have a magnet on hand use it to keep track of and organize your screws.
Cleaning the Machine Step 4: The screws will stick to the magnet and keep them from rolling around or becoming lost. Just keep in mind that you should always keep a magnet away from a computerized sewing machine as it can damage the internal workings. My machine only has two screws to remove before the needle plate can be taken off. Once the needle plate is removed, wipe away any lint/oil that is underneath and set it aside. On some newer machines, the face plate is a part of a housing that is mounted on hinges, which makes it easy to move the entire housing away from the bars and mechanisms behind it.
Cleaning the Machine Step 5: With the needle plate removed you can see just how dirty your sewing machine really is. Let’s clean! Using the lint brush, wipe and scoop away as much lint, thread bits, and fluff as you possibly can frequently wiping the lint onto your rag. I chose to leave my needle and sewing foot attached to my machine as I didn’t feel they were in the way (and my needle didn’t need changing) but if you feel they obstruct your cleaning, go ahead and remove them at this point as well.
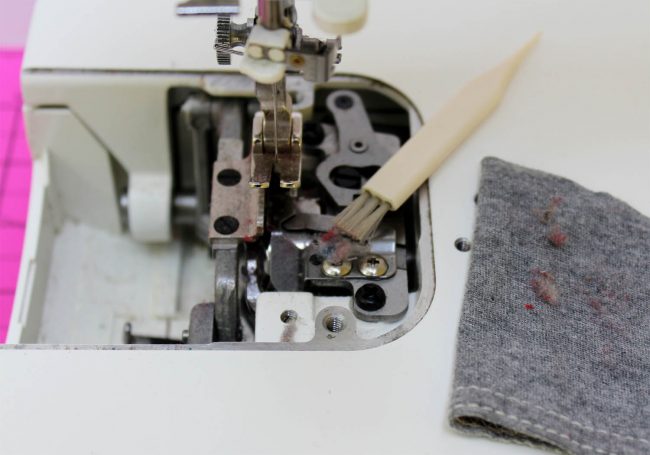
Cleaning the Machine Step 6:Once you have removed all the lint you can with your lint brush you can use a pipe cleaner to really get into the nooks and crannies. I don’t use a pipe cleaner every time, but it is nice to occasionally do a really deep clean on the machine.
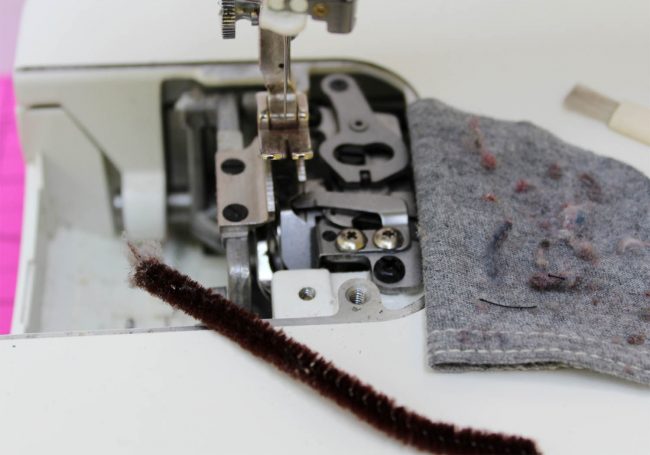
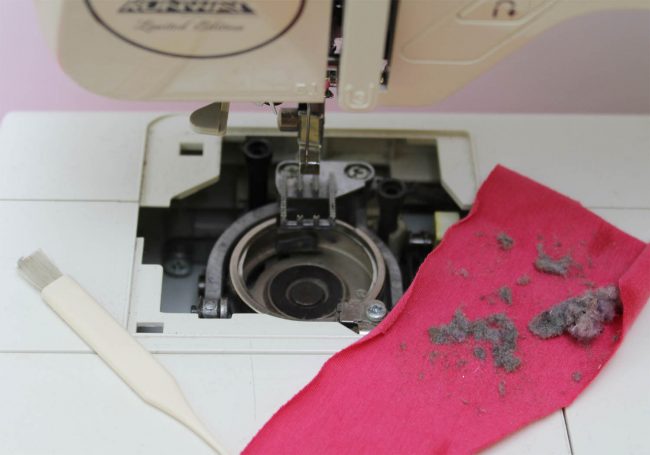
Cleaning the Machine Step 7: I decided to really clean so I also used Q-tips to wipe up any excess sticky oil residue that had accumulated at the bottom pan. Don’t use the Q-tips on any of the metal workings as it will just leave lint and fibers where you just cleaned. In the photo below you can see just how much lint I was able to clean out of my machine. Take all of this and throw it in the trash.
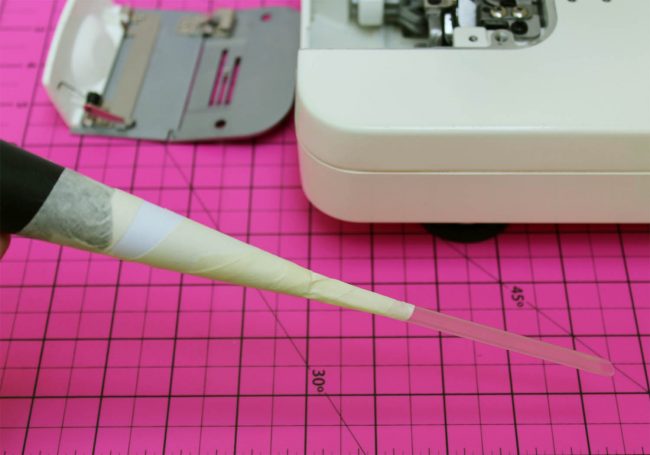
I don’t use the vacuum cleaner every time I clean my machine but I will show you the handmade tool (below) that I create in order to efficiently clean the inner workings. Take a plastic drinking straw and cut a 45 degree angle on one end. On the opposite end I tape the straw to a handmade “cone” that I make out of a cereal box or similar material. I then tape this cone onto the end of my vacuum cleaner hose.
Cleaning the Machine Step 8: Carefully tape everything (I use masking tape) to seal any holes and make a nice snug connection. Use this custom tool to vacuum out all of the lint and fibers that may be left inside your machine. Vacuuming is my last step. I was amazed at how much was actually still in there after all that cleaning.
I have heard of people recommending using compressed air cans to blow the lint out of your machine. Yes this may work but I don’t advise it. You risk the chance of actually blowing the lint deeper into your machine or damaging a component. If you choose to use compressed air, do so at your own risk.
The sewing machine is now lint/dirt free and all clean. Time to take out your sewing machine manual and look up where and how often you should oil the machine.
How to Oil Sewing Machines
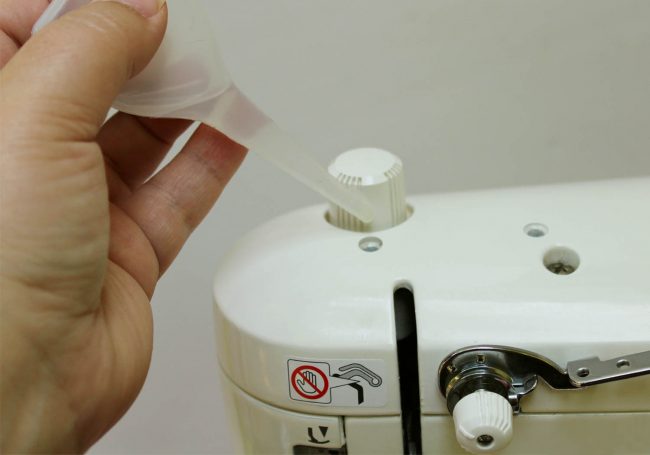
Oiling the Sewing Machine Tip 1: Not all sewing machines require oiling, so it is important to read your manual and find out. My sewing machine has seven different spots that need oiling. I carefully drop ONE drop of oil in each of these seven spots, counting as I go so I don’t miss one.
Oiling the Sewing Machine Tip 2: Oiling a machine is a very important step of sewing machine maintenance and should be done regularly to ensure that your machine is staying nice and lubricated. My machine is semi-industrial and the manual suggests oiling daily if you sew on it all day long or for 10-12 hours. I rarely sew all day long, so I don’t oil it daily but rather once a week or what I feel like is after 12 hours of use. If I am quilting, I will clean and oil it more regularly. A normal sewing machine won’t need lubrication as often. Make sure to read your manual to see what is recommended. I ALWAYS oil my machine after cleaning.
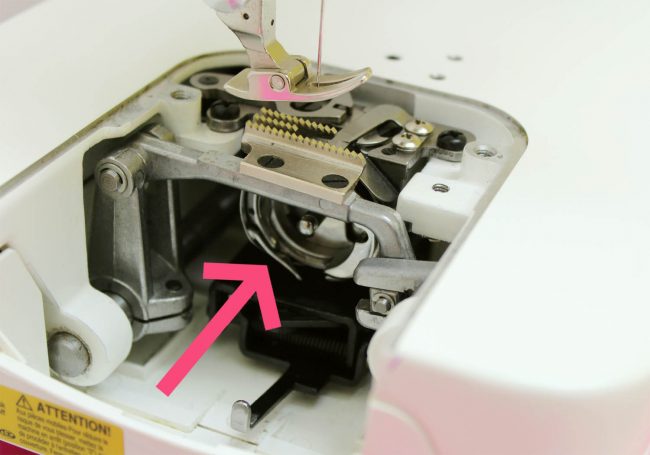
Oiling the Sewing Machine Tip 3: One of the most common spots that people tend to forget to oil is the bobbin case area or what is called the “hook.” This is actually a crucial spot that needs to be oiled. I have heard of people forgetting to oil this spot and having their machines start to smoke. In the photo below you can see I added a pink arrow that points to the “hook.” This is where you need to drop one or two drops of oil. If you can’t see the hook, slowly crank your hand wheel towards you until the hook moves into a position where you can see it. Never turn your hand wheel away from you or backwards, it isn’t good for your machine.
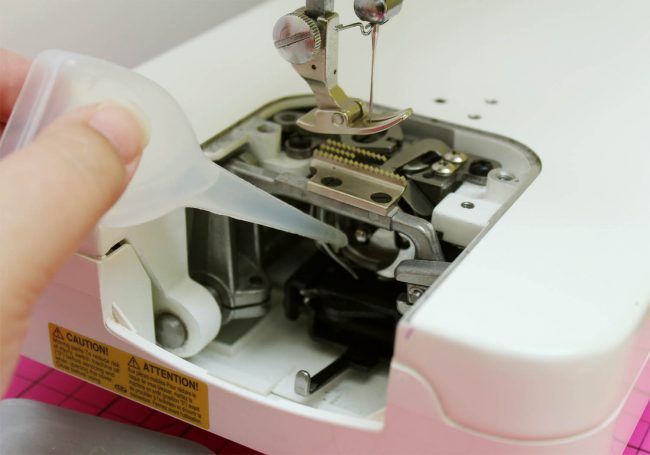
Oiling the Sewing Machine Tip 4: Now that you know where the hook is and you can see it clearly, drop one or two drops of oil into this area. Don’t worry it isn’t an exact spot or an exact science. The key is just getting the oil on there. Once you have applied the oil, turn the hand wheel towards you a few revolutions and if you watch you will see that the oil distributes all the way around the bobbin case. The point of oiling is to lubricate the moving parts.
Congratulations, you are have cleaned and oiled your machine! Now you can reload the bobbin and insert it back into the bobbin case. Place the needle plate back onto the machine, insert and tighten the screws taking care not to over-tighten them. Plug your machine back into the wall and you are ready to sew. The best thing for your sewing machine is to run it for a few minutes after oiling to make sure the oil distributes throughout the machine. Have fun sewing!
Cleaning and Servicing a Top Loading Bobbin Machine
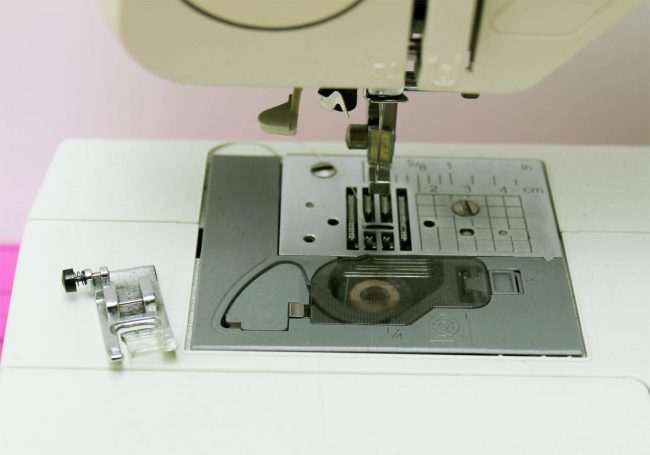
Cleaning a top-loading bobbin sewing machine is just as easy so I’ll show you some tricks and tips to make it go even faster. I removed my sewing foot as it is in the way, but I left my needle, just taking care not to accidentally poke myself. Don’t forget to unplug your machine! Clean the top of your machine using the same steps from above.
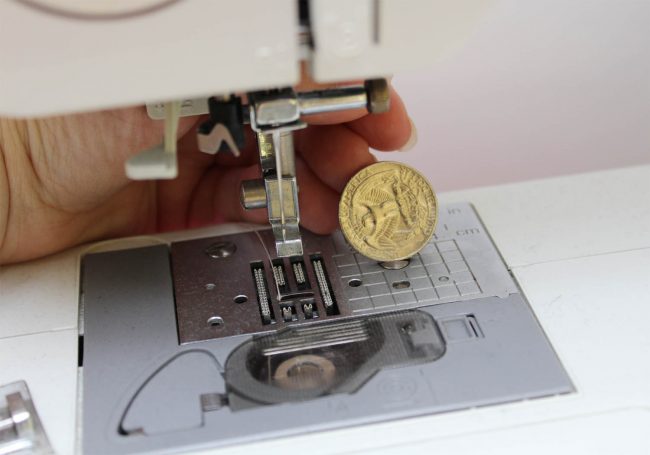
Top Loading Bobbin Maintenance Tip 1: Years ago my mom showed my a little trick for those hard to get to screws on the needle plate. If the screw has a large enough flat head opening, you can use a quarter to unscrew the screw. The small size makes it easier to fit your hand in the throat of the machine and a quarter is easier to grasp and turn.
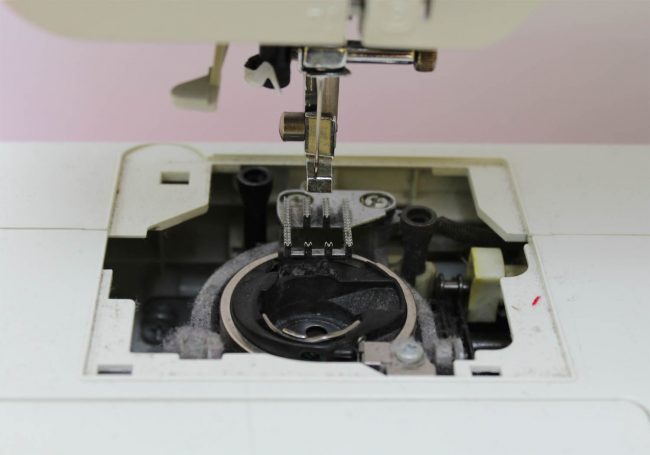
Top Loading Bobbin Maintenance Tip 2: Now that needle plate is removed and the screws set aside you can clearly see the bobbin case and a dirty sewing machine.
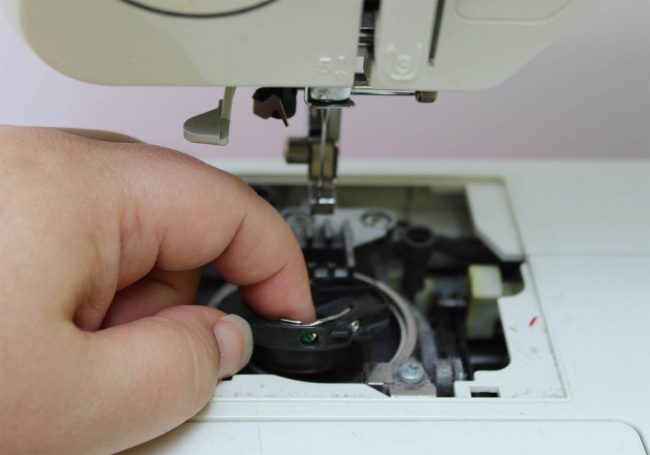
Top Loading Bobbin Maintenance Tip 3: Carefully insert your pointer finger into the bobbin case and holding the front with your thumb you should easily be able to lift the bobbin case straight out of the machine. Once it is removed, use the lint brush to carefully clean it and then set it aside.
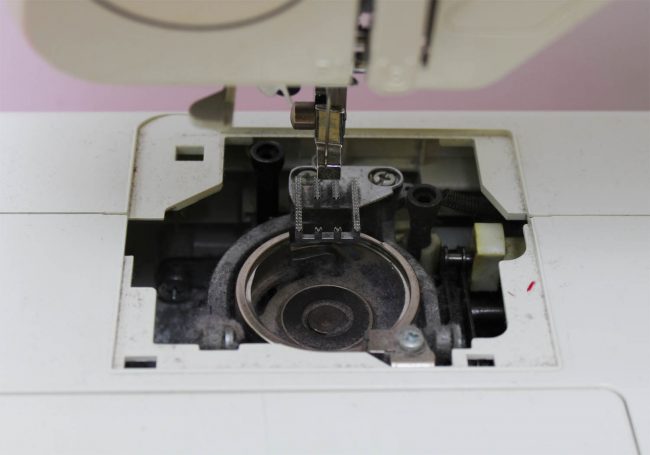
Top Loading Bobbin Maintenance Tip 4:Now that the bobbin case is removed you can clearly see just how dirty this machine was. I can honestly say it had been a while, especially since this is my back up machine and I don’t use it as often.
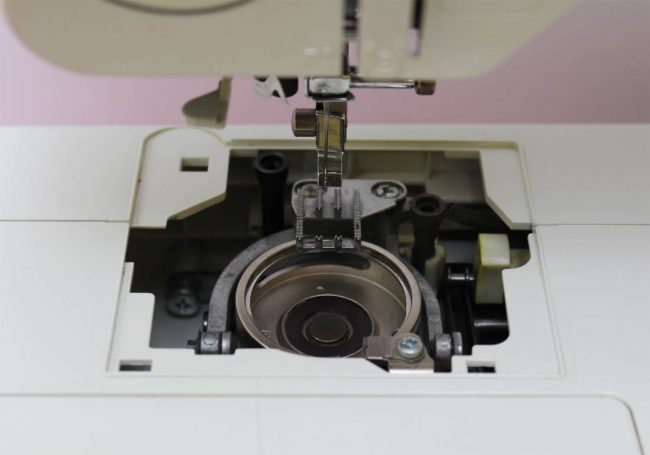
Top Loading Bobbin Maintenance Tip 5: Just as before, clean out all the loose lint using the lint brush, pipe cleaners, Q-tips, and vacuum if you choose. Below you can see what it looks like all clean. I read through my sewing machine manual and know that this is a mostly plastic component machine and it doesn’t require oiling. So technically I’m done. Simply brushing lint and dust from the machine each time it is used is a good way to prevent many problems. Use the soft nylon brush that comes with the machine or a narrow paint brush to dust away lint in the bobbin case, under the needle plate, and around the feed dog.
Top Loading Bobbin Maintenance Tip 6: Your machine may need oiling, you would do that step right now. Follow the directions in your manual for your machine. Once oiled (or not) go ahead and set the bobbin case back into the machine. Exactly how you removed it is how it should drop right back in. Install the needle plate and screws, plug the machine back in and start sewing.
We have completed all the steps of sewing machine maintenance – cleaning and oiling your machine. You now know the basics of sewing machine maintenance and your sewing machine should last you for years to come.
What tools do I need in order to properly maintain my sewing machine?
To properly maintain your sewing machine, you'll need a few essential tools. These include a small brush or vacuum cleaner to remove lint and dust, sewing machine oil for lubrication, a screwdriver to tighten loose screws, and a soft cloth for wiping down the machine.
Repair Sewing Machines | Professional Serving for Sewing Machine Problems
Thank you for that amazing article on sewing machine maintenance Marci!
It also should be noted that occasionally your sewing machine is doing something pretty funky or needs repairs that are best done by someone with training. Make sure to find your local sewing machine repair shop or quilt shop to find someone trained or who can repair your specific machine. I’ve sent my machines in for work a number of times and it’s always worth the fee!
Before your leave, be sure to join our sewing community at the Peek-a-Boo Pattern Shop Facebook Group and follow us on Instagram.
