PDF Sewing Patterns | Using Downloadable Patterns
Today, we’re going to learn how to use PDF Sewing Patterns. Discovering the world of PDF sewing patterns was one of the best things that ever happened to me during my sewing journey. If you are new to using them and are feeling a little overwhelmed or confused, follow along for this short walkthrough on how to use these patterns.
Our PDF Sewing Patterns
Of course, we have over 300 PDF Sewing Patterns for Sale for Women, Children, Men, Accessories, Etc. Our sewing patterns are mainly for clothing and accessories. Other shops may include things like embroidery or other types of digital files.
What is a PDF Sewing Pattern?
Simply put, PDF sewing patterns are digital files. They are similar to the patterns that you buy from a brick-and-mortar craft store except that they are digital in nature. This means when you buy one you get access to digital files that contain the pattern pieces and the instructions. Here at Peek-a-Boo Pattern Shop, this means you get access to a tutorial, a print-at-home file, a copy shop file, and a projector file for the pieces (except some of the older ones).
You can then download these files to your choice of digital device and access them anytime, anywhere. The beauty of having a downloadable sewing pattern? You do not have to worry about accidentally tearing the master pattern! You can print them as many times as you want and print only the sizes you want! This makes cutting the pieces a breeze as it’s not cluttered by all the sizes and their markings.
What are all the different files in printable sewing patterns?
All pattern companies offer a combination of files that have a tutorial with instructions on how to use that particular pattern and the pieces to be printed/used in your preferred way. Most often the instructions and the print-at-home pattern pieces will be in the same file, but it can be separate files too. Then there will be a copy shop/A0 file and a projector file, if the company offers that.
I will explain how our files are structured for ease of understanding and examples.
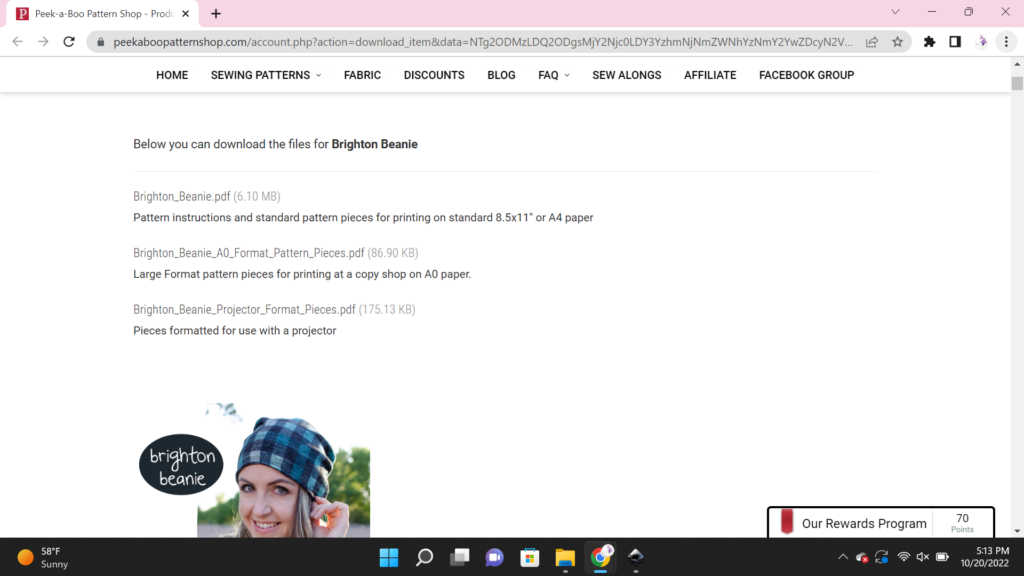
Tutorial – This is where you will find all the details you need. It will have the styles or variations available, fabric suggestions, fabric requirements, size chart, finished measurement chart, additional notions that you might need, printing layout and instructions, seam allowance, detailed instructions for the construction of the pattern etc. They are almost always supported with pictures to make it easier to understand them.
Print at home file – This is the part that makes the PDF patterns so easy to use and sets them apart from the paper patterns we find at craft stores. This can either be found at the end of the tutorial file or as a separate file. And you print them out, tape them together and cut or trace them and use it all from the comfort of the home, provided you have access to a printer.
A0/ Copy Shop File – This file is the large size file that you have to print on the A0 size paper. This file cannot be used on our home printers. There is no assembling of patterns in this version as the pieces will fit into this large blueprint style paper. You then cut out or trace out the pieces as needed and proceed.
There are a lot of places that do this kind of printing for you. You can try the local Fedex or Staples or any such place that does large-scale print jobs. There are also places like PDF Plotting and Blueprint Printing and a few other places that do these services for you. I have only used PDF Plotting and they have a very easy-to-use system where you can choose the Color or Black and White Pattern Printing and upload the A0 file and they will print them at the right size and ship them home to you.
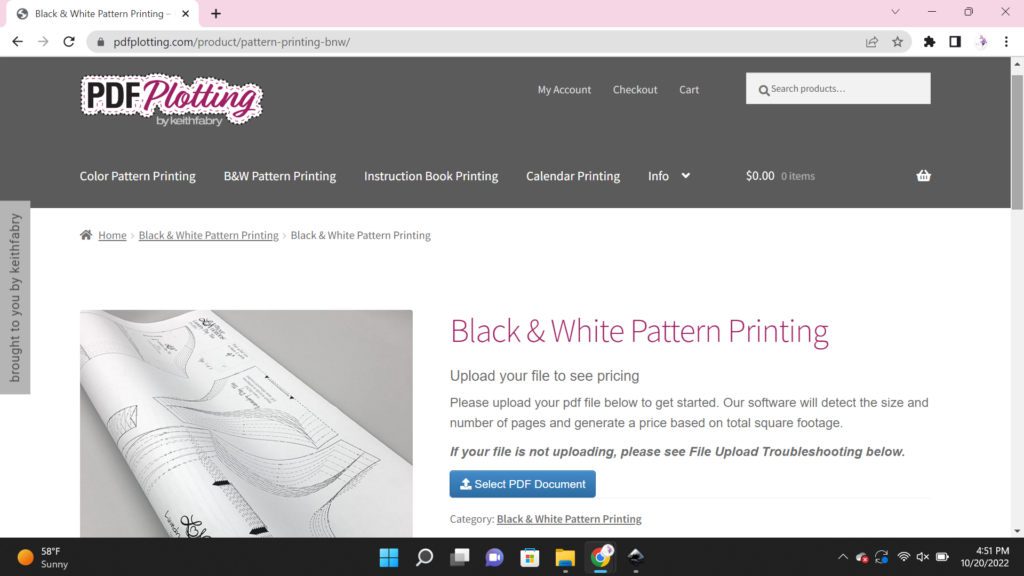
Please note: When printing A0 files, no modifications can be made. This generally includes choosing to print only one size or choosing not to print one size. This is to protect the rights of the pattern designer.
Projector File: These files are the ones you need if you have gotten on the Projector wagon. Let me tell you, it’s been a life-changing experience. You can read more about this in the blog post that Heather wrote Here about it.
How to use the Pattern
Now that we have an understanding of the type of files we get, let’s move on to how to use these files.
- Materials: The first couple of pages of a PDF Sewing Pattern are dedicated to all the information that you need before you can start making it. The materials needed, including the type of fabric and notions necessary.
- Size Chart: There will be a size chart and specific notations if any about your fabric choice. In addition to that, there will be a short write-up about the pattern itself and how the designer intended it to fit. The designer’s suggestion regarding the patterns and fabric choices is very important while choosing the size you are going to make or if you need to adjust it to your specific measurements. For example, in adult sizes, the pattern is drafted for an average height of 5’5″. If your height differs from this, you might have to adjust it to your specific height by lengthening/shortening the pattern.
- Printing: There will also be information about how to print it, how to tape them together and cutting out your pieces. Most designers offer a guidance chart to make printing out pieces easier. If there are multiple views available, this chart is what you use to print out only the pages that you need to make that particular version of the pattern. There will also be a print layout. This is your guide as to how to assemble all those sheets you print out. I will explain that in detail in the next step.
Printing PDF Pattern Layers
Many of these PDF Sewing Pattern files come with what is called a Layers function. This means that the pattern pieces and markings are stacked together in multiple layers and each size is grouped into a layer by itself. This makes it easier for us to choose only the size that we need to make and print only those pieces.
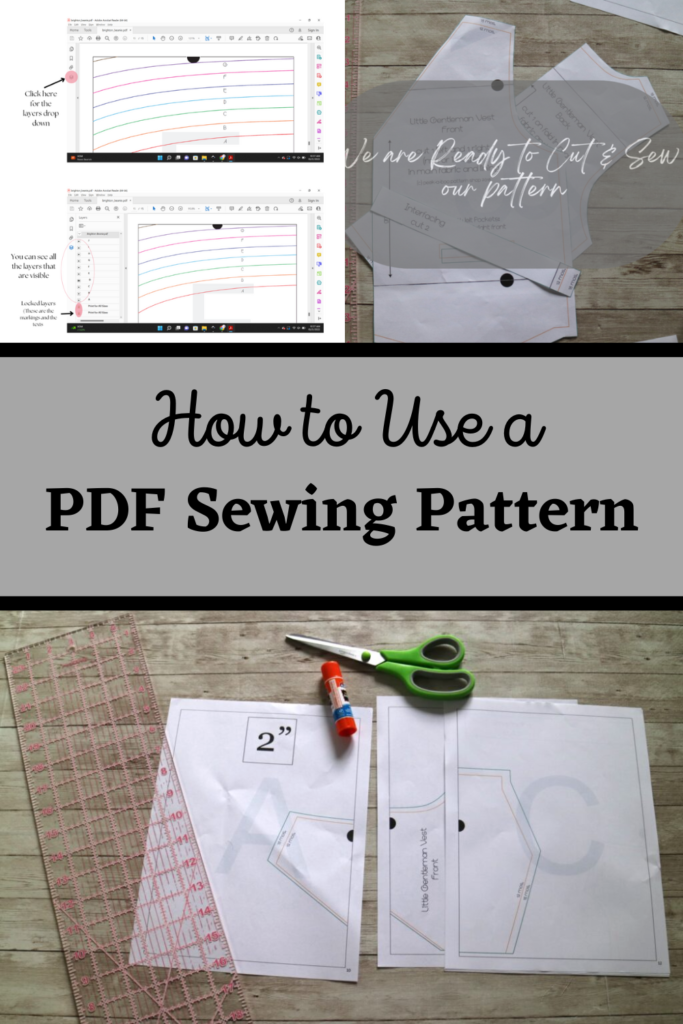
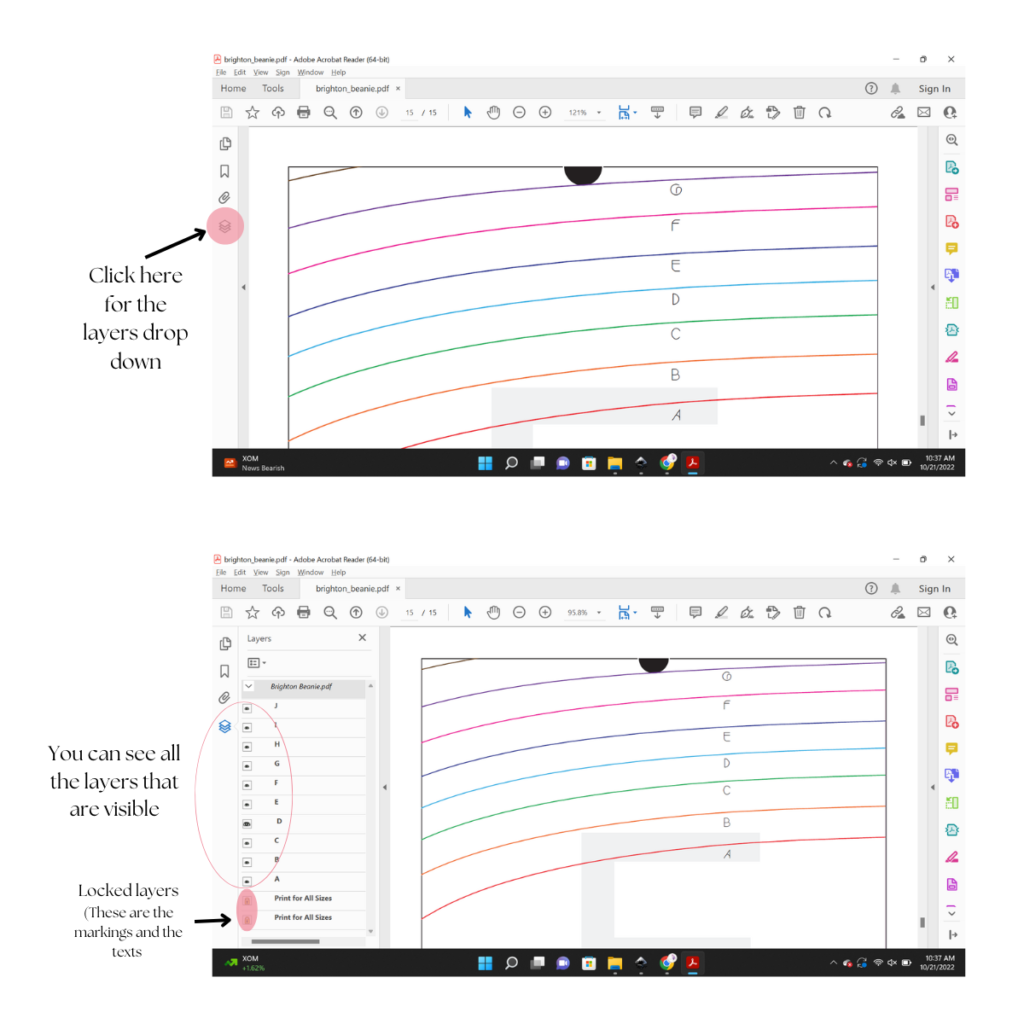
- Layers Button in Adobe Reader: You can access the layers from the left-hand side of the PDF File when you open them with Adobe Reader. Just click on the “layers” button at the bottom that looks like a stack of paper (See the 1st Image Below). You may also need to make a second click on the “drop-down” icon that follows with the pattern name.
- Turning Layers On and Off: As you see in the second illustration below, once you click on the Layers button there is a square in front of each listed layer and some have a tiny eye inside the box and some have the image of a padlock. If the eye is visible in the box, it means the layer is visible in the document. To turn off a particular layer, we will uncheck the eye.
The layers that have a lock sign are the layers that have all the pattern markings and size markings and generally all the information that is necessary for us to read the pattern pieces. In PAB patterns, these layers are locked, so we do not need to worry about accidentally turning it off and printing out all the pattern pieces with no idea about what is what.
 Here is a short screen capture of how to select the layers you need and how it will look.
How to Print & Assemble PDF Sewing Patterns together
Now that we know how to use the layers function let us move on to printing and taping the pdf sewing patterns pieces together. You choose the layer that corresponds to the size that you need only. If you need to grade between sizes, you will choose those two layers.
If you are like me and want to save paper, and need to print 2 sizes, I will print both sizes together and will trace the smaller size onto the pattern tracing paper once everything is assembled together. Printing the pattern correctly is very important. So pay extra attention to the details like printing scale and page setup.
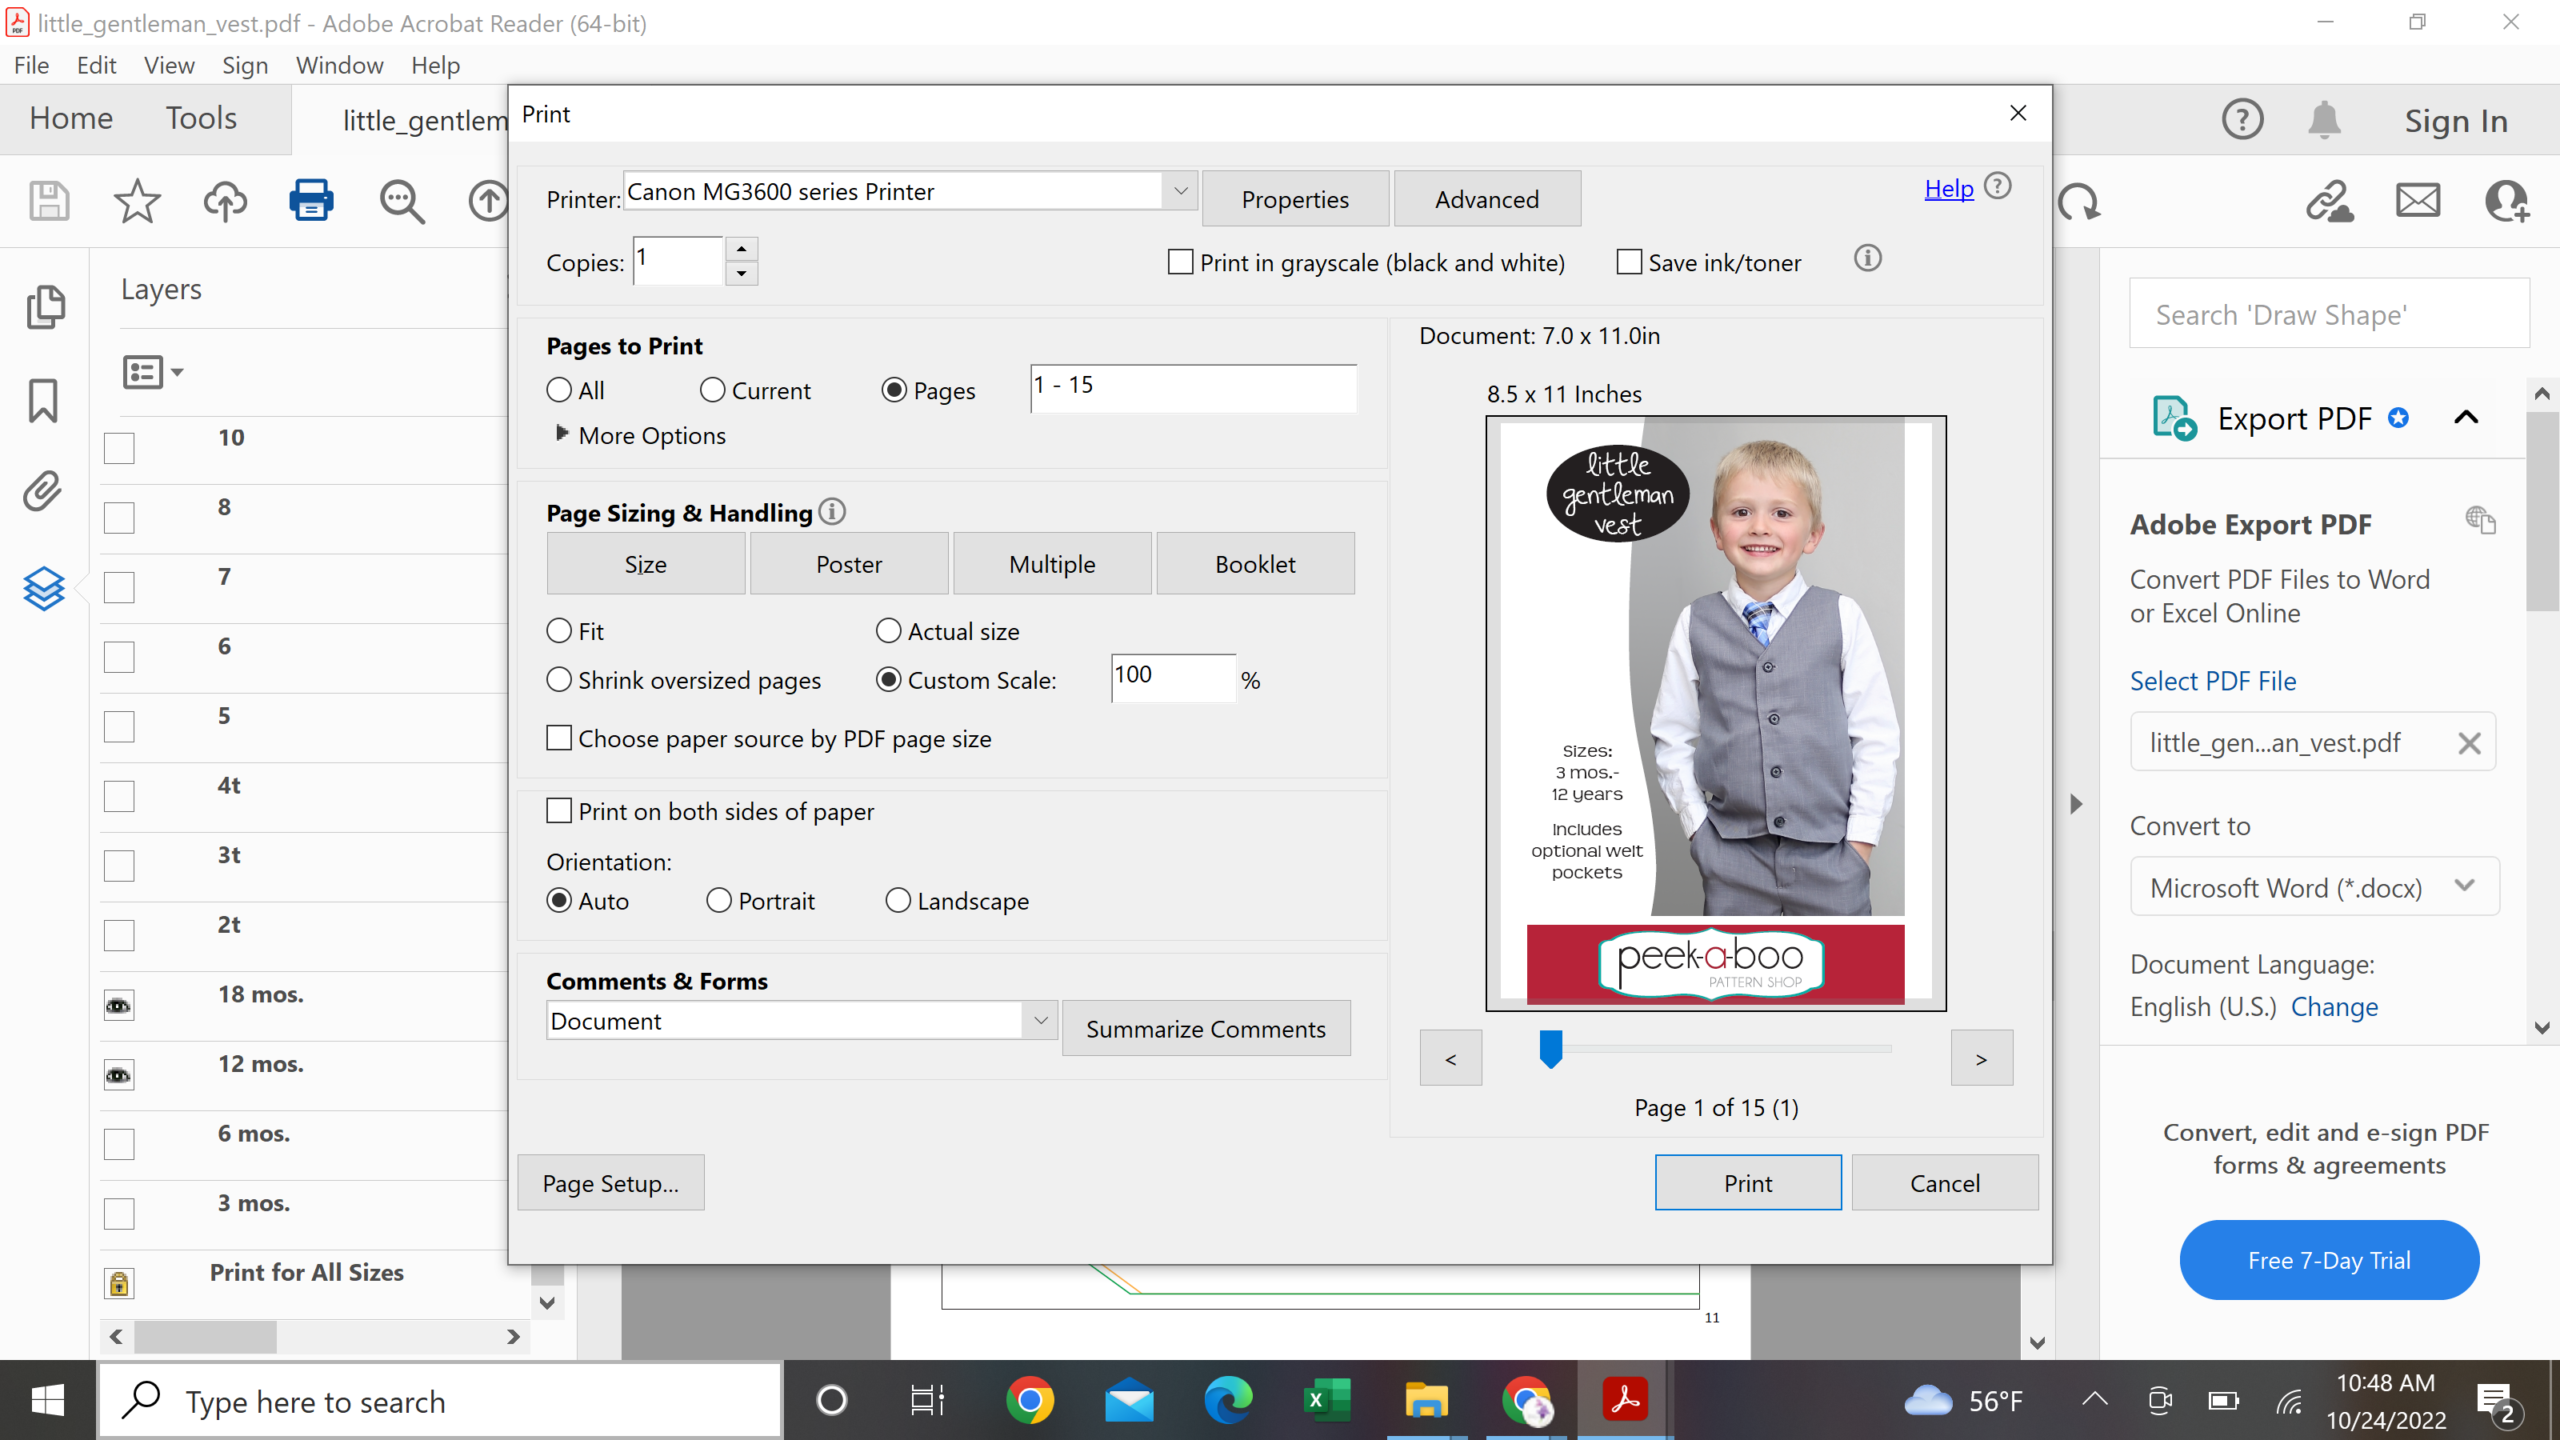 Once you have selected the layers you need to print, select the print command. The above dialogue box will pop up. In that dialogue box, choose your printer and the pages you want to print. You can select the range of numbers for the pattern pieces only or if you want a printout of the instruction you can print all pages. It is strongly advised to print only the first page at first to confirm it is printing correctly before printing the rest of the pages. Any difference in the scale can affect the finished piece and how it fits.
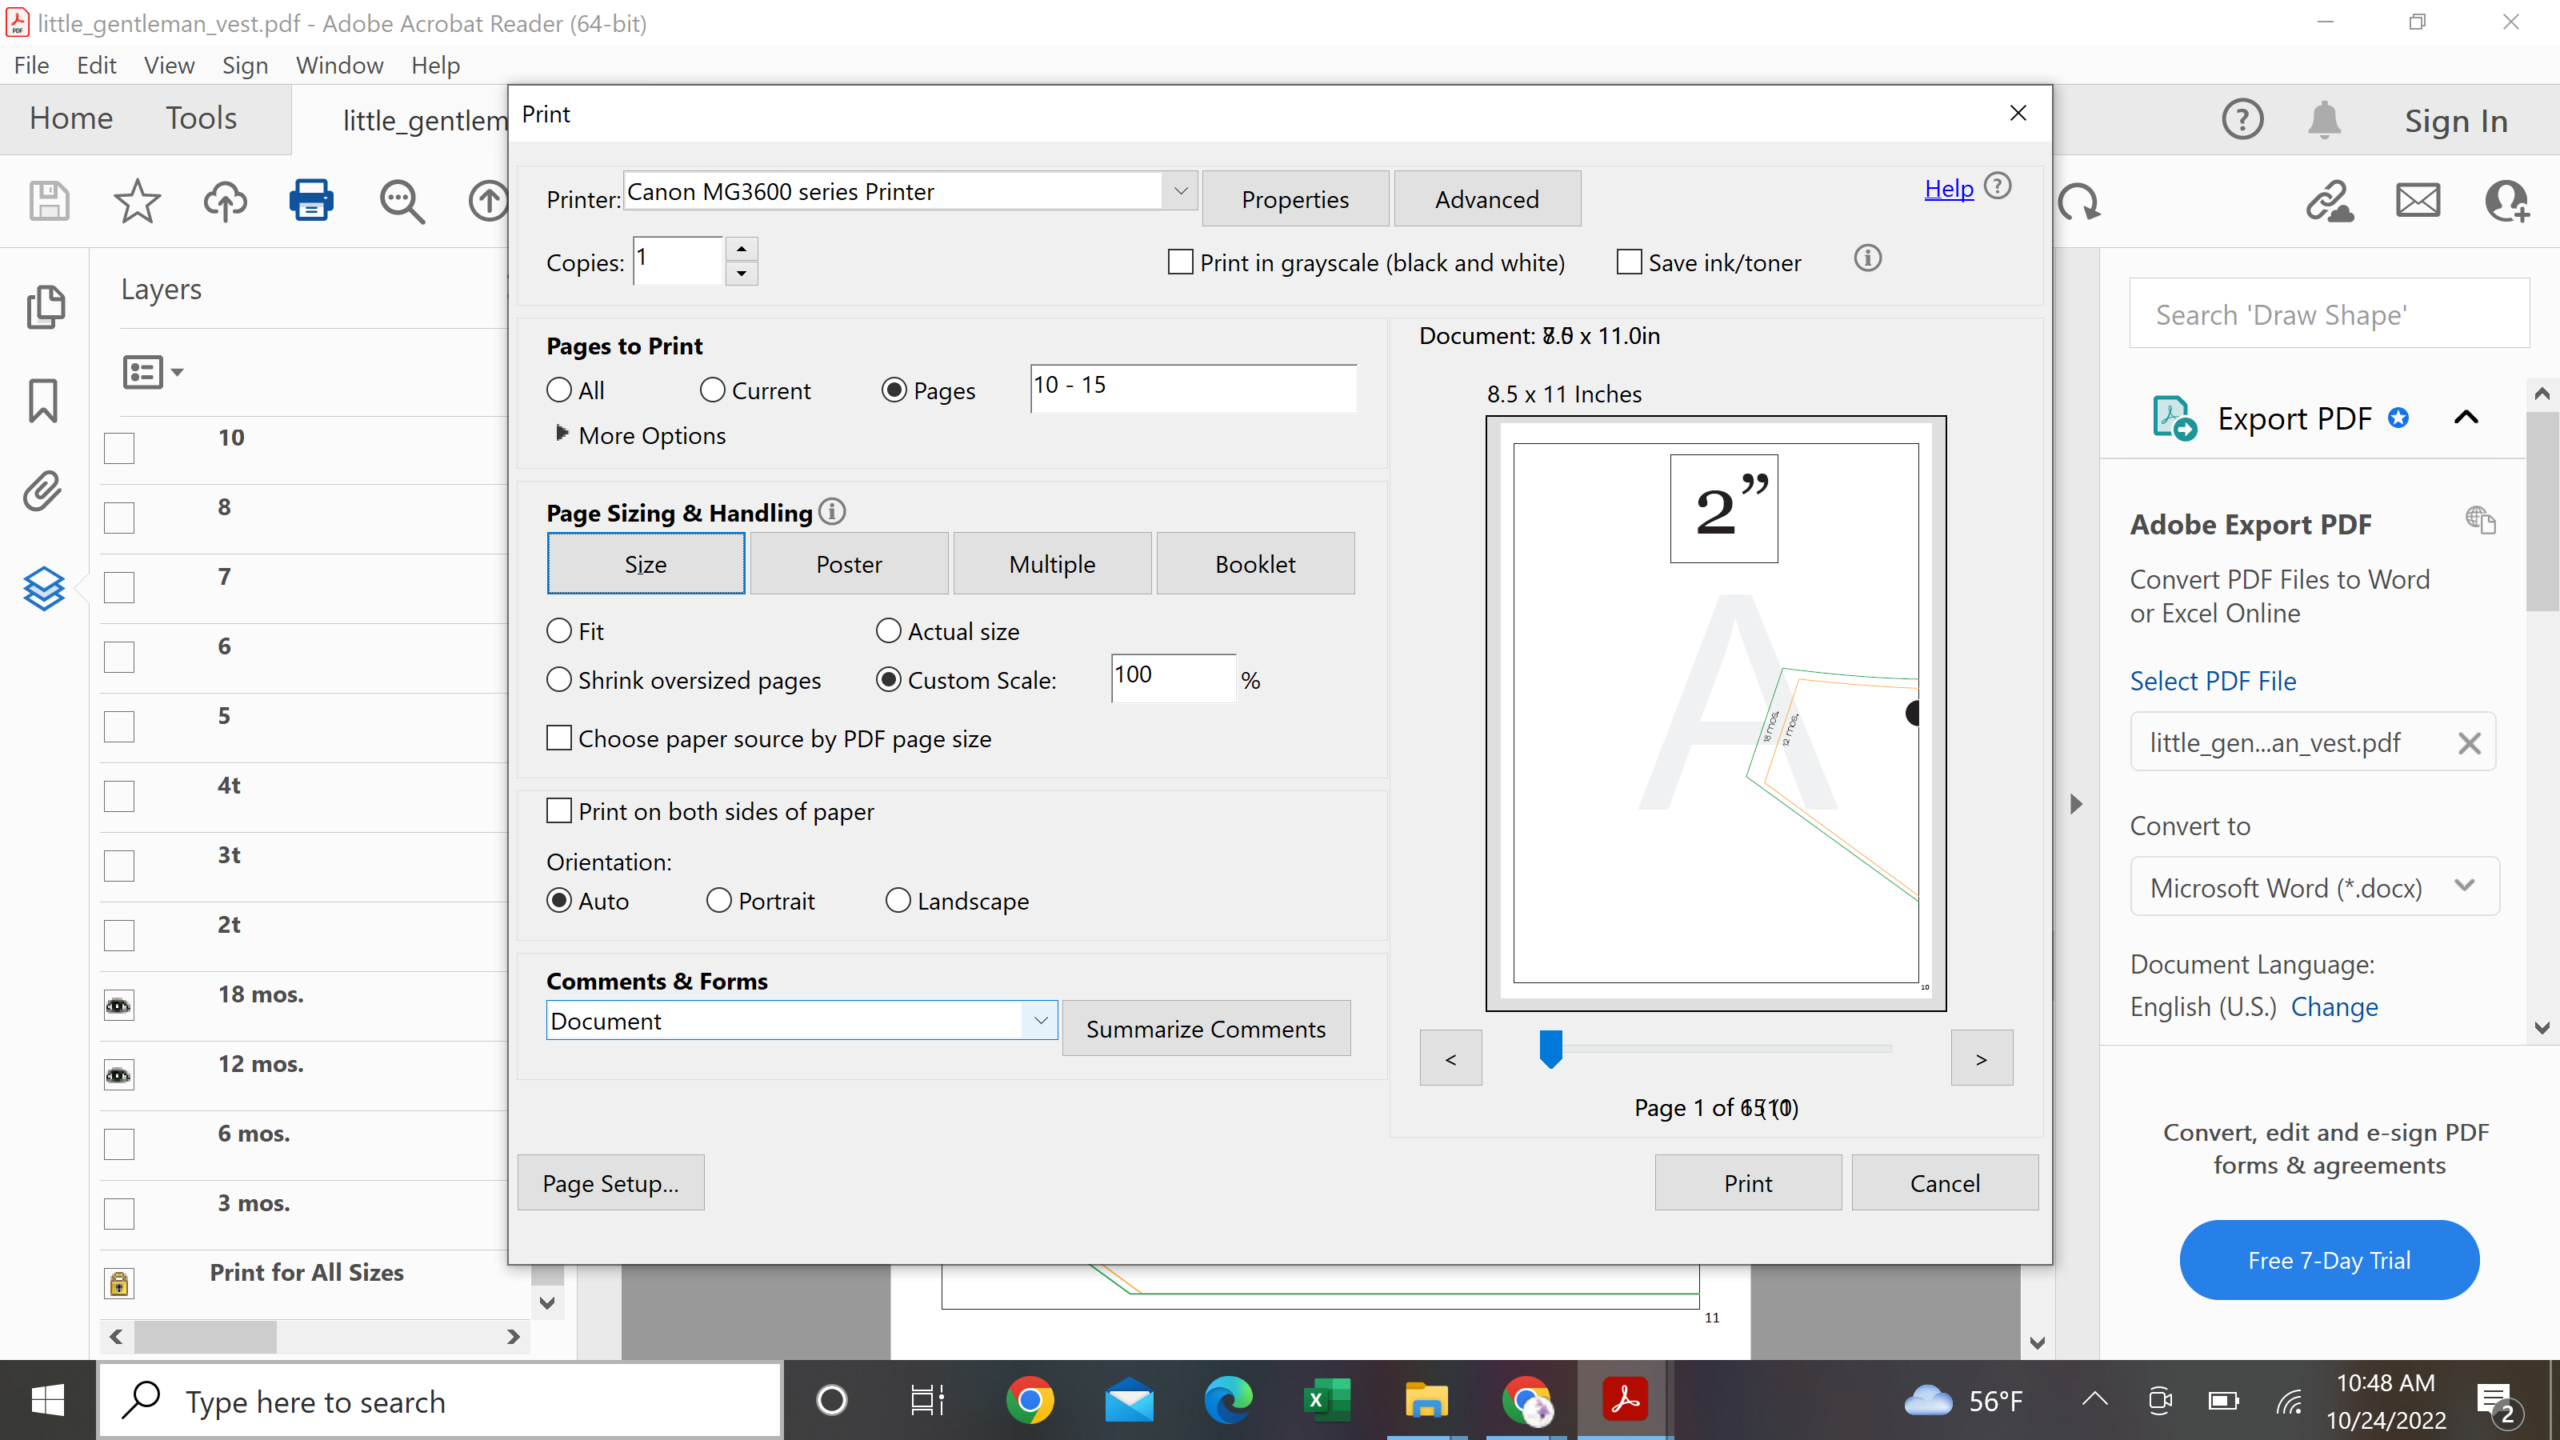 The next section, Page Sizing and Handling is one of the part you need to pay extra attention to. Choose Size and then choose Custom Scale at 100%. I prefer to leave the paper source by PDF Page Size unchecked. Make sure Print on both sides of the paper is not selected.
Orientation should be Auto, this will ensure that pattern pieces print as it is meant to be. Also, make sure that the appropriate page size is selected. For US residents, it is the Document size which is 8.5 x 11 Inches. If you are using an A4 size paper choose that size. Some pattern companies offer separate files for Letter size and A4 size paper. But at Peek-a-Boo Pattern Shop, it is the same file. Double check everything looks good and then hit Print.
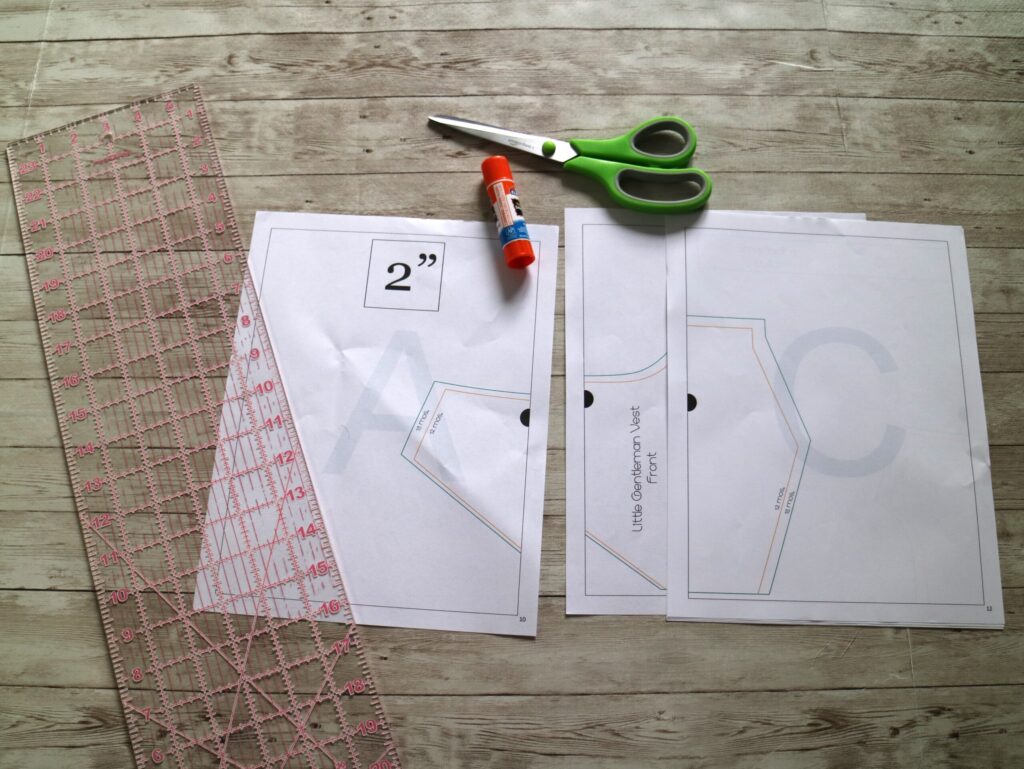 Let us put that pattern together now. Gather your supplies. We will need
- Acrylic ruler
- Scissors
- Glue or Tape
- Pattern Pieces
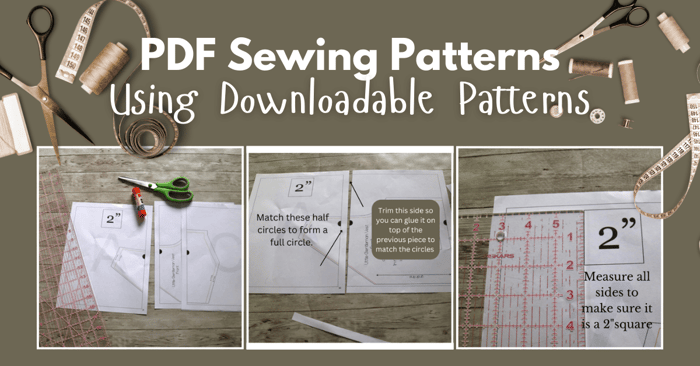
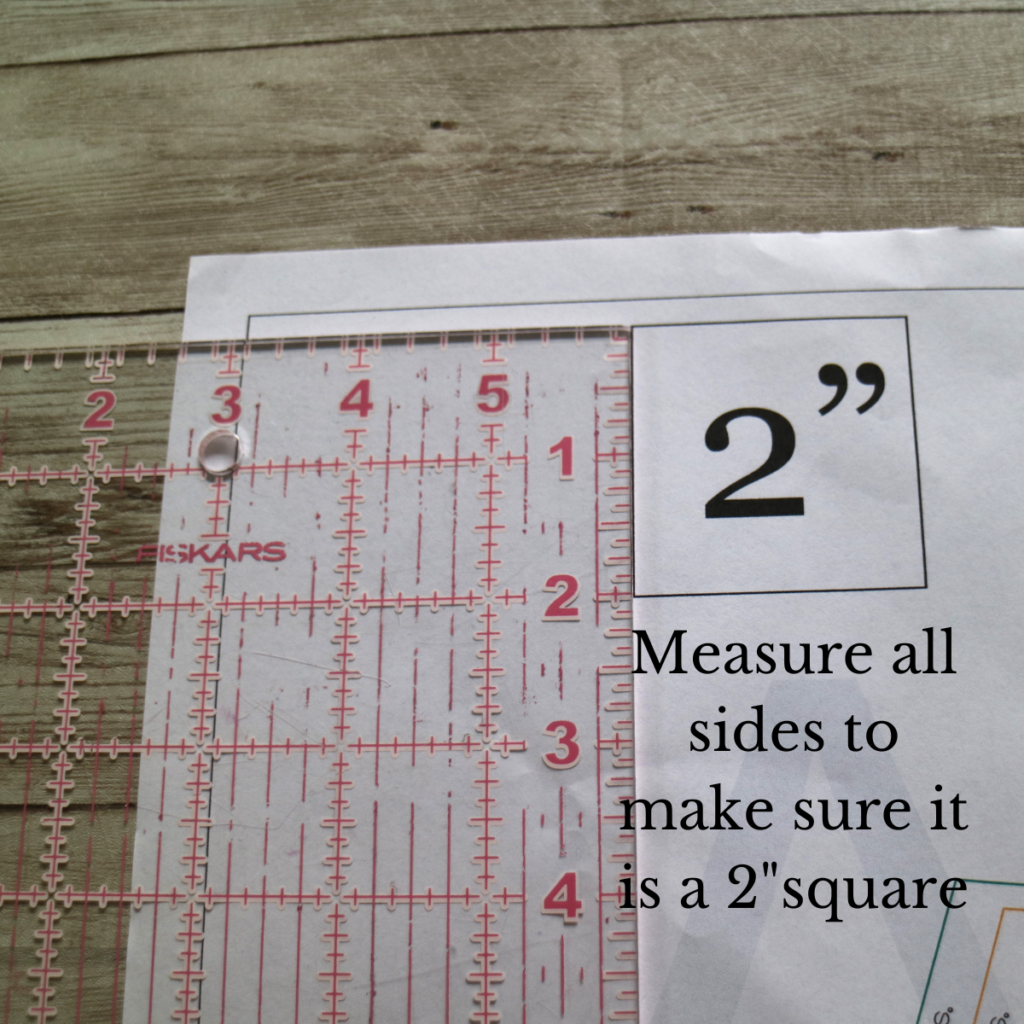
The very first thing to do is make sure that the pattern pieces are printed to the correct scale. Like I mentioned above it is strongly advised to print only the first page that has the test square to confirm it is printing to scale before printing the rest of the pages. Any difference in the scale can affect the finished piece and how it fits. This is where having an acrylic scale help. I like to place the ruler over the test square and measure all sides at the same time to confirm they printed at the right scale.
What if My Test Square is Off? | Check Your Print Settings
- What Program Are You Using to Print?
We recommend using Adobe Reader (Free Version) or Adobe Acrobat to print your patterns. Printing from your internet browser may not be sufficient.
- Double Check Your Print Settings
If the test square is off, then you should double-check your print set-up page. Make sure that: (1) Your custom scale is set to 100%, (2) Your orientation is set to Auto Portrait / Landscape, and (3) “Choose Paper Source by PDF Page Size is not selected.
With these settings your pattern pages should print in the center of each page.
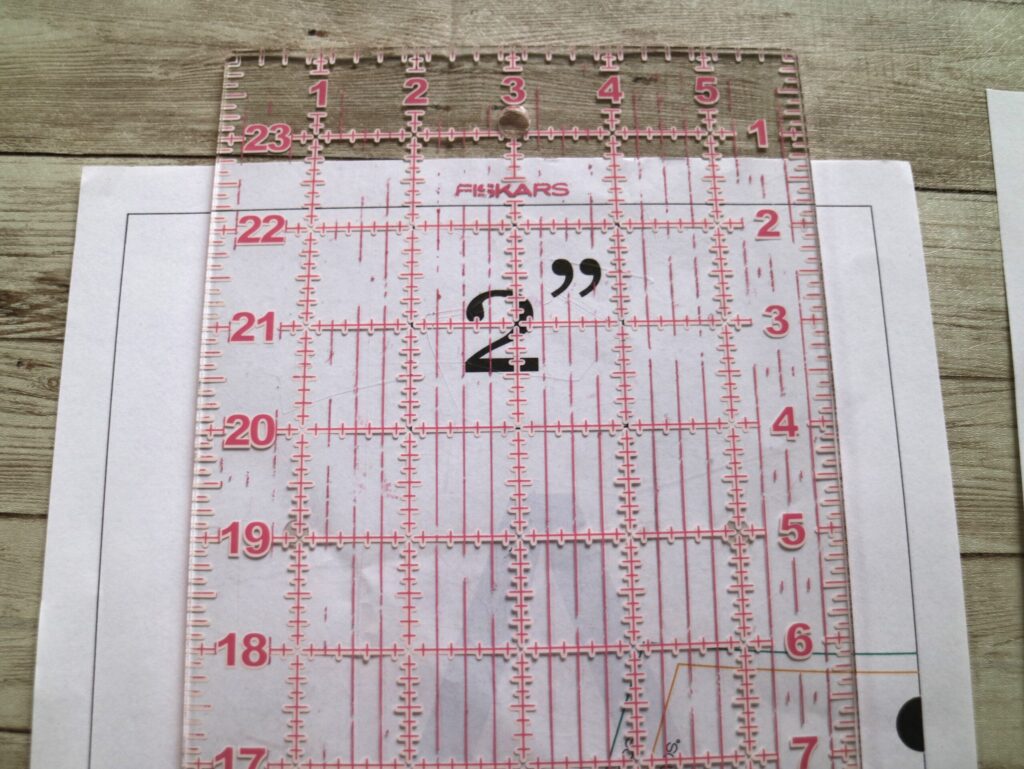 Once we make sure that the test square is printed correctly, we will go ahead and print the rest of the pages, again making sure to double-check the scaling is selected right. Now we can assemble the pattern pieces using the print layout given at the beginning of the pattern. Each page has an outline with a semi-circle on some of the sides and an alphabet or a number as an underlay. This underlay will help us to identify the pattern pieces and find out the exact location in the assembly.
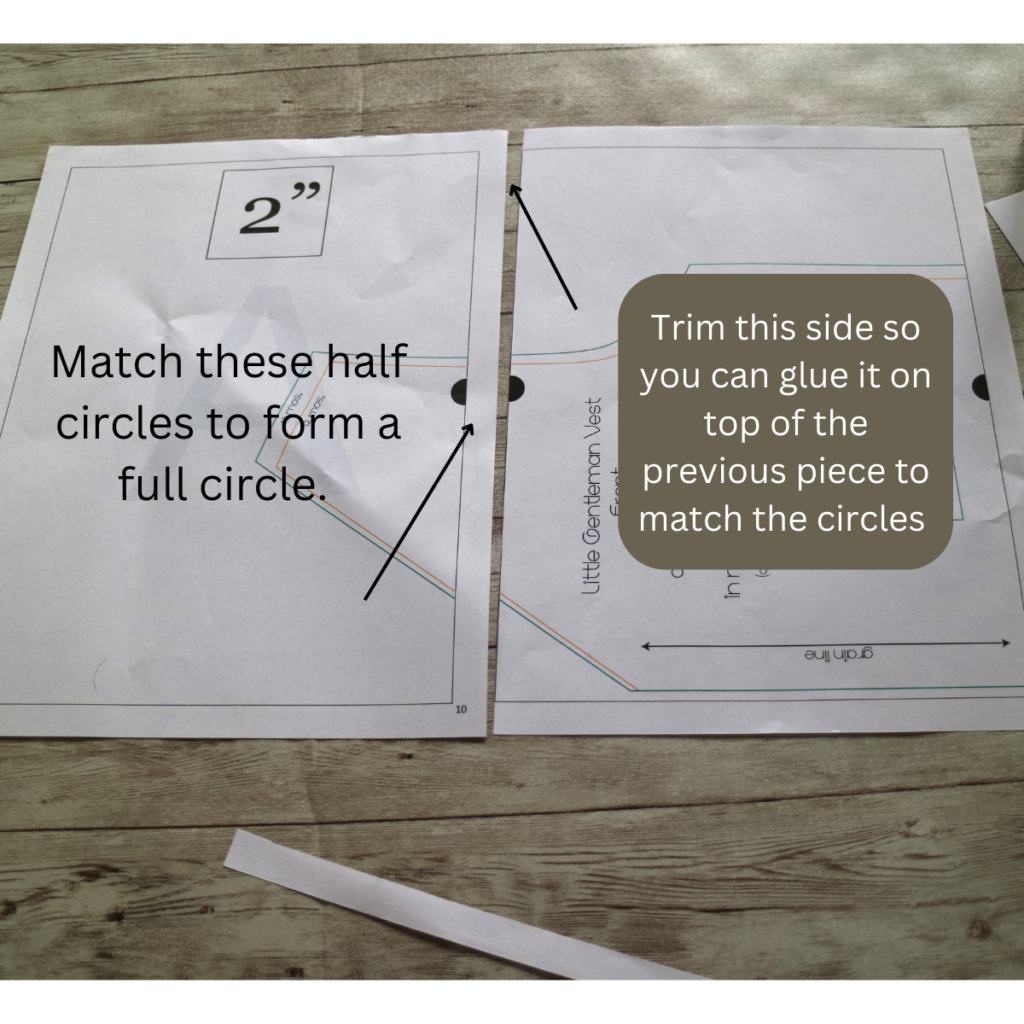
We have to match the semi-circles to form a full circle to assemble the pattern. I prefer to overlap the piece on the right on top of the left. So I trim the side of the piece on the right. This way it is easier to match the circles and assemble the pattern pieces. Glue or tape them together until the entire pattern is assembled.
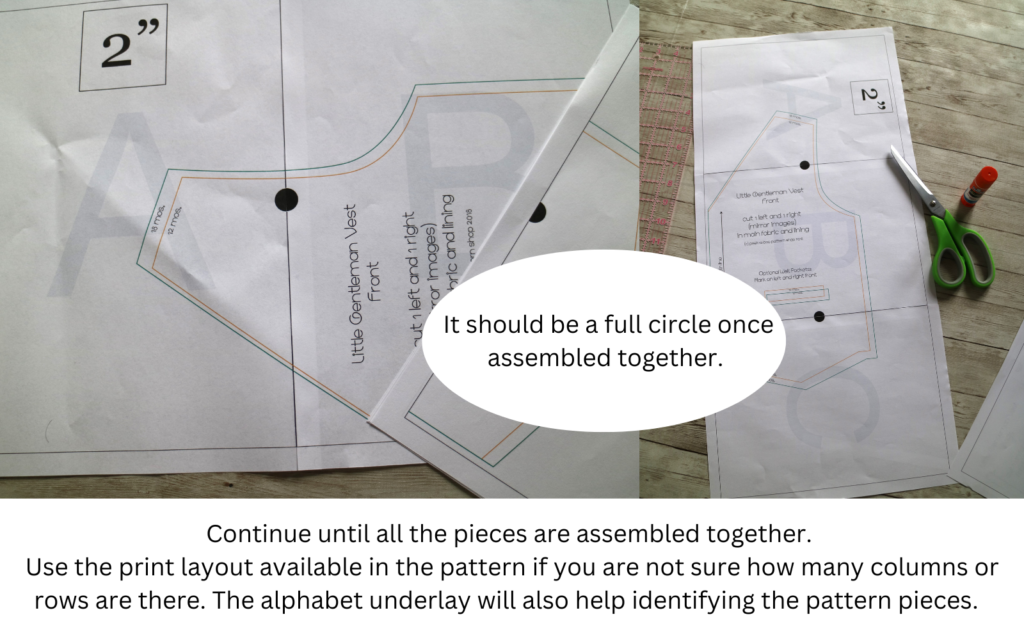
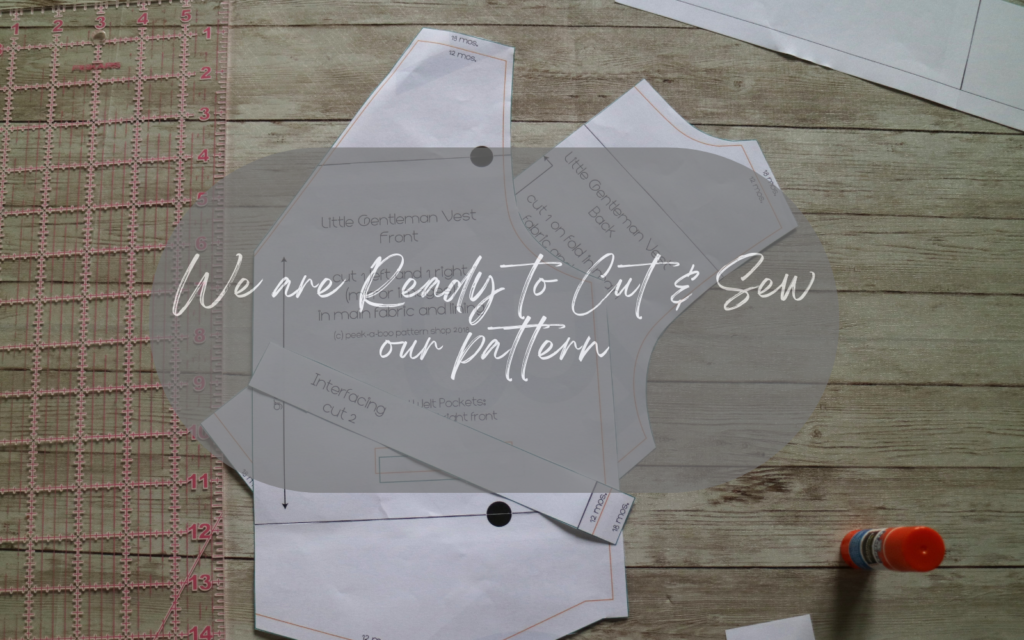
Once all the pieces are assembled together, cut out the pieces and you will be ready to cut into your fabric. From here on out it will be very similar to using any other paper patterns.
Can you print PDF sewing patterns at home or do you need to take them to a professional printer?
Print PDF sewing patterns at home using a regular printer. Make sure to set the correct printer settings and print at 100% scale. Alternatively, you can take the patterns to a professional printer for higher quality printing.
I hope I was able to give you a brief outline on what and how to use a PDF Sewing pattern. As always, come join us in the Peek-a-Boo Facebook Group to ask sewing-related questions and share what you make. You can also sign-up for our email Newsletter to get 25+ Free Sewing Patterns and follow us on YouTube or Instagram to stay in touch.
