How to Sew a Snap | Sewing Snaps 101
Now that it is summer here in the upper Midwest, I love to sew rompers and onesies for my toddler. One of the things I was most scared about when sewing rompers and onesies was how to sew a snap. I’m here today to share with you how I install both metal and plastic KAM snaps.
Snaps are versatile fasteners commonly used in clothing to secure closures such as buttons and zippers. Snaps offer a convenient and efficient alternative to traditional buttonholes, providing a neat and professional finish. . By learning how to sew snaps, you can add functionality and style to your garments, allowing you to create unique and personalized designs. Whether you're a beginner or an experienced seamstress, mastering the art of sewing snaps will open up a world of possibilities for your sewing projects. So grab your sewing kit and get ready to embark on a journey of creativity and craftsmanship!
KAM Snaps v. Metal Snaps
There are various types of metal snaps and kam snaps available for sewing clothing, each with its own unique features and benefits. Metal snaps, such as brass or stainless steel, are durable and can withstand repeated use without losing their functionality. They add a touch of elegance to garments and are commonly used in high-end fashion. On the other hand, kam snaps are made of plastic and are lightweight, making them suitable for lightweight fabrics. They come in a wide range of colors and designs, allowing for creative customization. Kam snaps are also easy to install with the help of specialized tools, making them popular among DIY enthusiasts. Whether you prefer the classic look of metal or the versatility of kam snaps, there is a perfect option available to enhance your clothing projects.


Tools and Materials Needed for Sewing Snaps
Sewing snaps can be a fun and useful skill to have, whether you're repairing a garment or adding a closure to a new project. To get started, you'll need a few basic tools and materials. Firstly, you'll need the snaps themselves, which typically come in sets that include both the male and female pieces. You'll also need a snap plier tool or a hammer and anvil set to install the snaps securely. Additionally, you'll need some fabric scissors to cut any necessary openings for the snaps. Finally, it's always handy to have some thread and a sewing needle on hand for any additional stitching that may be required. With these tools and materials at your disposal, you'll be ready to tackle any snap-sewing project that comes your way!
Step-by-Step Guide on How to Sew a Snap Onto Fabric
How and When to Use KAM Snaps
This is Amy here for a minute – I get a lot of questions about using KAM snaps and where to get them so I thought I’d fill you in (in the middle of Alisha’s tutorial). My go-to source for KAM snaps is I Like Big Buttons. They have super speedy shipping, the color charts are easy to use and make ordering a breeze, and the pricing is great.
I’ve ordered from them in the past and I Like Big Buttons was also kind enough to send me their awesome Starter Pack to review! For just $20 (plus shipping which I found quite reasonable) you get the pliers, 100 sets of snaps and a short how-to video. The video includes everything you need to know about installing the snaps and getting them back out if you make a mistake. It’s the perfect way to get started 🙂
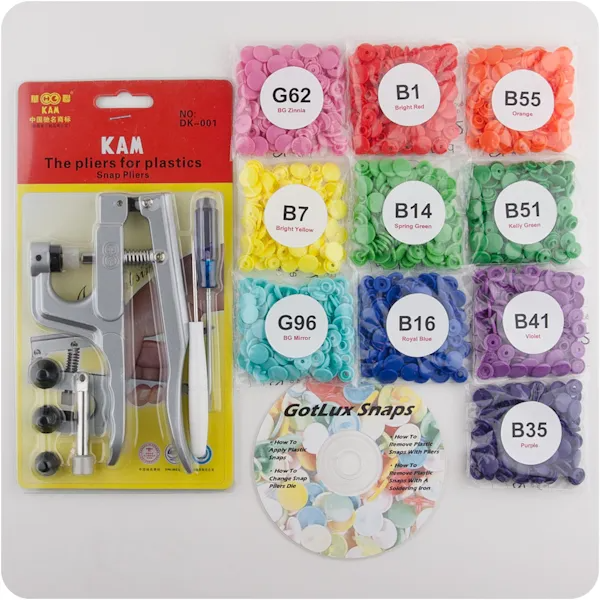
In the past, I had been using my Babyville pliers with my KAM snaps. It worked decently but now that I have the real deal I am in love! So much easier to use! The overall quality of the KAM pliers and snaps is much better than Babyville in my opinion. I did a full comparison of all the options for snaps and why I prefer KAM here. With a new baby in the house, I am finding lots of opportunities to use my snaps 🙂
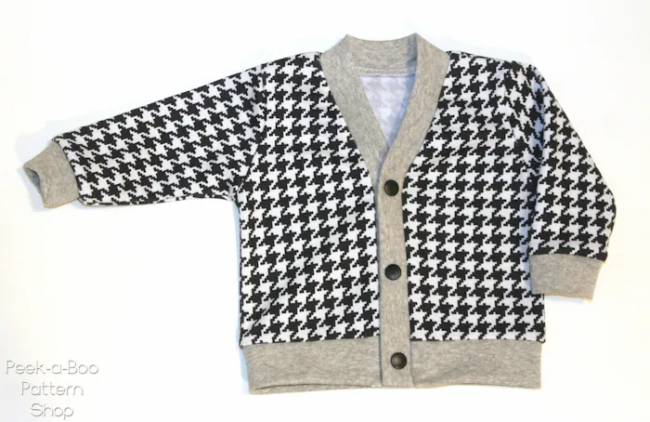
Really anywhere you can use a button you can use a snap instead. Just like with your buttons make sure you add interfacing so the snaps don’t tear or stress the fabric. Seen here on the V-Neck Cardigan
Snaps or so much easier than sewing buttonholes and with all of the color options it’s easy to get a perfect match. Seen here on the Lullaby Line Bodysuit.

Need more ideas of what to use your snaps on? I’ve also used them on pj tops, button-up shirts, dresses, the inseam of rompers, overalls straps, and pacifier clips. I use them ALL the time 🙂
Alright – now back to Alisha:
How to Sew a Snap: Getting Started
I started out using plastic KAM snaps with a starter set that I bought on Amazon.
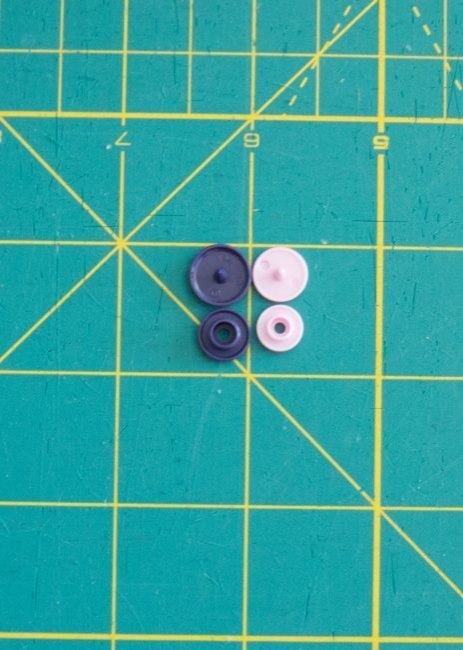
Size 20 has been working wonderfully on my big kids’ clothes as well as dresses for my daughter but for rompers and onesies, I prefer to use size 16. I purchased my size 16 snaps from the KAM snaps website. In this picture, the navy is size 20, and the light pink is size 16.
Sewing on Snaps: Installing Snaps
To install either kind, make sure you interface your fabric. I use SF101 interfacing on most of my projects. I iron it onto half of the placket. In the next steps, my placket will be shown folded in half.
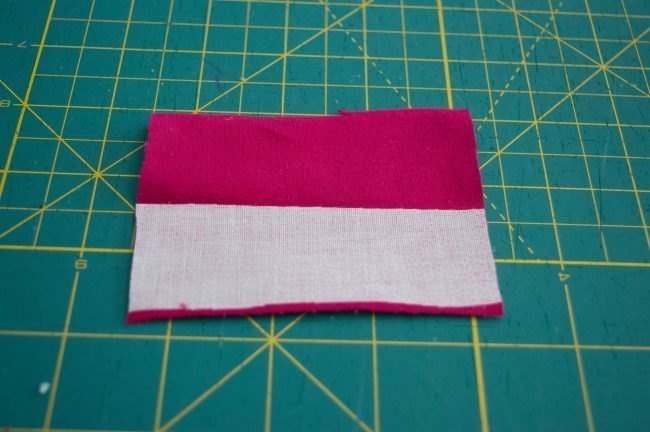
Both kinds come with rings/prongs and sockets. There are both male and female sockets so be careful to use the correct one on each side of your placket.
How to Sew a Snap on Clothing: Tools for Installation
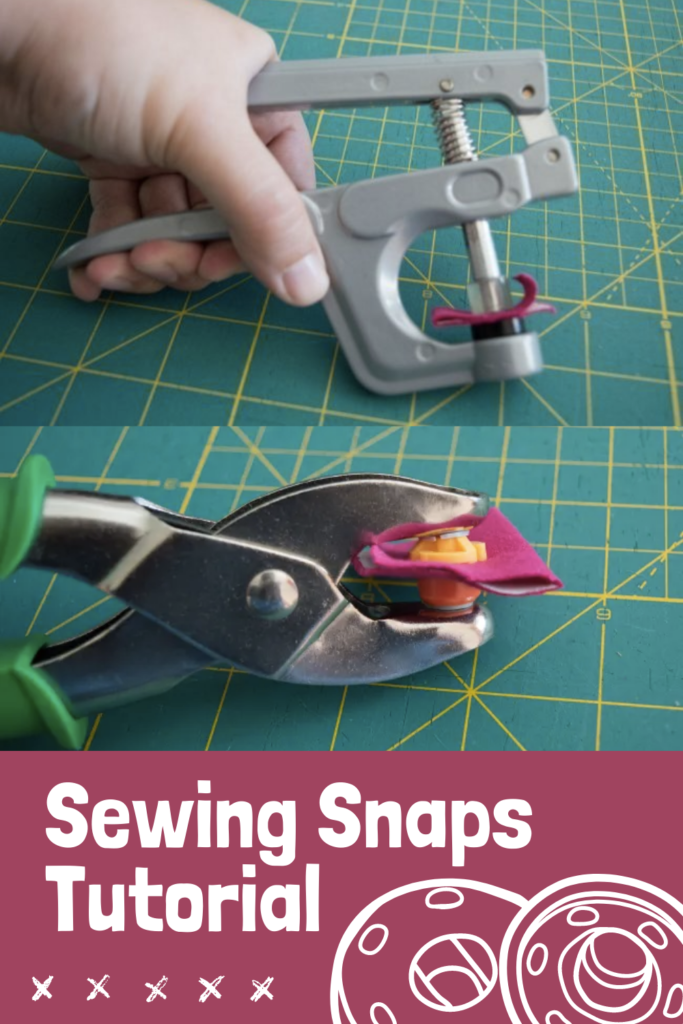
Pliers or a snap press are used to insert KAM plastic snaps. Use the included awl to poke a hole through the layers of fabric where the prong will be inserted.
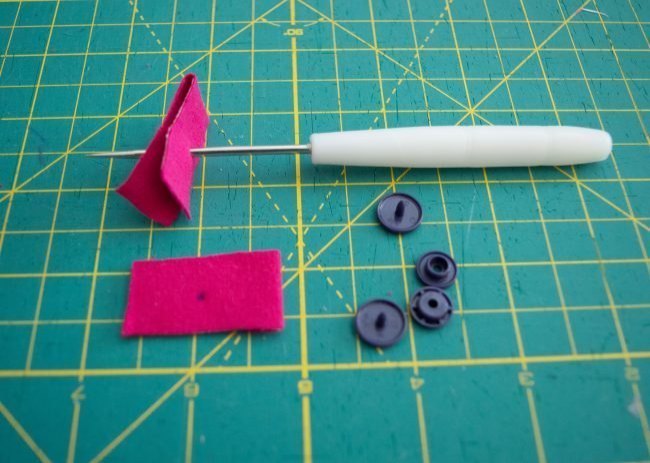
Insert the prong through the hole and add the corresponding socket. Insert into the pliers and squeeze. I usually use both hands to make sure I’ve applied enough pressure. Repeat for all the snaps you need to insert.
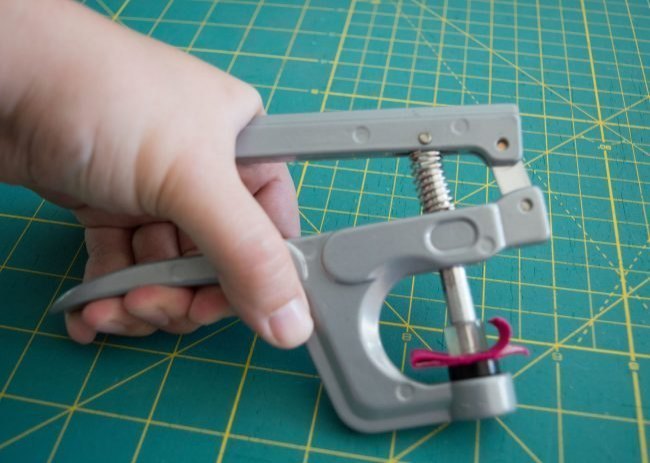
Sewing Snaps: Setter
I like to use metal snaps on my daughter’s rompers and onesies. I use size 16 open ring snaps from Snap Source. They also sell a purple installation tool, but I recently found pliers at Walmart that work to insert them as well. The purple setter has three pieces.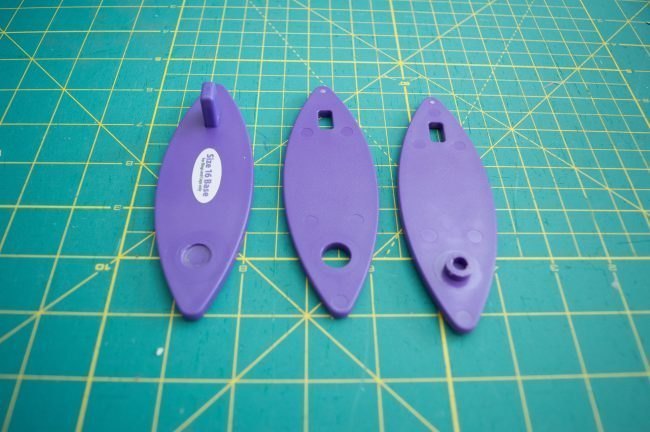
Take the bottom piece and insert the ring. I then lay my fabric on top and push the ring into the fabric to hold it steady.
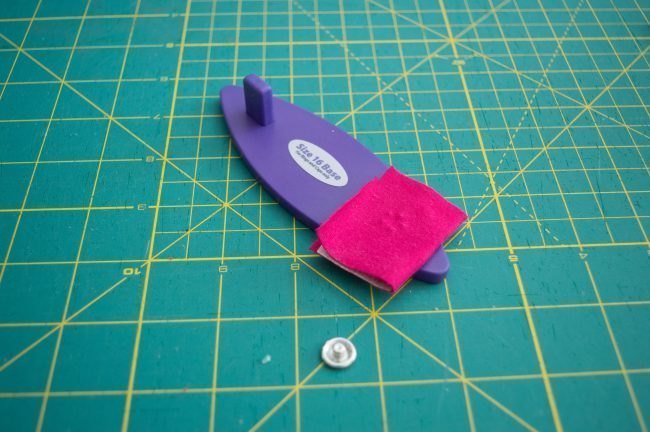
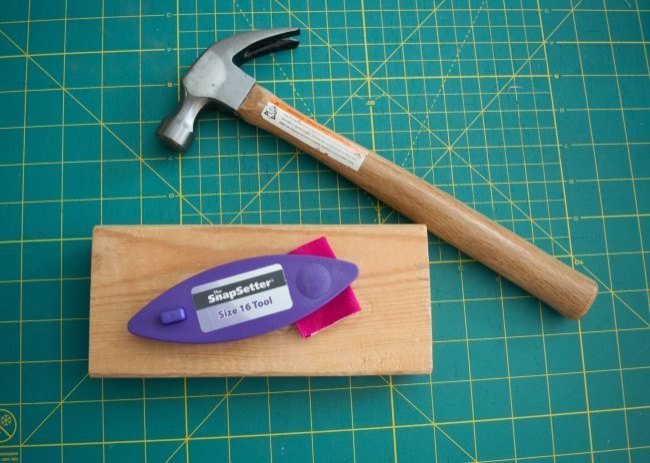
Add the second piece of the setter and the appropriate piece of the socket. Finally add the third layer of the setter. Place your setter on a block of wood or hard surface, and hammer the snap in. I usually sit on the floor with my block of wood and hammer. I’ve found that about 5 hits with the hammer are enough to secure the snap.
How to Sew a Snap: Pliers for Metal Snaps
Using the pliers for metal ones is much quieter. There are different dies depending on which size snaps you are using. Insert the ring and socket into the pliers.
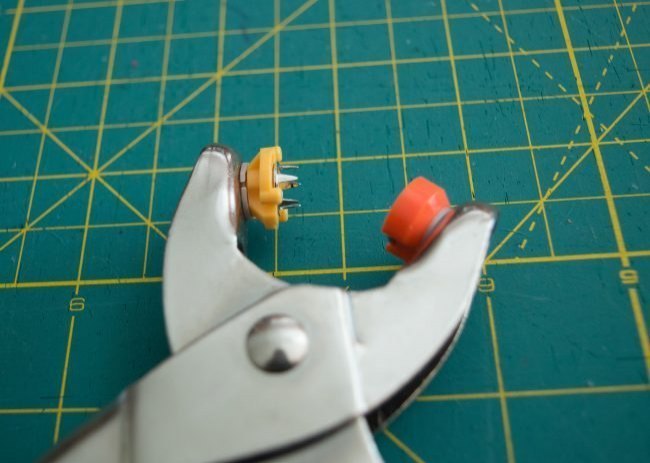
Insert over your fabric in the correct place, and squeeze. Similarly apply the rest of them.

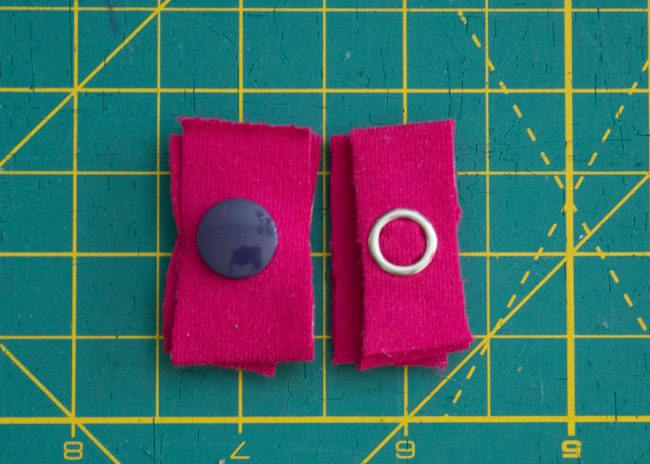
Here is a comparison of what both the plastic and metal ones look like after application.
Hopefully, this helps explain some of the mystery surrounding how to sew a snap and which ones to use. Make sure to share some of your pictures in the Peek A Boo Pattern Shop Group so we can see your creations!
Using Snap Tape
We’d like to thank Alisha for her amazing tutorial on sewing a snap. I thought I’d point out one more thing about using snaps – Snap Tape. Snap tape is basically a fabric strip with embedded snaps in it. Instead of worrying about getting your pliers and hammer out to put the snaps in you can sew the snap tape into place. You can find these that have both plastic and metal snaps.

Tips for Achieving a Professional-Looking Finish When Sewing Snaps
There are a few tips to keep in mind to achieve a professional-looking finish. First, ensure you have the right tools for the job, including a good-quality snap fastener kit. Take your time when measuring and marking the placement of the snaps, as accuracy is key for a neat and symmetrical look. When sewing the snaps onto your fabric, use a strong thread that matches your fabric color and take small, even stitches to ensure they are securely attached. Lastly, give your finished snaps a press with an iron to flatten any puckering or wrinkles in the fabric. With these tips in mind, you'll be able to create beautiful and functional snap closures that elevate the overall look of your sewing projects.
Troubleshooting Tips
Sewing snaps can be frustrating, but with a few troubleshooting tips, you can overcome any challenges. First, ensure you use the correct size and type of snaps for your fabric. Snaps that are too small or too large may not properly secure or may cause the fabric to bunch or tear. Additionally, check that your sewing machine needle is sharp and appropriate for the fabric you are working with. Dull needles can lead to uneven stitches or difficulty piercing through thick materials. If your snaps are not in place, try reinforcing them with a small piece of interfacing or stabilizer on the wrong side of the fabric. This extra support layer can help prevent snaps from pulling out or becoming loose. Finally, take your time and practice patience when sewing snaps. It may require some trial and error to achieve the perfect snap placement and tension, but with perseverance, you will master this essential sewing technique.
Where do you buy snaps?
Snaps can be found at most craft stores or fabric stores. They are usually located in the notions section, alongside other sewing supplies like buttons, zippers, and threads. You can also purchase snaps online from various retailers specializing in sewing and crafting supplies.
Now that you are an expert on knowing how to sew a snap, make sure to check out some of our sewing patterns and tutorials. Also, follow us on Instagram and join our Facebook Group for special deals and to share what you're making.
