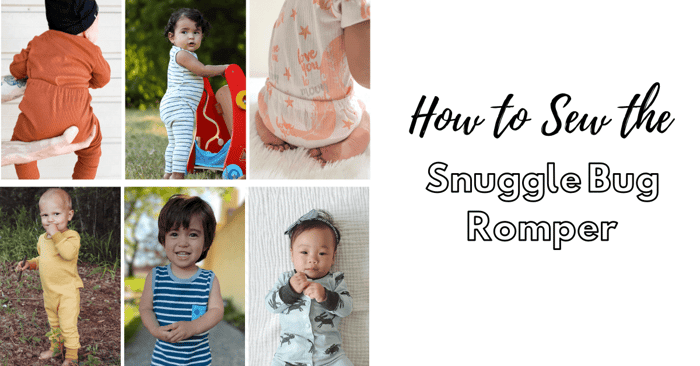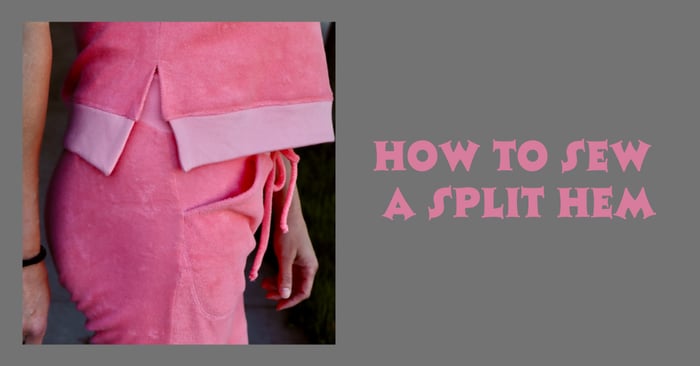
How to Sew a Split Hem | Using the Sequoia Pullover
Let’s learn how to sew a split hem. I absolutely love the look of a split hem on a top. I also love that the Sequoia Top Pattern from Peek-a-Boo Pattern shop has a band along the bottom hem for a hem split. It won't take you a long time to master this technique with our quick tutorial.

What is a Split Hem?
A split hem is a design feature commonly found in clothing, particularly in tops and dresses. It refers to a hemline that is divided into two or more separate sections, creating a subtle opening or slit at the bottom edge of the garment. The purpose of a split hem is to add visual interest and movement to the overall silhouette of the clothing item. It allows for ease of movement and can also help to create a more flattering fit, especially for garments that are more form-fitting. Split hems can vary in length and placement, from small slits at the sides of a shirt to longer, more dramatic openings at the front or back of a dress. Overall, split hems are a stylish detail that adds an element of modernity and sophistication to any outfit.
The split hem is a stylish addition that can elevate any pattern. It's a simple construction process that can be easily accomplished. The split hem adds an attractive visual detail to any garment, making it a popular choice among designers and fashion enthusiasts alike. One of the great things about the split hem is that it can be customized to suit different styles and preferences. Whether you prefer a subtle or bold split, the possibilities are endless.
What tools and materials do I need when sewing a split hem?
To sew a split hem, you will need a sewing machine, fabric scissors, pins or clips, a ruler or measuring tape, a marking tool, and matching thread. Additionally, you will need the fabric of your choice to sew the split hem onto your garment.

How to Sew a Split Hem
I wanted this top to be loungewear and I also wanted it to have a more cropped look to it. So first I’ll show you how I cropped the Sequoia Pullover.
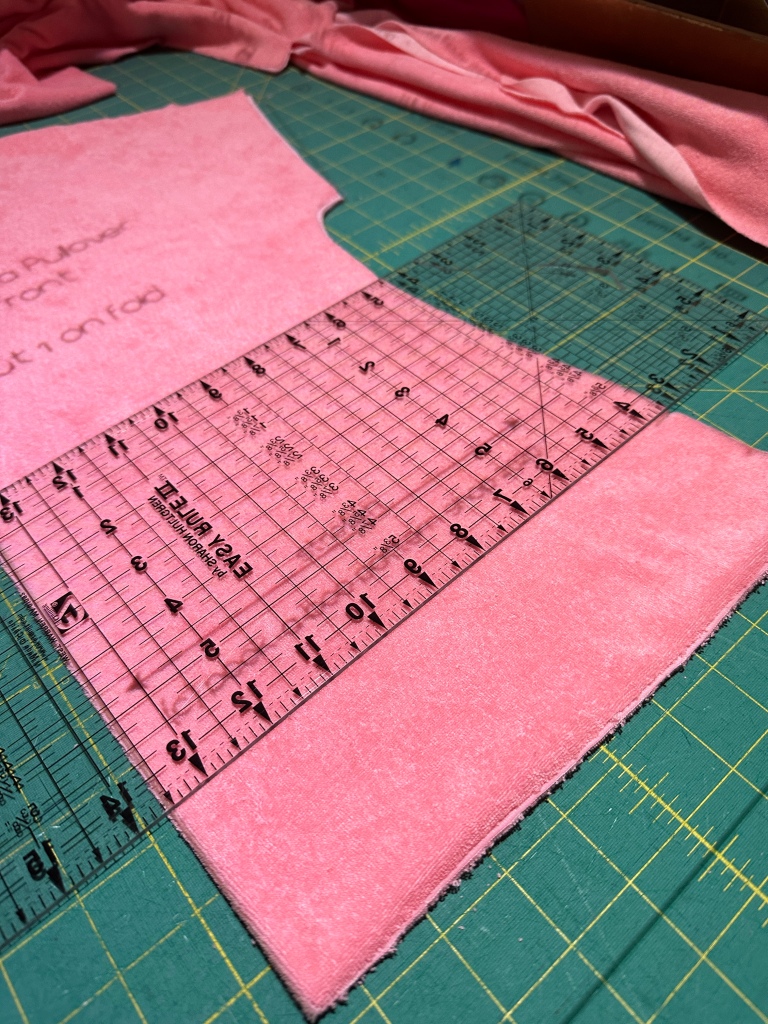
I tried on a Sequoia I had made previously and decided where I wanted the hem to land. On the side seam of the pattern there are two markings or notches that are used to construct your split hem. I decided that the TOP notch was a perfect place to trim my top to have it hit just wear I wanted after the band was added.
Before I cut, I took my ruler and made sure it was perpendicular to the center front and lined up right at that top notch. Use your scissors or rotary cutter and cut along the bottom edge of the ruler.
 Next, you need to take into consideration how the side seam slants out just a bit. When I cut the bottom of the pattern off we lost 3/8″ from the bottom width. We need to cut 3/8″ off of the width of the bottom band so it will fit properly when added.
 Take the Bottom band piece and measure over 3/8″ from the edge and trim off.
Because we shortened the hem on this shirt (and cut off our notches) we need to add notch mark back to the side of the pattern pieces so we can easily construct the split hem.
Measure the pattern. From the bottom hem to the bottom notch. Head over to your actual pattern piece and measure up the same amount. This will be your new BOTTOM notch.
Then on the pattern again, measure the distance between the bottom notch and the top notch. Go back to your fabric and mark the distance on the fabric. This will be your new top notch.
Now that our pattern pieces have been altered, we are ready to start constructing.
Note: For this top I choose to use the same fabric with the “wrong” side out to add some contrast texture. From here on out the wrong side, without loops, will be our new “right” side for all of the Bands and Cuffs. The main pieces of the shirt are opposite.
Start with your two bottom bands and fold with RIGHT sides together. The long sides should meet up. Sew the short ends of the band together with a 1/2″ seam allowance.

Turn right side out and press flat.

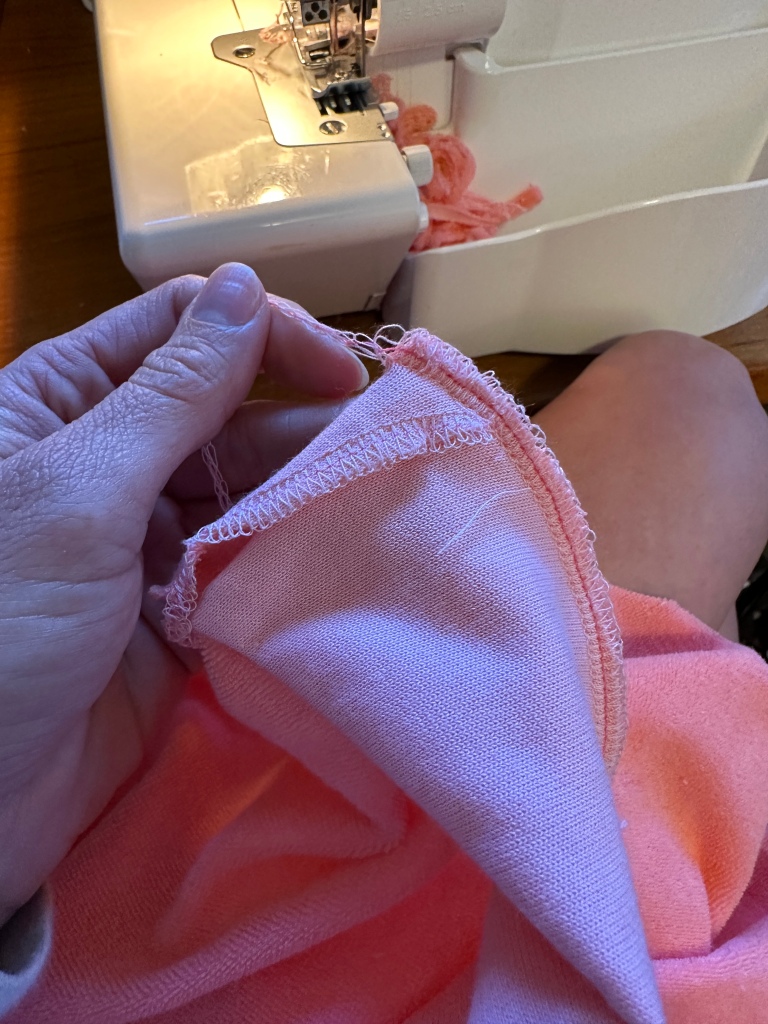
An optional step is finishing the side seams of the front shirt piece between the upper marking and the bottom edge of the shirt using a serger or zig-zag stitch. Do not trim away any fabric. Repeat with the back piece; do not
sew the 2 pieces together yet.
 Next you will center the band on the front shirt piece with the raw edges aligned at the bottom edge of the shirt. Make sure the finish side seam of the band is 5/8″ from the side seams of the shirt.

Fold the side seams of the shirt over towards the right side of the fabric, so the shirt is wrapped tightly around the edge of the band. If needed you can baste the folded edge of the shirt to the band along the bottom edge of the band. Just at the corners that have been folded. Not the entire length of the band.

Slightly stretch the rest of the band to fit the bottom edge of the shirt. Sew across the bottom edge of the pullover through all layers.
 Flip the band down and give it a good press to get it flat. Repeat with the back of the shirt.

The inside will look like this.
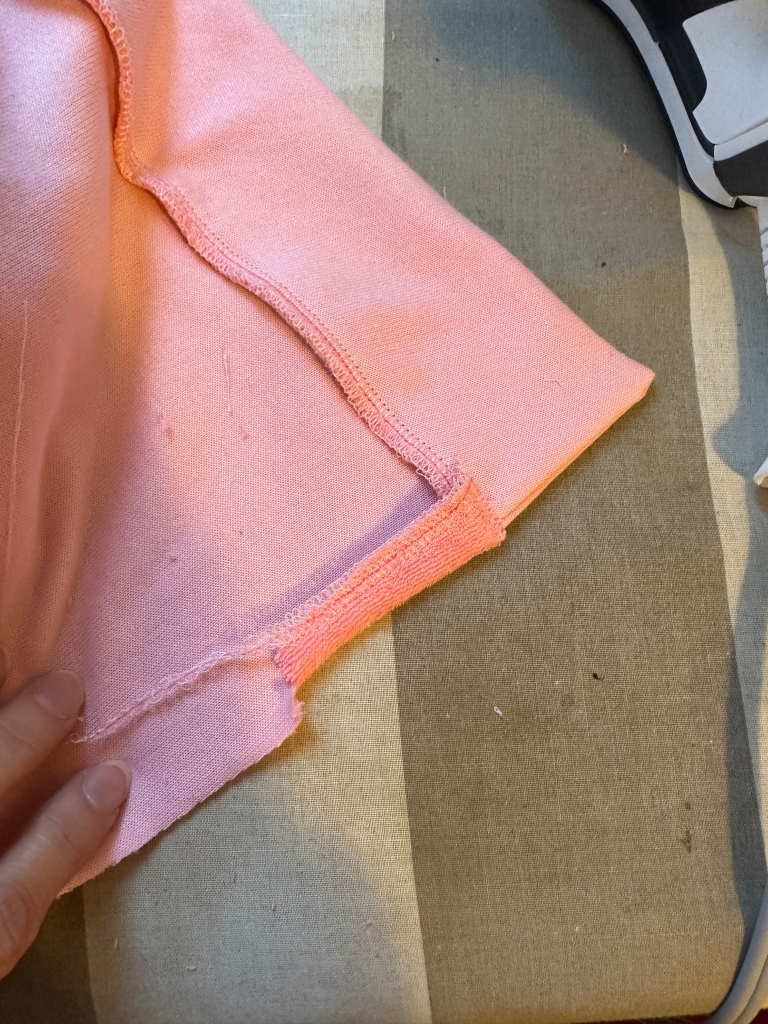

Align the front and back pieces at the side seams, matching up the marked points. With the right sides together sew the front and back of the shirt together between the 2 marked points. Do not use a serger for this step and press the seam allowance open.
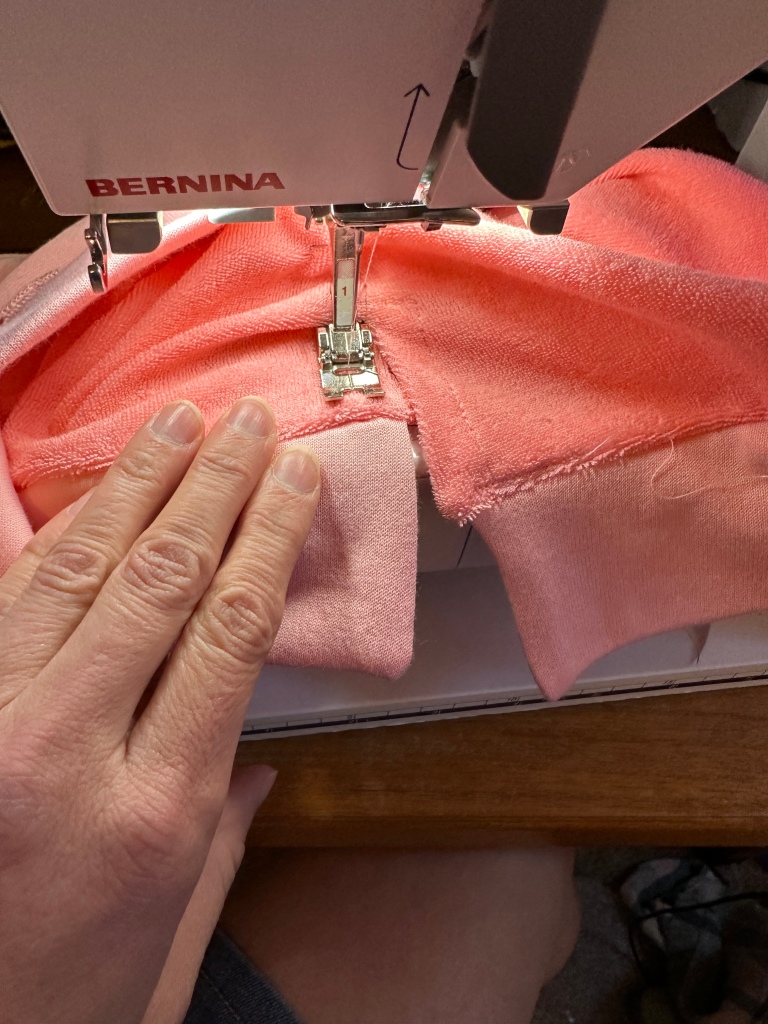
Clip the SEAM ALLOWANCE ONLY! At the TOP marking.


At this point you can go ahead and top stitch around your hem seam allowance. Stitch around the split hem opening.
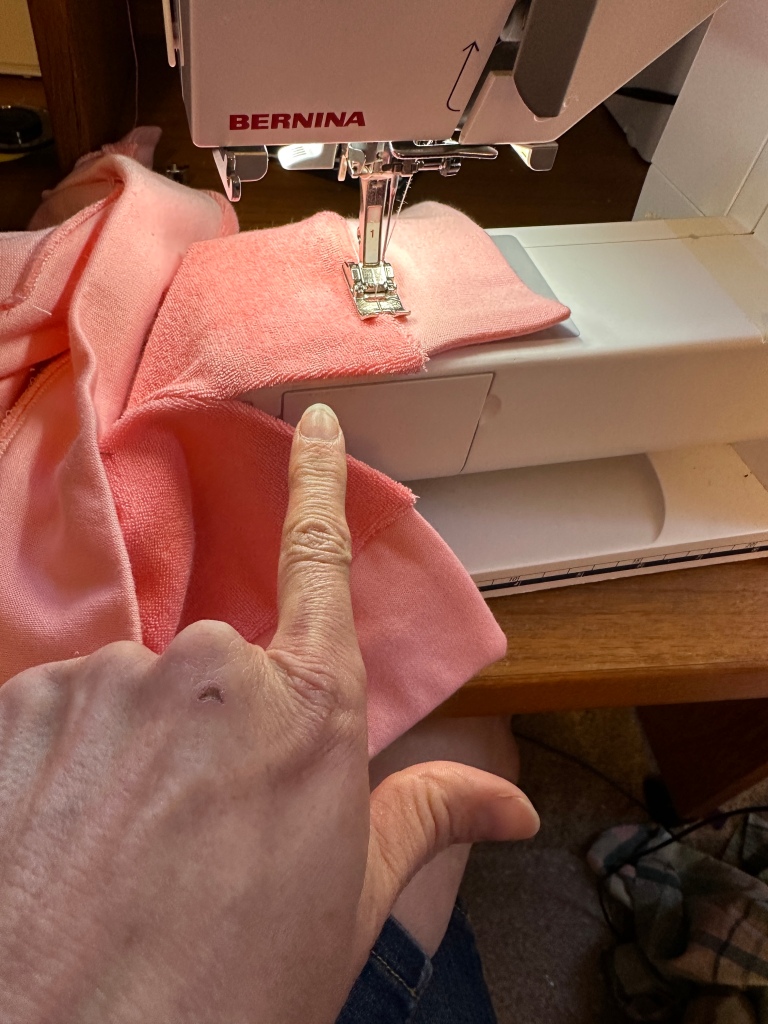
Stitch across the front hem band pressing the seam allowance up toward the shirt. When you get to the side of the split hem pivot and sew up (your now going up the side seam) tacking that split hem to your side seam.

When you get to the top of the split hem pivot and go back down the back side seam. Then pivot again and go across the back hem carefully tacking that hem band seam allowance to the bottom of the shirt not the band.


Sew up the side seams. With right sides together sew the front and back of the shirt together from the sleeve hem to where your stitching left off at the top clip. Your split hem should lay nice and flat.
With right sides together sew the front and back of the shirt together along the shoulder seam.

Cuffs and neckband is up next. With right sides together sew the short ends of the short sleeve cuff together, forming a loop.

Bring the long edges together so the raw edges are aligned, wrong sides are together and the seam is now enclosed.

Quarter the center front and center back, and each side of the neckline and neckband. (The side quarter marks will not be at the shoulder seams. They will be more towards the front of the shirt.)

With right sides together slide the neckband over the neckline and match up your quarter marked points.

Stretch the neckband to fit the neck opening and sew together using a 1/4″ seam allowance. (Note: This is different than the rest of the pattern that is sewn with 3/8″ seam allowance.)

Flip the neckband up and press flat. Topstitch the seam allowance to the neckline using a zig-zag stitch, stretch stitch or double needle, if desired.
Slide the cuff over the sleeve with right sides together. Align the cuff seam with the shirt side seam. And the mid point of the band with the shoulder seam of the shirt. Stretch the cuff slightly to fit. It won’t need to stretch as much as the neckband. Sew together.


Flip the cuff down and press flat. Topstitch the seam allowance to the shirt, if desired.
And your done!

Thank you for joining us today as for this sewing project as we learned how to sew a split hem with the sequoia pullover. Before you leave, make sure to join our Facebook Group and follow us on Instagram. Happy Sewing!