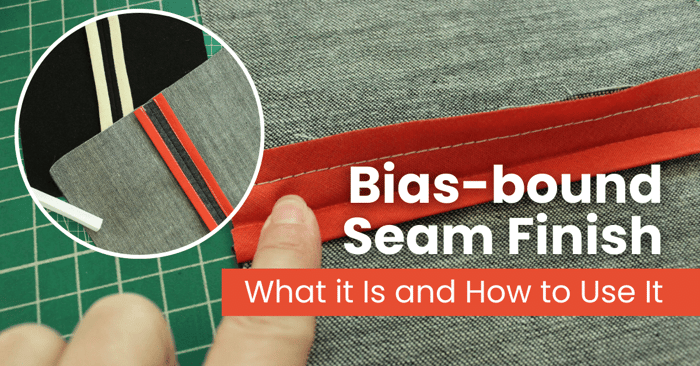
Bias-bound Seam Finish | What it Is and How to Use It
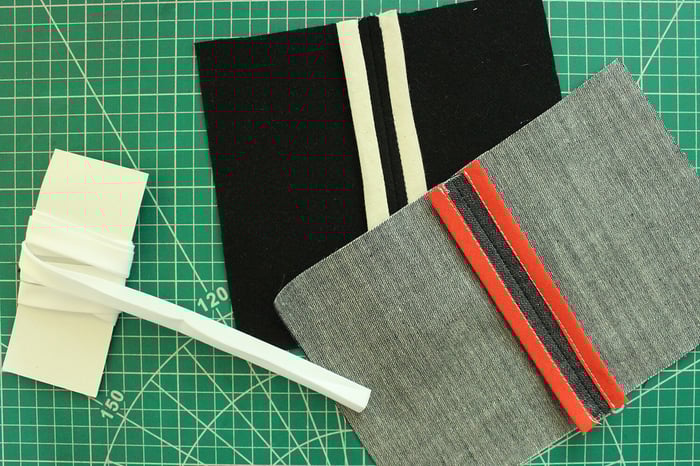
Bias-bound seams are a favorite technique among sewists to achieve a professional finish, especially on unlined garments. Even though this type of seam finish is more time-consuming than just serging the raw edges, the result is quite neat and elegant.
In this comprehensive article, we will explore everything you need to know about the bias-bound seam finish, where to use it, how to make double-folded bias binding, step-by-step tutorial on how to sew this type of finish, and many tips on how to perfect it.
What is a bias-bound seam and how does it work?
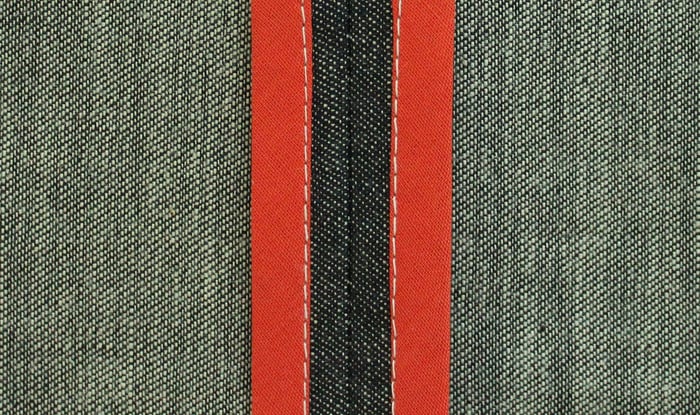
The bias-bound seam finish is known as a method to finish seam allowances, where each fabric raw edge is enclosed in a double-folded bias binding strip. This type of finish results in a clean finish on both sides and is appropriate for medium- to heavy-weight fabrics. Besides being known as an aesthetic detail, bias-bound also creates strong and durable seam finishes.
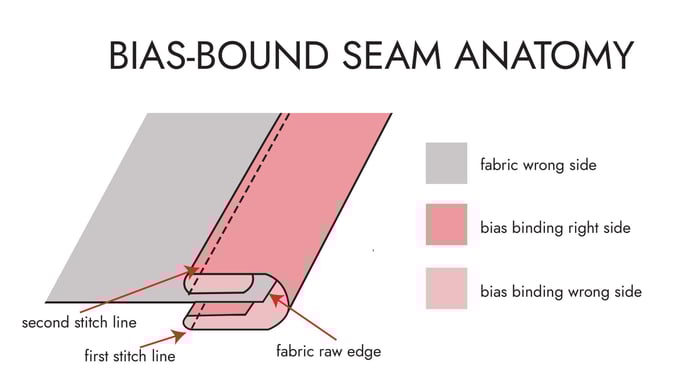
Bias-bound seam anatomy
Where to use bias-bound seams?
This seam finish encloses seam allowance raw edges with quite an elegance, which is why it is widely used on unlined coats, jackets, vests, skirts, and dresses. In addition, they’re preferred for thicker fabrics, such as wool, to minimize the bulk and achieve a clean finish.
Specifically, this type of finish can be used on facings, and seams on unlined garments made from delicate fabrics, armholes, unlined bags, and accessories.
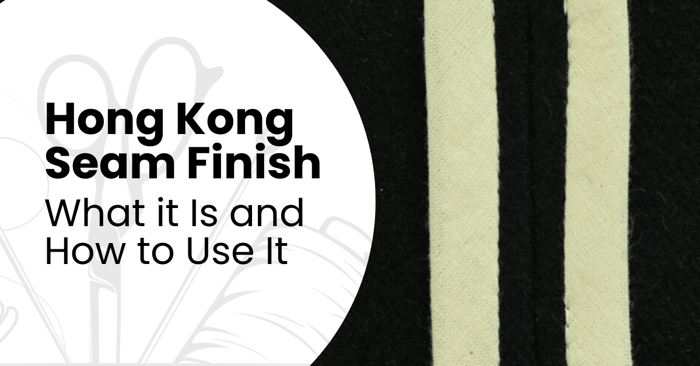
What is a Hong Kong seam and where to use it?
The Hong Kong seam finish is known as a method to finish seam allowances, where each raw edge is enclosed in a bias strip of lightweight fabric. In other words, it involves binding a seam, but compared to traditional bound seams, the binding on the wrong side of the fabric's raw edge is not turned but left as is.
Hong Kong seam finishing usually takes longer compared to a zigzag, serger, or French seam, but it adds so much personality to the inside of the garments. This type of seam finish can be used for aesthetic reasons, but at the same time it’s strong and durable, and the results are well worth it.

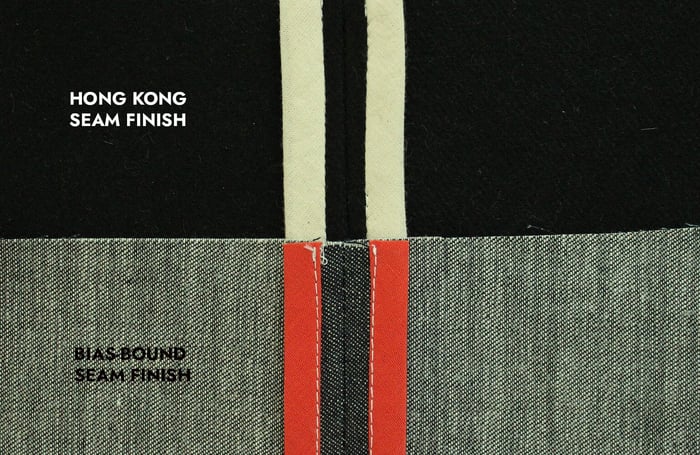
Is there a difference between the Hong Kong seam and bias bound seam?
The role of both of these techniques is to enclose raw edges and create a professional-looking finish, but they do differ in construction and appearance. The Hong Kong finish is more convenient than bounded seams because there is one step less. It is not required to press and fold the bias binding before the application.
The Hong Kong seam finish is used on seams that are to be pressed open, and on the other side, the bias-bound seams can be pressed open but also to the other side.
Let’s take, for example, a dress where both of these seam finishes can be used. The Hong Kong seam on the side seams and center back, and on the armhole area the seam is pressed to one side and finished with bias-bound seam.
PREPARATIONS
Seam allowance
At least 1-1.6 cm (3/8 - 5/8”) seam allowance is recommended for sewing the bias-bound seam finish. If you’re planning to add this seam finish and your pattern pieces have less seam allowance, be sure to add that extra amount that is needed. 1 cm (3/8”) in most cases is enough to create this type of finish, but the bias binding should have enough width to enclose the fabric's raw edges.
Sewing foot choice
The bias-bound seam can be sewn without the use of any special pressure foot. So, the basic presser foot does the job just right.
On the other side, if a ¼” quilter’s foot guide is one of the sewing machine accessories you may have, then this foot ensures a consistent and neat seam finish.
Bias Binding
To sew the bias-bound seam finish, you will need a 2.5-3 cm (1-1 1/4") wide double-folded bias binding. Take into consideration that you will need twice the amount of the binding if you’re binding each seam allowance separately. For example, if your seam is 30 cm long, then you will need 60 cm of bias binding (30 cm for each side). If you’re binding both seam allowances together, then you will only need one bias binding piece that is in the length of the seam.
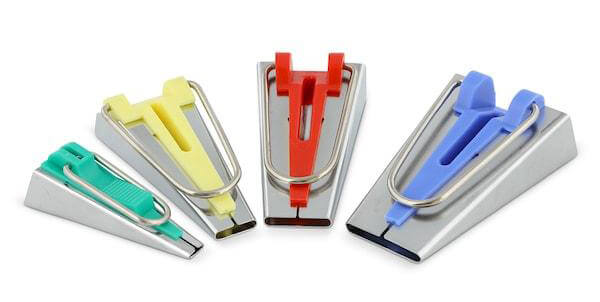
If you’re making your own bias binding, always make sure to cut the fabric strips on the bias (a 45° angle to the selvage) and handle them with care since the bias strips can stretch easily. After your bias strips are cut, use a bias tape maker tool to create the folds and press the bias strips. Take into consideration that these bias tape makers come in specific sizes such as 6mm/12mm/18mm/25mm (1/4″, 3/8″, 1/2″, 3/4″, 1″, 2″) width.
Besides the bias tape maker, there are several other methods that can be used to make double-folded bias tape using only the basics, such as iron and needles.
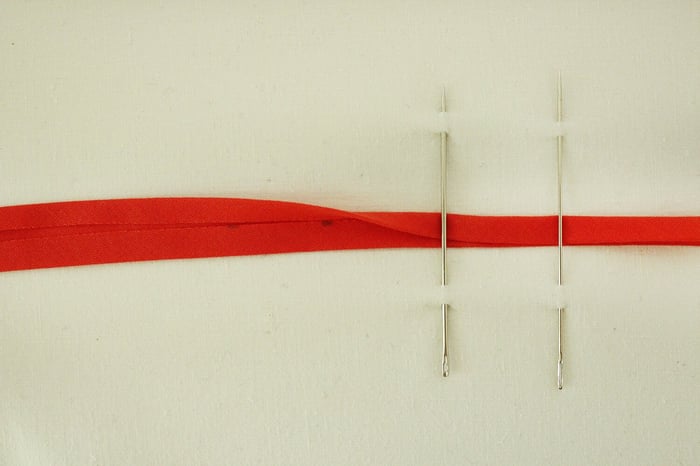
Personally, I do not own a bias tape maker, and I usually make tape using the method below. This method requires an iron and long, thicker-than-usual sewing pins or hand needles.
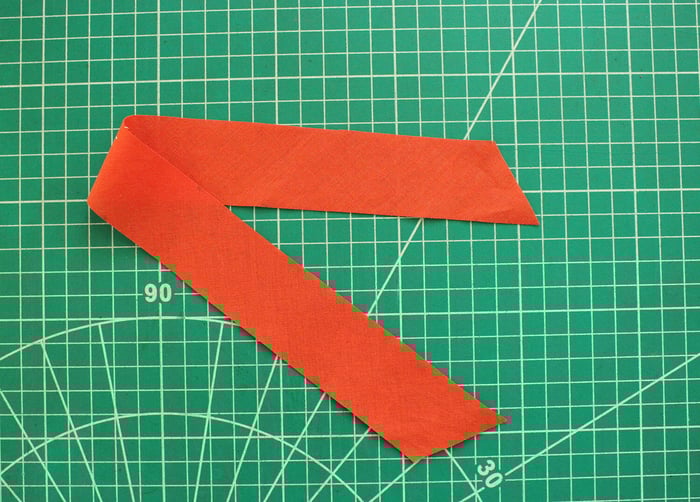
- Cut your fabric strips on the bias.
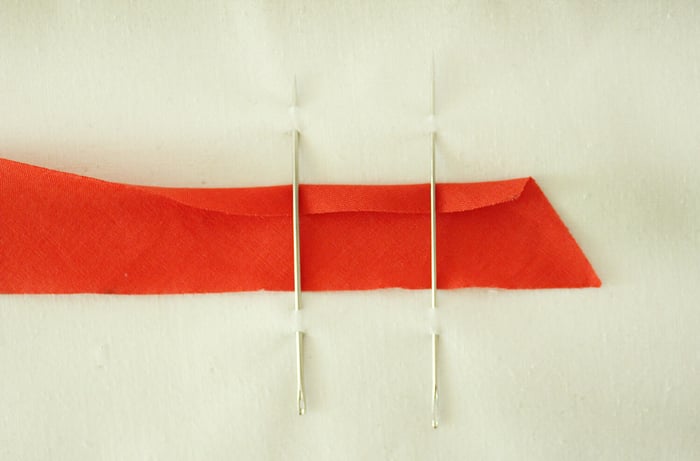
- Pin two needles through the fabric of your ironing board where the center gap is approximately the measurement width of the bias strip.
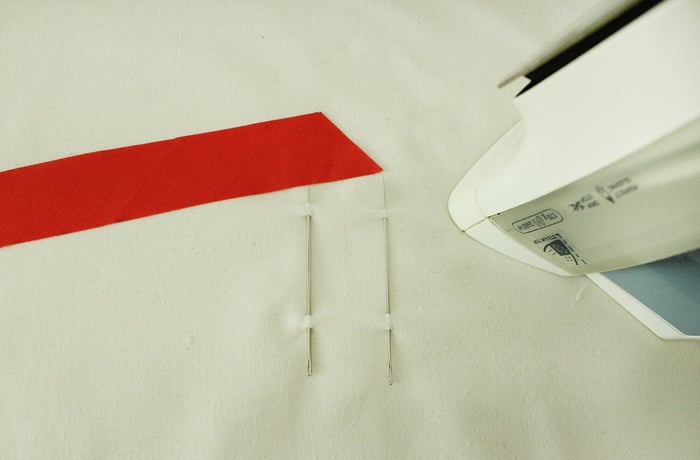
- Thread the bias strip under the needles with the wrong side facing up.
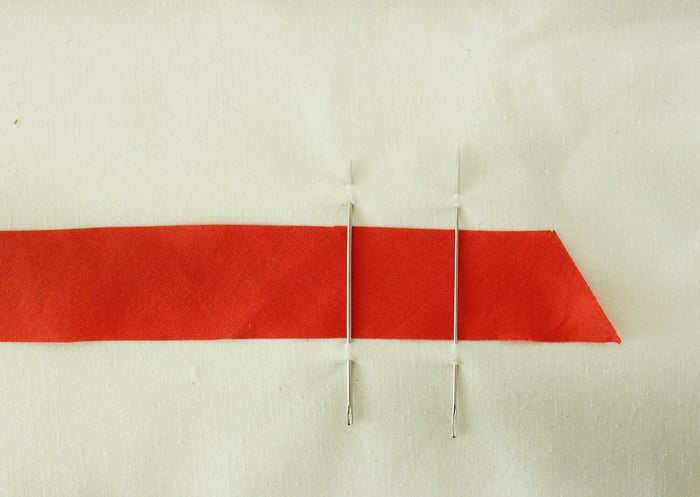
- Start folding the raw edges of the bias strip to meet in the center.
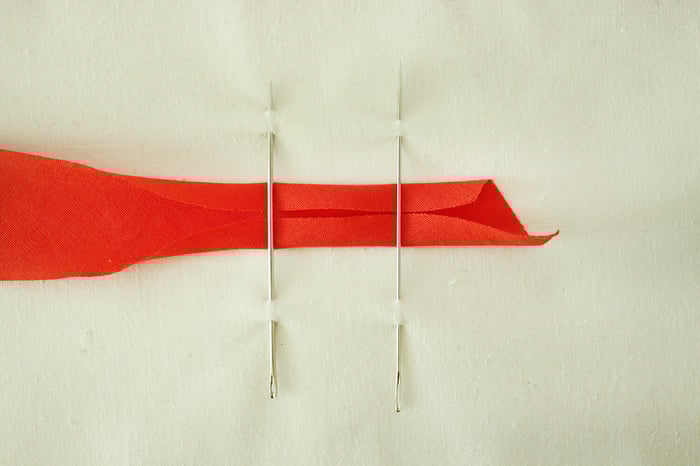
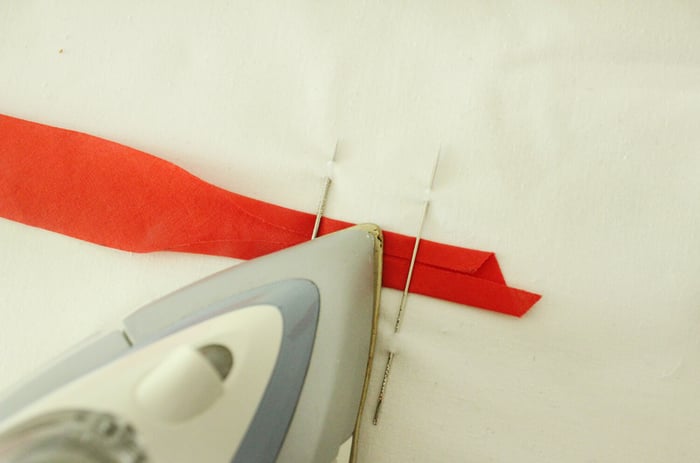
- With the raw edges meeting in the center of the fabric strip, take your hot iron and press. Pull the strip and press again section by section until you reach the end of the bias strip.
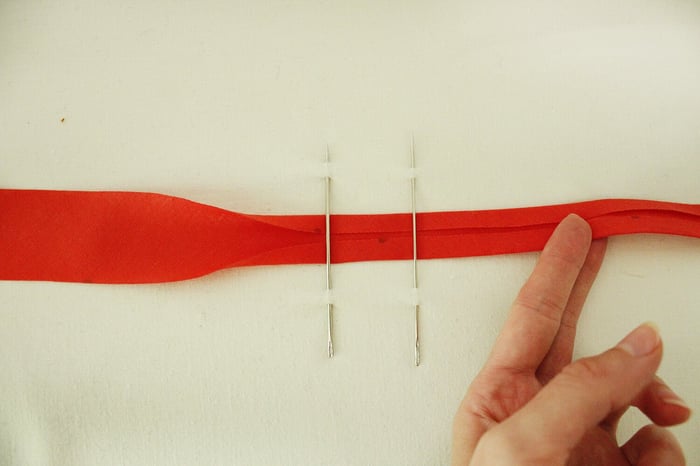
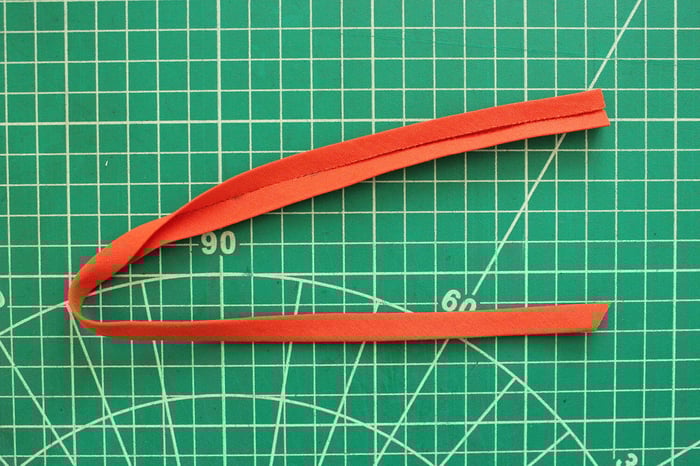
- Once you have your single-fold bias tape, fold it in half with the raw edges on the inside and press in place.
In case you want to skip the bias binding-making process, then we suggest you purchase ready-to-use bias tape that can be found in most craft and fabric stores.
BIAS-BOUND SEAM FINISH
The tutorial shows how to create a bias-bound seam finish with a 5/8″ (1.6 cm) seam allowance.
- Place both corresponding fabric layers with the wrong sides together and stitch 1.6 cm (5/8”) from the fabric's raw edge. Press.
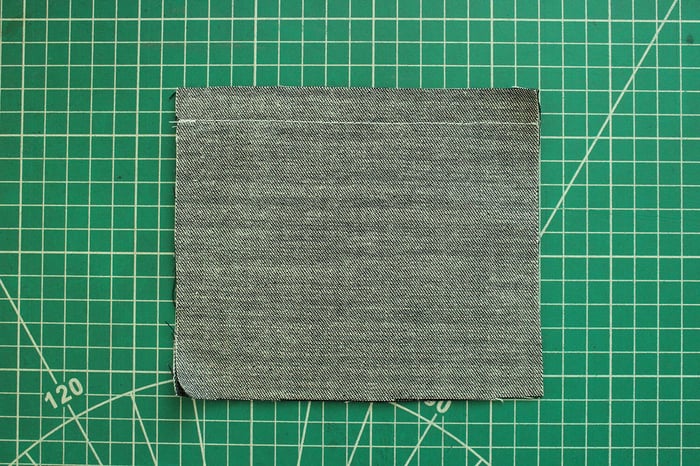
- Press the seam allowance open.

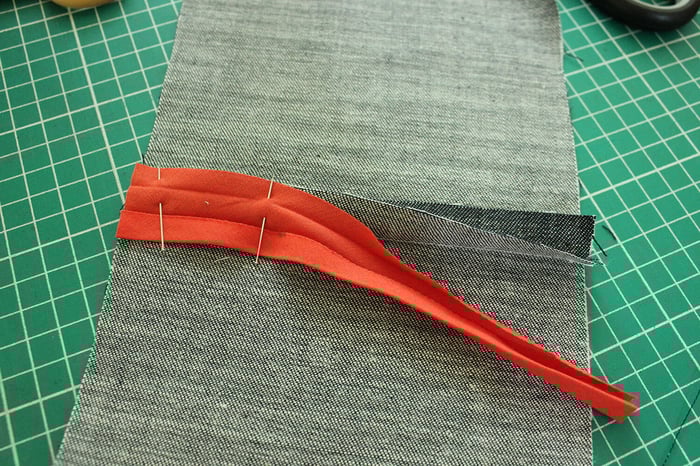
- Cut a 2.5- 3 cm (1- 1.2") wide fabric strip on a bias from your chosen fabric. Measure the needed length + seam allowance.
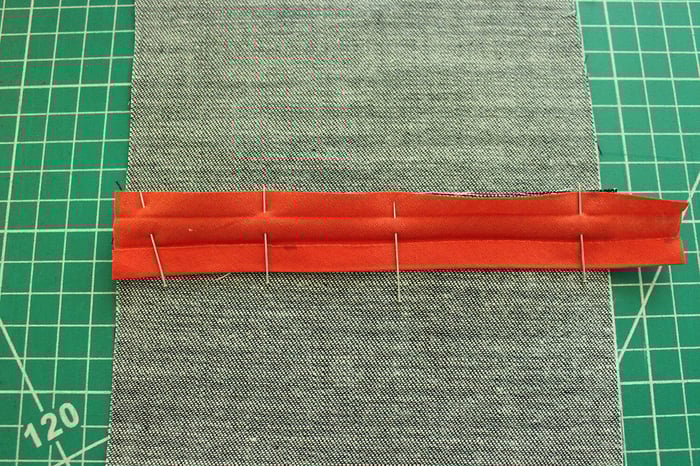
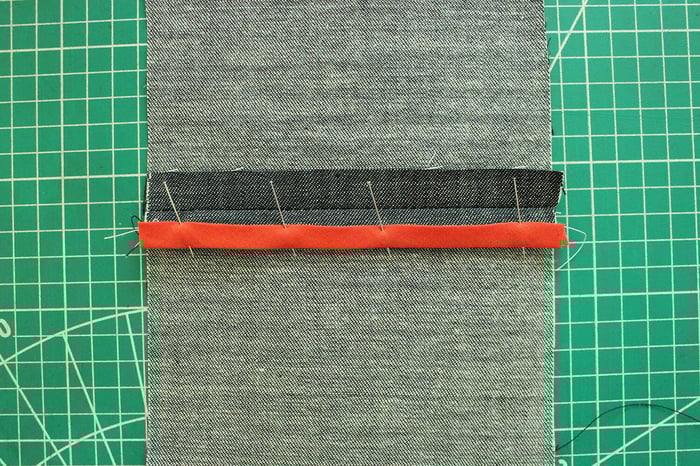
- Unfold the double-folded bias binding and place it along the wrong side of the raw edge. Line up the binding to the raw edges and secure with pins in place.
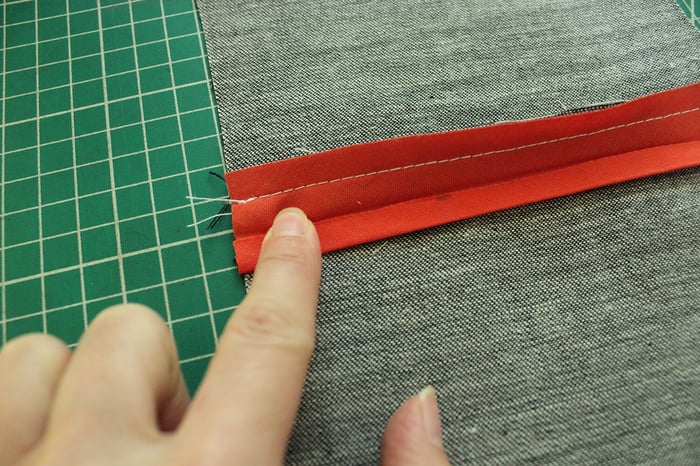
- Stitch the bias binding in place with a 6mm (¼in) seam allowance along the first crease (fold line) in the binding.
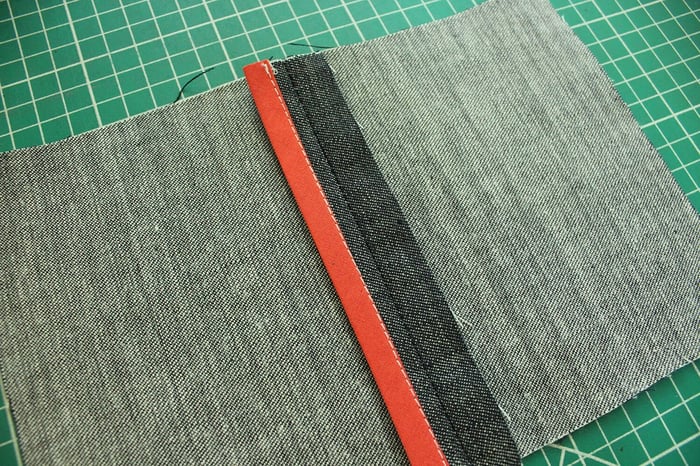
- Turn the bias binding to the right side and press seam allowance towards the bias binding.
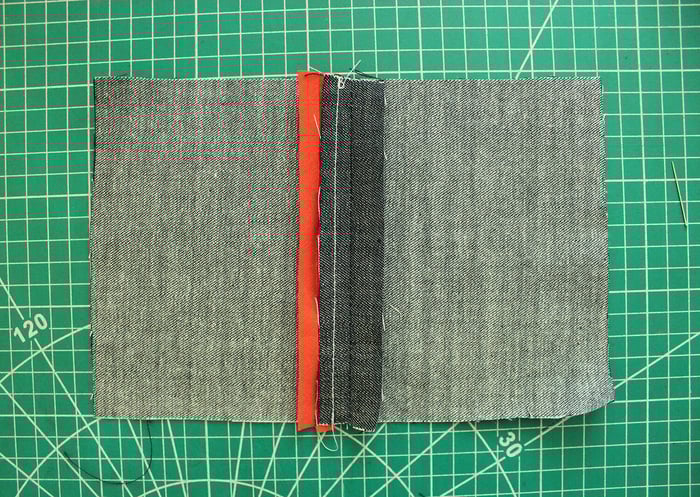
- Wrap the bias binding around the raw edges and press. Secure in place with pins or baste by hand.
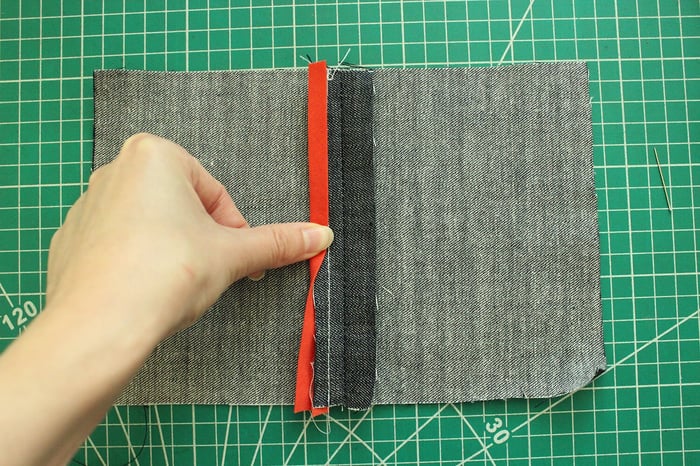
- Edgestitch close to the folded edge to enclose all binding and fabric layers in place. Press.
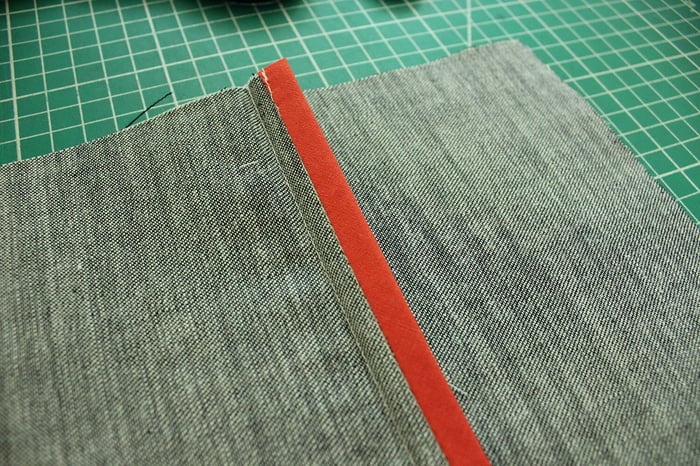
- Repeat for the other side of the seam.

TIPS
Using the tool of your choice (a ruler or a sewing gauge), always be sure to mark the seam allowance correctly.
- Depending on the fabric choice, keep in mind to choose the right thread and needle size. If all three are in line, then the strength will be impeccable.
- As with any other sewing technique, pressing is a must, and in order to get a neat finish, press your seams after every step.
- If sewing bias-bound seams for the first time, practice on different scraps; this way you will get to see the difference it makes depending on the fabric weight.
- The seam allowance should fill the binding but consider trimming if needed. There are cases with thick fabrics where bulk may be created, so trimming is recommended.
- If you’re using store-bought double-folded bias tape, the narrow side of the tape should go on the right side of the seam.
Final thoughts on bias-bound seams
Bias-bound seams are not the fastest way to finish fabric raw edges, but they do create this clean finish inside of the garment free of frayed and stretched seam allowances.
Even as a sewing beginner, you can nail this technique by practicing on scraps and choosing the right bias binding. So, take the time to go through our guide and practice the bias-bound seam so your future projects have a professional finish inside and out.
Thank you for joining us today to learn about the bias bound seam finish! Before you leave, make sure to sign-up for our newsletter below. You can also join our Facebook Group or follow us on Instagram. Happy Sewing!