How to Sew a Bucket Hat: A Step-by-Step Guide
Let's learning how to sew a bucket hat. Summer is a much-awaited season, bringing along beach days and outdoor adventures. However, as a parent of a toddler, it can be challenging to ensure your children are adequately protected from the sun's harmful rays, especially when they are constantly moving. In such situations, a hat becomes an essential accessory to shield your little ones from the sun.
Sewing a Reversible Bucket Hat
Bucket hats are all the rage these days, and learning how to sew one yourself can be a great way to create your own unique style statement. In this step-by-step guide, we will take you through the entire process of sewing a bucket hat, from understanding the design to selecting your materials, cutting out fabric pieces, assembling the components, and finishing touches. Whether you're looking to make a simple solid-colored hat or want to get creative with patterns and designs, this guide has got you covered. We'll also cover some common troubleshooting tips if things don't go as planned. With this guide, you'll be able to sew your own bucket hat in no time!
How long does it typically take to sew a bucket hat, and is it suitable for beginners?
Sewing a bucket hat typically takes around 2-3 hours, depending on your sewing skills and experience. It is a suitable project for beginners as it involves basic sewing techniques like straight stitching and attaching a brim. With practice and patience, anyone can successfully sew a bucket hat.
Bucket Hat Features
Bucket hats are a versatile accessory that can be easily sewn at home. The design features a round crown and a wide brim, providing sun protection. By sewing your own, you have the freedom to customize the fabric, color, and size according to your preferences. Additionally, you can make it reversible for added versatility. DIY bucket hats not only showcase your sewing skills but also allow you to create a unique accessory tailored to your style. Whether you're a beginner or an experienced sewer, this tutorial will guide you through the process step-by-step, ensuring the best results. So grab your fabric, paper pattern, and sewing tools, and let's get started on creating your very own bucket hat!
The design showcases a round crown and a wide brim, making it a stylish accessory for both sun protection and fashion. You can add structure to the hat by sewing the brim with interfacing. It's also versatile, as you can choose different fabrics for various occasions and seasons. Whether you're a beginner or an experienced sewist, making your own bucket hat is a fun and rewarding project that allows you to showcase your skills. Moreover, bucket hats are unisex and can be worn by people of all ages, making them a trendy and practical accessory for the summer months. Sort through Pinterest to see a variety of fun bucket hat creations.
What Fabric Should I Use?
When it comes to choosing the best fabric for your bucket hat, there are a few factors to consider. For summer hats, lightweight cotton fabrics are ideal as they offer breathability and comfort during the hot months. If you're looking for a more durable and structured hat, denim or twill fabrics are great options. Quilting cottons provide a wide range of prints and patterns to choose from, allowing you to customize your hat to suit your style. Additionally, consider the weight of the fabric for the desired drape and comfort. Lastly, opt for fabrics that are easy to wash and maintain for long-lasting wear. A reversible bucket hat won't take much fabric - about a fat quarters to a third of a yard of fabric should do for the outer fabric and about the same for the lining pieces.
Downloading and Printing our Reversible Bucket Hat Sewing Pattern
To get started on your bucket hat project, the first step is to download and print the bucket hat pattern. Make sure that the pattern is in PDF format for easy printing. Once you have the pattern, print it on letter or A4-sized paper at 100% scaling. Check that the pattern includes all the necessary pieces for the hat, and then trim and tape the pattern pieces together to create the full pattern. With these steps complete, you're ready to move on to the next stage of sewing your own bucket hat!
In this article, we will guide you through the process of sewing a reversible bucket hat using the Reversible Bucket Hat Pattern from Peek-a-Boo Pattern Shop:
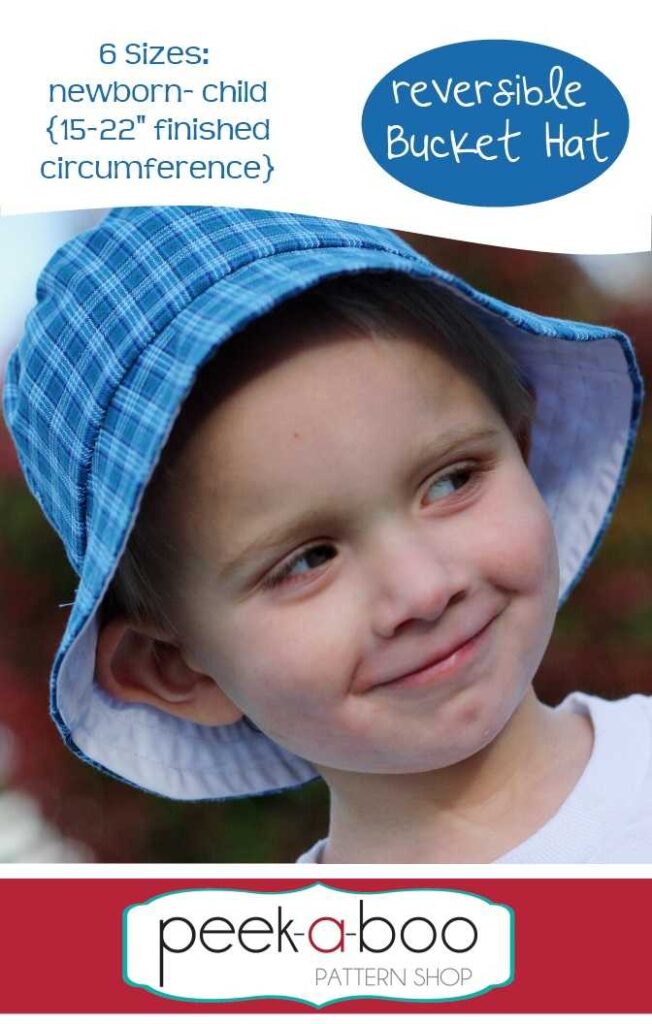
The reversible bucket hat can be customized to different sizes, ensuring a perfect fit based on your child's head circumference. With its versatility and stylish design, this is an excellent option for the summer season.
To choose the correct size, measure the circumference of your head at its widest part. Compare this measurement to the size chart provided with the pattern. If you're in between sizes, it's usually better to go with the larger size. Consider the desired fit and make adjustments to the pattern accordingly. Test the fit by creating a mock-up with scrap fabric before cutting into your main fabric.
Step-by-Step Guide to a DIY Bucket Hat
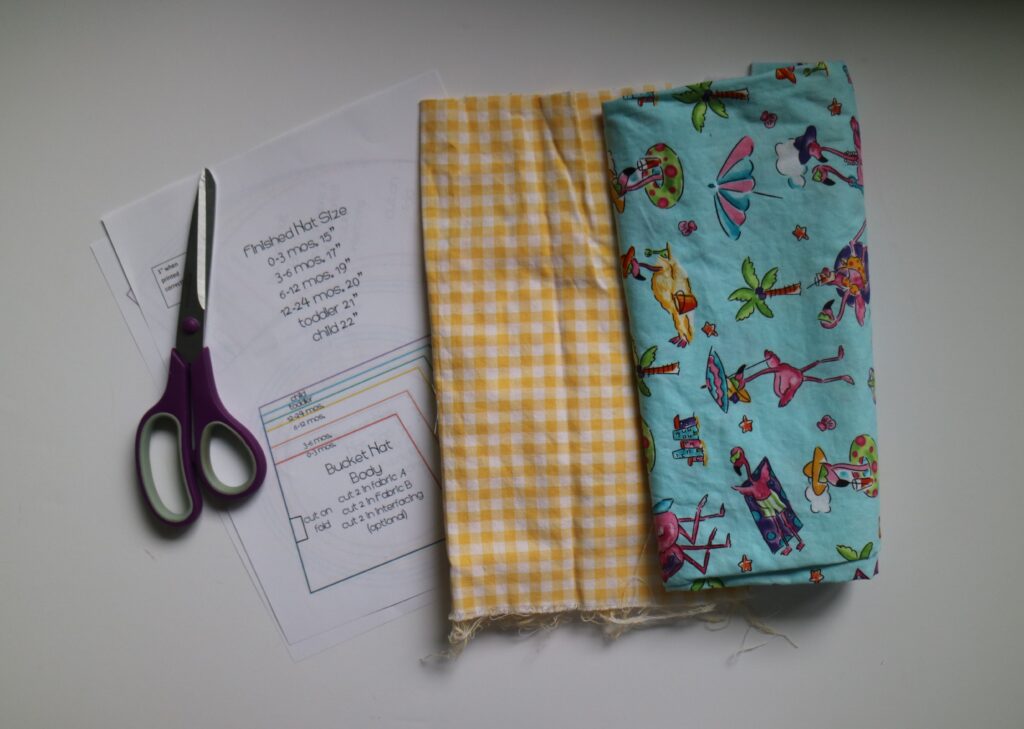
How to Sew a Bucket Hat Step 1: Materials and Pattern Preparation
To begin crafting your reversible bucket hat, you will need the Reversible Bucket Hat Pattern and various materials. As noted, the pattern is available in multiple sizes, so it's essential to double-check the head circumference to ensure a good hat size. Depending on your preference, choose woven fabrics such as quilting cotton, board short fabrics, or other suitable materials. I am going to use this fun flamingo beach print woven cotton fabric from the Quilting Cotton section of the local store.
For added structure, you may also need interfacing. Start by cutting out all the pattern pieces, making sure to cut a full set in each fabric to achieve the reversible feature. Additionally, cut out interfacing pieces for the components you wish to interface. While it's optional to interface the top and body of the hat, you should interface the brim for enhanced stability. By having all the pieces neatly cut and ready, you're prepared to proceed with the sewing process.
How to Sew a Bucket Hat Step 2: Sewing the Hat
Lets start out by cutting out all the pattern pieces. Remember to cut a full set of the pieces in each of the fabrics so they can be reversible. Also cut out interfacing for all the pieces that you want to interface. It is optional to interface the top and body of the hat, and I will only be interfacing the brim of the hat.
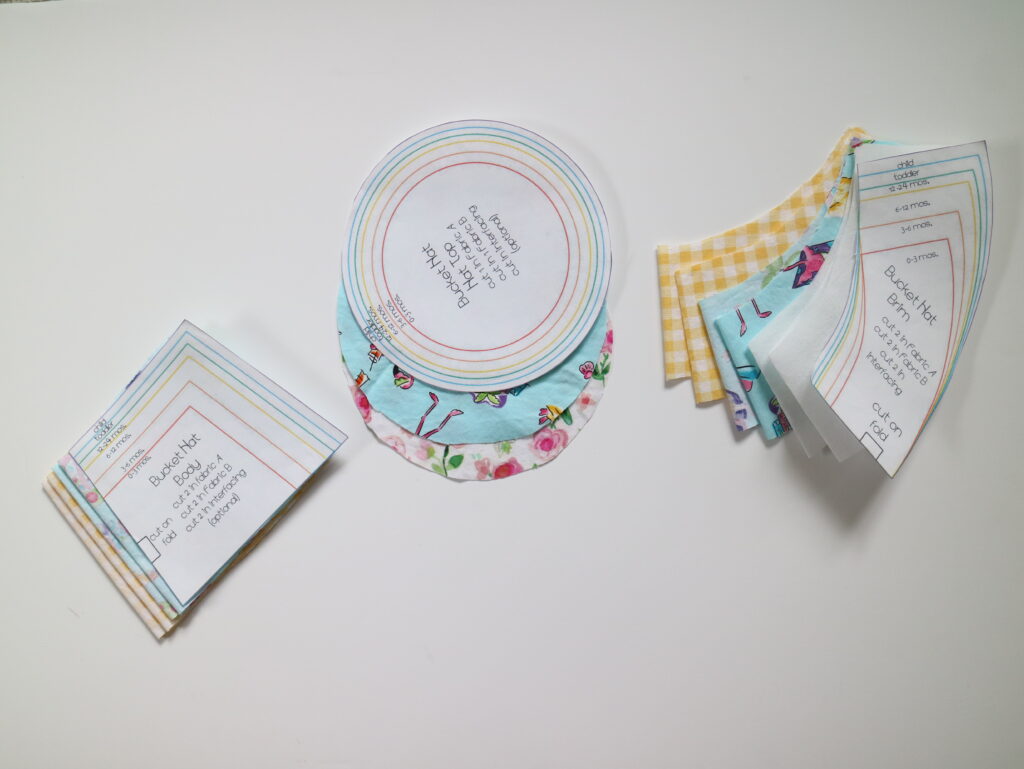
Cut out one hat top in each fabric. Cut 2 Hat brim on fold each from both fabrics and interfacing, so you will have a total of 4 pieces in fabric and 2 in interfacing. Cut 2 Hat body on fold each from both fabrics and interfacing if you choose. I have all the pieces cut here and lets get started.
Lets start by adding the interfacing to the wrong side of the hat pieces that we are interfacing. Make sure that you are leaving the 1/4 inch seam allowance free of the interfacing on the fabric. Once the interfacing pieces are cut out I like to mark the seam allowance at a few points and use those markings to cut the piece smaller. Follow the instructions on the interfacing to transfer. I am interfacing only the brim of the hat.
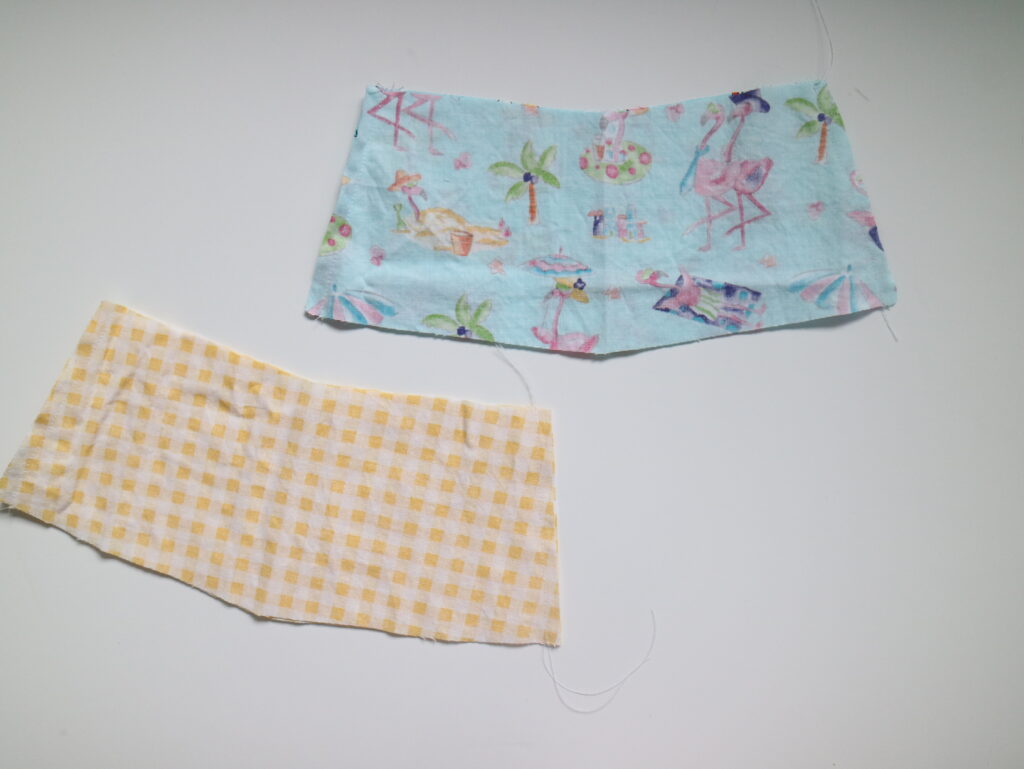
Locate your hat body pieces in both fabrics. With right sides together place the body pieces together and sew on the short side. Here I have sewn the flamingo fabric pieces together and done the same for the yellow gingham fabric.
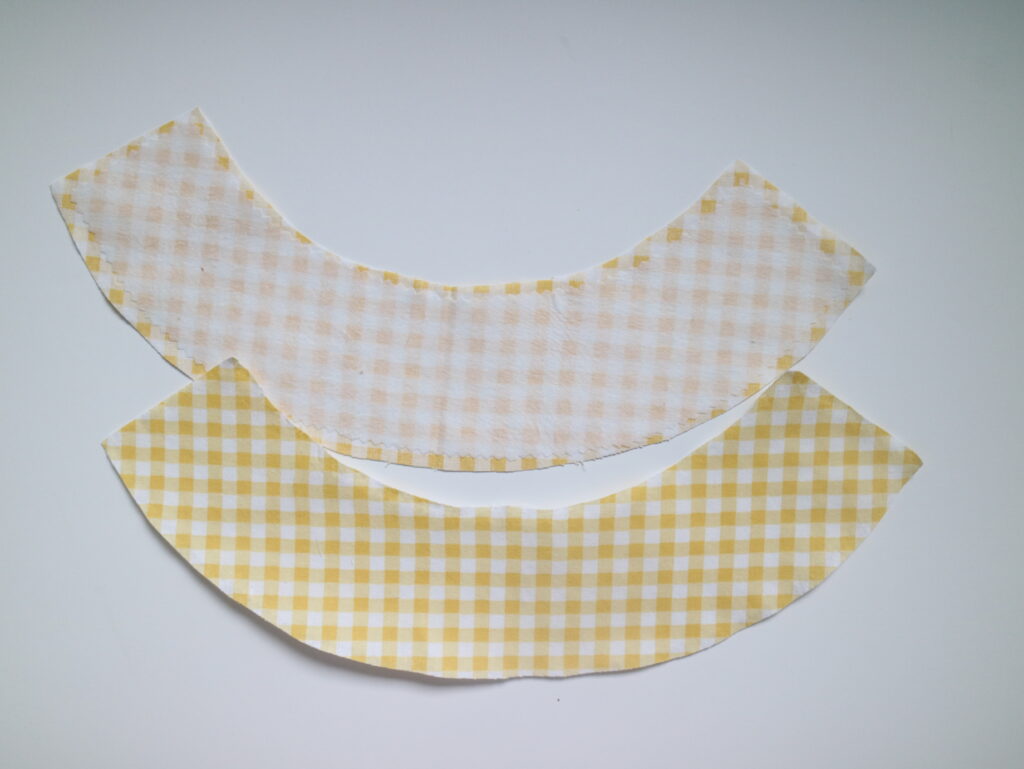
Now locate the hat brim pieces of both sets of fabrics. With right sides together sew the short ends of the brim piece together. Repeat this on both sets of fabrics. Now we have 2 sets of hat pieces ready to be sewn together.
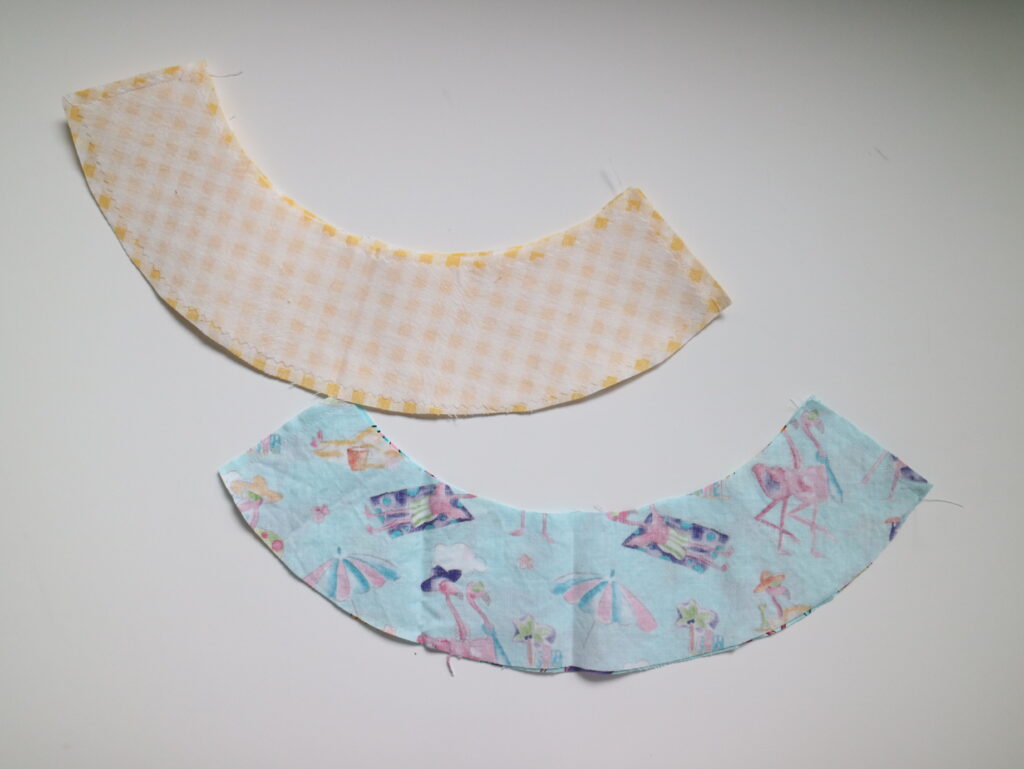
The hat body piece has a shorter top side and more wider bottom side. Keep this in mind while you work on this step. With right sides together we will sew the hat top piece, the circle, to the shorter top side. You will have to gently ease the circle in to the opening to sew this. I like to start pinning/clipping and gently ease the curves in and keep going until I have got them perfectly set. Remember to go slow and and not pull or tug too much. Now repeat this with the other fabric. Set that aside.

Lets work on the brim now. Place both the brim pieces right sides together. Sew along the outer curved edge of the brim piece. Make sure that both side seams are aligned. Again make sure to sew slow as we are following a curve.

Turn the brim pieces right sides out and give it a good press. Topstitch around the edge of the brim. Using the presser foot on the machine as a guide to get an even top stitching, sew a few more concentric circles of top stitching if you like. Remember to match or coordinate your bobbin thread to the fabric as the hat is reversible! I did about four more circles here.
Now take the finished brim piece and matching the correct pieces place the hat body and the brim right side together. We are constructing the hat now and you can envision how the brim should look on the hat to help you with the placement. I matched the fabrics as I was going for a solid look. Sew a basting stitch carefully around using a 1/4" seam allowance.

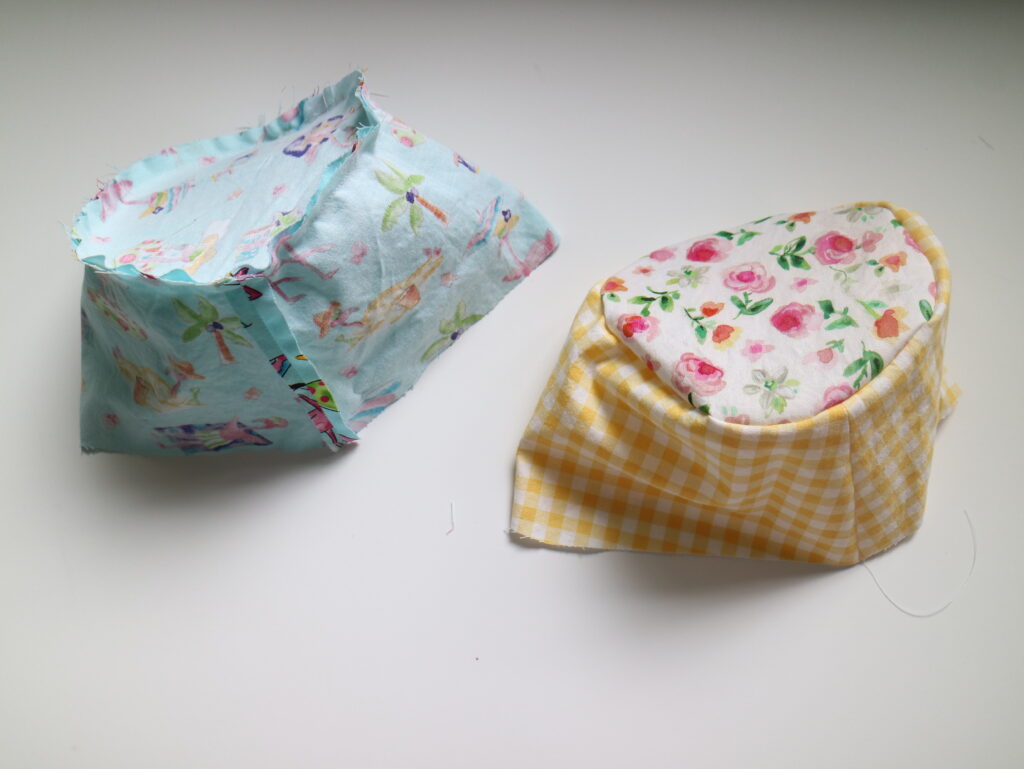
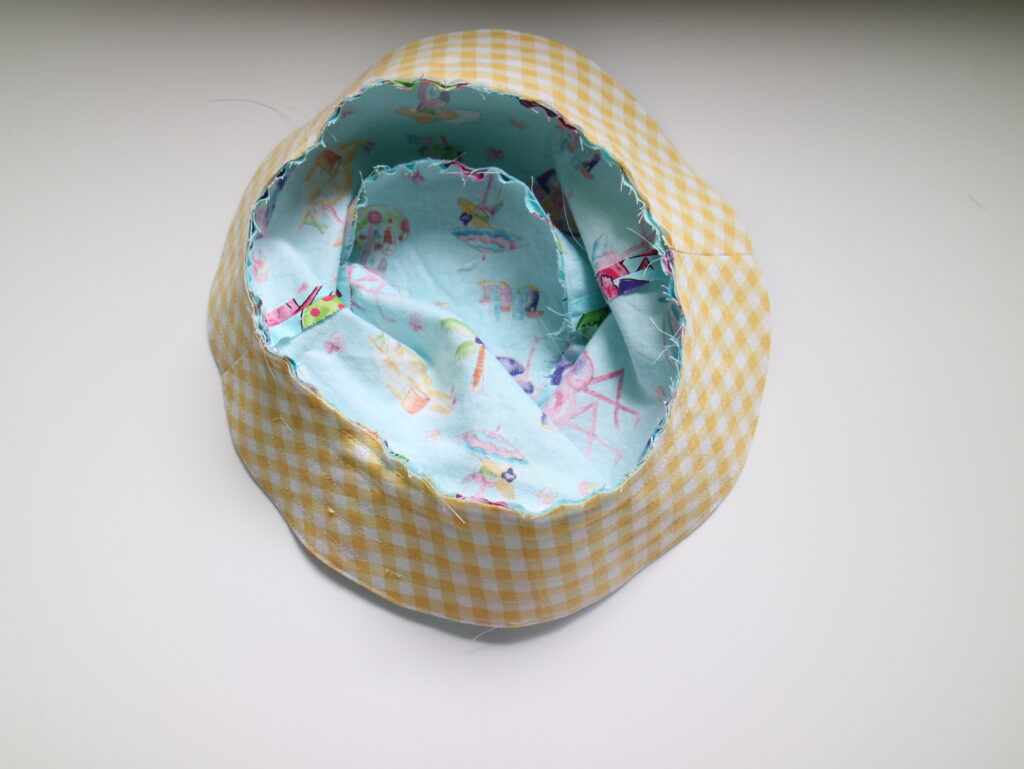
Take the other hat top & body piece. In my case the gingham side. Slide the entire hat piece that we basted together in the previous step into the bucket shaped part of the gingham hat body so that they are right sides together. Pin the raw edges together so that the brim piece is sandwiched between the two hat body piece. In the picture above I have clipped half of the hat and left the other half untucked so you can see what I have done.

Sew around the raw edges using the basting stitch from the previous step as a guide. Make sure to leave a 2" opening to turn the hat right sides out.

Gently pull the hat right sides out through the opening we left in the previous step. We are almost done with the hat!!
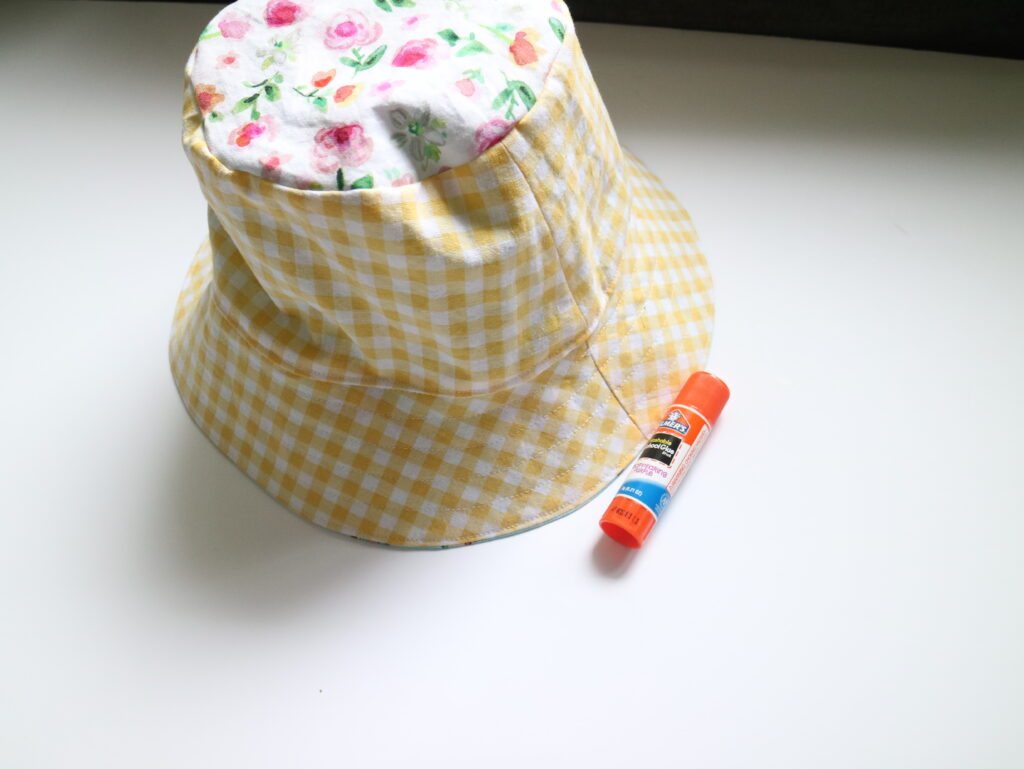
Tuck the seam allowance of the opening in and top stitch all around the hat, closing the opening along with it. Remember to hold the fabric taut on both sides while top stitching so there are no puckers on the hat. I wanted the flamingo side to be the most used side, so I topstitched with that side on top. But the opening that I left for turning was on the gingham side. So I used my handy glue stick as a helper to hold the seam allowance in place and get a neat top stitching.
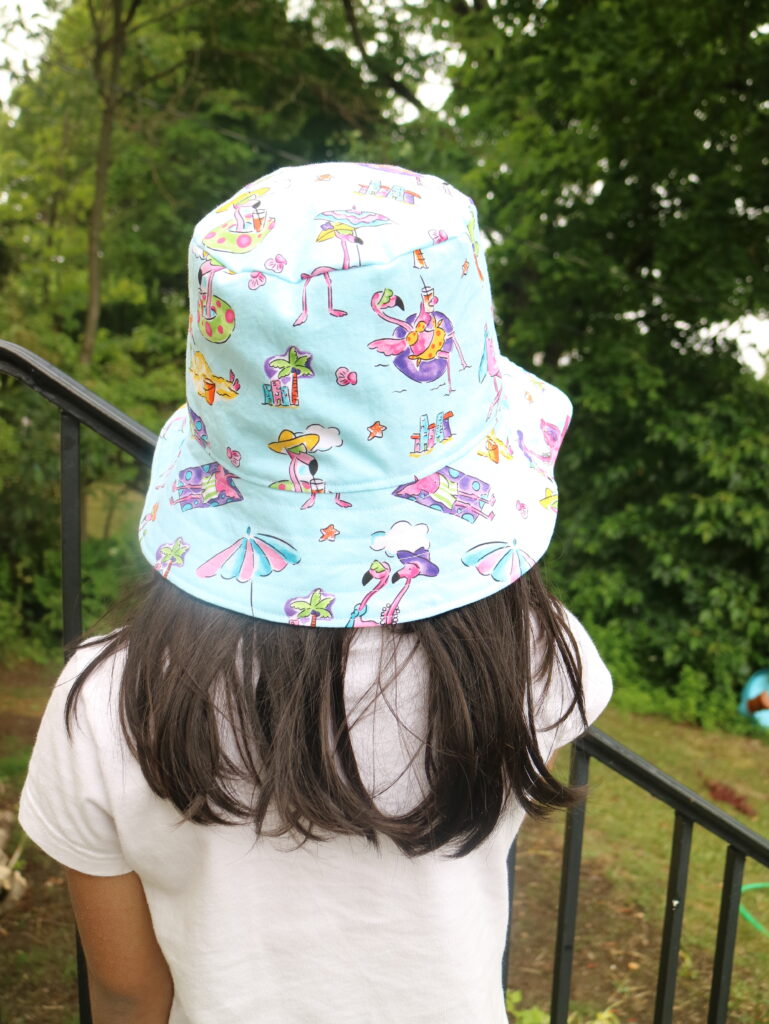
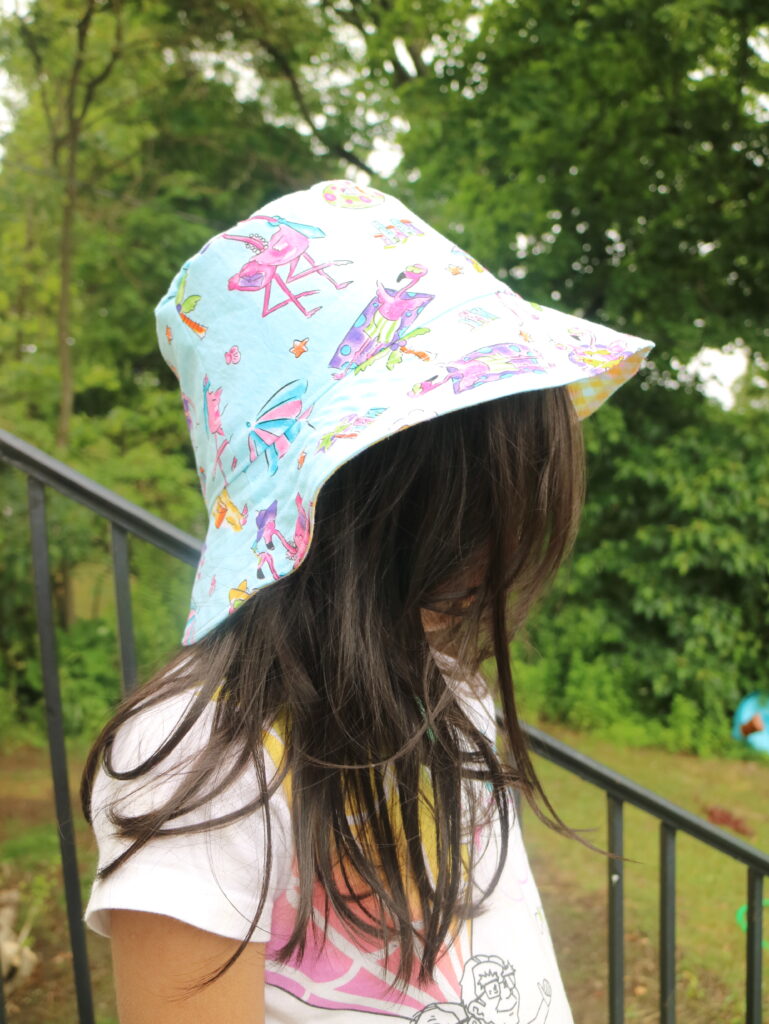
That is it! We are done!! You have got yourself a reversible Bucket Hat!! Modeled here by my daughter on a rainy day!
You can easily make this hat with a board-shorts fabric as well. Just make sure to go very slow while sewing as they are known to be shifty! But using the boardshort fabric would make this a great option to use while at the pool or beach and you can match with your swim suit/ shorts! Before interfacing the boardshorts fabric double check and test out the heat settings as no two boardshort fabrics are alike!
The beauty of this project is that it is a quick sew. It won't take up too much of your time, making it an excellent option if you're looking for a simple DIY activity. The matching hats are perfect for children since they provide shade without obstructing their vision. Additionally, the fit of these hats is exceptional and will look great on your little ones. Give this sewing project a try and see how easy it is to create stylish and functional hats for your kids.
Using Interfacing When Sewing a Bucket Hat
Many people find Iinterfacing to be essential when sewing a bucket hat. It provides structure and stability to the hat, ensuring that it holds its shape and withstands regular wear and tear. It's not as critical when sewing a reversible bucket hat that has inner fabric and more structure but you may want to consider it when sewing a bucket hat that isn't reversible.
By adding interfacing to the brim of the hat, you can create a crisp, defined edge that adds a professional touch to the finished product. Additionally, using interfacing on the crown of the hat helps it maintain its shape and prevents it from collapsing or slouching. When selecting interfacing for your bucket hat, be sure to choose one that is compatible with your fabric and desired level of stiffness. Overall, incorporating interfacing into your sewing process will elevate the quality and durability of your bucket hat, resulting in a stylish and long-lasting accessory.
Customizing a Bucket Hat
When customizing your bucket hat, it's important to choose the right fabric based on the weather and purpose of the hat. Consider personalizing it with patches, embroidery, or other decorations to make it unique. To ensure a comfortable fit, adjust the size or add elastic as needed. Protecting against the sun can be achieved by adding a lining or using UV-resistant fabric. Experiment with different colors, patterns, or brim shapes to create a one-of-a-kind look. With these tips, you can turn a simple bucket hat into a fashionable statement piece.
To add a ponytail hole to your bucket hat, start by measuring the desired location on the crown piece. Draw a small oval shape using a fabric pen and carefully cut it out with sharp scissors. Finish the edges with a narrow hem or bias binding. Test the ponytail hole before sewing the hat together.
Troubleshooting Your Bucket Hat
If your finished bucket hat turns out to be too large, there are a few steps you can take to fix it. Firstly, you can try using a smaller size pattern or adding elastic to the crown to ensure a snug fit. Another common issue that you might encounter is wrinkles or puckering in the fabric. In such cases, it's important to check your seam allowance and make adjustments if necessary. Additionally, if the brim of your hat is not laying flat, make sure you have topstitched it securely to keep it in place. If the fit of your hat isn't quite right, consider adjusting the circumference or brim width to achieve the desired size. Lastly, if you find it difficult to turn the hat right side out, clipping the seam allowance and using a turning tool can make the process easier. By troubleshooting these common issues, you'll be able to overcome any challenges and successfully complete your bucket hat project.
Making it Look Professional
For a professional-looking bucket hat, there are several tips and tricks you can employ. First, use a sewing machine with a small stitch length to ensure neat and durable seams. This will prevent the fabric from unraveling over time. Secondly, choose high-quality fabric that is suitable for the purpose of the hat. Consider the weight, drape, and durability of the fabric. Additionally, pay attention to fabric grain and pattern placement to achieve a polished look. Make sure all the elements of the hat align correctly. Use matching thread to create a seamless finish that blends in with the fabric. Lastly, finish your seams with a serger or zigzag stitch to prevent fraying, providing a professional touch to your bucket hat.
Thank You for Learning How to Sew a Bucket Hat with Us
Thank you for joining us today to learn how to sew a bucket hat. Sewing a reversible bucket hat provides an enjoyable and practical project for the summer season. This versatile accessory offers excellent sun protection while allowing children to maintain their vision and enjoy outdoor activities comfortably. By following the detailed steps outlined in this article, you can create a personalized hat using your preferred fabrics, such as quilting cotton or boardshort fabric.
The reversible nature of the bucket hat allows for coordination with swimwear or shorts, making it an ideal accessory for pool or beach outings. Additionally, the hat's design ensures a secure fit, staying in place even during active play. Whether you choose to make a hat with a vibrant flamingo print or opt for a more traditional gingham pattern, the end result will be a practical and stylish accessory for your little ones to enjoy all summer long.
We hope this comprehensive tutorial has inspired you to embark on your own sewing adventure. Get creative, have fun, and embrace the joys of summer while keeping your kids protected in style. Enjoy the process of sewing a reversible bucket hat and revel in the satisfaction of creating a unique and functional accessory for your children.
If you want to stay updated on our latest activities, be sure to follow us on Facebook and Instagram before you go. Additionally, by signing up for our email Newsletter, you can receive 25+ free sewing patterns and stay in the loop regarding our latest offerings. Don't miss out on exclusive content and exciting updates!