How to Sew a Blanket | Sew Up an Easy Blanket
Today I would like to show you how to sew a blanket. This is a beginner-friendly project and would be a good starting point for any young person who desires to learn how to sew or for anyone who is looking to make their own blanket! It only involves one type of stitch, and you get to choose your own fabrics to work with! Looking for something snuggly? Try fleece or sherpa. Looking for something soft and luxurious? Choose chenille. Cozy? Brushed flannel would make a warm throw blanket and it can be as simple, practical or luxurious as you desire it to be!
Learning how to sew a blanket can be a fun and rewarding DIY project that allows you to create a cozy and personalized item for yourself or as a heartfelt gift...these make great baby shower gifts. Whether you're a beginner or an experienced seamstress, sewing a blanket is a great way to showcase your creativity and craftsmanship. In this tutorial, we'll guide you through the step-by-step process of sewing a blanket, from selecting the right materials to adding the finishing touches. So grab your sewing machine, scissors, and fabric, and let's get started on this sewing adventure!
Blanket Sewing Supplies List:
- Two pieces of fabric of your choice
- A sewing machine
- Coordinating thread and appropriate size needle
- Scissors or rotary cutter and measuring tape
- Wonder clips or pins
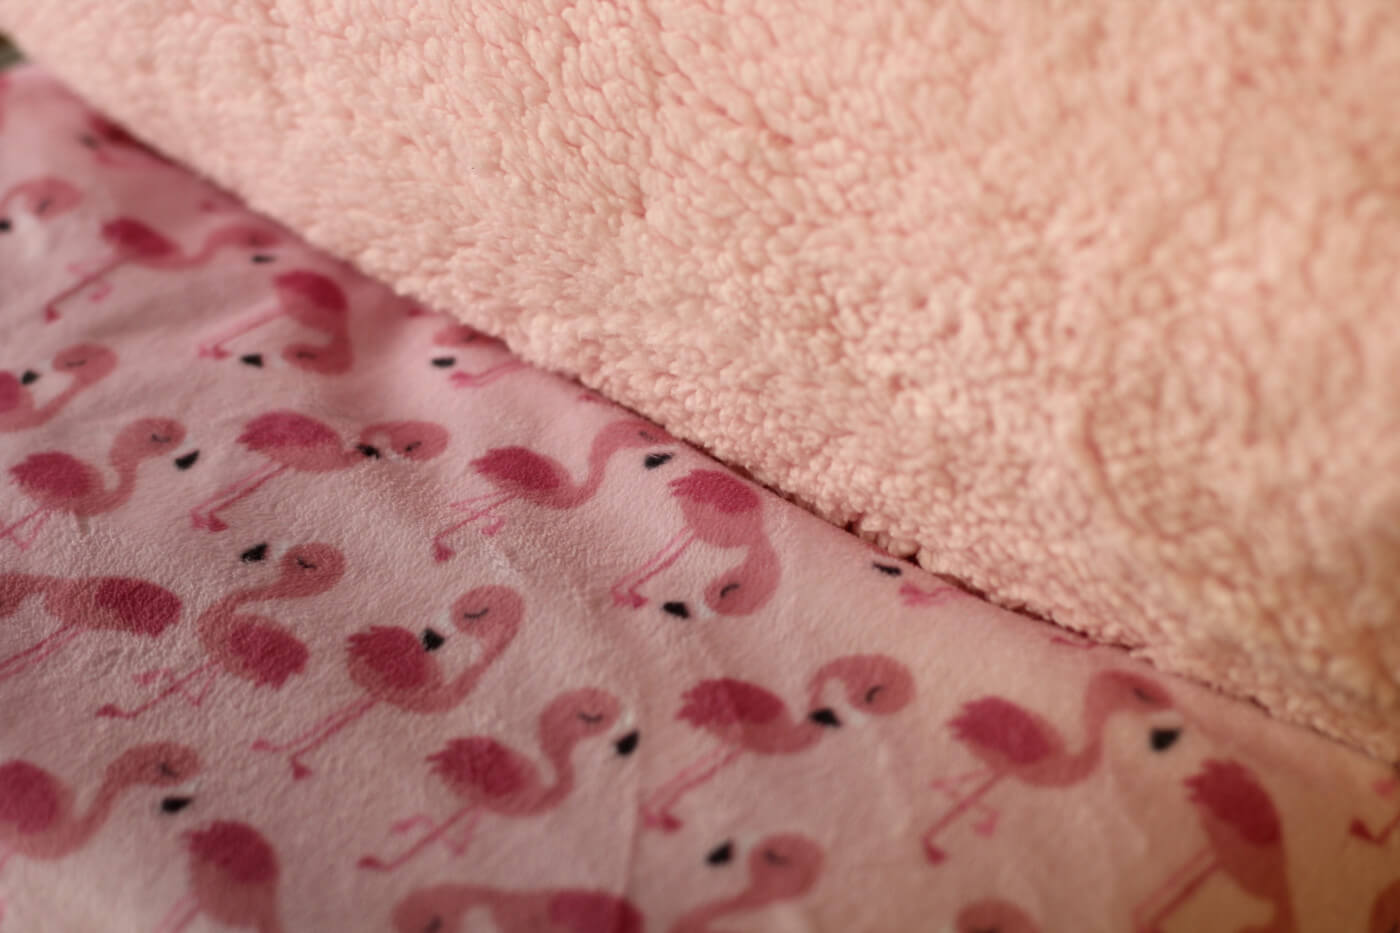
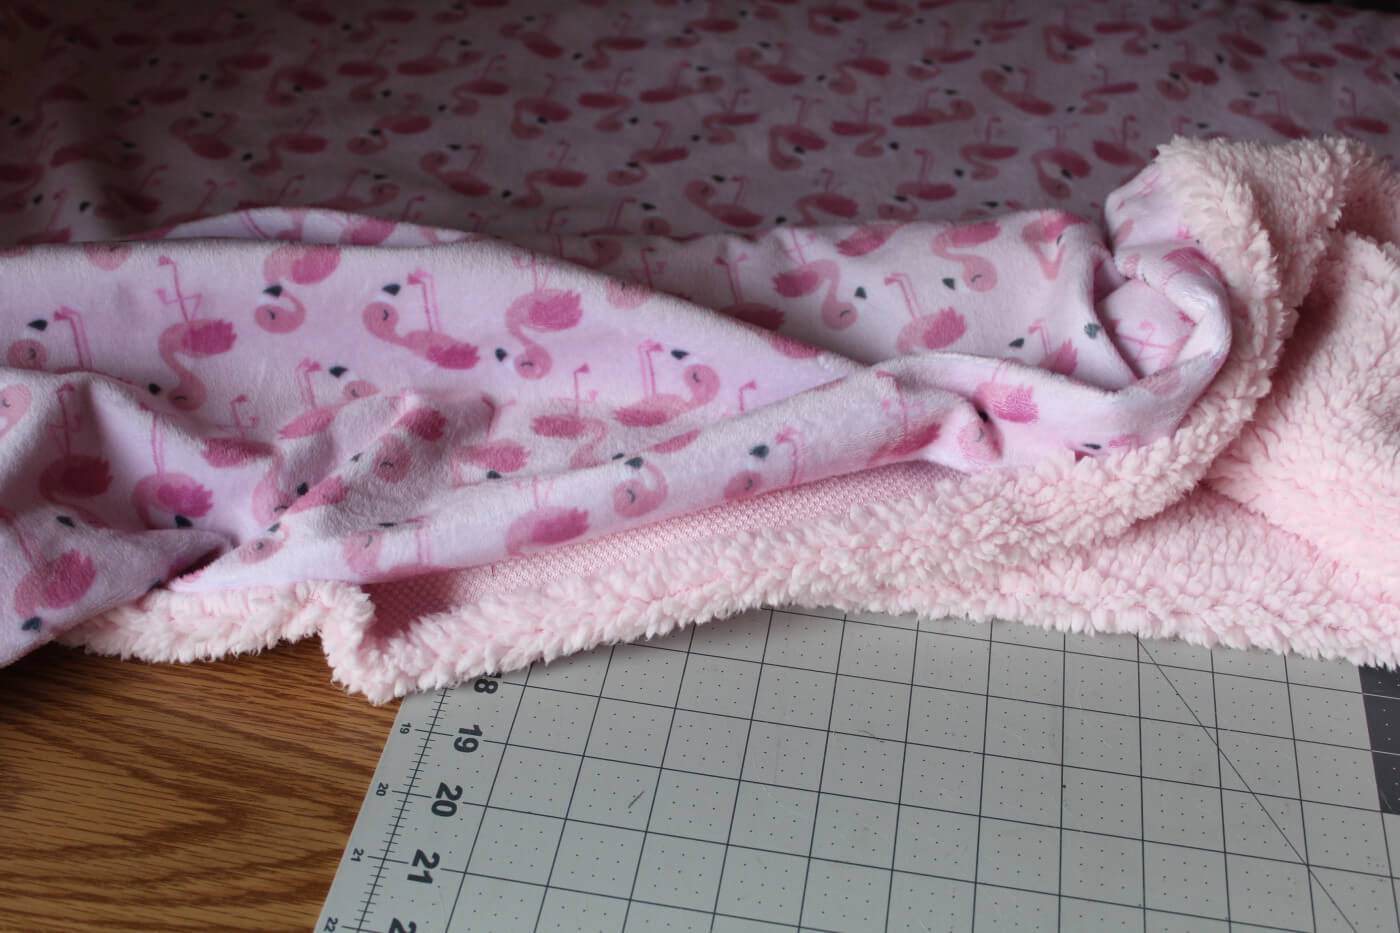
For my blanket, I chose a fun cuddle minky fabric for the top and a coordinating sherpa fabric for the backside. I used a 90/14 universal sewing needle and my machine handled both fabrics together very well with a straight stitch set at a length of about three for the seams and a long straight stitch at a length of four for the topstitching. Your settings may need to be different depending upon the fabric bases you choose for your blanket.
How do you choose the right fabric for a blanket?
When choosing fabric for a blanket, consider factors such as warmth, durability, and comfort. Opt for fabrics like fleece, flannel, or minky that are soft and cozy. Additionally, make sure the fabric is machine washable and suitable for the blanket's intended use.
What to Consider When Choosing Your Fabric?
Choosing the right material for your blanket is a crucial decision that will affect both the appearance and functionality of the finished product. Here are a few reasons why selecting the right material is so important:
- Comfort and Warmth: The material you choose will determine how cozy and warm the blanket feels when in use. Minky fabric, for example, is known for its plush and luxurious texture, making it perfect for a blanket that you want to snuggle up with. Fleece fabric, on the other hand, provides a soft and fuzzy layer of warmth, ideal for blankets used on a twin bed or for cuddling up on the couch. Flannel fabric offers a gentle and comforting feel, making it excellent for blankets used during the colder months.
- Aesthetic Appeal: The fabric you choose significantly impacts the overall look of the blanket. Minky fabric, with its velvety texture, adds a touch of elegance and luxury to any blanket. Fleece fabric comes in a wide range of colors, patterns, and prints, allowing for endless design possibilities. Flannel fabric offers a classic, timeless look that is both cozy and visually pleasing.
- Thickness and Durability: The thickness of the fabric is an essential consideration, especially for blankets that require extra warmth or durability. Fleece fabric, for example, can be found in varying thicknesses to suit different needs. Thicker fleece is great for winter blankets, while thinner fleece works well for lightweight throws. Polyester batting, used between fabric layers, provides thickness and insulation, adding warmth to the blanket.
- Longevity: Choosing the right fabric ensures that your blanket will withstand the test of time. Opting for high-quality materials such as minky fabric, fleece, or flannel will result in a blanket that is not only visually appealing but also durable. These fabrics are less prone to pilling, tearing, or fading, ensuring that your blanket will last for years to come.
- By carefully considering the right material for your blanket, you can create a cozy, visually pleasing, and long-lasting item that you'll cherish for years to come.
Choosing Your Blanket Type
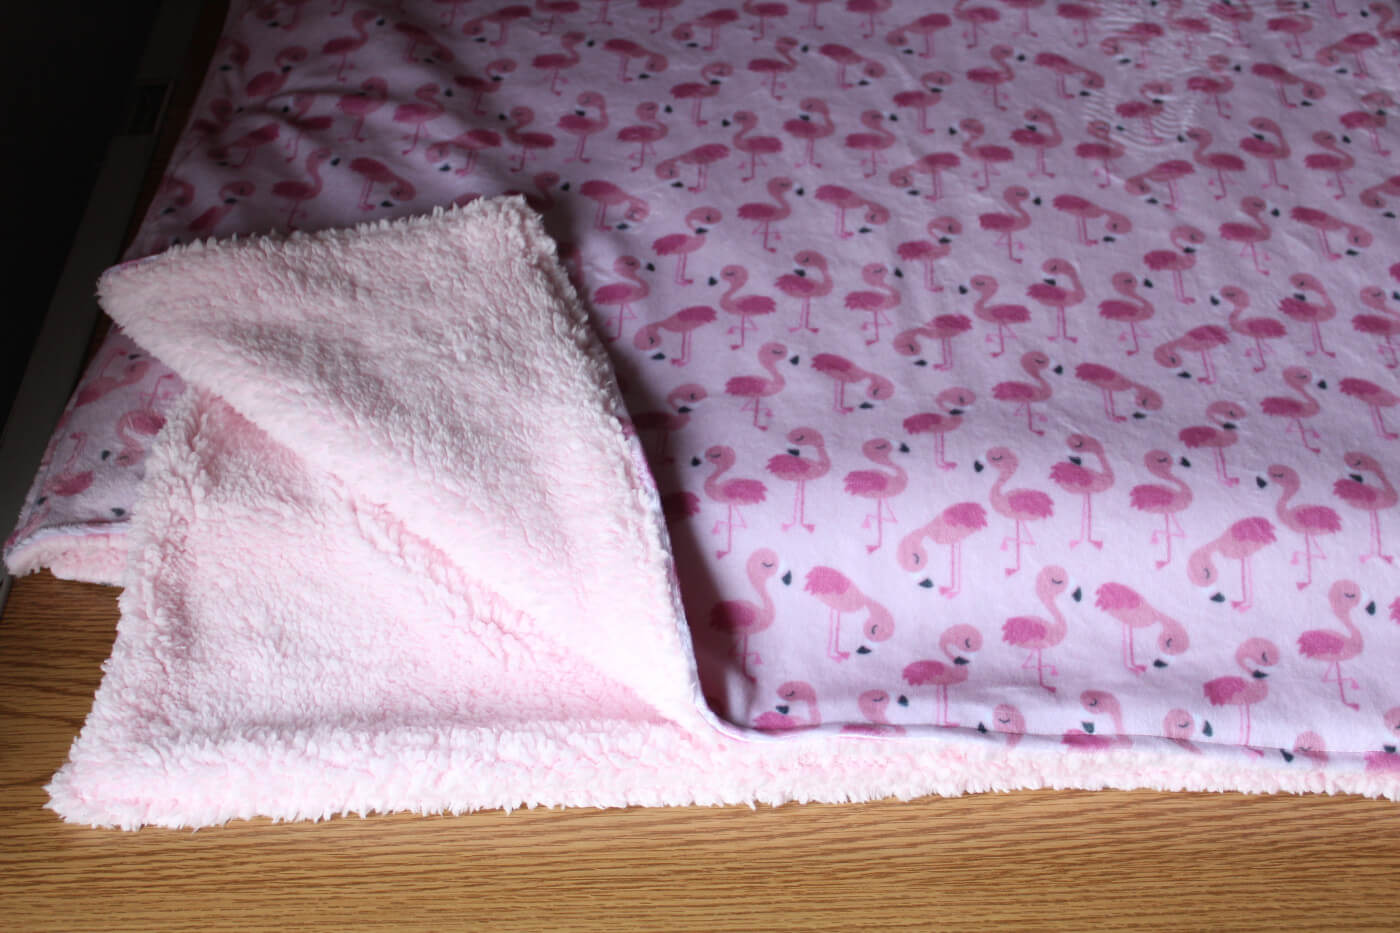
This is a double-sided blanket with enclosed seams. Your fabric choices will have a bearing on the final outcome. Thicker or heavier fabrics will create a weightier blanket and vice versa. You'll also want to secure enough fabric depending on who you will be making this for. For a baby or dog size blanket, you could easily get away with one yard or less for each of your two choices. An adult size blanket would be the length and width desired according to that person. I made my daughters blanket out of 2 yards of each. That may sound like a lot but I'm always looking for good a deal, so I usually never pay full price. This could also make a good upcycle project too. Fabric is fabric!
How to Sew a Blanket
Step One: Cutting the Fabric to Size
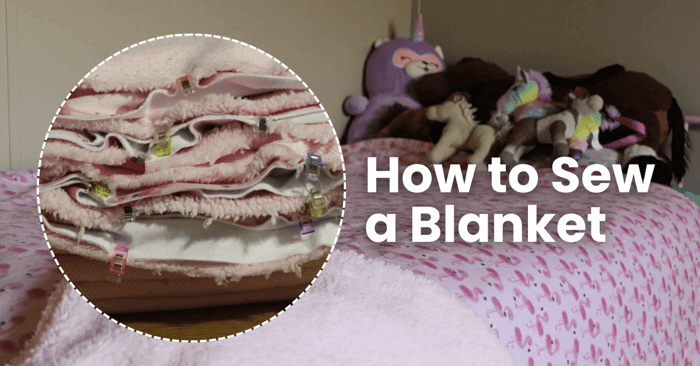
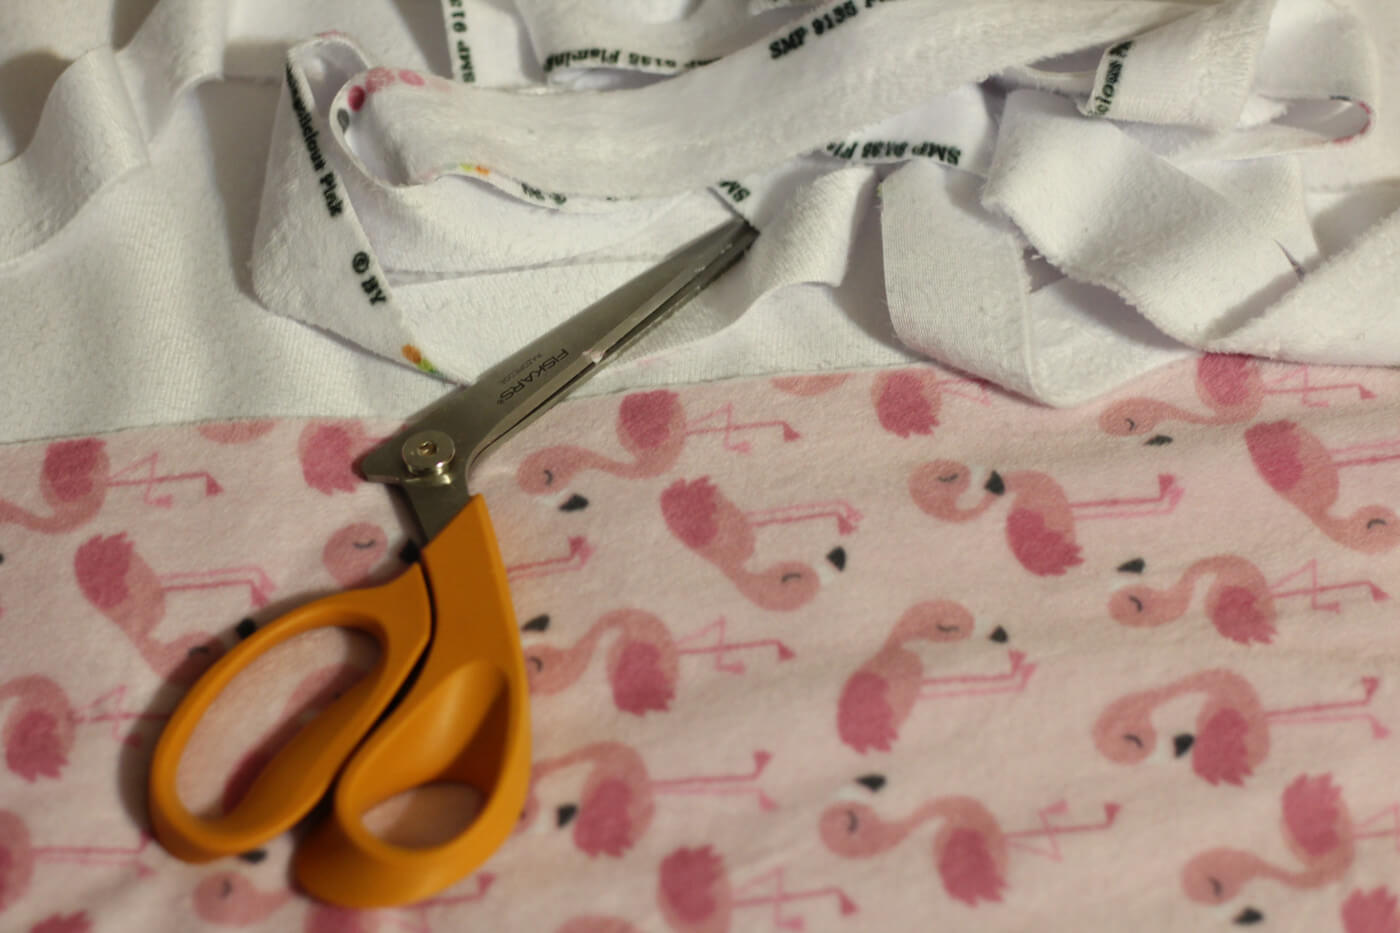
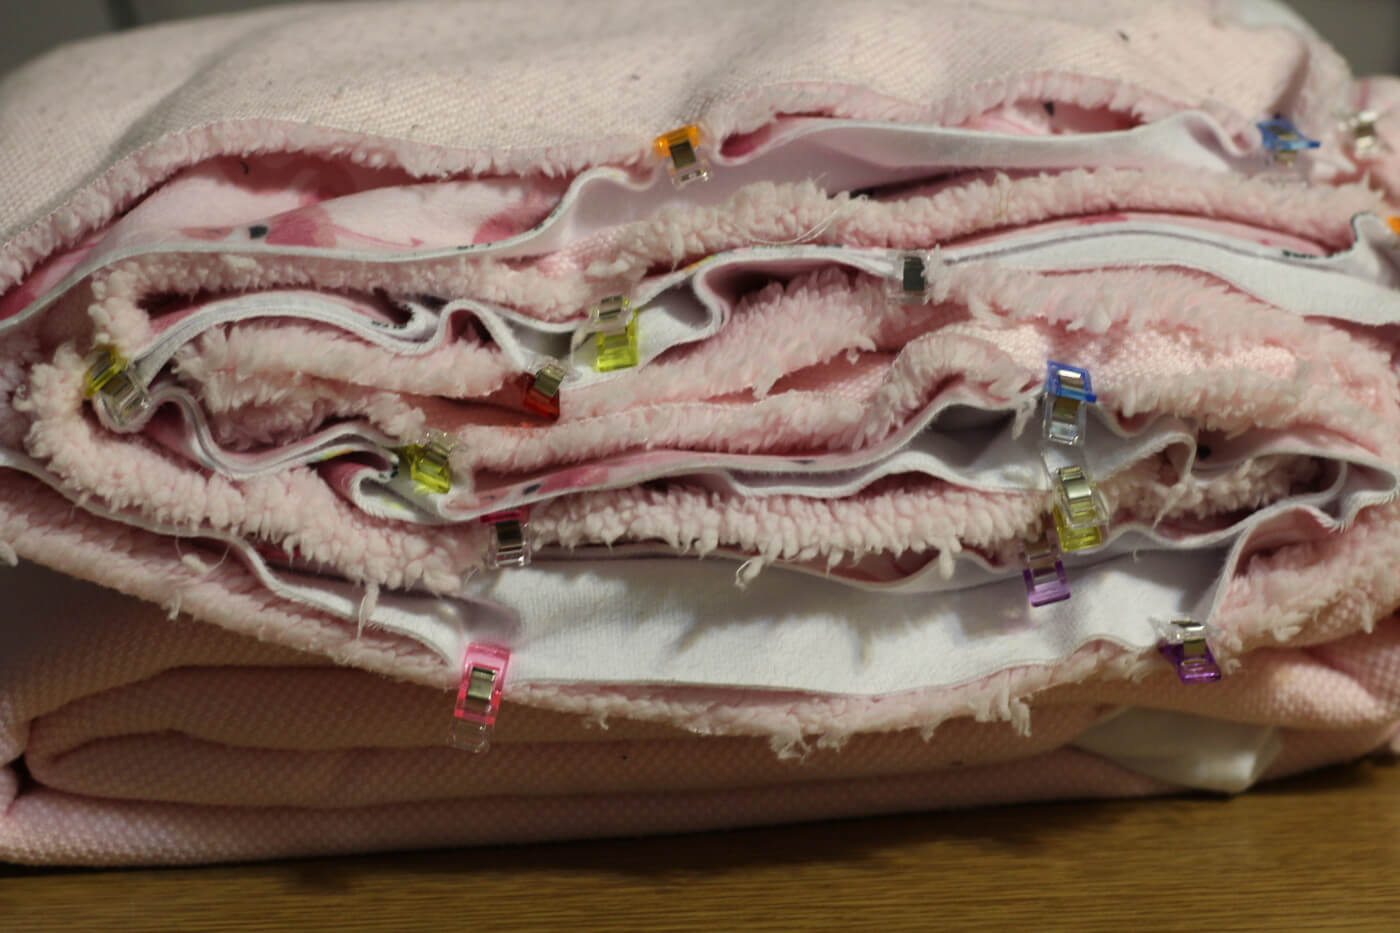
The first thing I did was cut off the selvedge on both sides of my flamingo minky fabric. Next, I laid the minky on top of the sherpa with right sides together and lined up one corner and side edge so that it was even one with the other. I began to wonder clip the two fabrics together along the top and one side, stopping when I reached the end of the flamingo fabric. I then carefully cut across the sherpa, matching the top fabric length and width to create a cohesive piece. I finished wonder clipping the bottom edge and other side until all four sides were secured in place.
Now that we have our two fabrics clipped together, we can take it to the sewing machine and prepare for sewing.
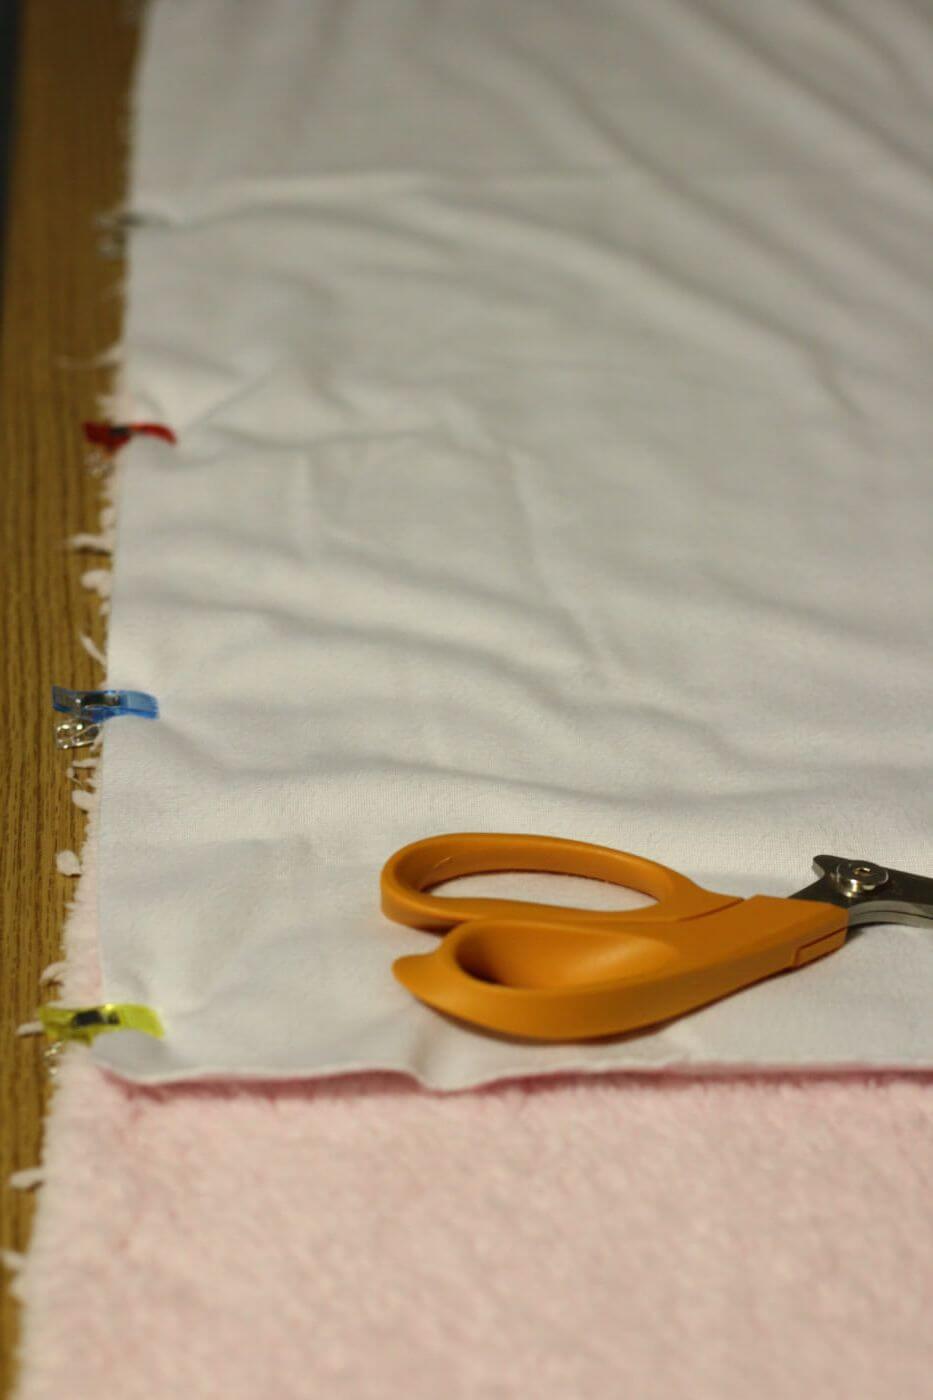
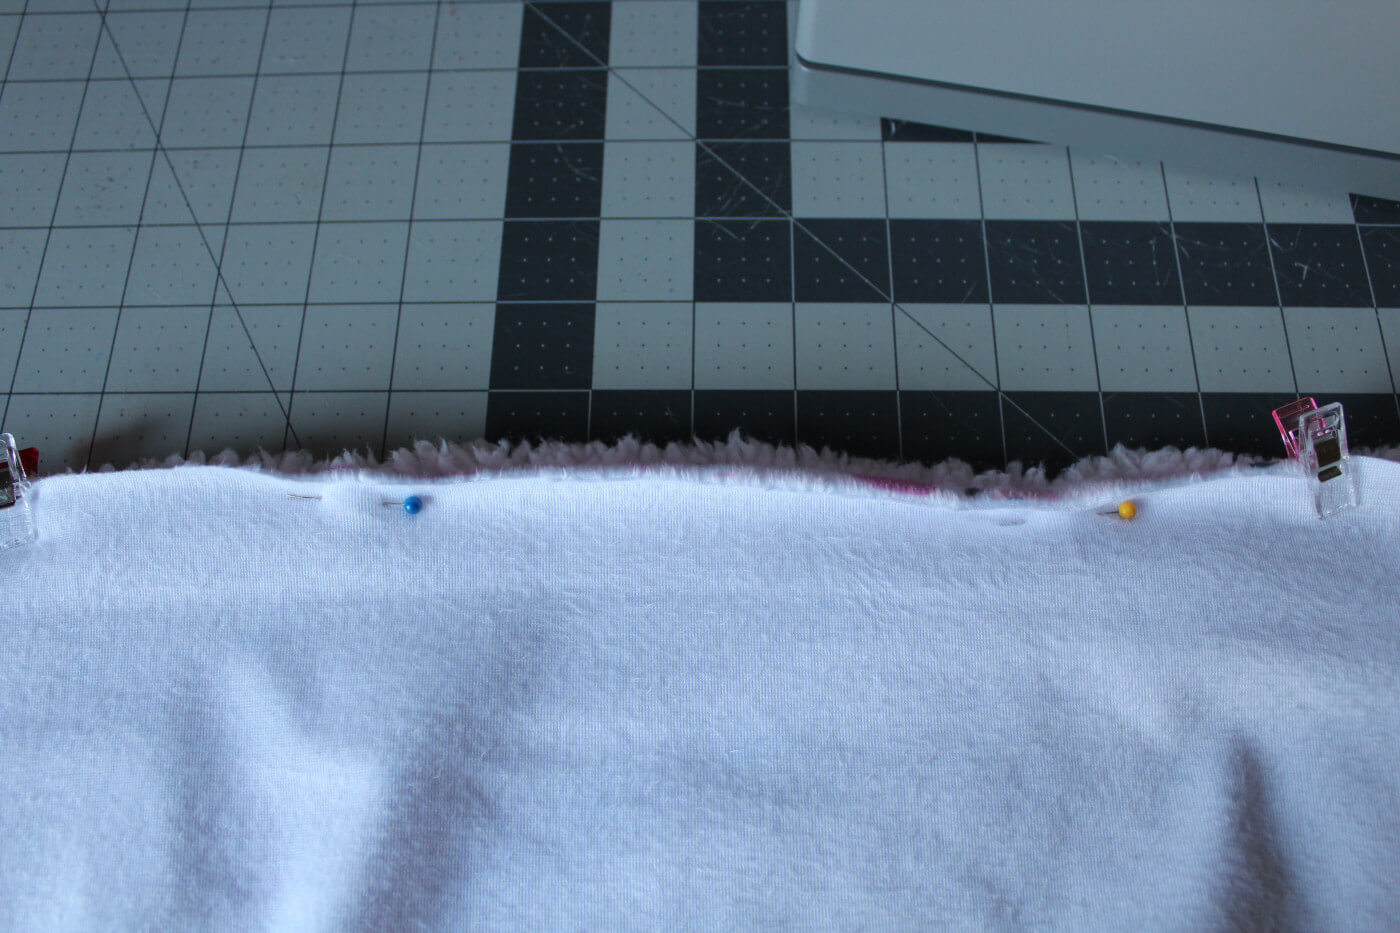
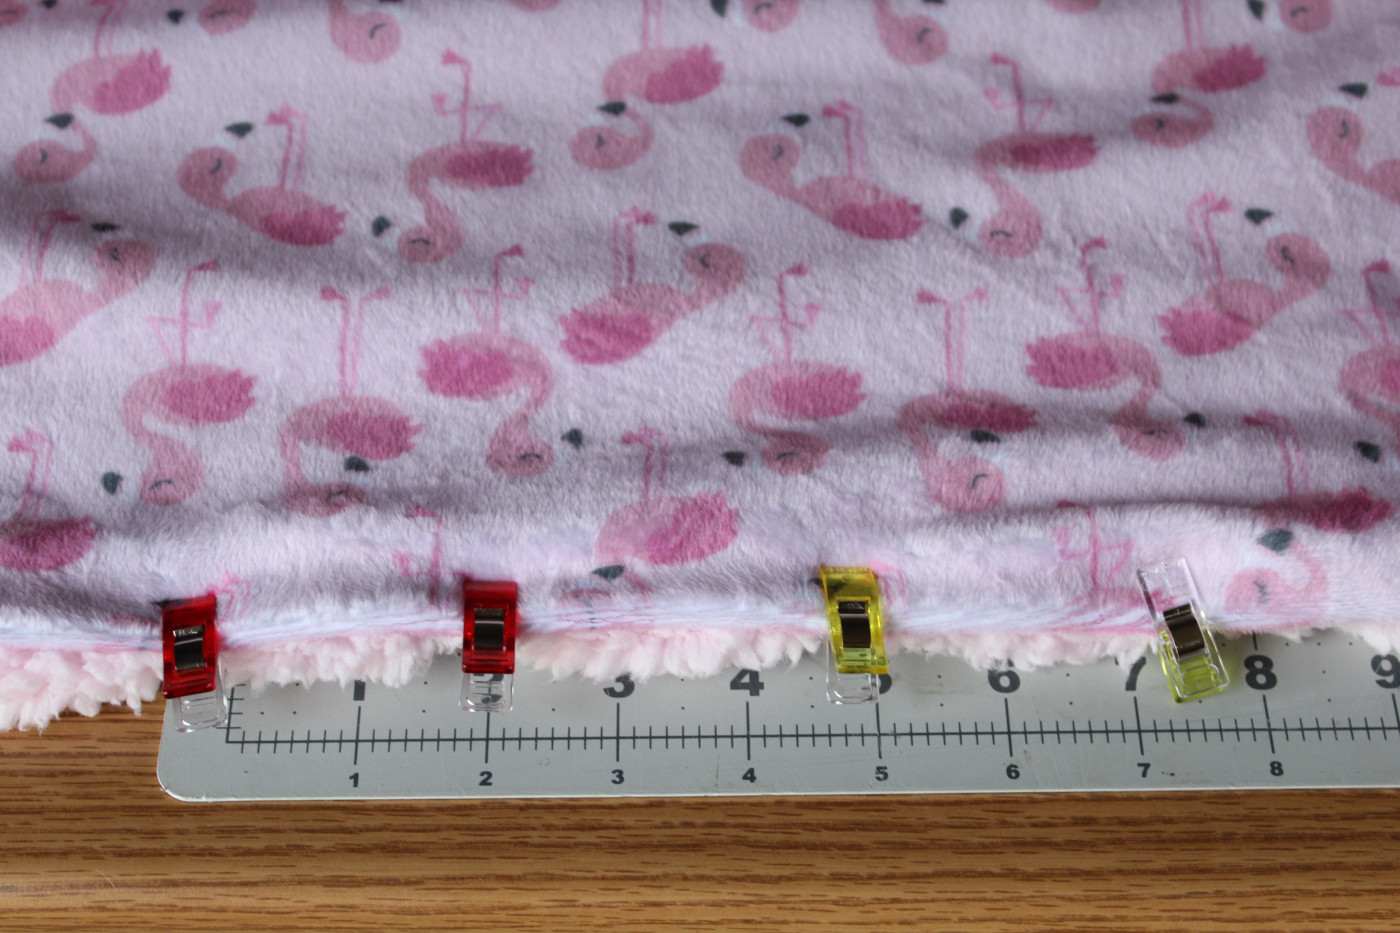
Important! Make sure you leave a generous opening for turning the blanket right side out. I left about nine/ten inches open at the top of the blanket as marked in the photo with pins to remind me not to sew between those two points. A fabric marking pen would also work too.
Step Two: Blanket Construction
Begin sewing on the outside of one of your marked points using a 1/2" seam allowance. Pivot at each corner, turning at the half inch mark and continue sewing all four sides of the blanket. Stop sewing once you get to the other pin or mark you made to remind yourself to stop here. Make sure you backstitch at the beginning and end to secure the seam for turning.
Before we turn the blanket right side out, go ahead and clip any extra seam allowance around the blanket and at the four corners. Make sure not to get too close the thread as you trim. Do not trim the seam allowance from our opening!
Now, we will turn our blanket right side out through the opening we left for turning.
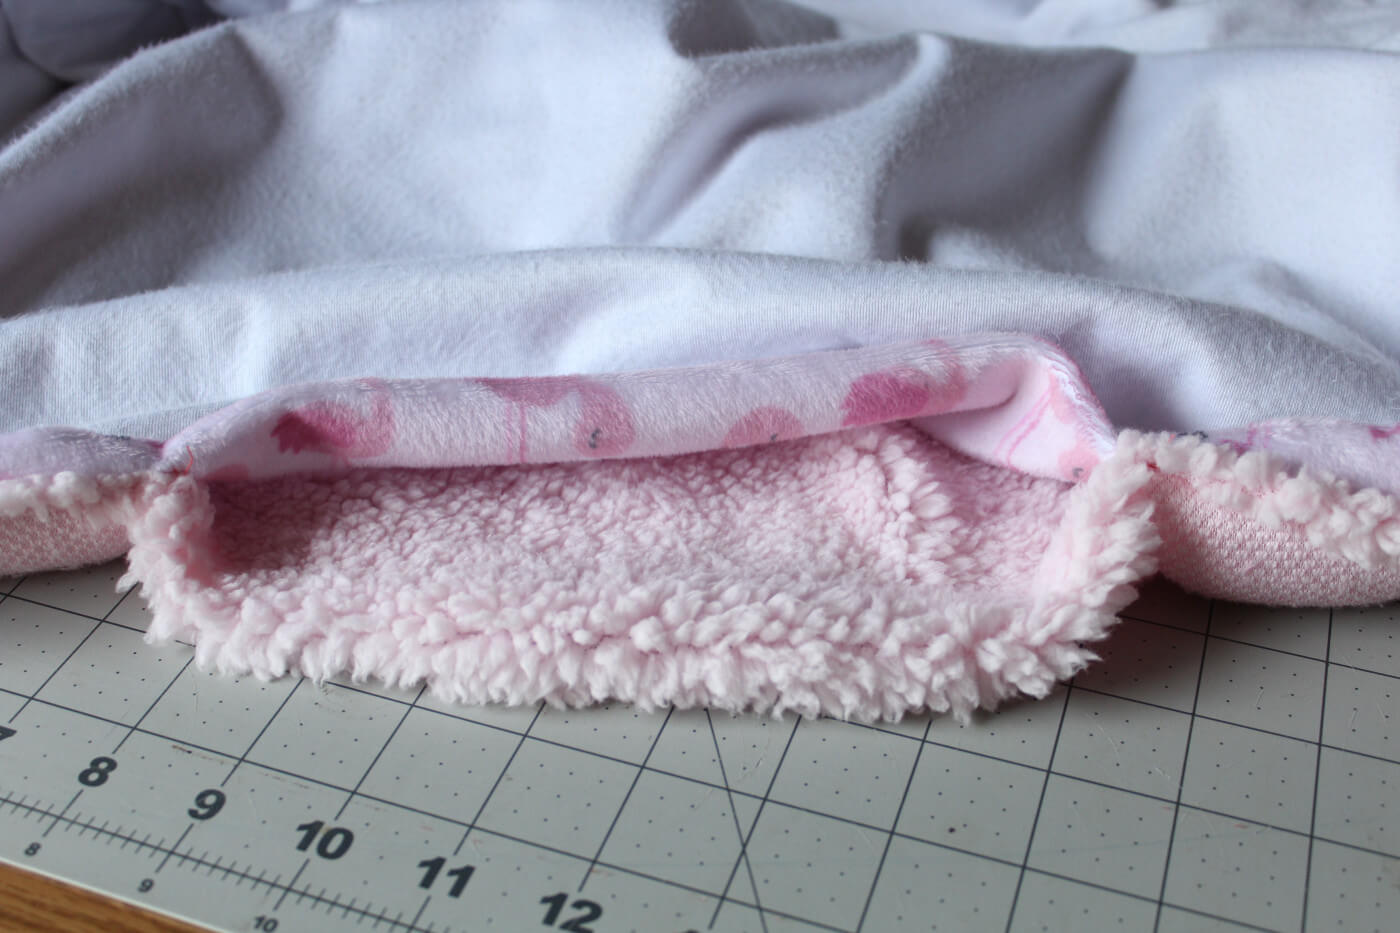
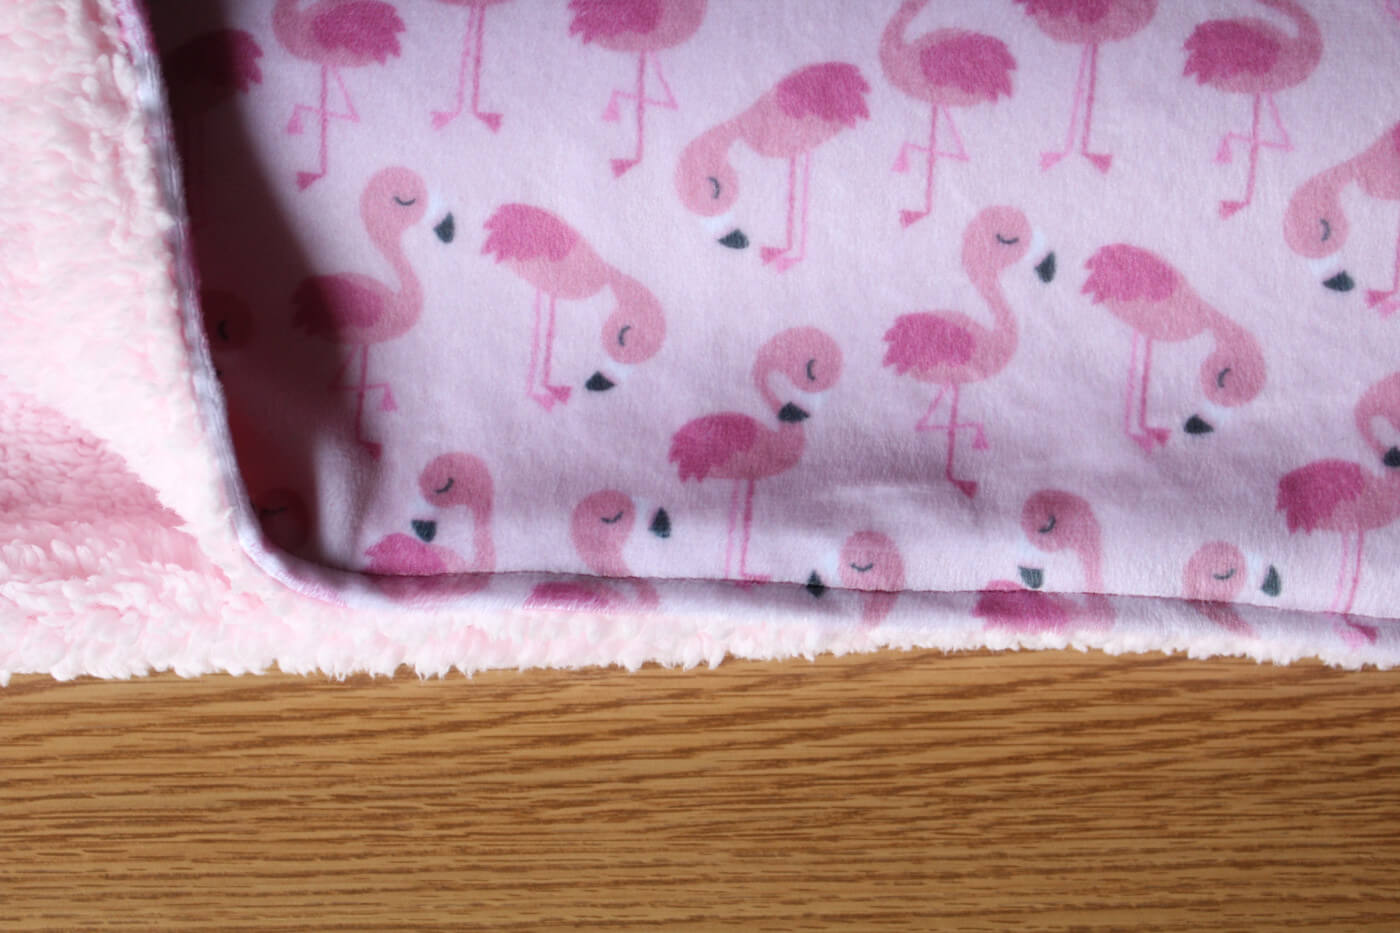
After turning the blanket right side out, use a pencil or something similar to gently poke each of the four corners out from the inside so that our corners look nice and clean for topstitching.
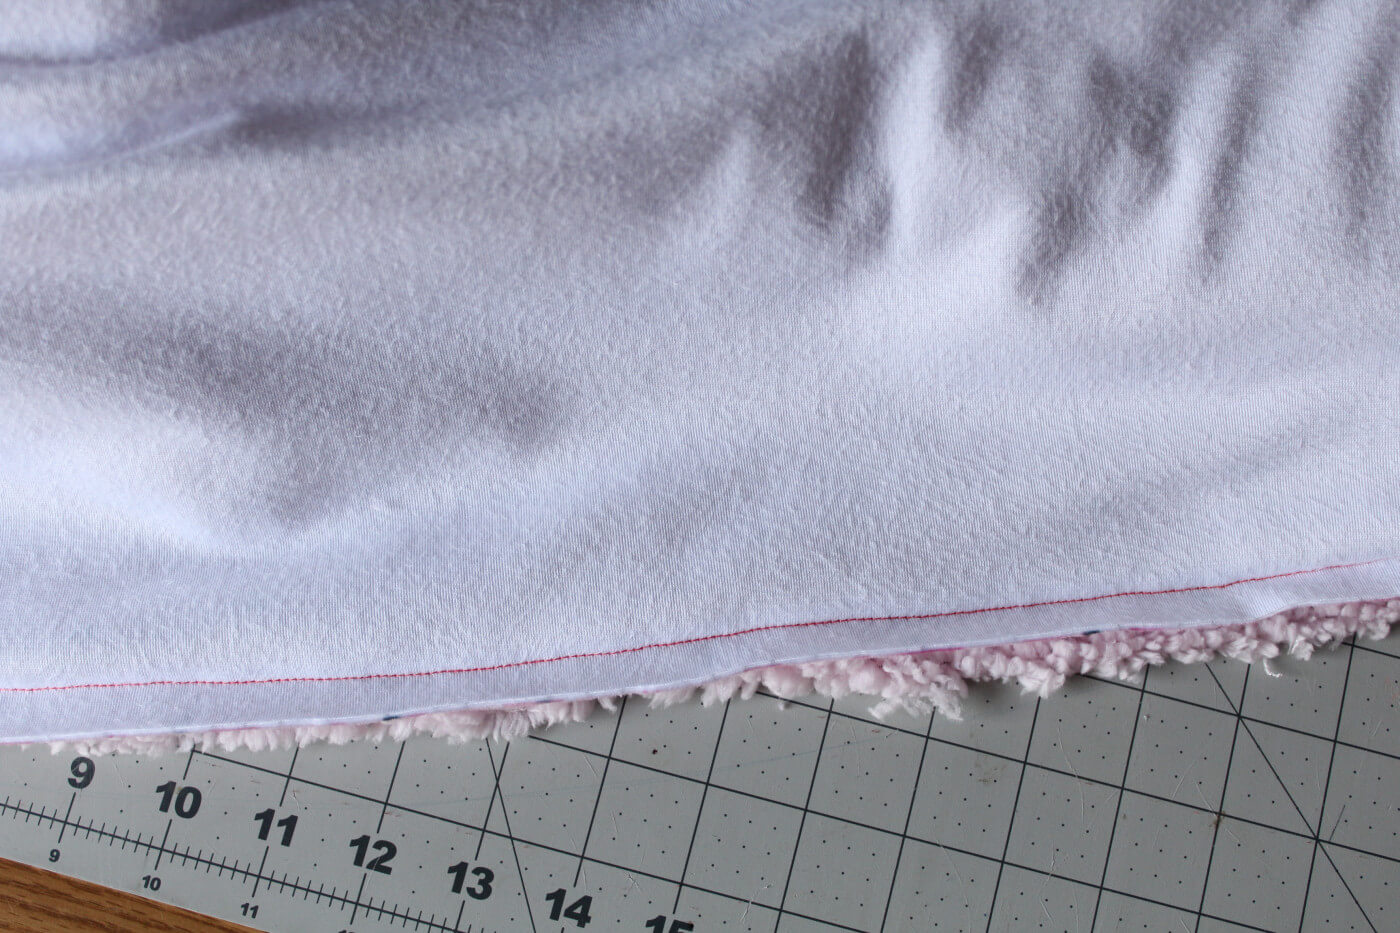
How to Sew a Blanket Step Three: Topstitching
At the edge of the fabric, begin pinning or wonder clipping our opening closed by folding in the seam allowance to match the rest of the blanket.
Topstitch around all four edges using a 1/4" seam allowance, being mindful of closing the opening.
Our blanket is complete! Time to see how the finished project looks.
A quick throw on the bed to have a look.
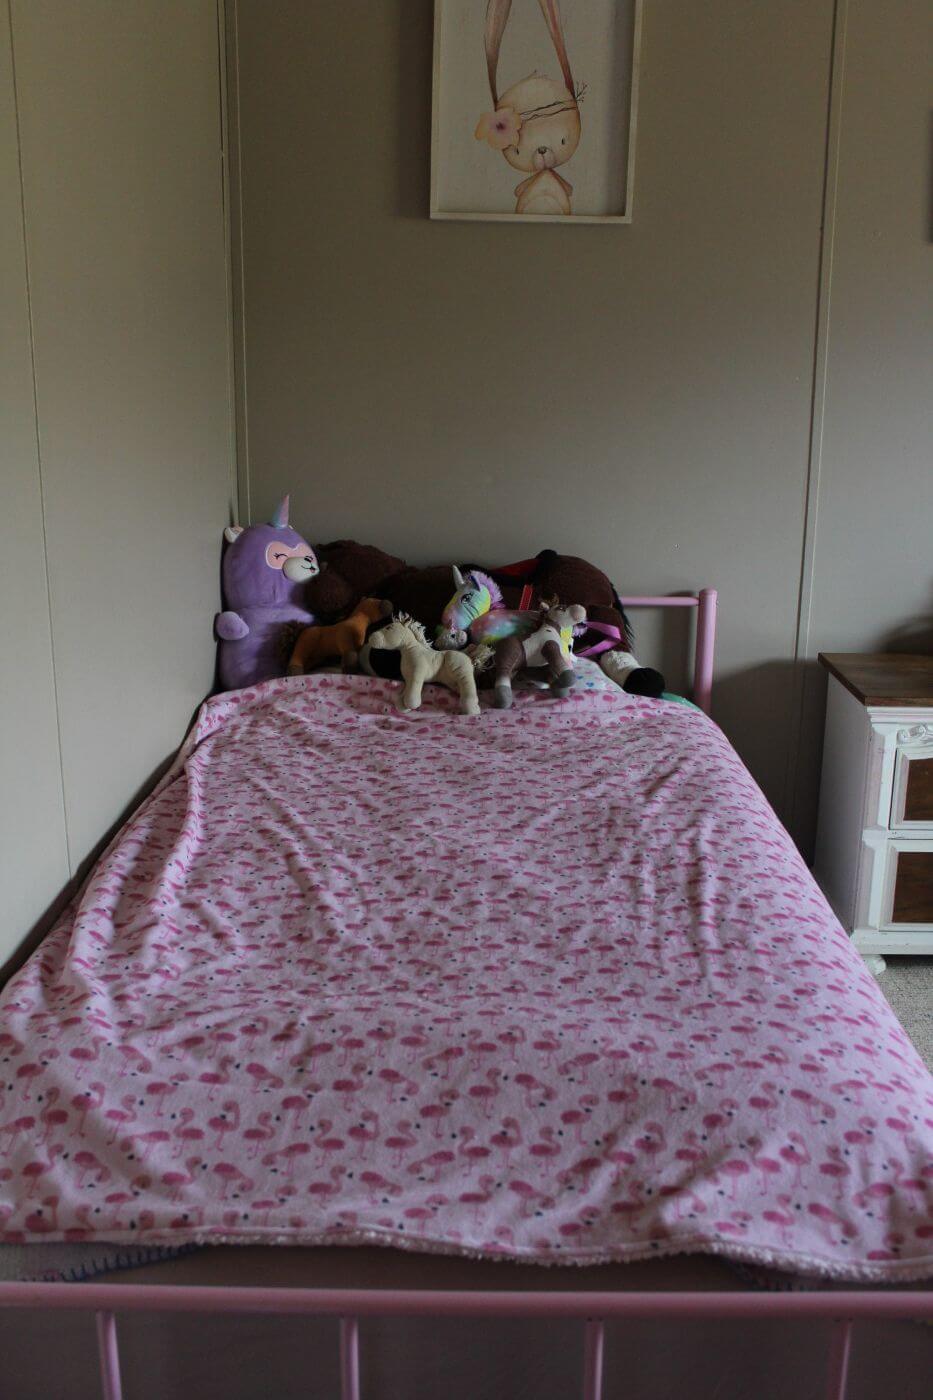
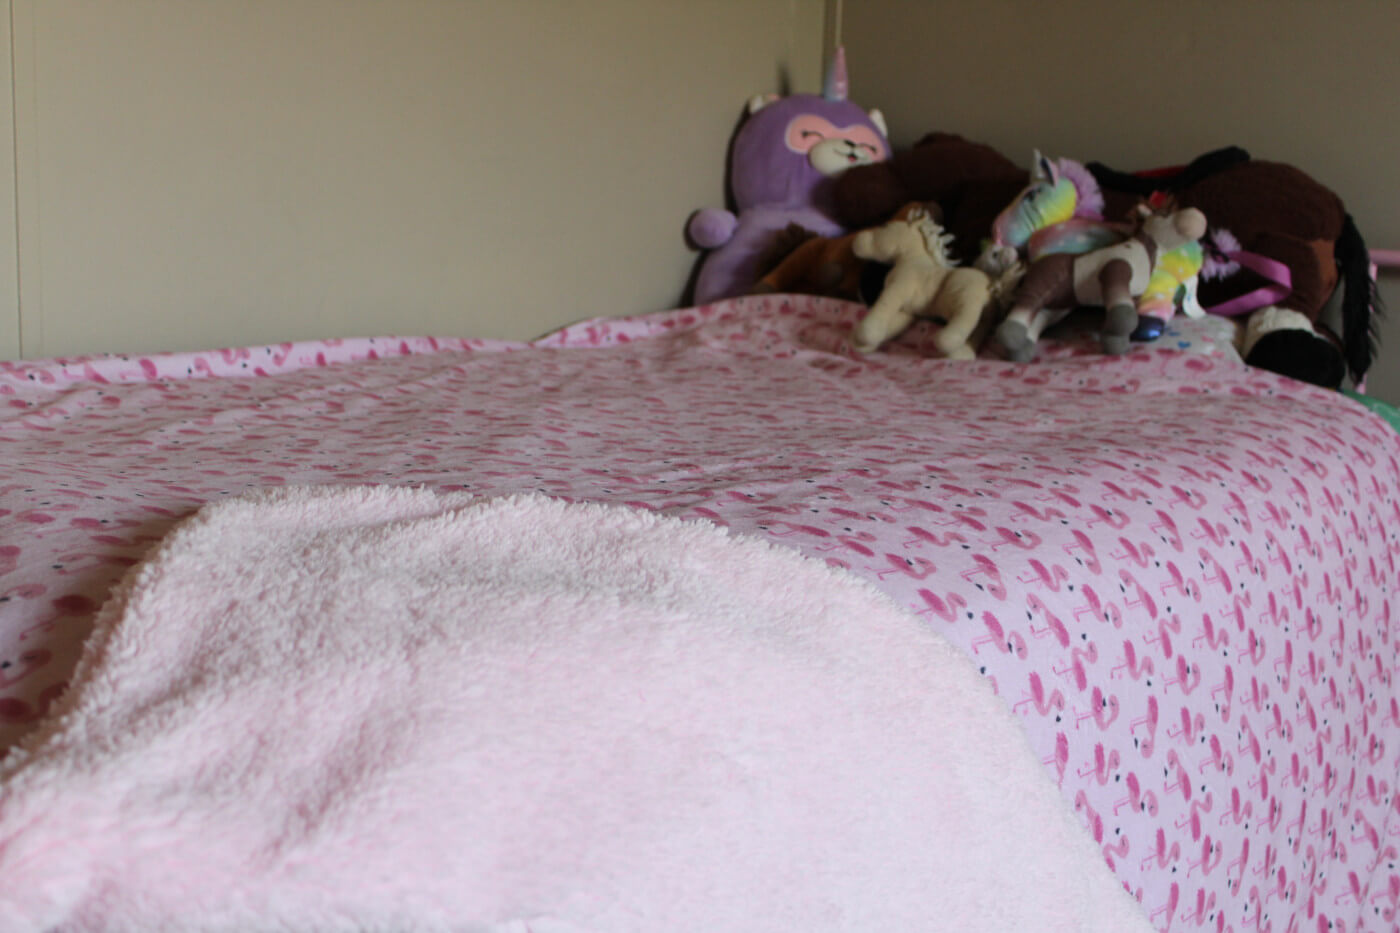
This blanket looks and feels so snuggly warm! It fits this twin-size bed perfectly, but I'm sure it will also be great to just wrap up in and watch a movie with. I cannot wait to give it to my daughter for her birthday. I had to sneak these pictures in to see how it looked, so hopefully it'll still be a surprise.
There are many different methods to sewing a blanket. The first blanket I ever made was with the guidance of my grandma and it was an even simpler construction than this one that I entered into the county fair when I was a child. I had that blanket for many years, even after I got married and sometimes simple is best. Sometimes it is just about the memories surrounding the making of a project, even a quick and easy sew. You never know who you are teaching and guiding along today and what sort of impact it could have on them. What a great gift to pass along whether it be knowledge and the know how or just a loving gift to aid in someone's day.
I hope this tutorial finds everyone well and ready to take on your next project! Want to get a little more adventurous? You could easily turn this tutorial into a dog or cat bed too by adding in some polyfil before you close the opening! I bet your pets would love that especially as we move into the colder months here!
So, who are you going to inspire to sew or create a blanket for? I'm sure it will be lovely!
Conclusion
In conclusion, learning how to sew a blanket offers a range of benefits. Not only can you create a personalized design and unique product, but it is also an economical and environmentally friendly option. You can ensure a durable and long-lasting blanket by selecting the right materials and using quality sewing notions. Following a step-by-step guide, such as the one in this blog, allows you to sew a blanket of any size easily. Additionally, you can explore various types of blanket sewing projects, from double-sided baby blankets to easy fleece blankets and patchwork picnic blankets. Remember, choosing the right material for your blanket is crucial to its quality and functionality. So, get your sewing supplies ready and enjoy the satisfaction of creating your very own cozy blanket.
Thank you for joining us today to learn how to sew a blanket! Before you leave, make sure to join our Facebook Group and follow us on Instagram. Happy Sewing!