DIY Face Mask for Kids | Sewing Tutorial
October is a fun month, and after the last seven months, I think we all need a little (socially distanced!) fun. Face masks are certainly a part of life now, and may be for some time. As we continue wearing face masks, its fun make a homemade face mask while being safe and still abiding by the CDC guidelines. Doing that, we can personalize our diy face masks to match our unique lives and loves. Aaaannd making a DIY mask cute and comfortable enough for our little ones to wear without too much argument. 🙂
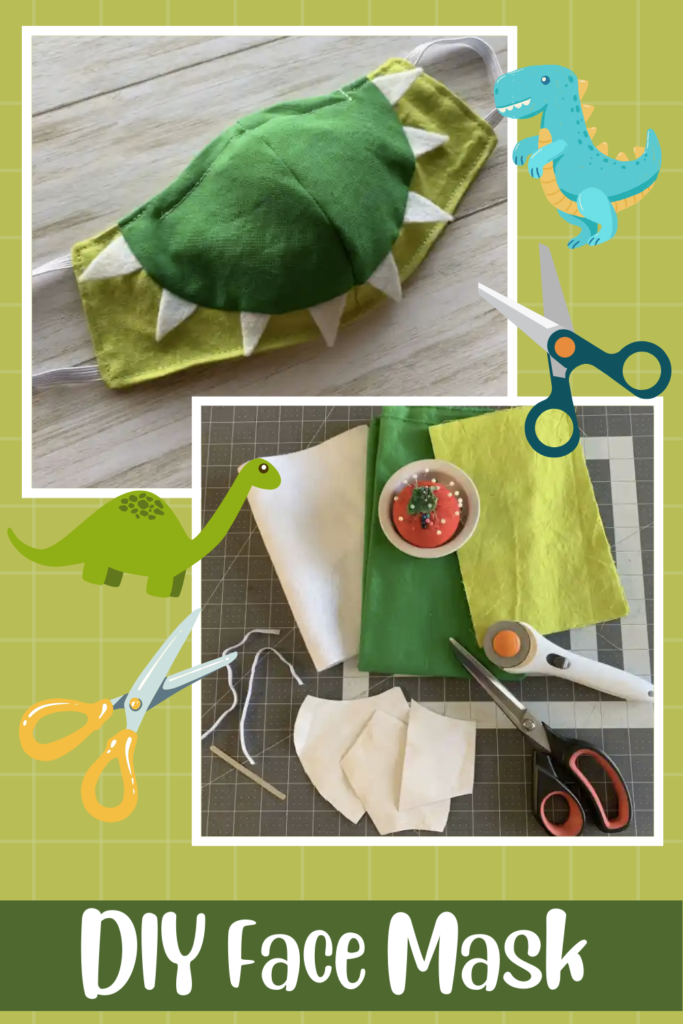
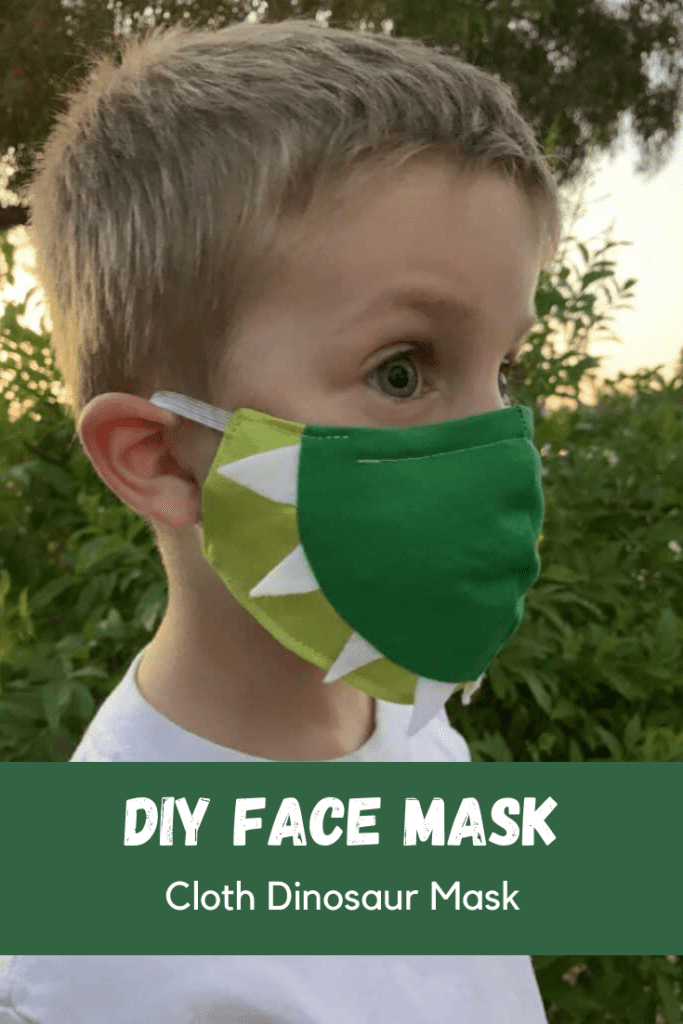
My 4 year old, fueled by Pinspirations of course, convinced me to make this mask for him. He’s been such a trooper since day one, wearing his mask over his face and not fearing adults that wear them. So I decided to make him a mask he’d be even more excited about wearing – done! That’s him in the picture below modeling his new homemade face mask.
Let’s get started!
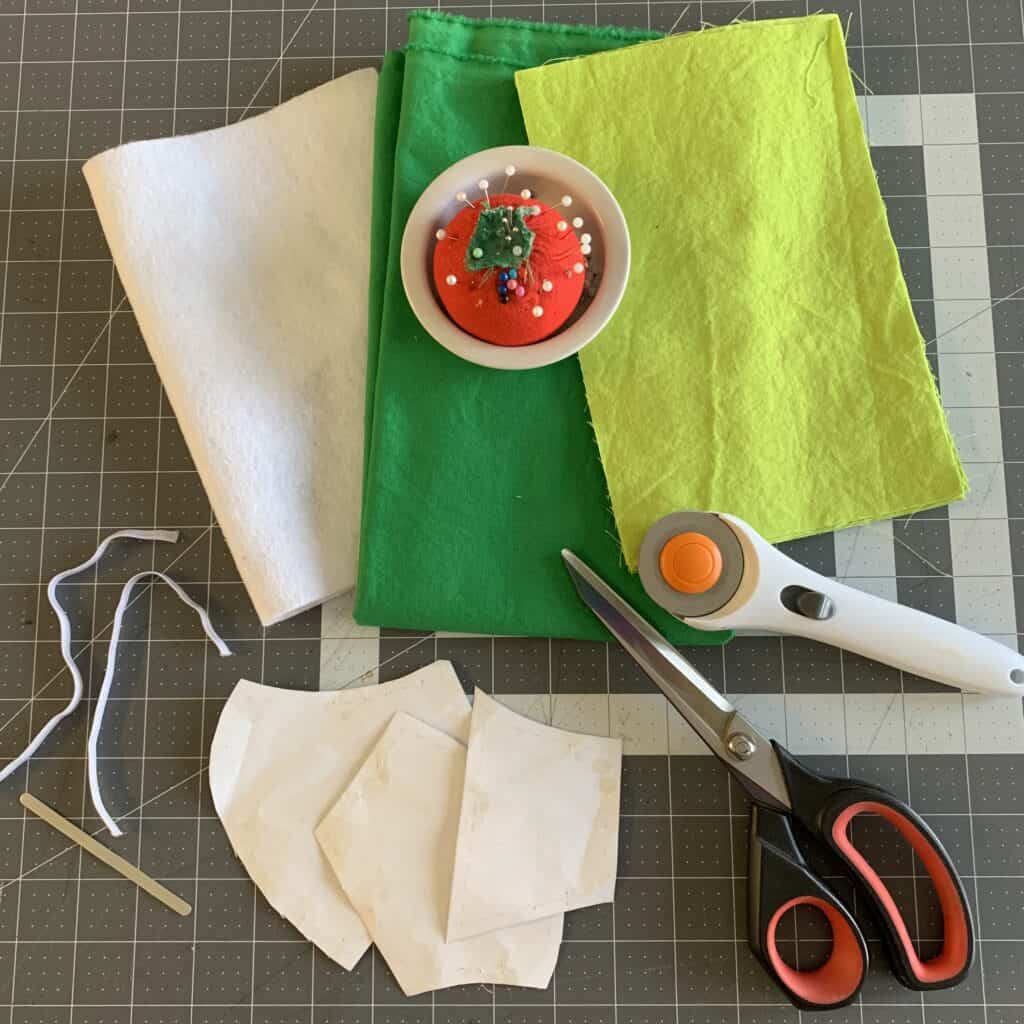
DIY Face Mask Supplies Needed:
- Two shades of green (or whatever colors suit your fancy!), 100% tightly woven cotton, pre-washed.
- White felt
- Your favorite cloth mask pattern. I recommend using a non-pleated version. I’m using the child’s size Olsen style from Unity Point Health (more on that below).
- Elastic or ties
- Scissors or a rotary cutter and self healing mat
- Pins or clips
- Nose bridge/wire (optional)
- Filter (optional)
Face Mask Notes & Disclaimers
A couple quick notes and disclaimers before I go any further with these homemade face masks.
According to the World Health Organization (WHO) –
Non-medical masks (also known as fabric masks, home-made masks, DIY masks) can act as a barrier to prevent the spread of the virus from the wearer to others.
A face mask can be purchased commercially or handmade, and are generally not standardized like a medical mask. There are numerous types of diy face masks but they should cover the nose, mouth, and chin and be secured with elastic loops or ties, include multiple layers, be washable and reusable.
Remember, the use of a mask alone is not sufficient to provide an adequate level of protection. Maintain a minimum physical distance of at least 6 feet from others, frequently clean your hands and continue to avoid touching your face and the mask.
The Olsen style mask was designed by medical professionals to be used when other surgical and N95 face masks are not available. It is curved to fit the nose and mouth area, and there is a pocket on the inside to hold an additional filter if you choose to use one. I will oftentimes insert a disposable mask inside my filter pockets, but you can opt to use any number of other recommended filters.
I understand that people have very differing opinions on face masks and they can be a sensitive subject – please simply enjoy this adorable diy face mask tutorial. That’s all I ask. 🙂
Ok… back to the fun mask tutorial!
Steps to Make DIY Face Masks
DIY Mask Step 1. Draw your dino snout.
Grab the front part of your mask pattern.
Mark a line 1″ from the bottom of the front piece (where the chin will go) as well as 1″ from the side of that same piece (where the cheek will be).
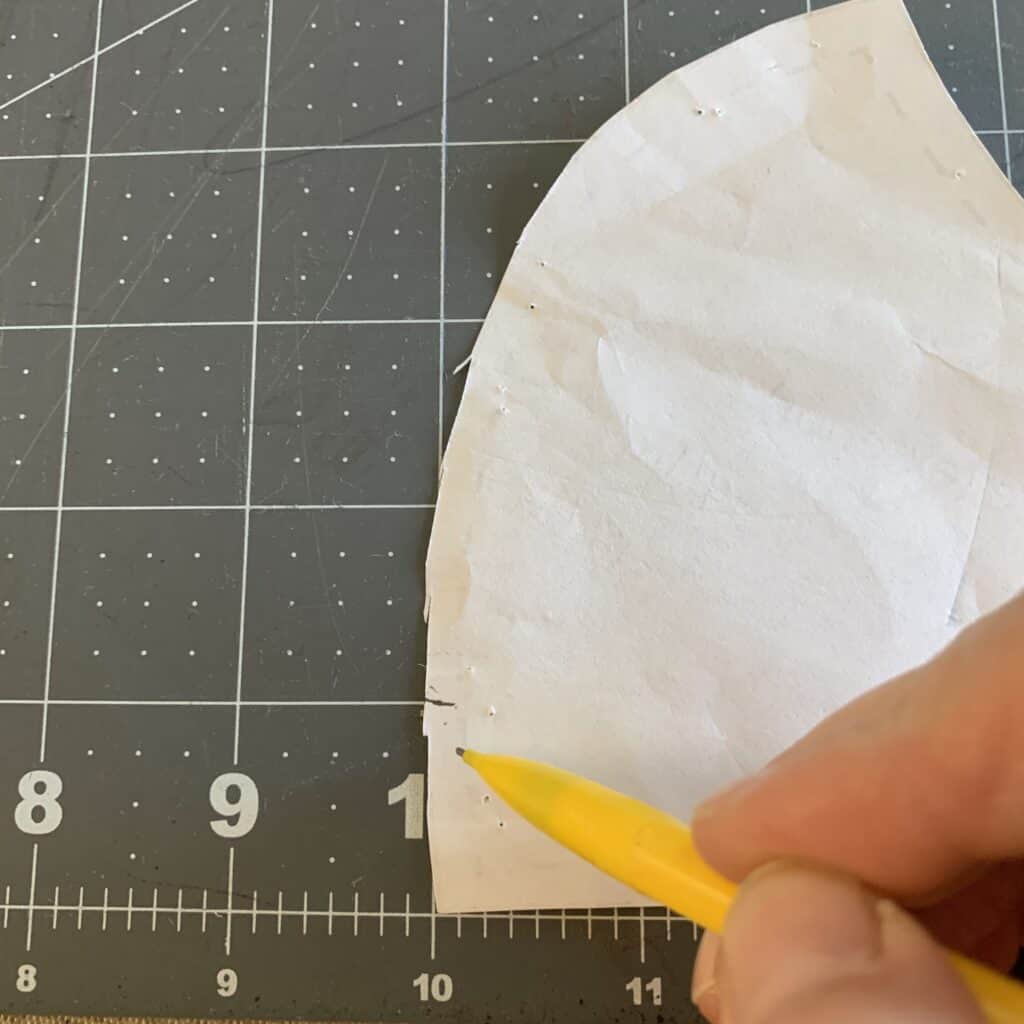
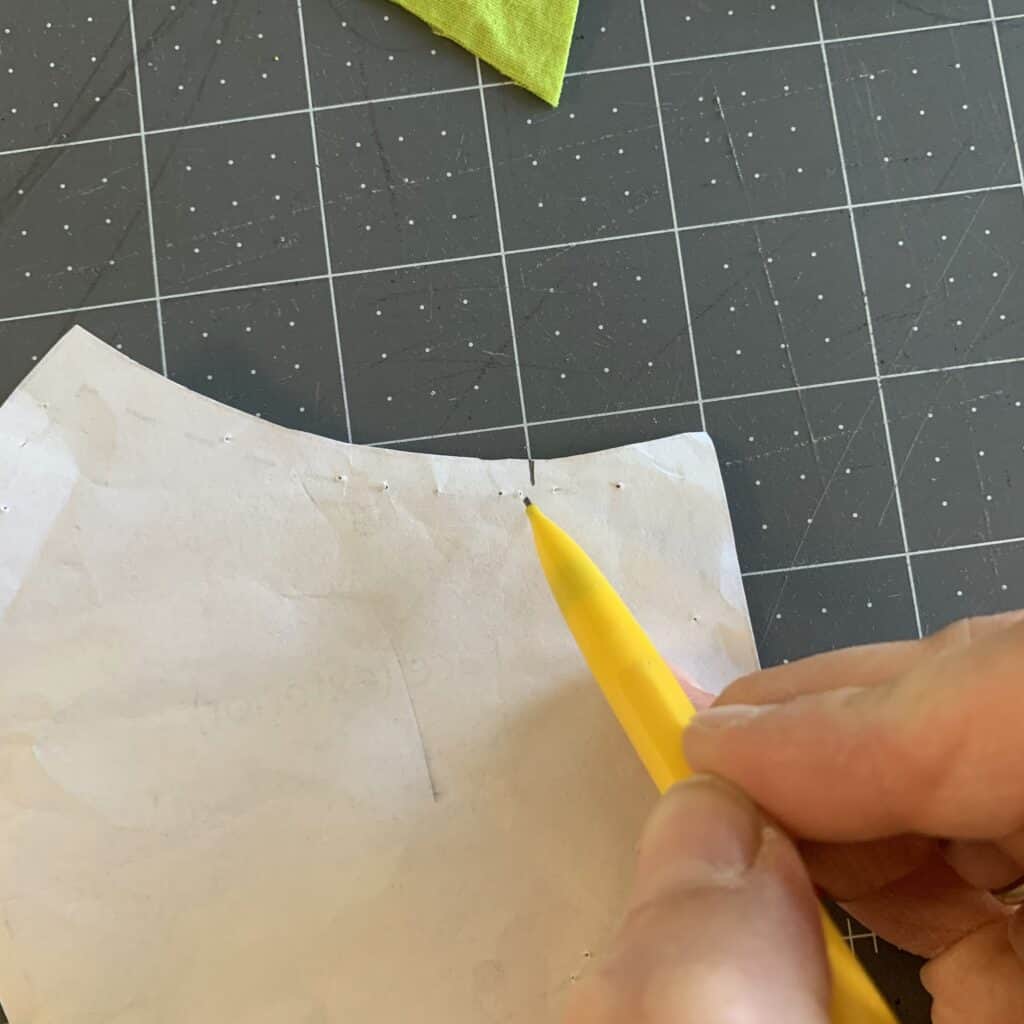
Make a curved “dino snout” connecting those two points.
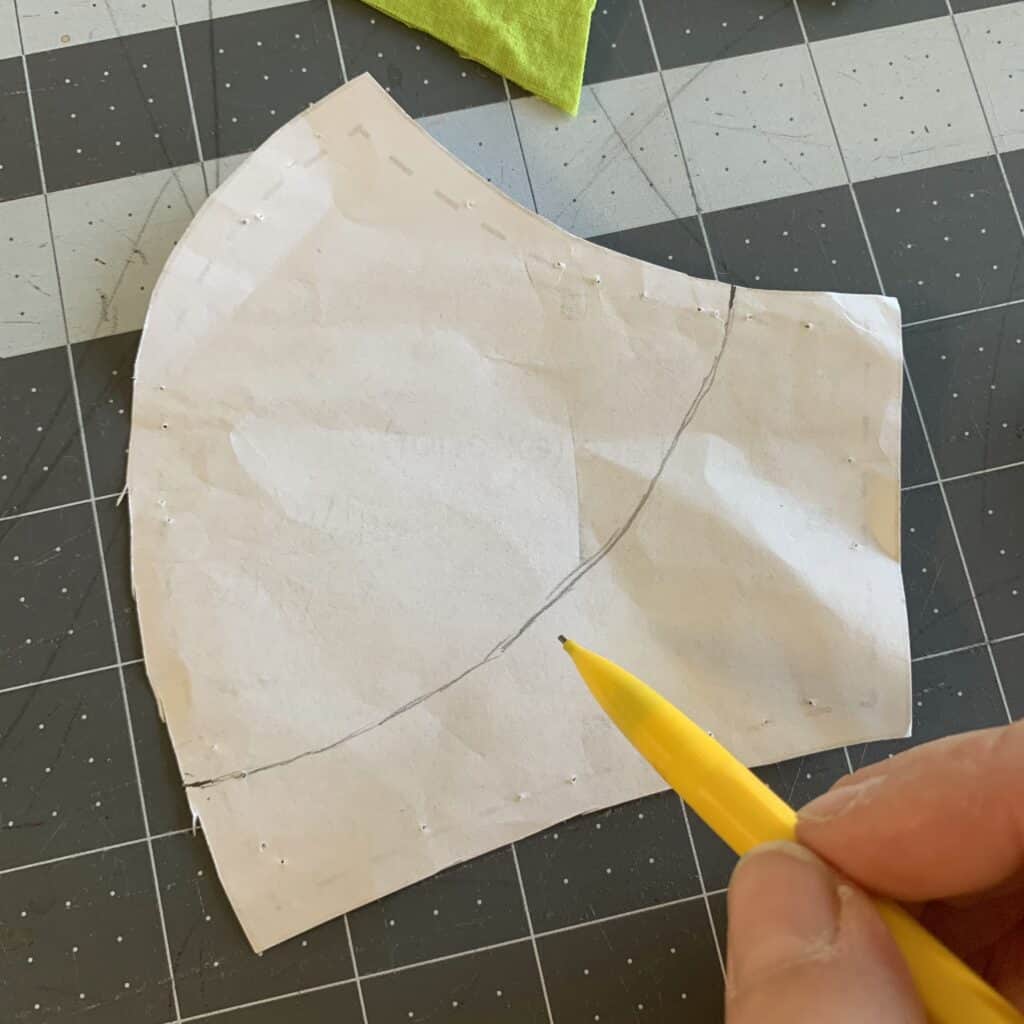
DIY Face Mask Step 2. Create some dino teeth.
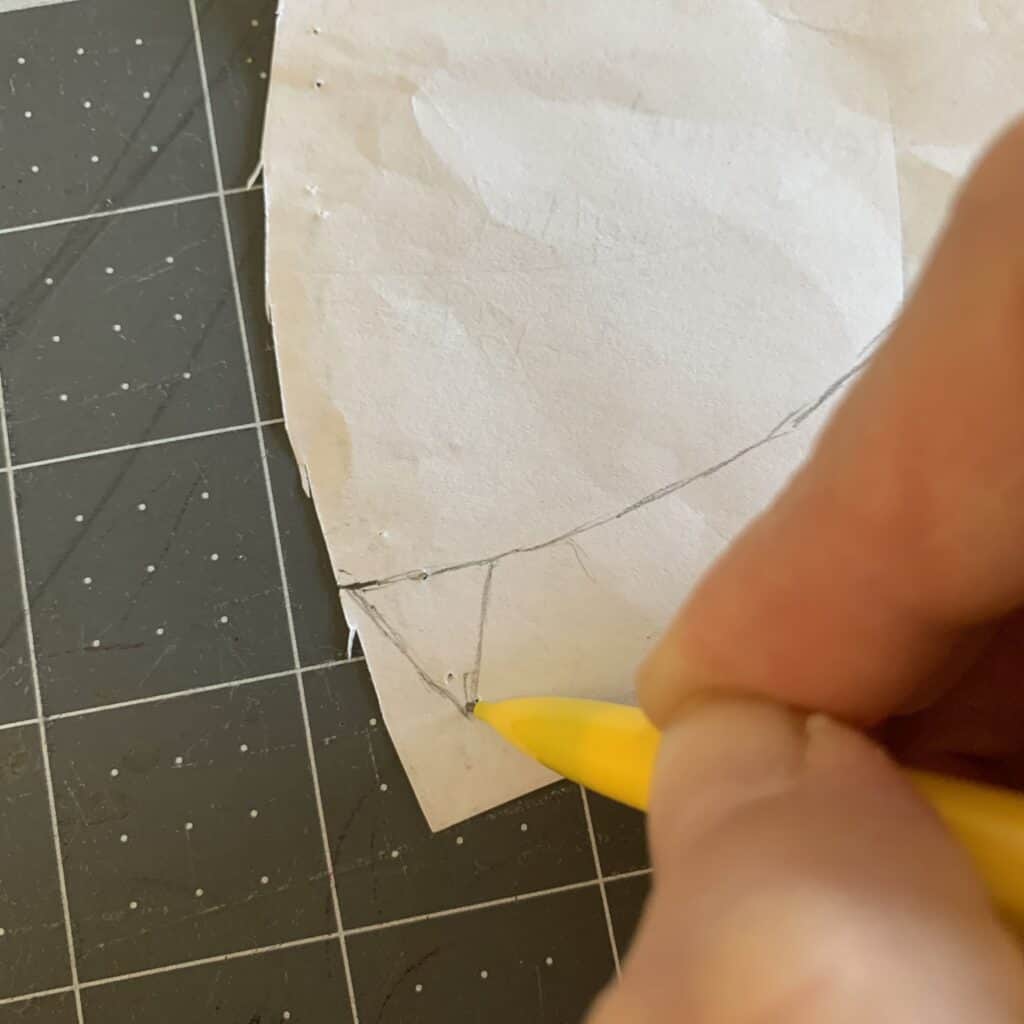
This is one of the fun parts – draw in some teeth to your mask! You can make them as big or as small as you’d like, make them sharp for carnivores like the T-Rex, or dull for herbivores like the Triceratops. It’s your choice!
Since my son loves T-Rex, the mask teeth have to be sharp and scary!
I drew mine 3/4″ long and about 1/2″ wide at the base. Like many projects I’ve been showing you, this is not an exact science, though. Have fun with it!
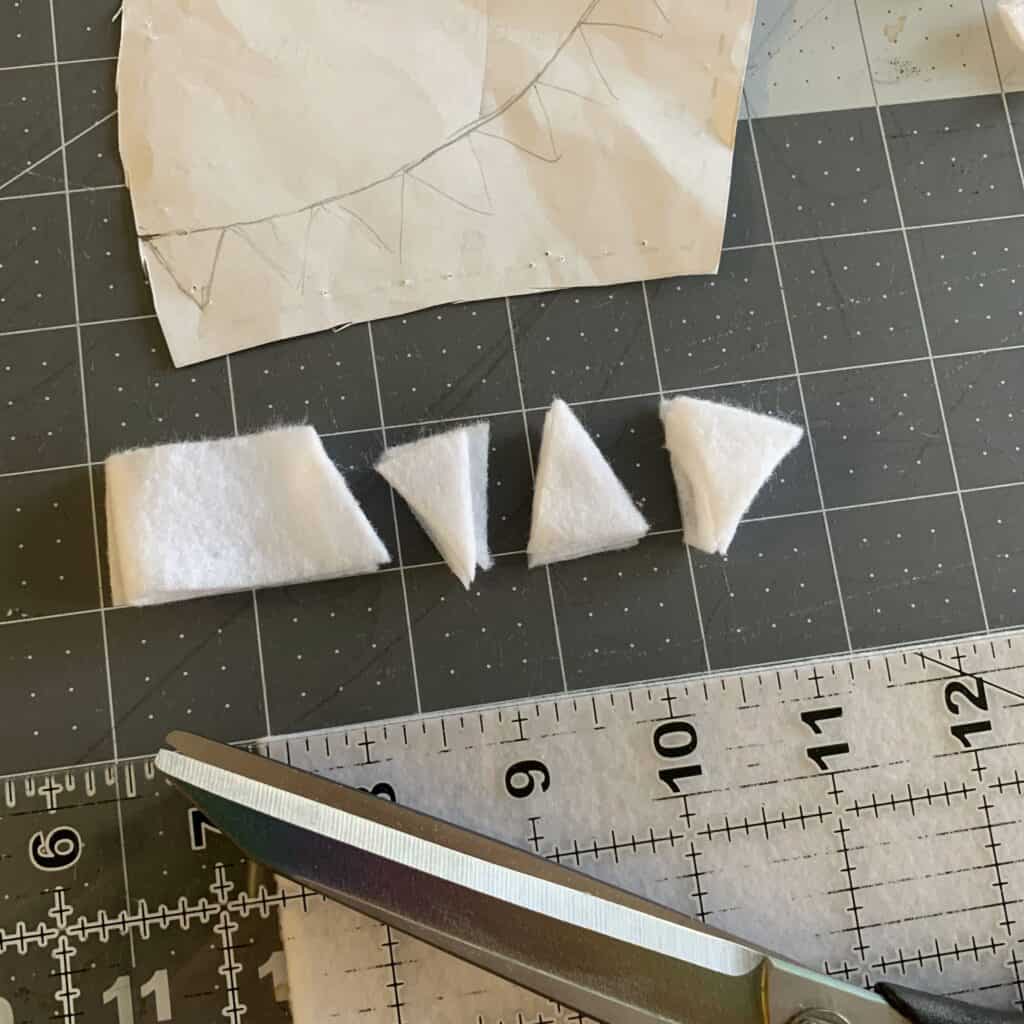
Step 3: Cut out the teeth.
Grab your felt, and cut out the teeth. Just as I mentioned above, they can look however you want them to!
I cut a strip 1″ long since I wanted my teeth to be 3/4″ long and I’m including a 1/4″ seam allowance.
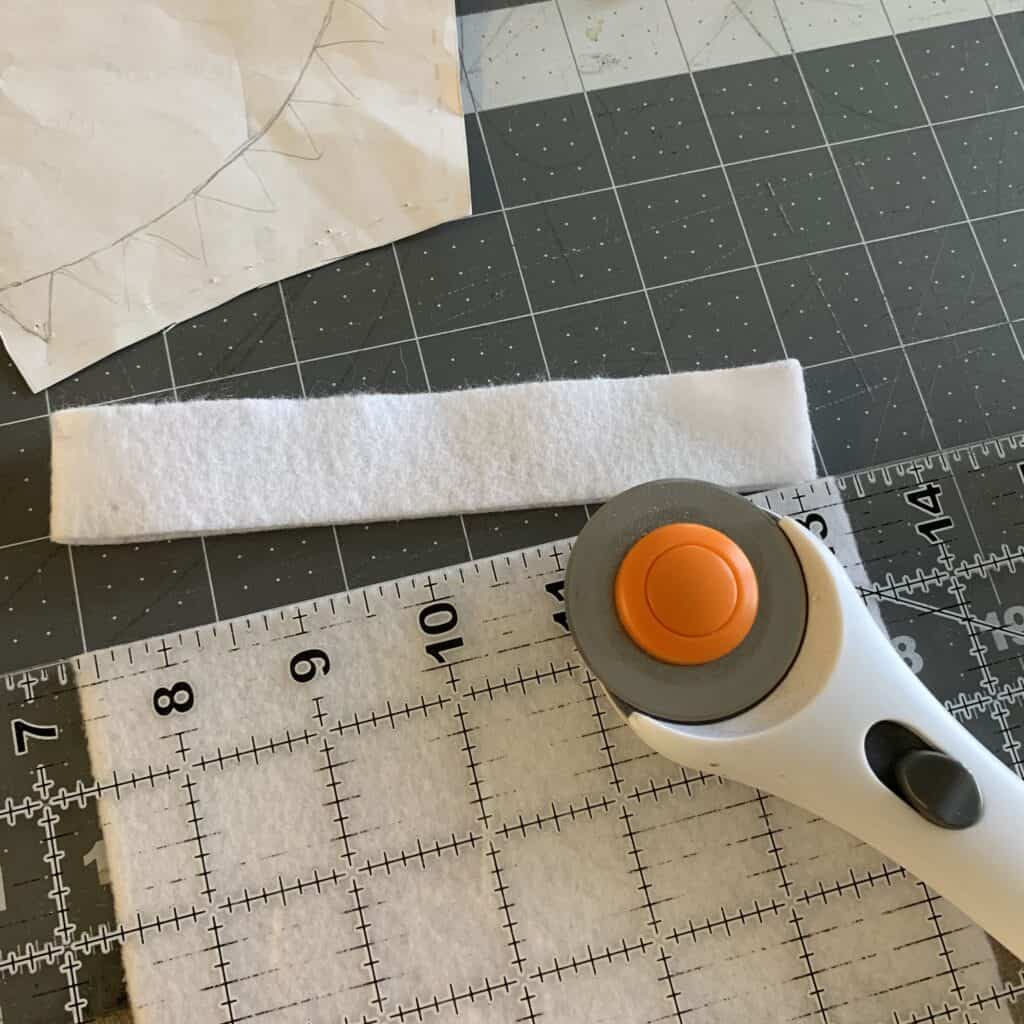
Next I cut them into trianges, roughly 1/2″ wide as I’d originally planned.
Step 4: Add the seam allowance.
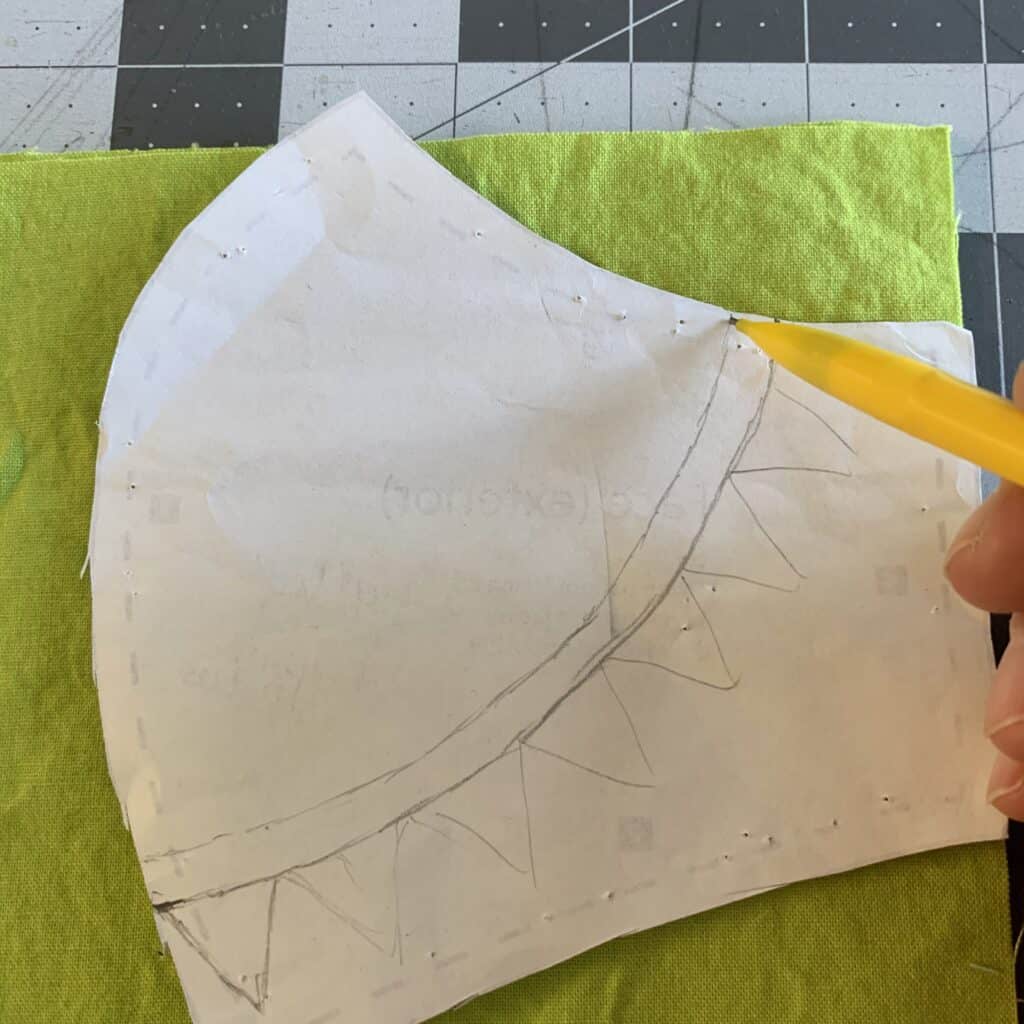
Draw two lines on either side of the snout line, indicating where you will cut your fabric for the mask. You can use whatever seam allowance you’d like. I tend to use 1/4″, so will be drawing a line 1/4″ above the snout line and another one below. (I only took a picture of the first seam allowance line I drew).
Step 5: Cut your fabric
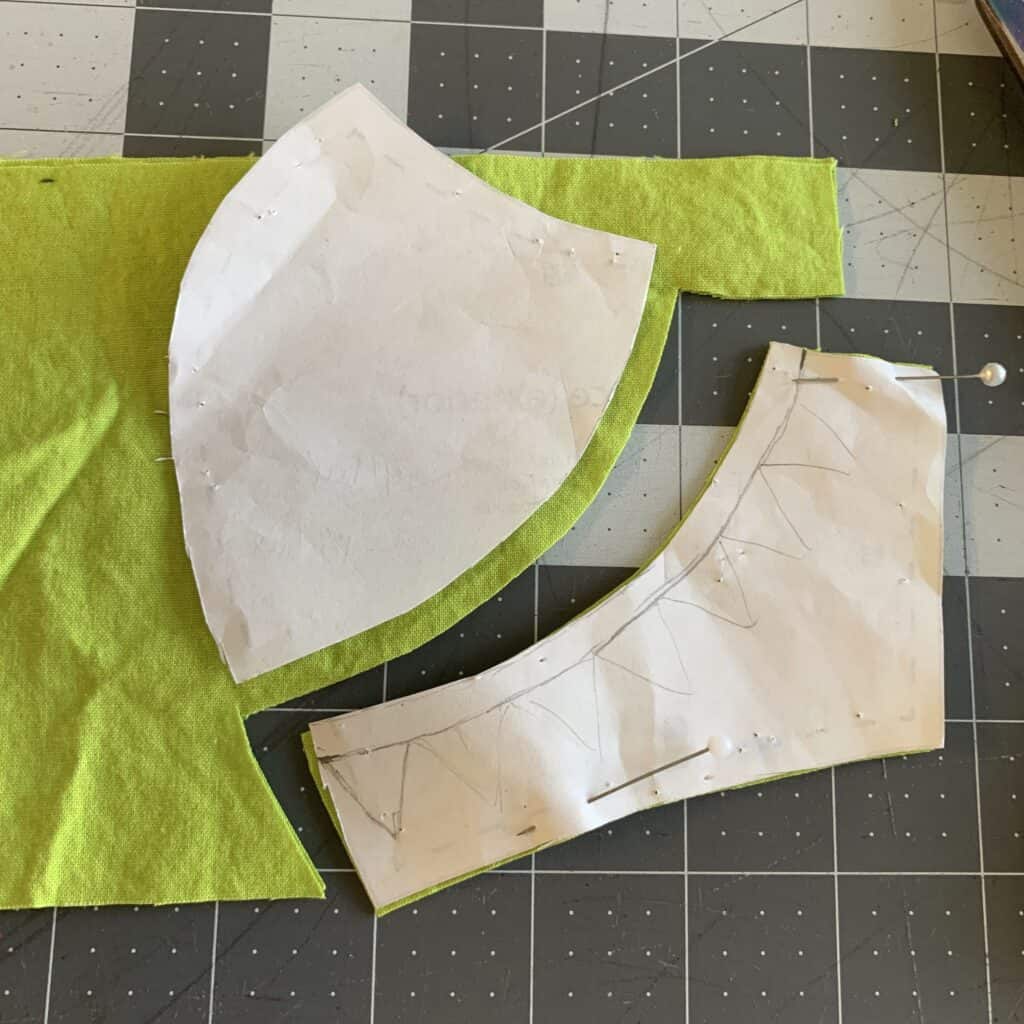
Cut the back piece(s) as per your mask pattern’s instructions.
For the front – with the awesome dino snout and teeth! – cut the bottom portion at the seam allowance line above the snout line.
Tape your pieces back together – or print out multiple versions of the pattern piece.
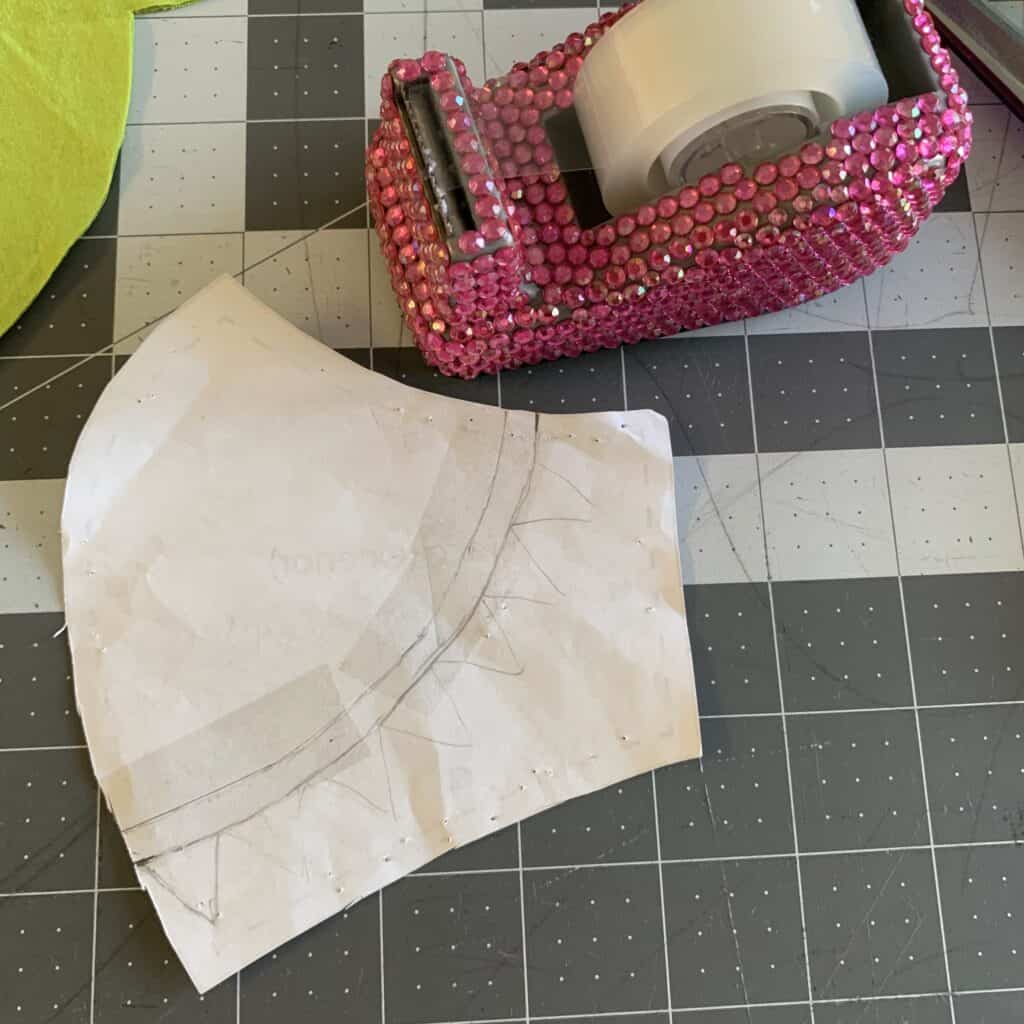
(Pretend to see a second seam allowance line in the image about, 1/4″ below the snout line. I forgot to add it initially, and when I remembered, didn’t take pictures. I was sidetracked by two cuties that really needed me to turn on their car…)
(Ok… Back to it!)
Repeat with the top portion, cutting the fabric at the 1/4″ seam allowance line below the snout line.
You should now have all your mask pieces!
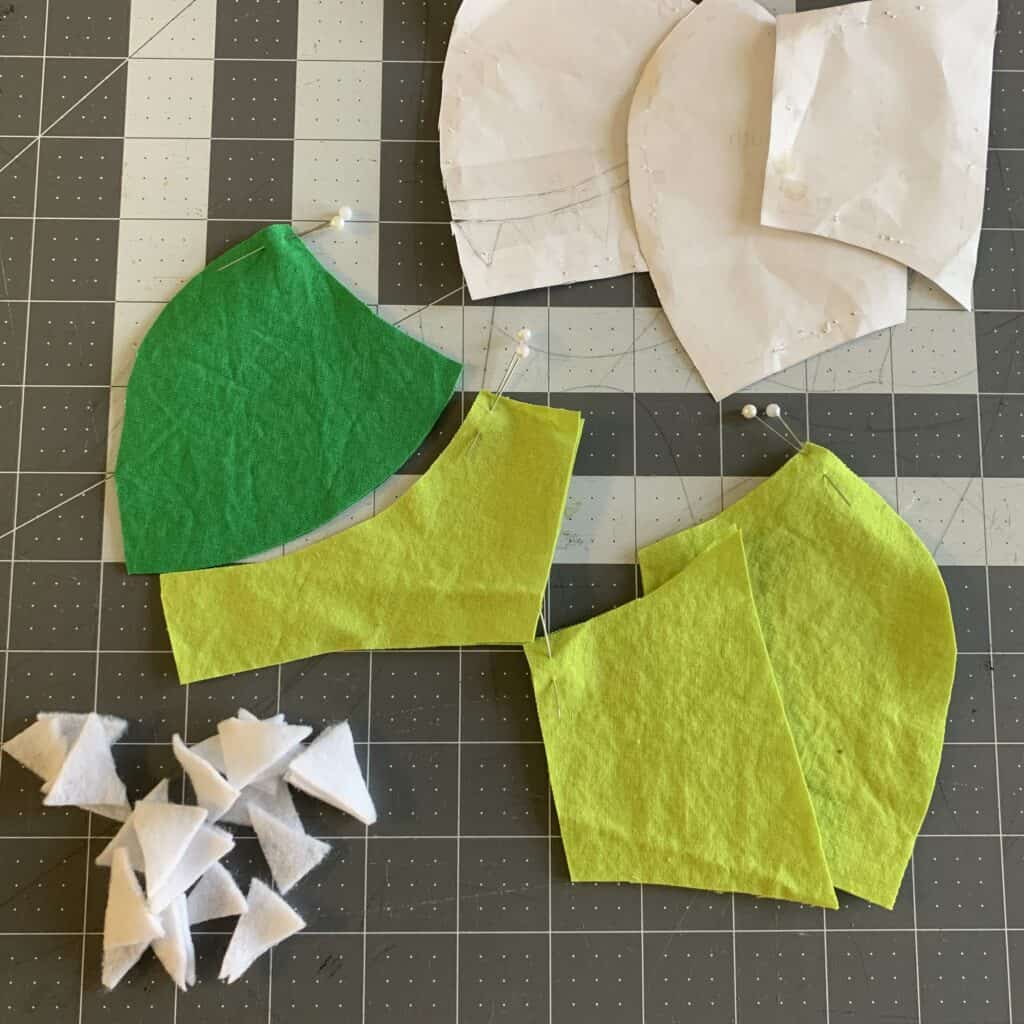
Step 6: Place and sew on the teeth.
This is the fun part! Get creative and lay out your teeth! You can overlap them, only add two or three, make them close together or far apart… whatever you’d like for your mask.
I started mine a smidgy bit over 1/4″ from the center line (where the two pieces will be sewn together) so they do not touch in front. I then placed them 1/4″ from one another, somehow perfectly aligning them so they stopped 1/4″ from the top raw edge, to allow for the seam allowance.
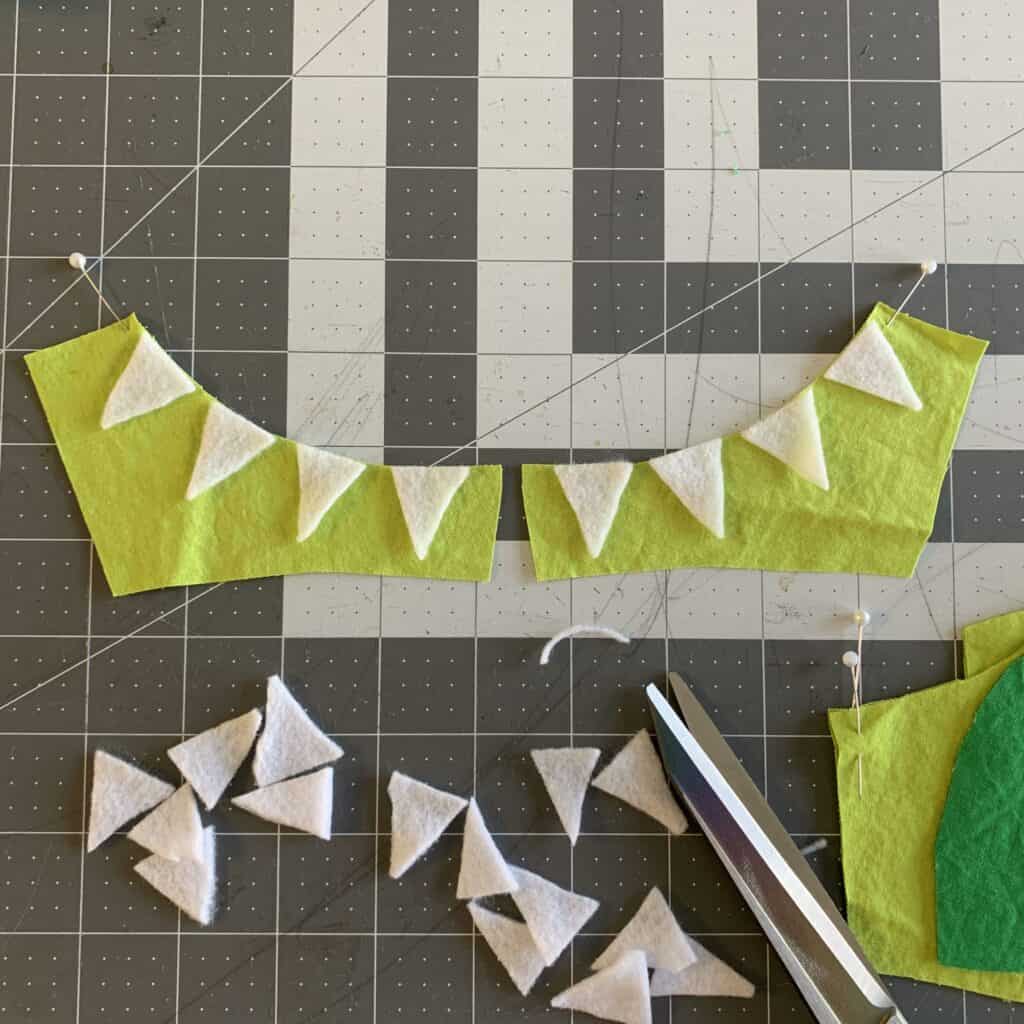
That was fun right?! Or was that just me…? 🙂
Baste into place.
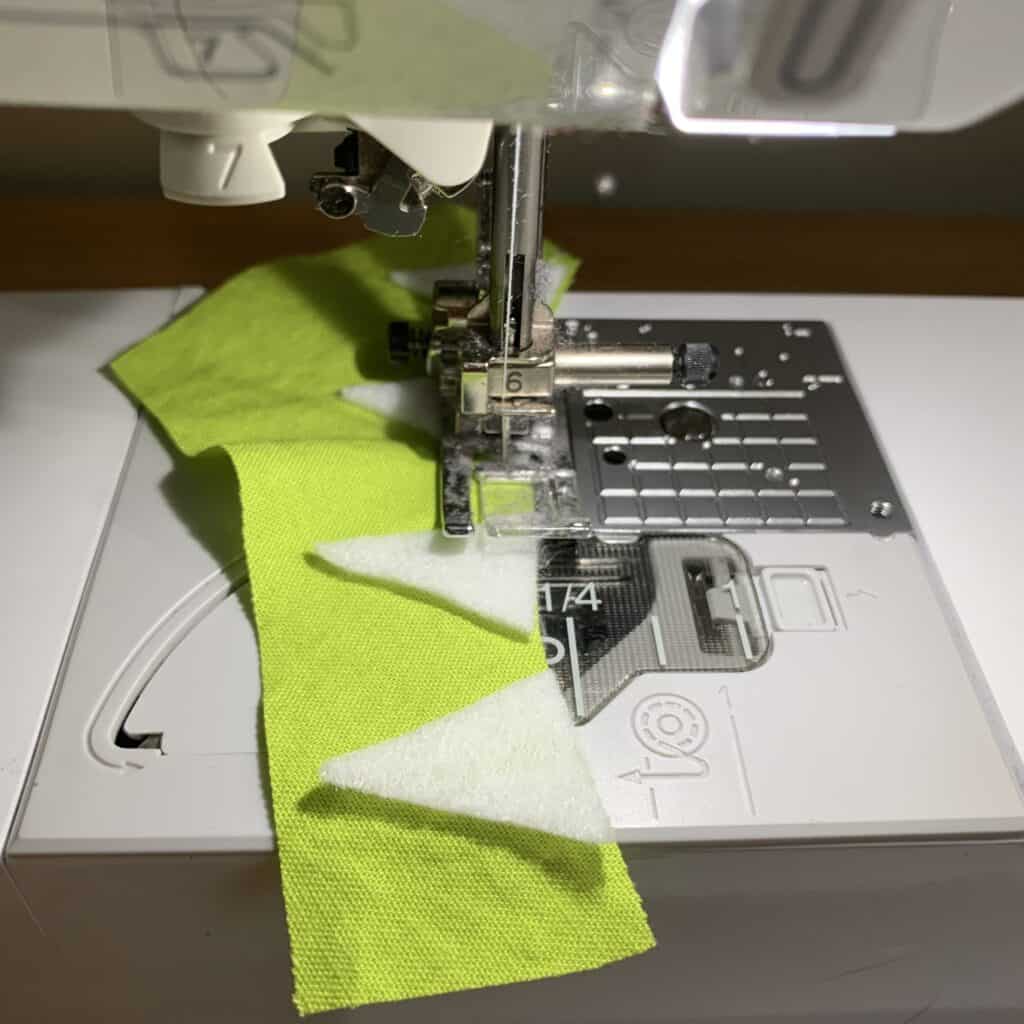
Felt tends to stick to fabric pretty well, so I didn’t use pins or any sort of clips to keep them in place before basting, but you may need to. I recommend pinning only when necessary, and if at all possible, within the seam allowance. Try to avoid putting unnecessary holes on your mask.
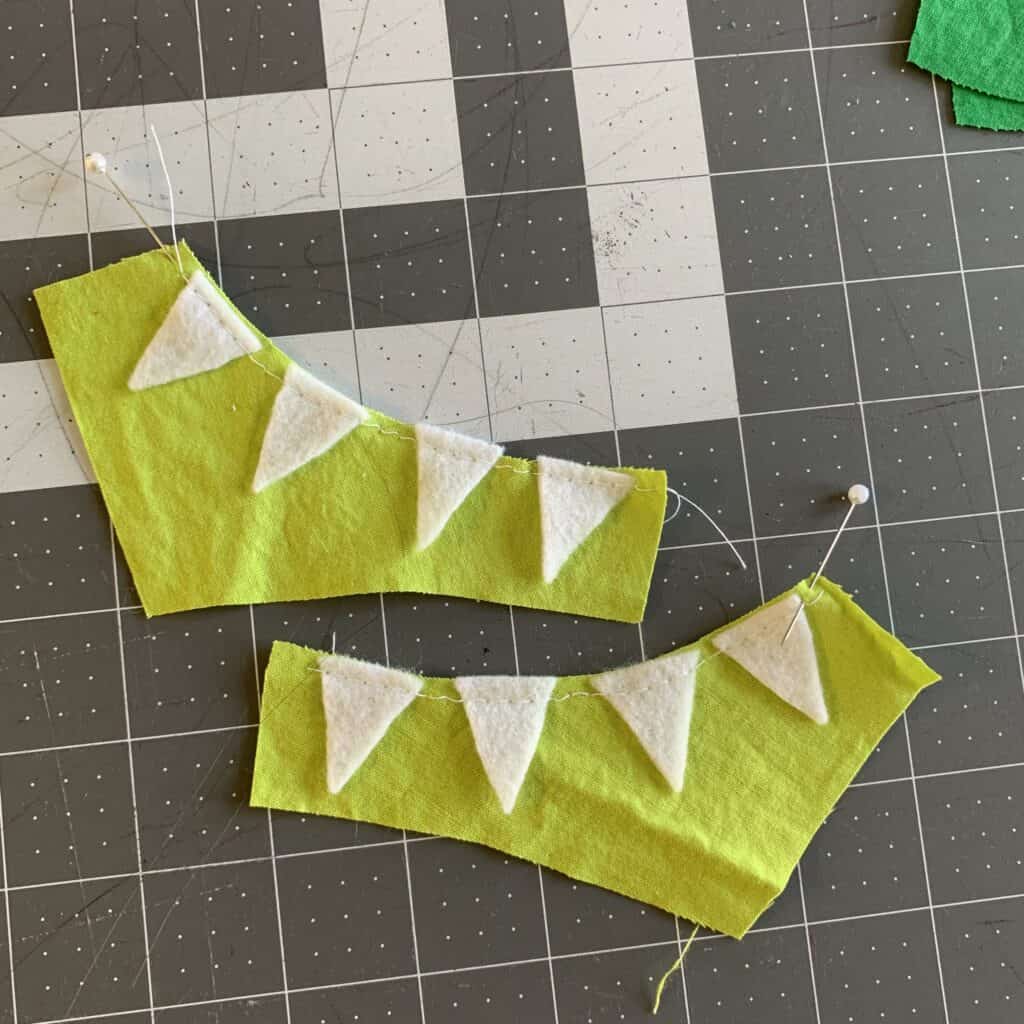
Step 7: Sew the snout and teeth pieces together.
Grab your two front pieces, aka the snout and teeth pieces.
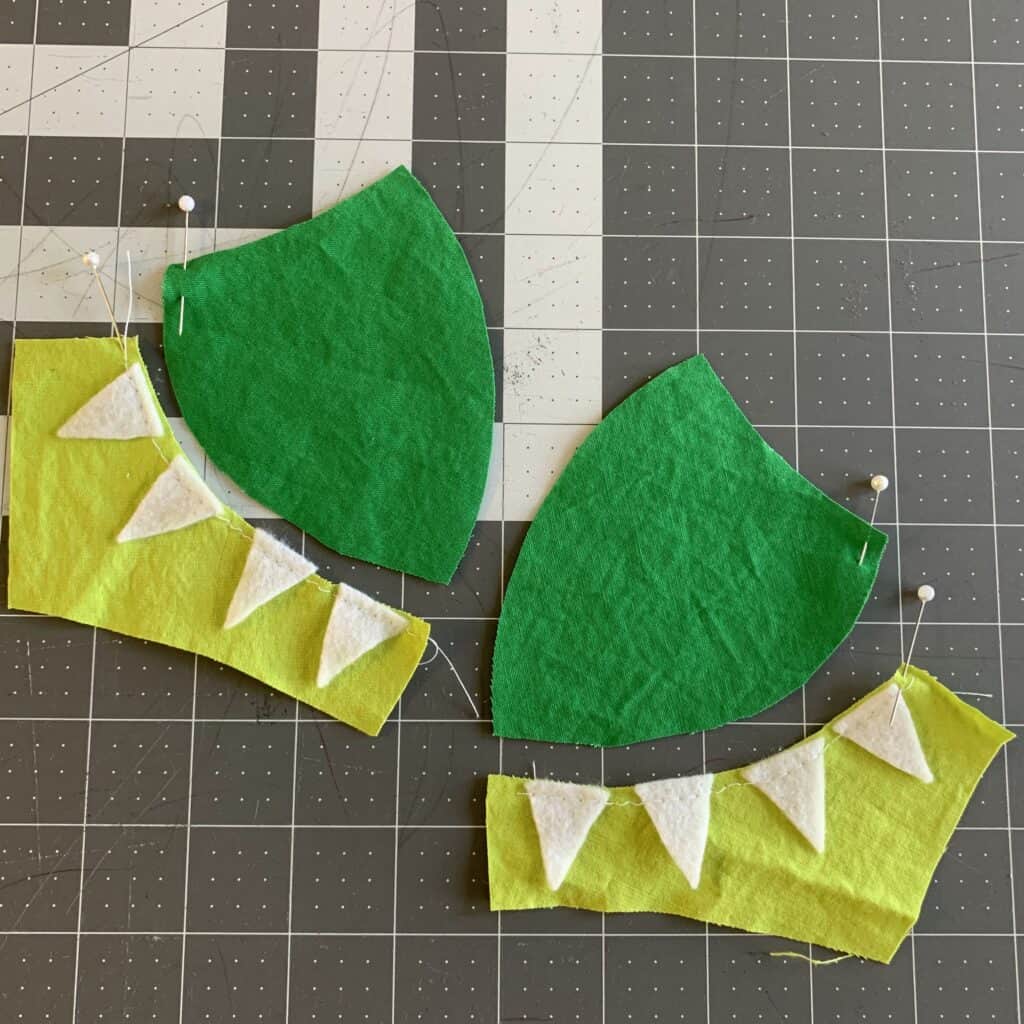
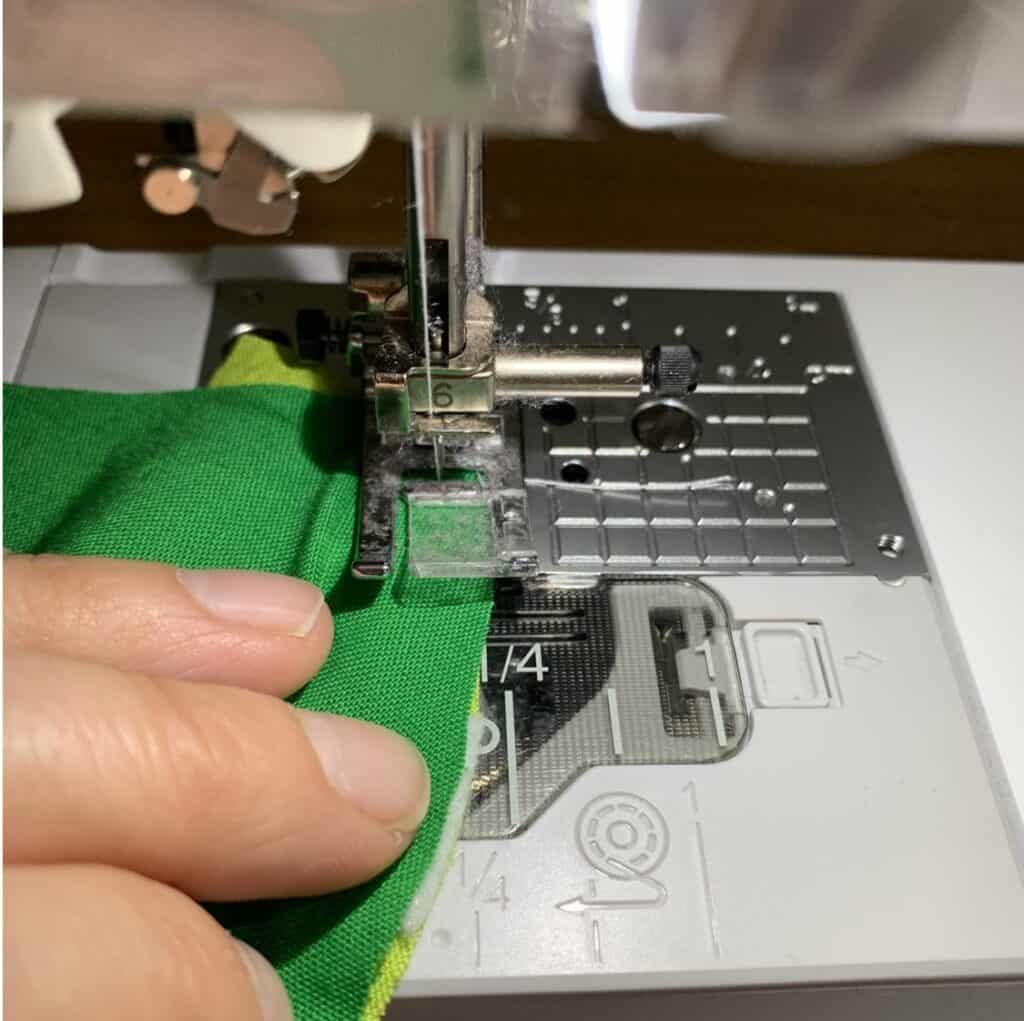
This is somewhat tricky. If you’re familiar with sewing a gusset, this is the same concept. You’re going to be sewing two curved pieces together.
With right sides together, match the top, middle, and bottom part of the front pieces and pin – within the seam allowance if possible.
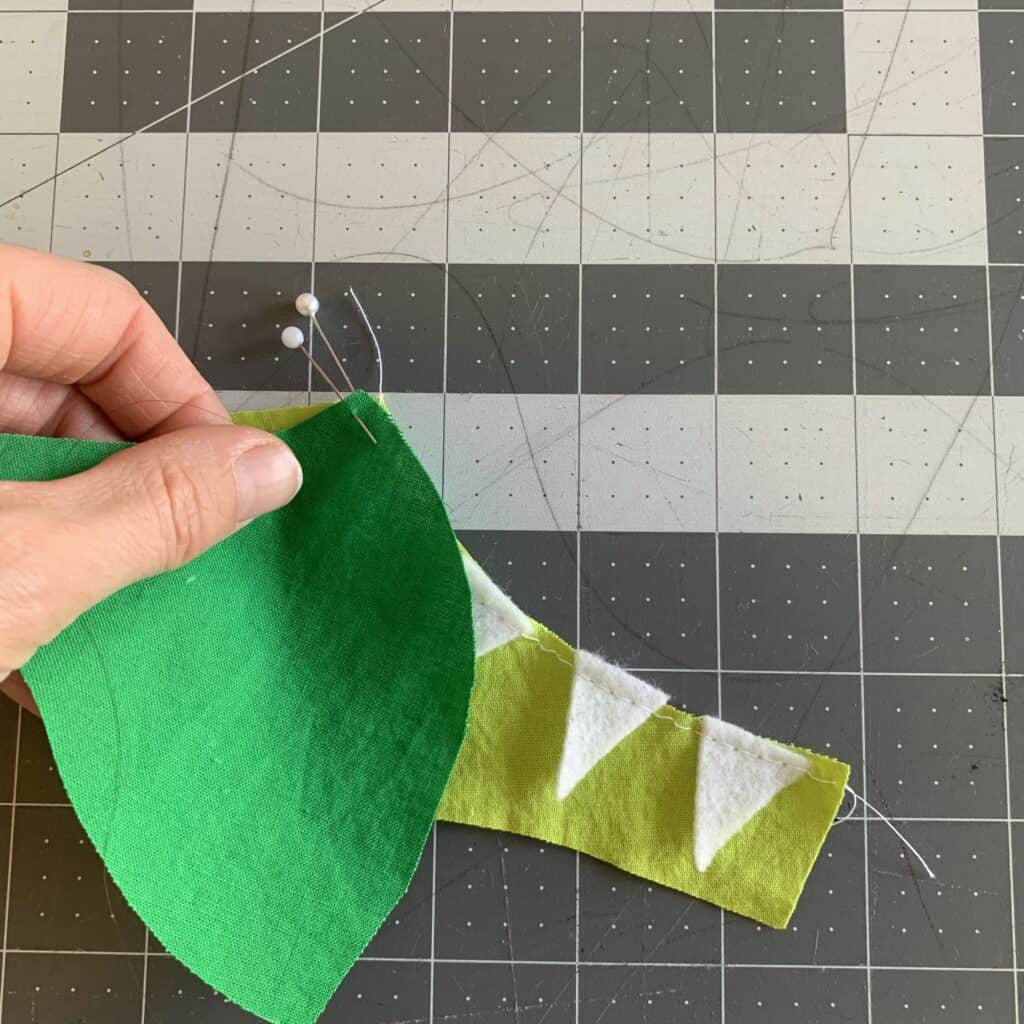
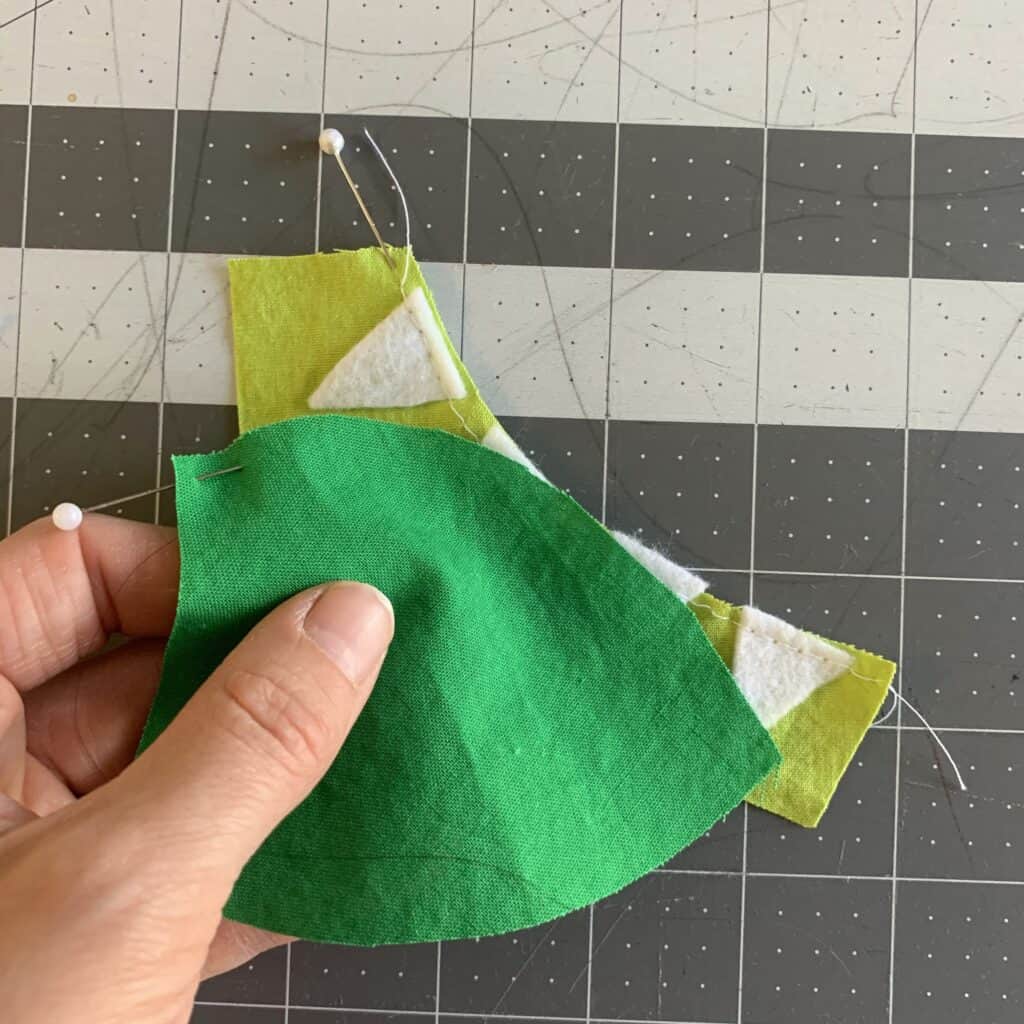
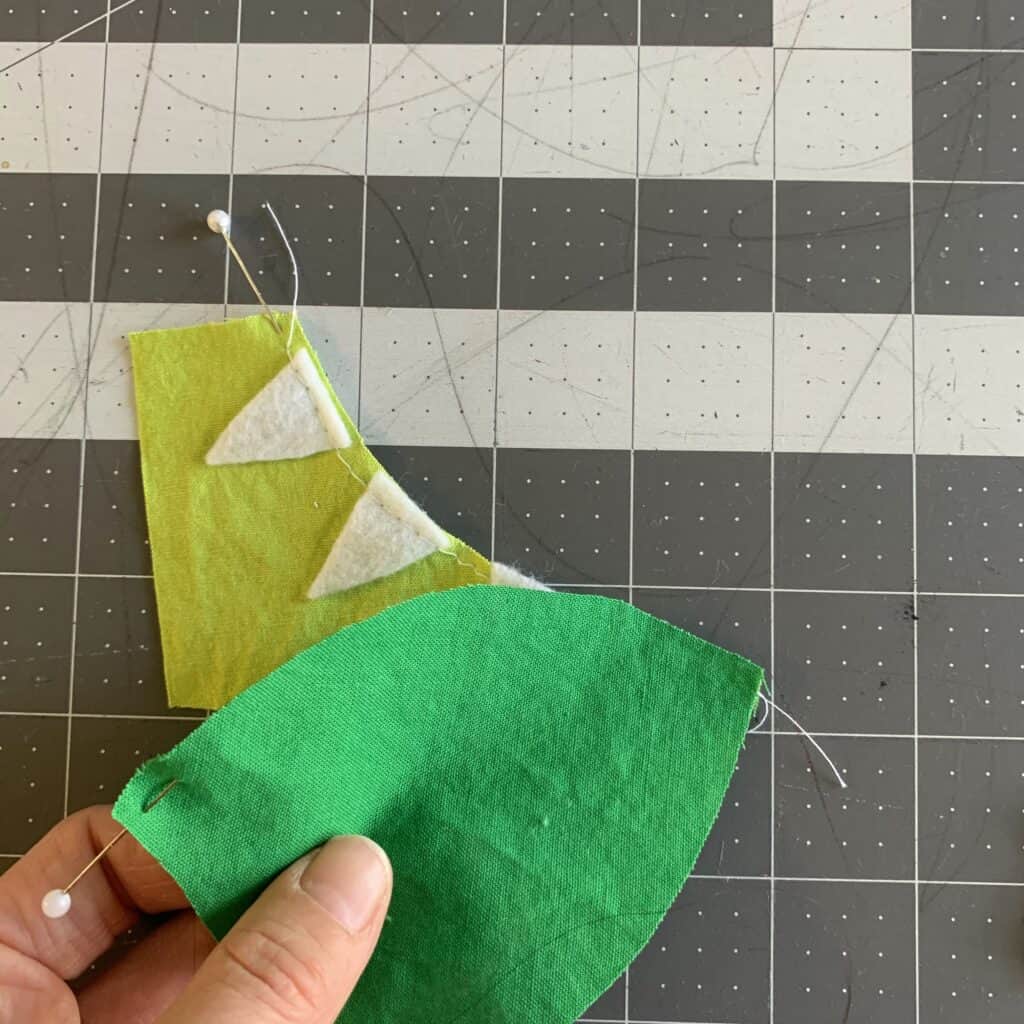
I didn’t pin the middle in the image below, but it will look something like this.
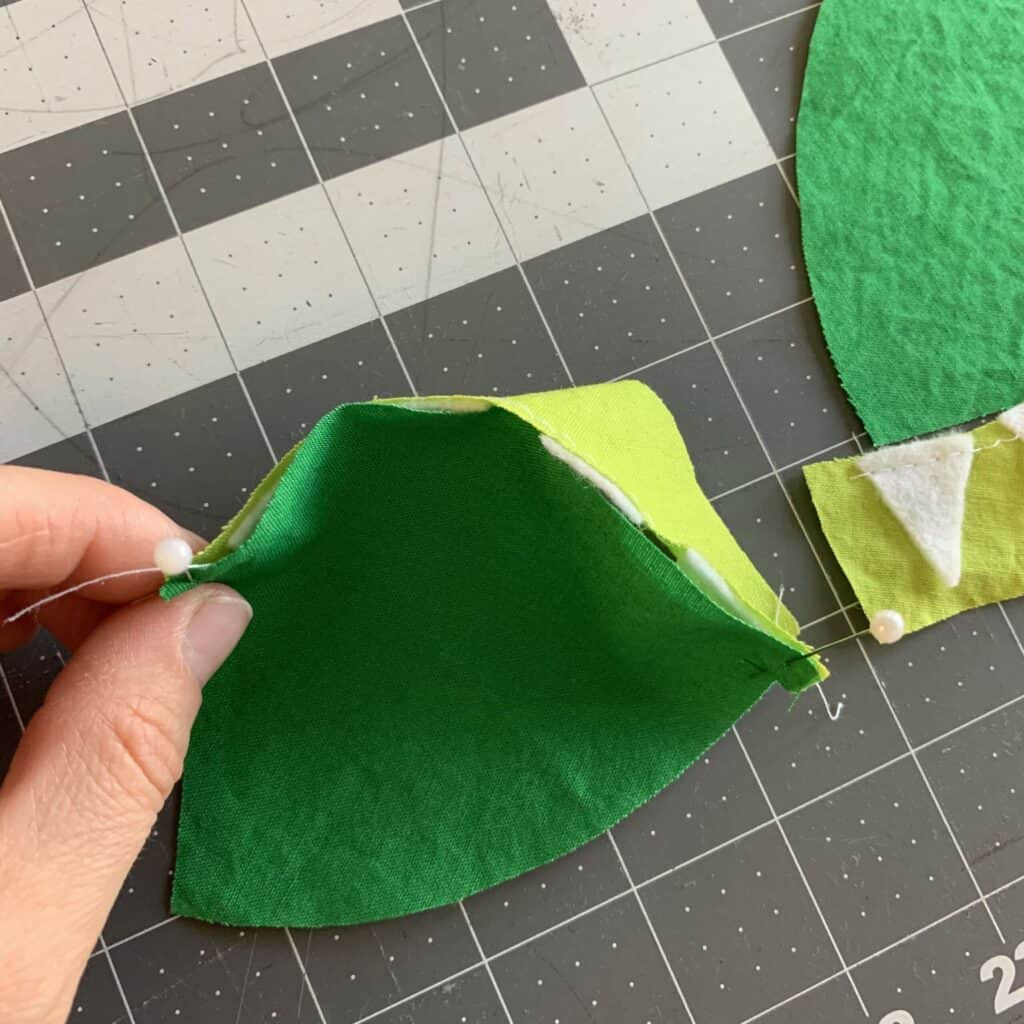
Sew together, carefully keeping the curved pieces aligned.
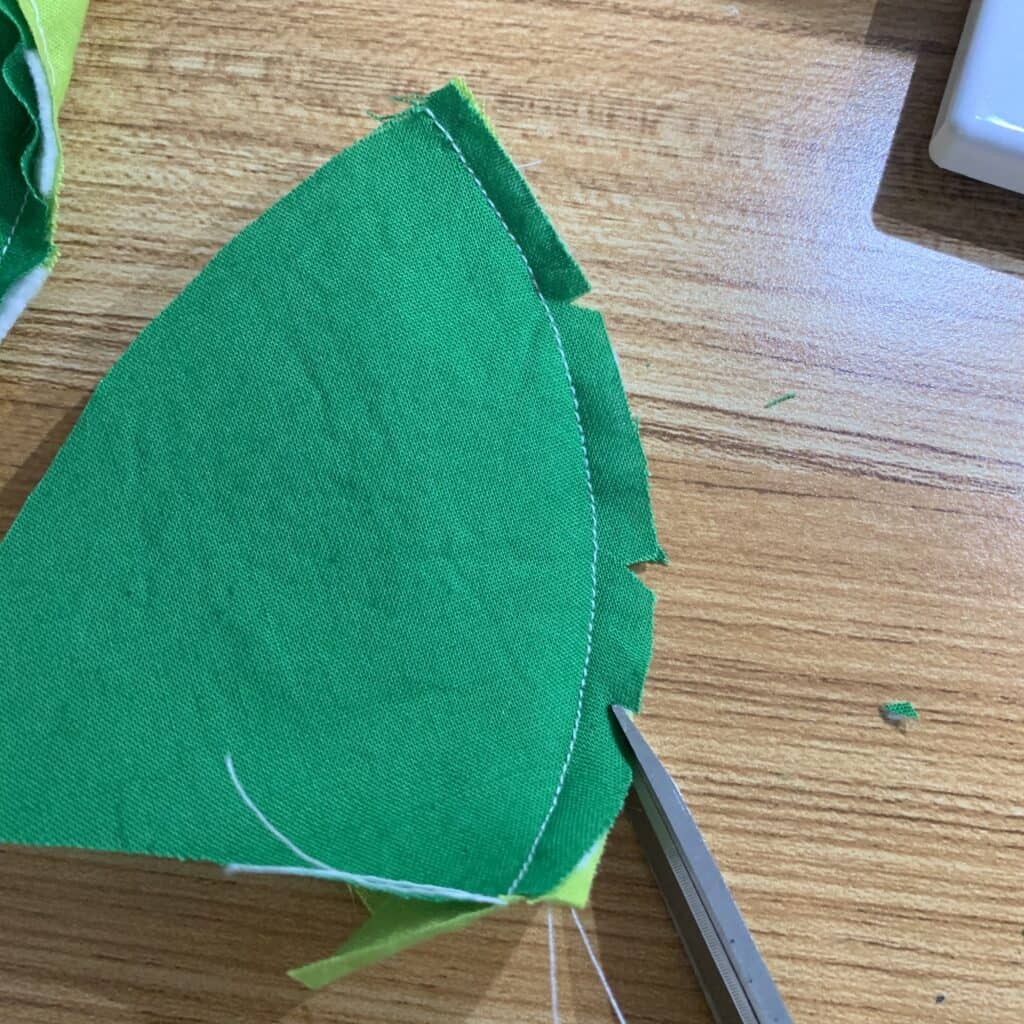
Once the DIY Face Mask is sewn, clip the curve to reduce bulk. (Check out this tutorial for more information on Reducing Bulk!)
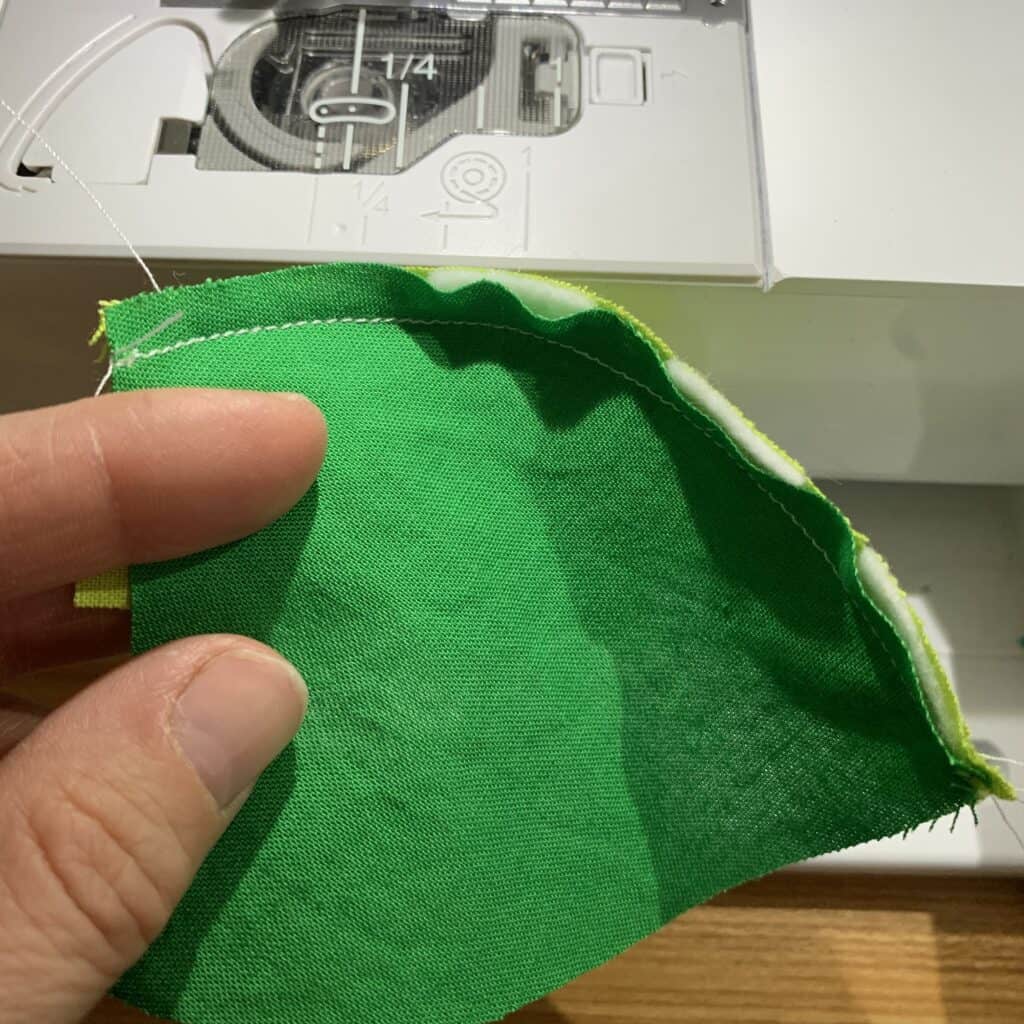
Open the piece and finger press. The seam allowance will be upward, so so you won’t be looking down into the seam and so the teeth lay flat again that piece.
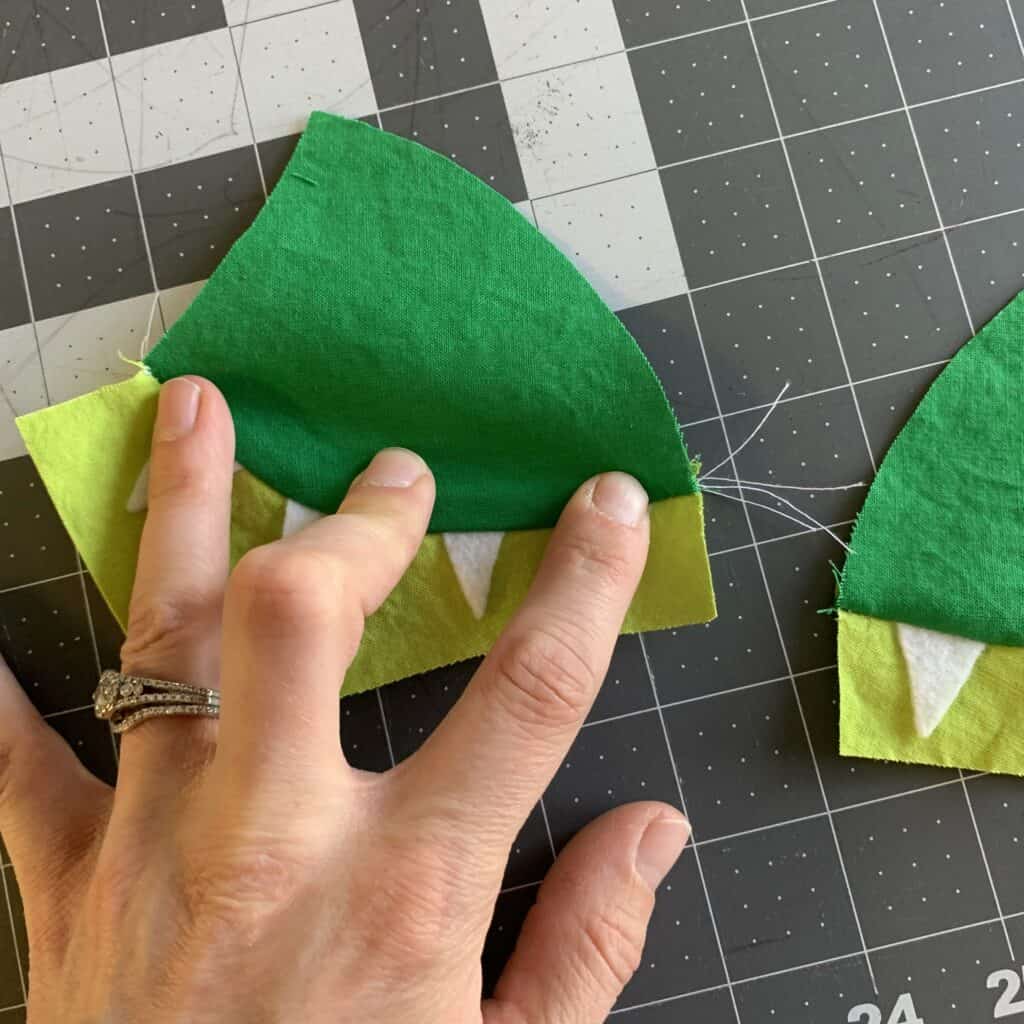
Repeat with the other side, and there are your two sides!
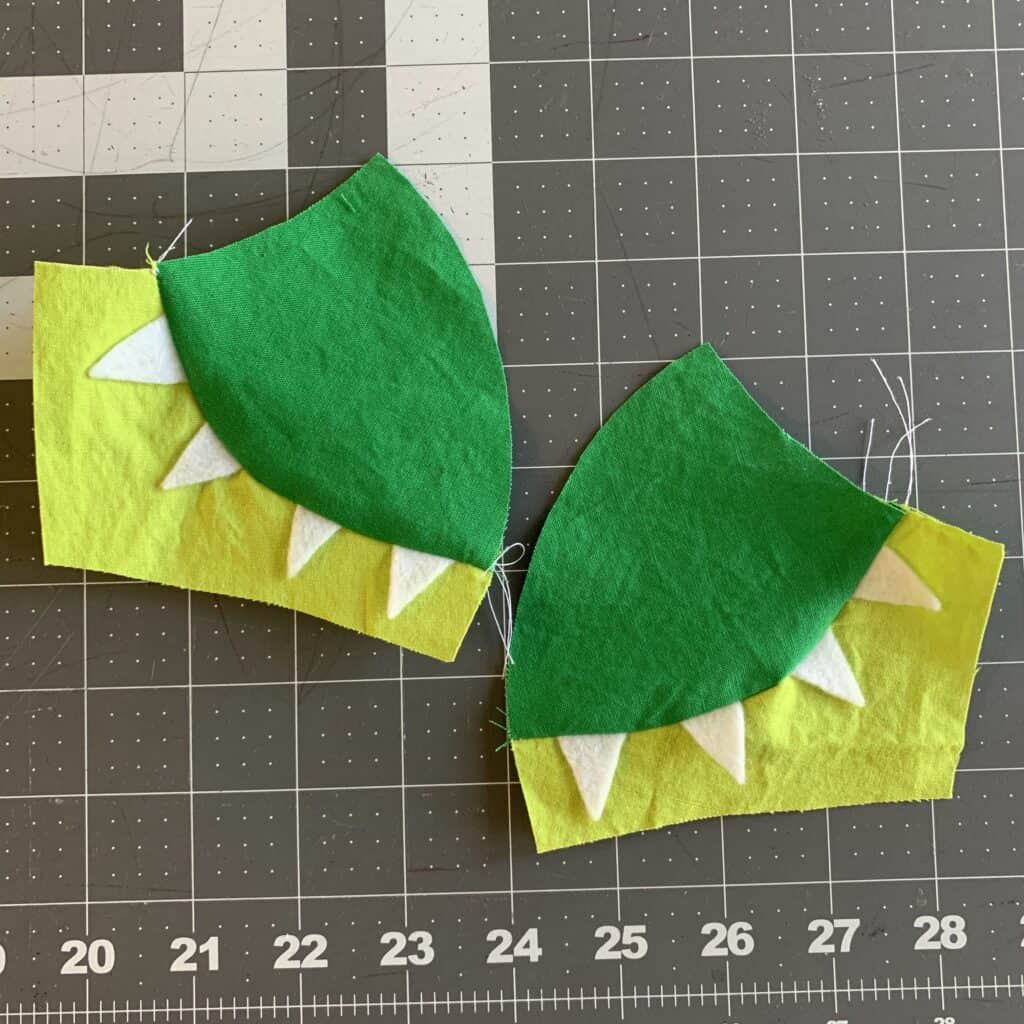
Time to sew them together.
Mask Step 8. Sew the mask together.
At this point you should be able to follow the directions as you normally would for your mask, but I have some tips for you.
First, when you sew the front pieces together, line up the seams and make sure the seam allowance is pointed upwards as I mentioned in the previous step.
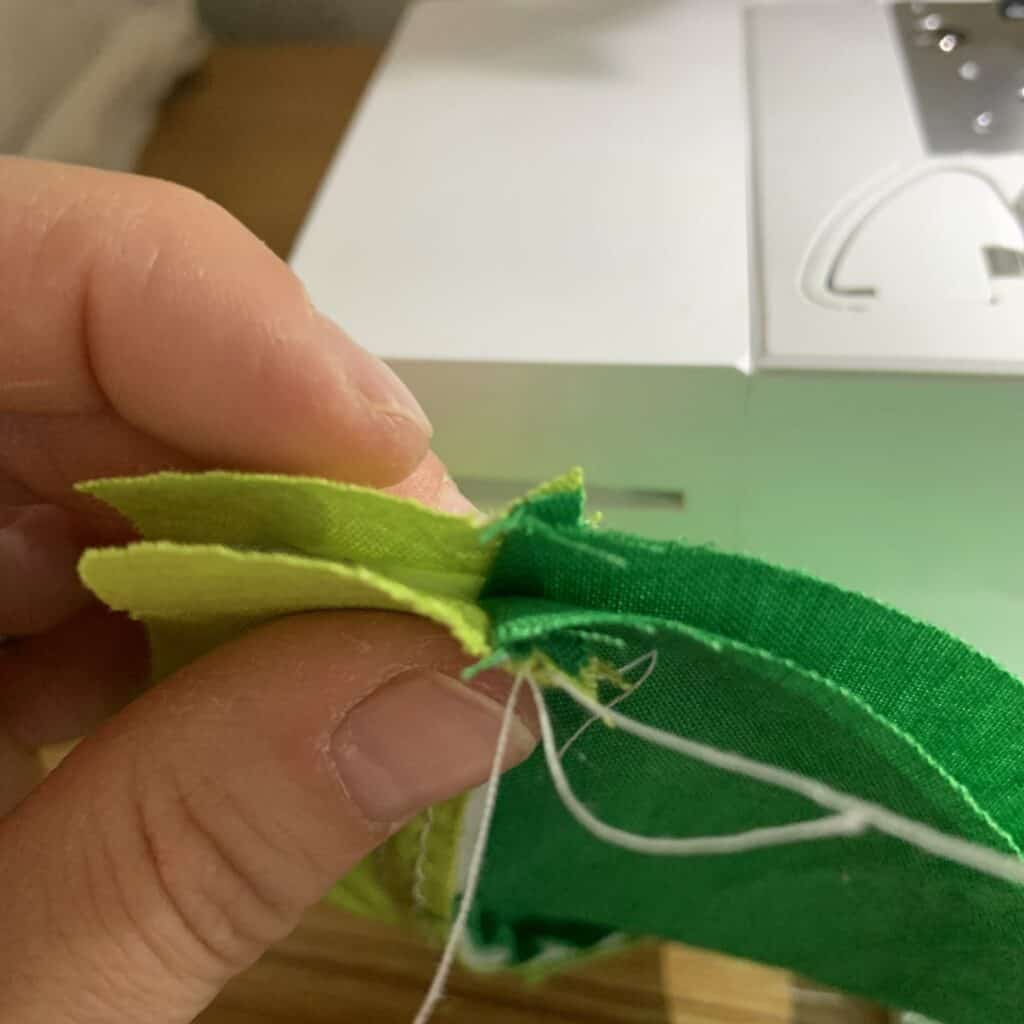
Next, after you sew the mask together, clip and trim the seam allowance before turning right side out.
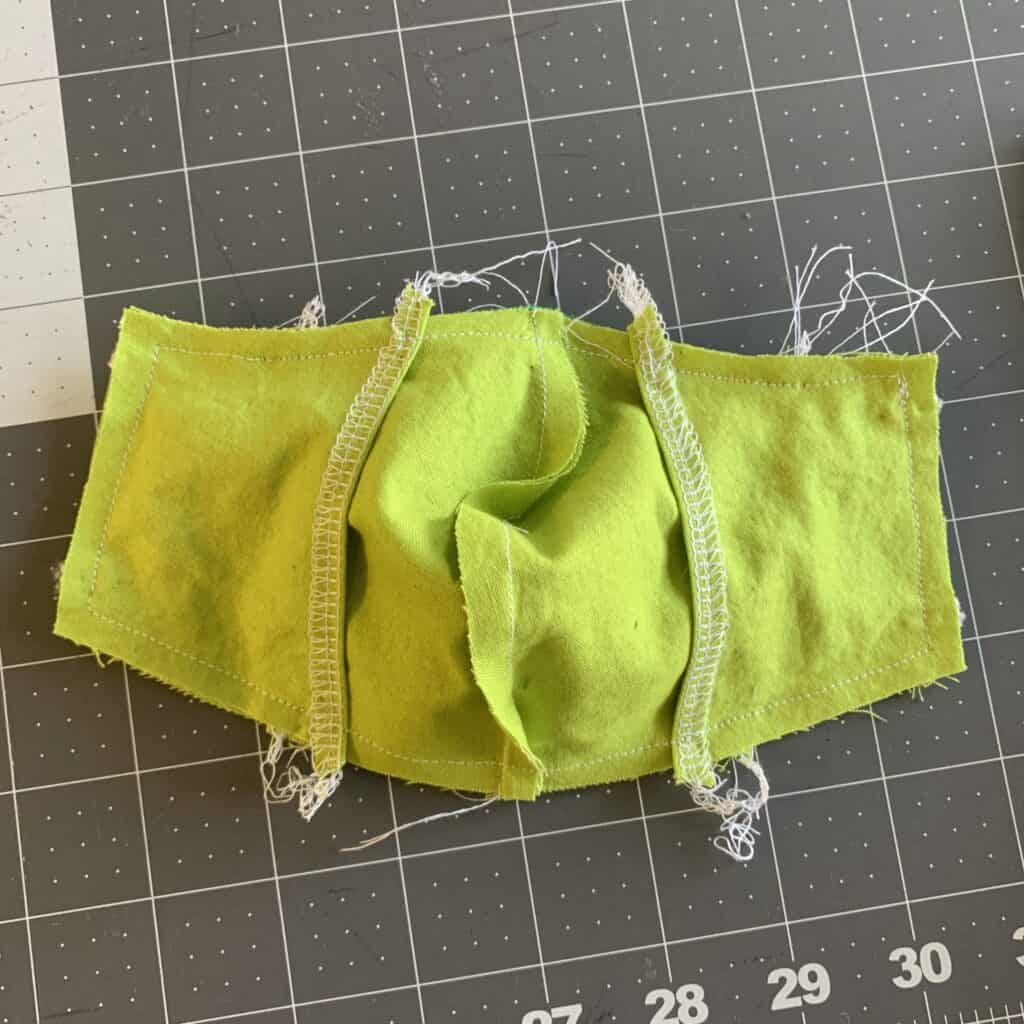
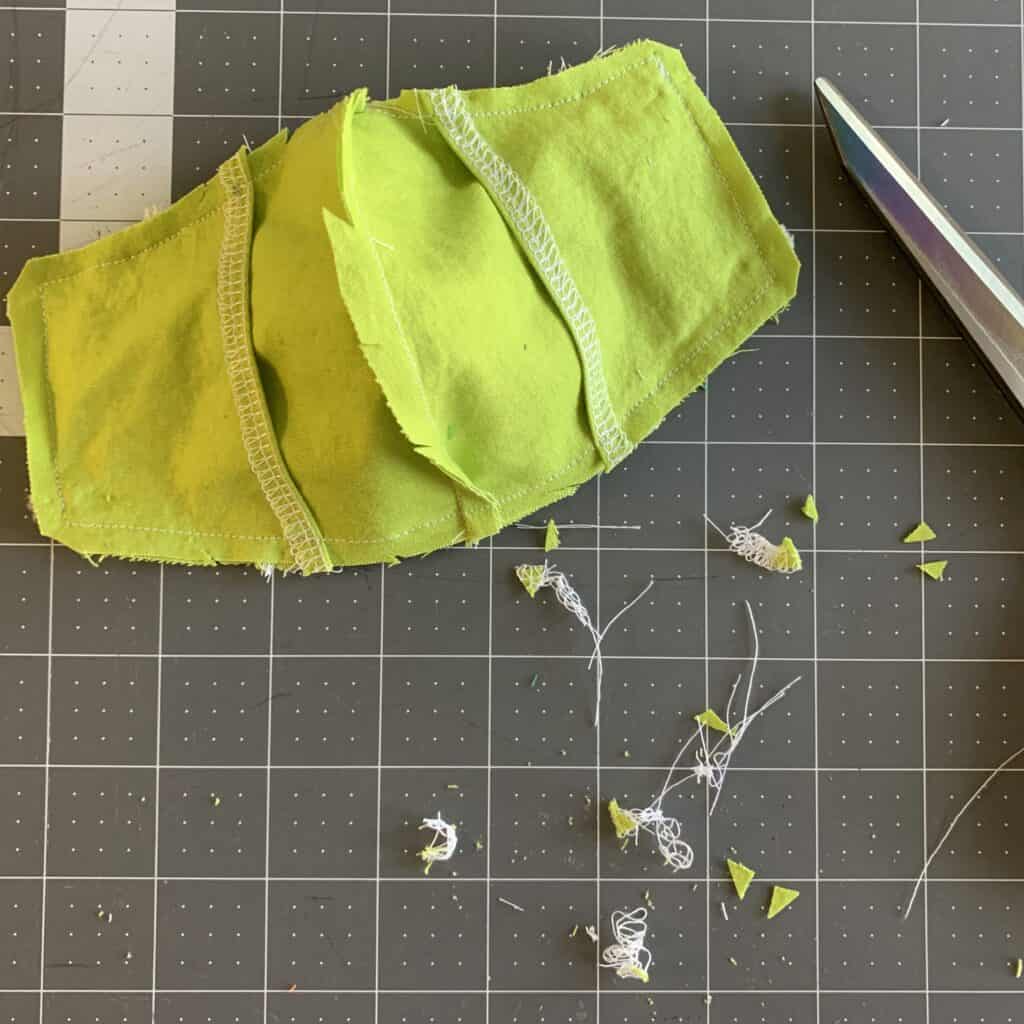
Finish up as your pattern says and VIOLA! Your DIY Face Mask dino mask is finished!
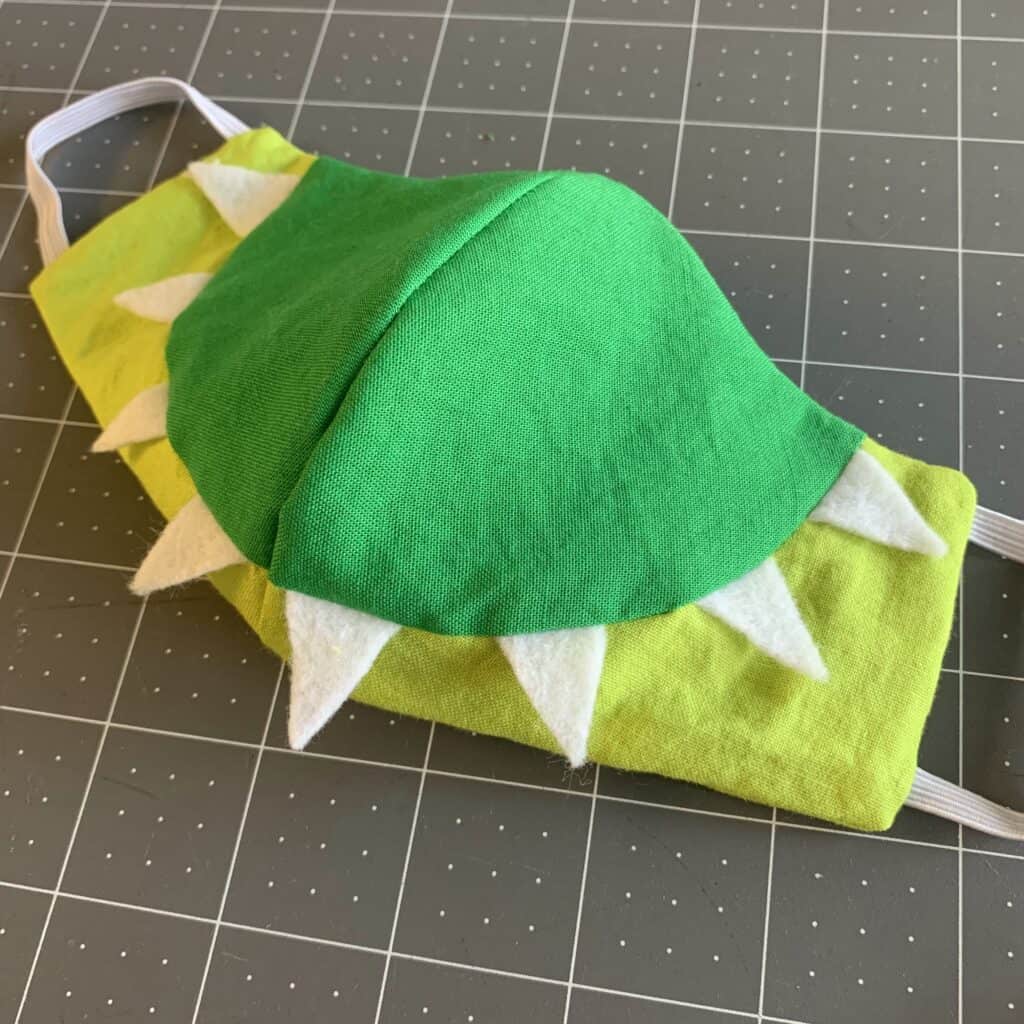
I add a pocket for a nose bridge and topstitch around the mask, so mine is not quite finished.
Ok… now VOILA! You were able to take this simple face mask pattern and made something unique.
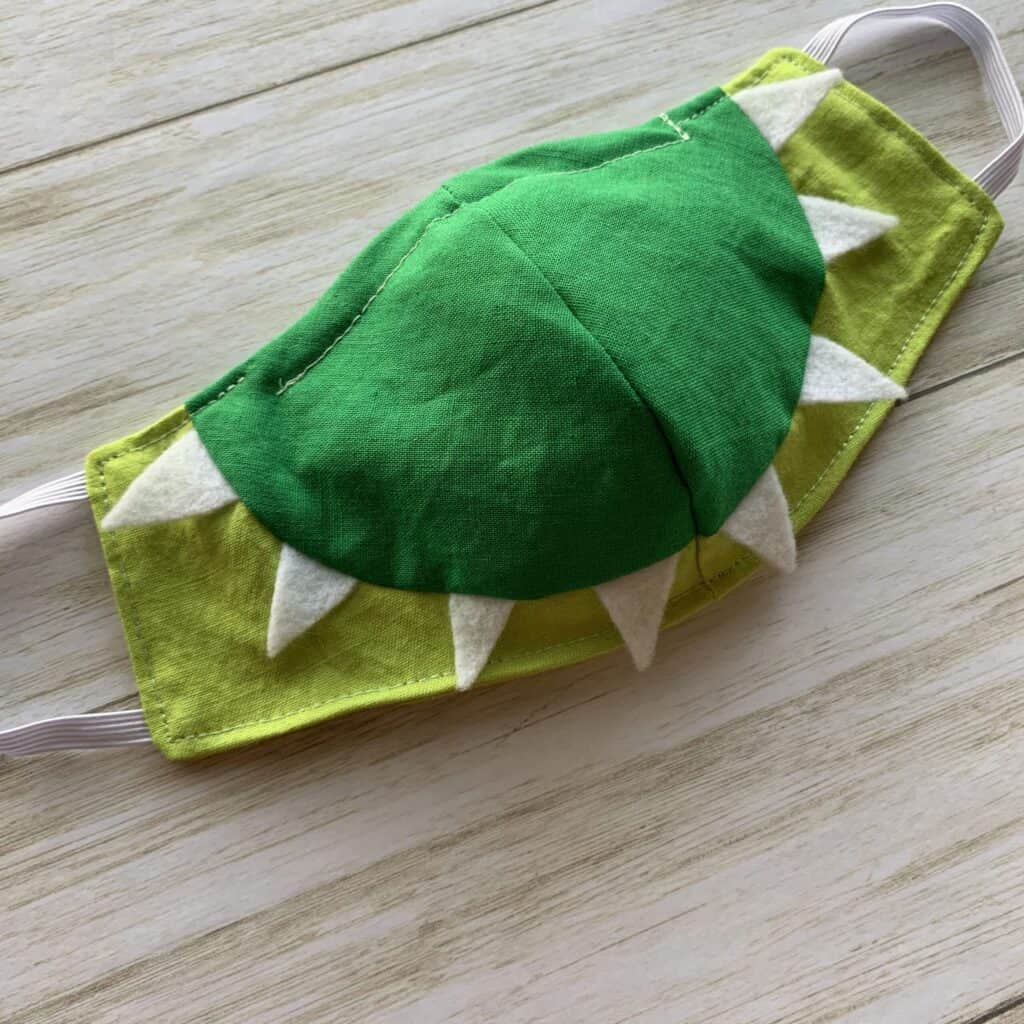
I hope you’ve enjoyed this fun little mask tutorial and it has inspired you to make a new mask for you or your kiddos. Of course, these same principals can be used to make a diy face mask for every style or occasion.
If you enjoyed this mask tutorial, you might also enjoy our tutorial on Ways to Make a DIY Face Mask Ear guard.
If you need help with your homemade sewing projects, be sure to join our Peek-a-Boo Pattern Shop Facebook Group. In our Facebook Group, members post and receive answers to sewing questions, receive special offers, get a code for 25+ free sewing patterns, and more.
