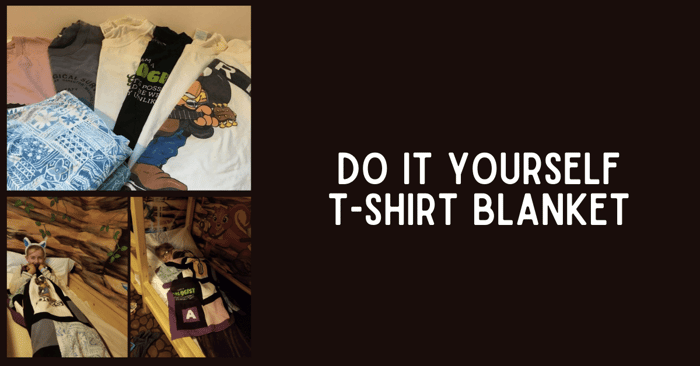
How to Make a Tshirt Quilt
Hello again! It’s Stephanie from Stephie B’s here to share a blog post with you on the process of how to make a tshirt quilt! I’m excited to share this project with you!
DIY T-Shirt Quilt | How to Make a T-Shirt Quilt
I’m sharing pictures and images so you can see how my T-Shirt Blanket project progressed. There is no one way to make a T-shirt quilt, but hopefully some of the advice and information I’ve included below will help you make a special memento for someone you love.
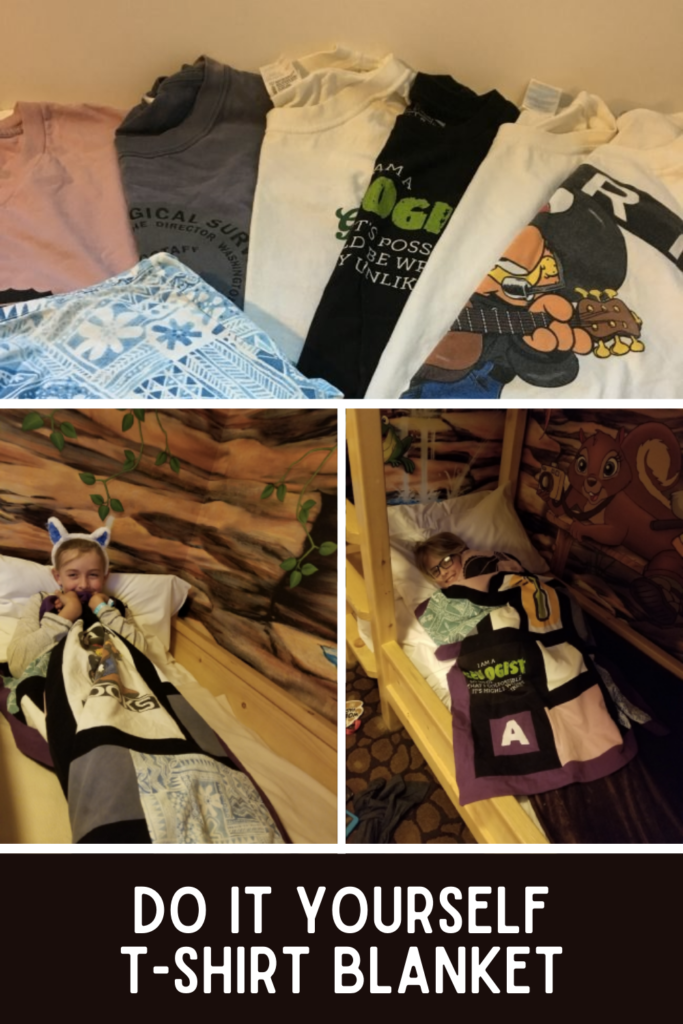
The two blankets I’ve made for this tutorial are very, very special, and as a result, took me a few months to complete. Don’t worry, the process of making a tshirt quilt doesn’t take that long… it took me longer to make the first cut than it did to make the blankets. A close friend lost her father tragically several years ago and was looking for a way to use eight shirts he left behind to make keepsakes for her two sons.
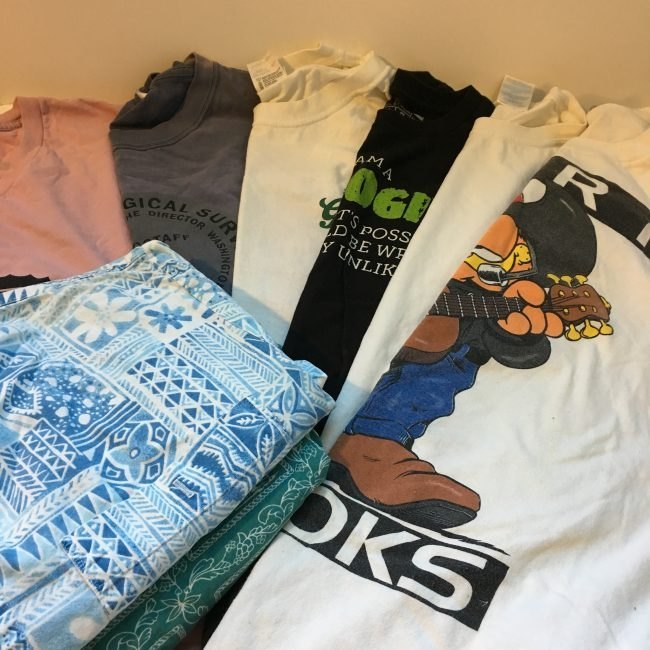
In total, I had six knit t-shirts and two woven button-up Hawaiian shirts to work with. Her only two requests were that I incorporate purple, her father’s favorite color, into the blankets, and that I not wash the shirts since they still had her father’s scent on them. Done and done. 🙂
This is a great way for you to preserve great memories with someone you love.
What materials do I need to make a t-shirt quilt?
To make a t-shirt quilt, you will need t-shirts, a sewing machine, a rotary cutter, a cutting mat, quilting ruler, backing fabric, and coordinating thread. Additionally, you may choose to use interfacing to stabilize the t-shirt material and a walking foot to ensure smooth stitching.
How to Make a TShirt Quilt | Sewing Instructions
1. Decide on a T-Shirt Quilt Design and Make a Plan
There are a few things you need to figure out before you start cutting.
- Blanket size:
What size do you want your blanket? What will it be used for?
The chart below is a good starting point to a typical blanket or quilt size and may help you figure out how large you want to go, or how large you can go based on the t-shirts and additional fabric you have.
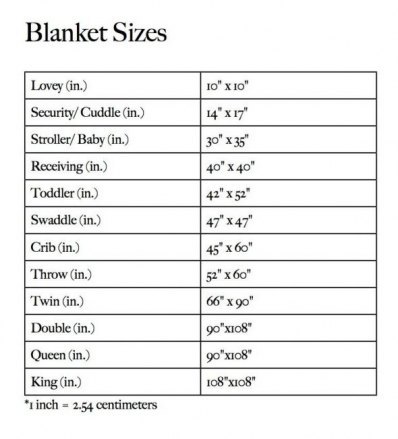
Don’t feel obligated to stick to these exact measurements… I sure didn’t! You can make many different sizes. My two blankets were meant to be lap blankets for the boys, so I chose to make their final size 48” x 36”.
- Uniform vs. irregular sized panels
What will your panels look like? Will they all be the same size (uniform) or will some be larger than others and consist of rectangles and squares (irregular)?
There are several options for how the front of the blanket will look.
Some t-shirt blankets you’ll see will consist of uniformly-sized square panels or quilt blocks, with each one containing the t-shirt’s central graphic. If you can do this with your t-shirts, wonderful! Plan for them all to the same size (for example 12 x 12) and continue with the steps I cover next.
The amazingly high-quality images below show the difference between t-shirt blankets with uniform vs. irregular-sized shirt panels. 😉
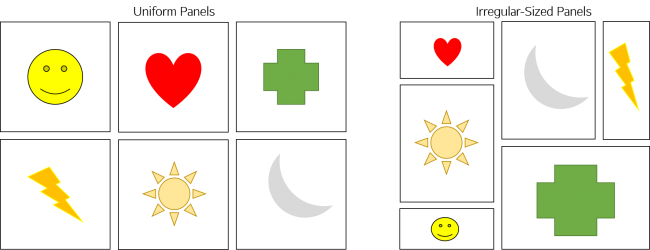
Because the graphics on my t-shirts were numerous sizes and in different locations on each shirt, I opted to plot out squares and rectangles based on each different shirts’ graphics. I also chose to use the pockets and button plackets from the two Hawaiian shirts and wanted to add a panel with each of the boys’ initials on it so the blankets would be even more personal to them.
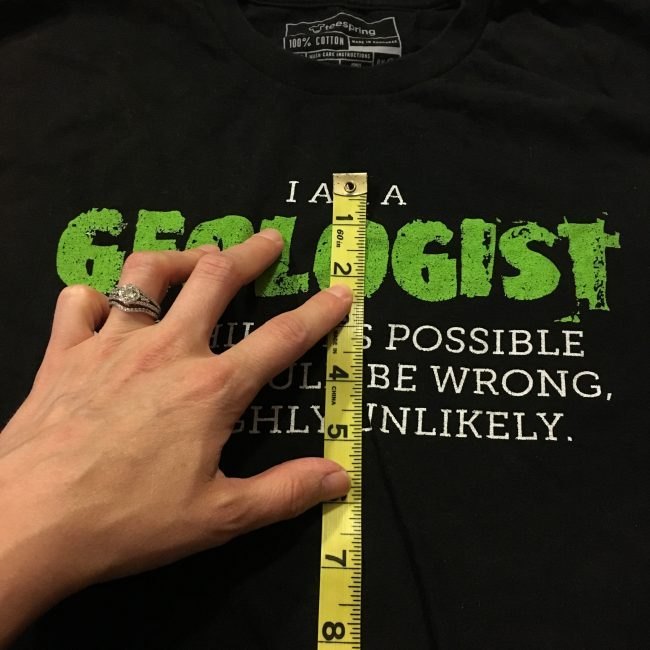
If you choose to do irregular-sized blocks as I did, measure each of your graphics and take note of how much fabric surrounds the image. For example, in the image below, the graphic is 5” long, but can be extended up and down a few inches, so I called it a maximum of 8”. That way I’d have about 1 ½” on the top and bottom of the graphic, cutting it as close to the collar as I could.
- Binding or pillow-case style
How will you be attaching the front of the quilt to the back? Will you use binding, or sew the two sides together around the edges and flip right-side-out like a pillowcase?
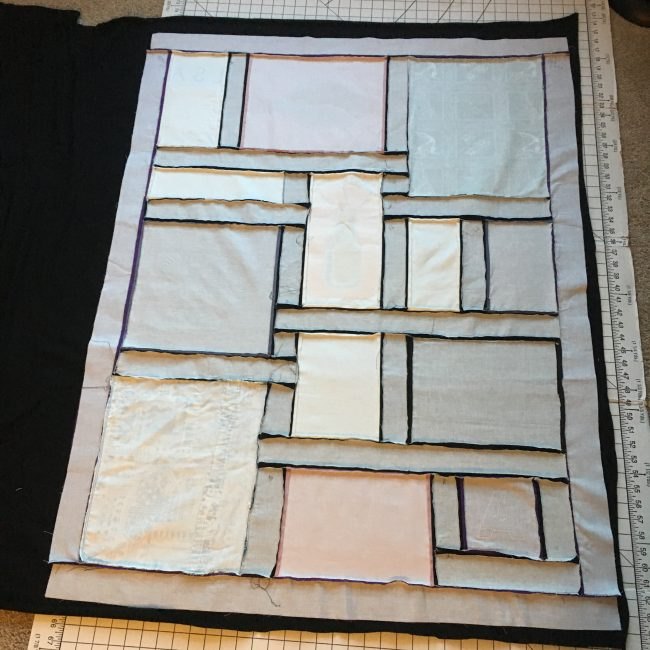
Because my quilt consists of many blocks sewn together, I cannot simply use just one layer – the seams would be exposed on the back and it would look pretty sloppy. Below is a sneak peak of the back of one of my blankets… this is not what you want the back of a blanket to look like, and it’s definitely not snuggle-worthy.
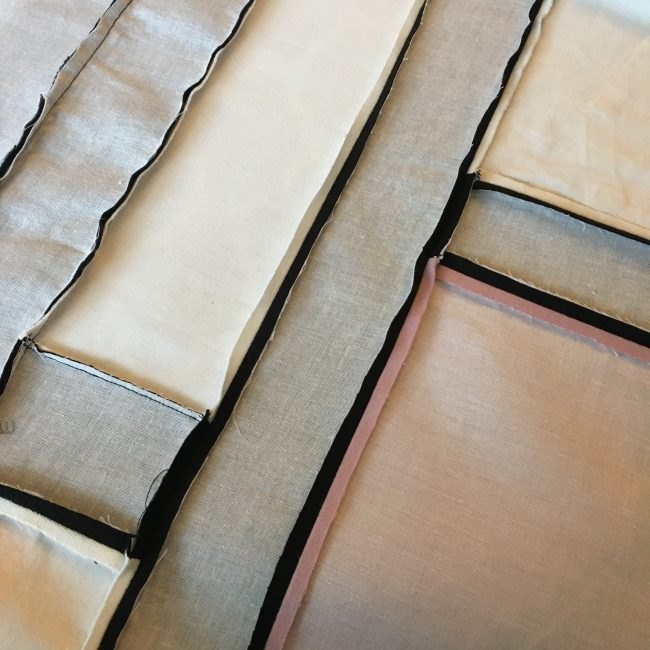
I chose to use a pillowcase-style, which will be achieved by sewing the front and back together around the edges with right sides together (RST), leaving a gap to turn the blanket right-side-out. I’ll go over more of how to do this in Step 4.
I also chose to use solid black cotton Lycra for the back of the quilt, cut to the same dimensions as the front.
- Sashing and border strips
Will you be adding sashing strips between the panels to break them up/define them from one another? Will you also include a border around the edges?
Sashing strips are the horizontal and vertical pieces of fabric between each panel. They provide a barrier, separating the panels from one another to add definition. If you choose to use them, they can be as thick or thin as you’d like, and be any color or print you think looks good – it’s a personal preference and may also depend on how large or small you’d like your final blanket to be.
The first image below depicts the uniform and irregular blanket examples from above without sashing strips and a border…
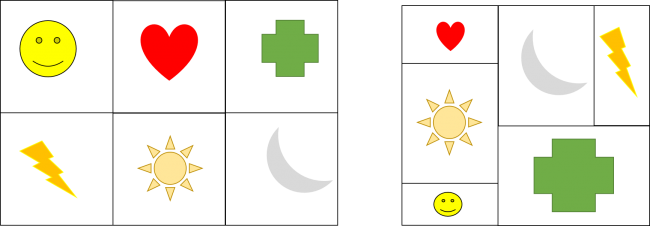
While this next image shows them with…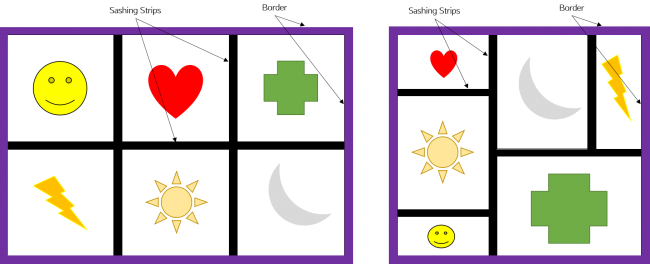
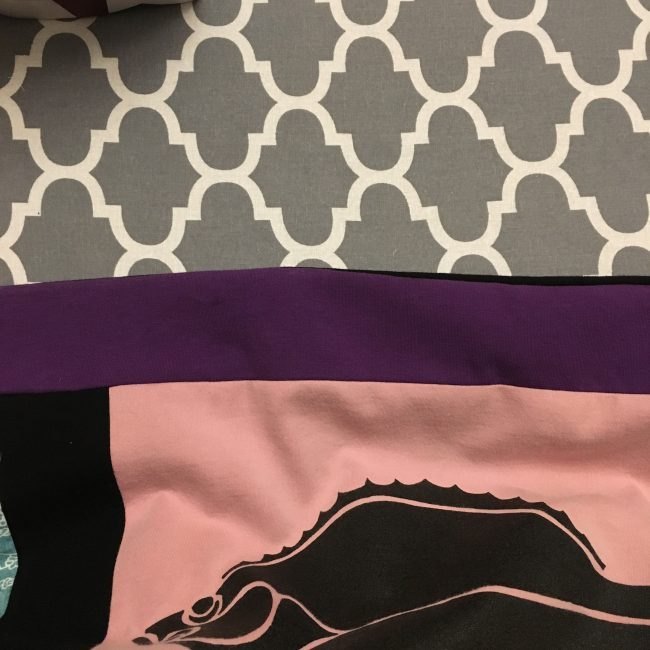
For my blankets, I chose to add a 2” sashing strip of black cotton Lycra between each panel, and in order to incorporate the purple she had requested, I opted to use a 2” strip of purple cotton Lycra around the borders.
- Seam allowance for the DIY T-Shirt Blanket
What will you use for your seam allowance? ¼”? ½”?
The seam allowance MUST be included in all your measurements (panels, sashing strips, and borders) or the whole blanket will be off – the pieces won’t fit properly and it will be inches smaller than you expected.
I chose to use a ¼” seam allowance so I could utilize as much of the t-shirts as possible. Therefore, each of my length and width measurements needed to include an extra ½” seam allowance – ¼” on either side of all the pieces.
For example, using the Geologist t-shirt graphic from the image above, I chose to make the final panel 8” x 11”, so would eventually cut 8 ½” x 11 ½” in order to achieve that size.

- Fusible interfacing
Will you be applying interfacing to your t-shirts to help stabilize them before cutting and sewing?
The ‘problem’ with a t shirt quilt is that they are made from t-shirts, which generally means they’re made from knit fabric which is stretchy. Stretchy fabric does not lend itself well to exact measurements – which is precisely what you need when making a blanket. Every ¼” matters, so the slightest stretch in one shirt will mis-align the rest of the blanket.
Additionally, most sewing machines don’t work well with knits, so having that stabilization will help keep your machine happy… which is always a good thing.
On the other hand, interfacing tends to stiffen and thicken the fabric, meaning it is not as flimsy and stretchy as the original t-shirt, which may be a feature you want.
If you are confident in your ability to sew knits without stabilization and you prefer to maintain the stretchiness of the fabric, by all means, skip the interfacing! I went back and forth for over a month on this one aspect of the blankets – and even cut out many of the panels – before ultimately decided to use interfacing.
After researching and testing several different types of fusible interfacing, I chose to use Pellon SF101. I ordered a 10 yard bolt off Amazon to make sure I had enough. I don’t feel it stiffened the fabric very much, and in fact, I think it made the blankets a little heavier and snugly-er.
2. Plot out Your T-Shirt Blanket
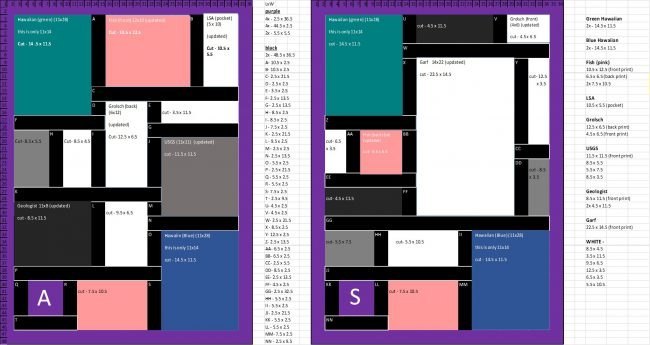
No matter how you do it, you need to plot the layout of the quilt top. You need to know what size to cut each panel, sashing strip, and border strip (with the seam allowance!) in order to know where your pieces are going to go. Use scratch paper, draw it on graph paper, or if you’re like me, head to your computer and build it in Excel.
Below is the layout I used for both my blankets. As you can see, I’ve included all the graphic panels, additional fabric from each shirt to use as solid colored panels, sashing strips, the border, the personalized ‘A’ and ‘S’ panels, as well as a label for each piece so I knew what and how much to cut out and where they all went. I printed these out and had them next to me each step of the way.
3. Prepare the shirts
- Disassemble your t-shirts
This is what took me the longest to do. That very first cut in these special and favorite shirts was hard for me to make, but after a few encouraging texts from my close friend, away I went. 🙂
Grab your rotary cutter or a sharp pair of scissors. I separated the fronts of the shirts from the backs along the side and shoulder seams, also cutting around the sleeve seams and neckband as I went. Every piece of the shirt was saved and stored in plastic storage bags until I needed them, which helped retain her father’s smell throughout the whole process.
- Apply the fusible interfacing and cut out the panels
If you’ve chosen to use fusible interfacing, apply it before making any additional cuts following the manufacturer’s instructions.
For the graphic panels, I ironed on a large piece of interfacing to the wrong side of the shirt, and then cut the panel and interfacing together.
As mentioned in a previous step, not only had I planned to use the graphics, I also wanted to use additional fabric from each shirt to supplement the blanket size and use more of the shirts than just the images. Applying a large piece of interfacing allowed me to measure, use a fabric pen to mark, and cut not only the graphic panel according to the plan I had made, but cut the solid colored panel at the same time. Win win!
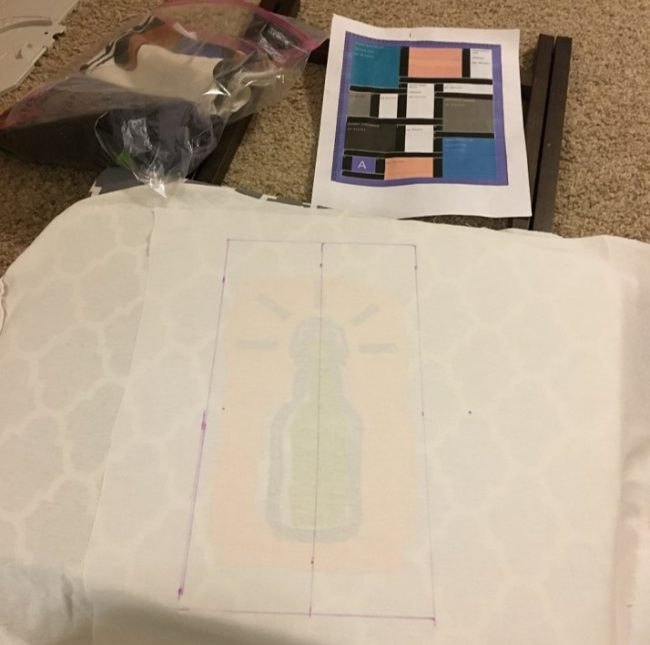
However, as you can see below, for my sashing and border strips, I cut the interfacing first, then ironed them onto the fabric. It was easier for me to do it this way.
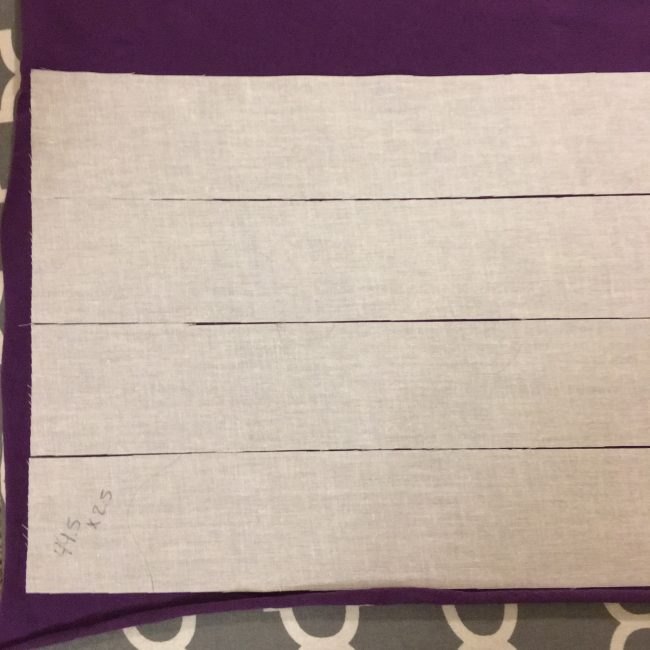
You can also see in the image above that I labeled the back of the purple border strips with a pencil, identifying the size so when I was ready to use one of these strips (these are the four side border pieces), I knew I had the correct ones.
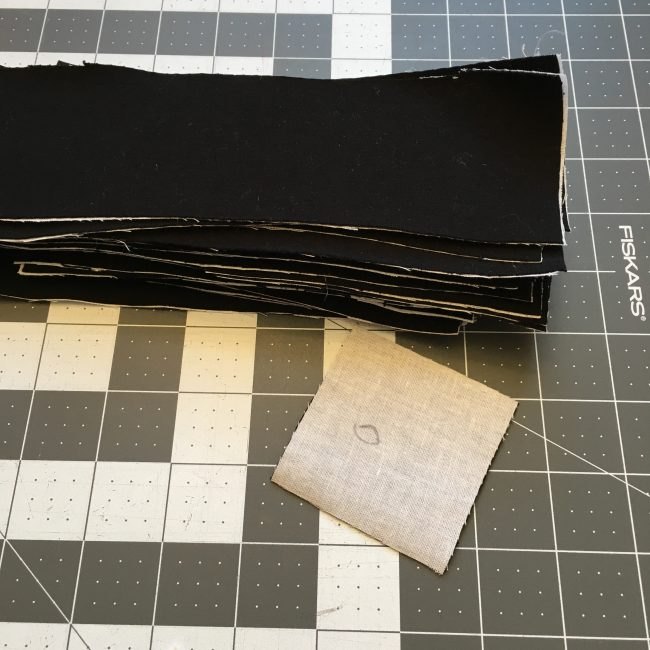
When I applied the interfacing to each of the black sashing strips, I labeled them as well, A through NN, as labeled in my Excel layout. The image below show all my sashing strips cut out, labeled, and stacked up so I can grab them as I need them. ‘D’ is shown in this picture just as an example.
4. Lay out and sew the front of the t-shirt blanket
Using my layout, I went through and attached the sashing strips to the panels in portions, pinning then sewing them together using the 1/4 inch seam allowance. In the next few images, I will be working on the portion of one of the t-shirt blanket highlighted in red below.
The whole process involves a lot of pinning…
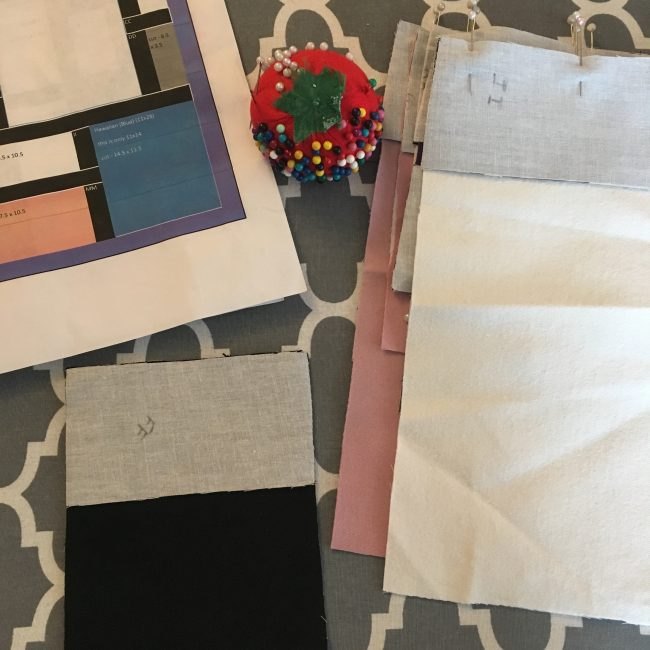
Sewing….
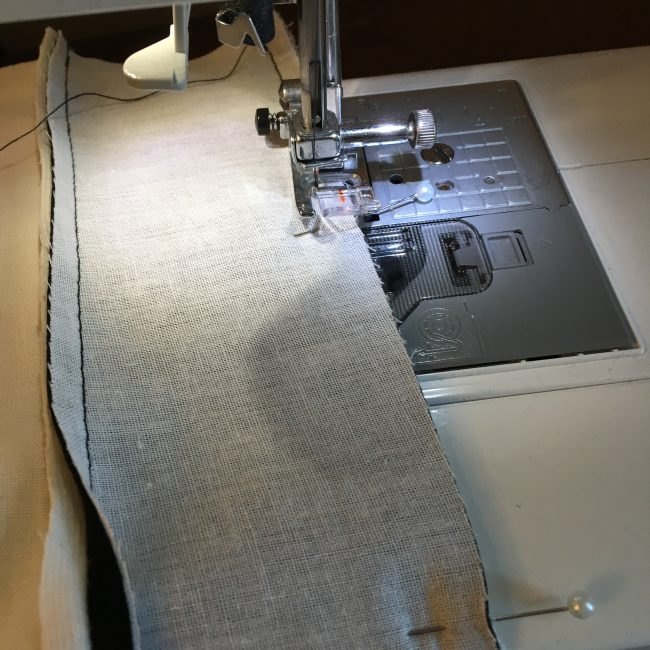
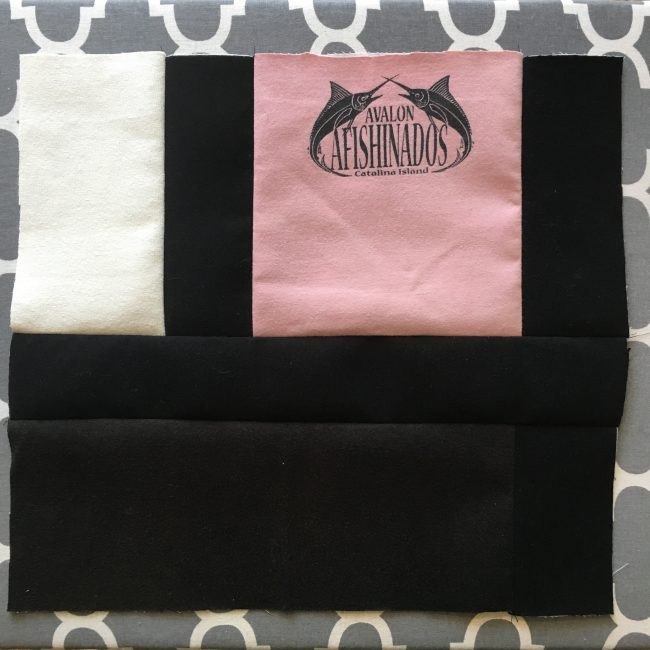
Piecing Together….
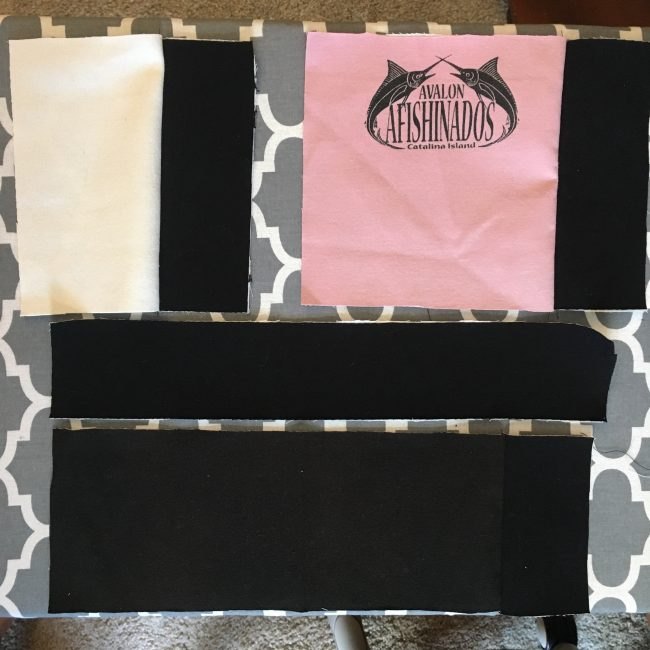
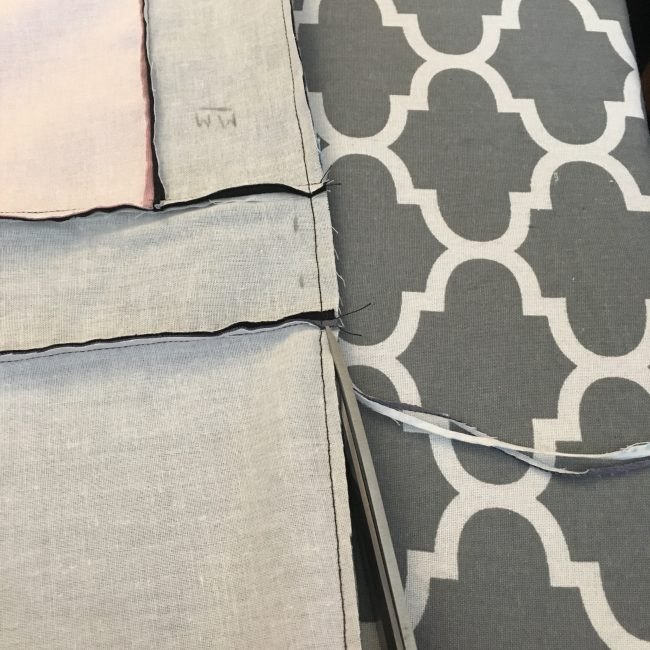
trimming…
Even using 1/4″ seam allowance resulted in bulky seams, so all of the seams were trimmed down (and later ironed) to about 1/8″.
and ironing… over and over until all the portions are all sewn together, seam allowances are trimmed, and the seams are pressed down with an iron.
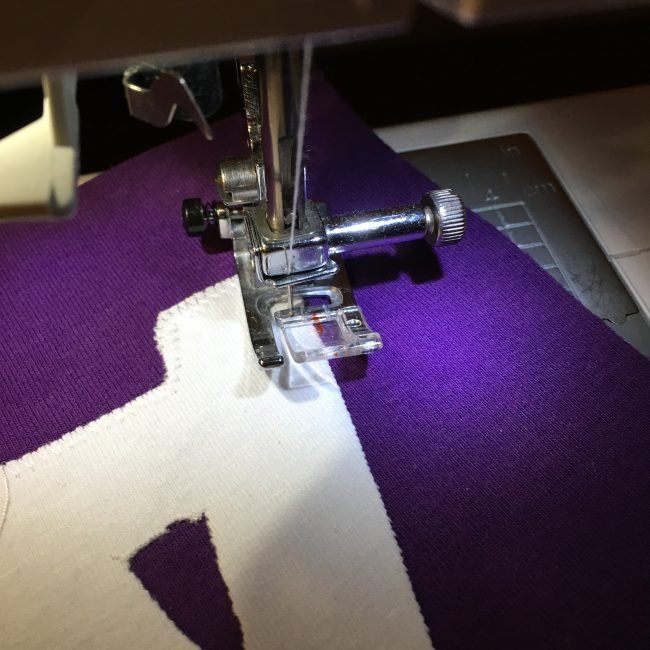
Side note, I also added a special panel to each of the blankets with each boys’ first initial. I essentially appliqued the letter on each panel, and sewed them just like the graphic panels.
Once all the panels and sashing strips were sewn together, it was time for the borders. Pin them to the sides and top/bottom, sew, trim, and finally iron.
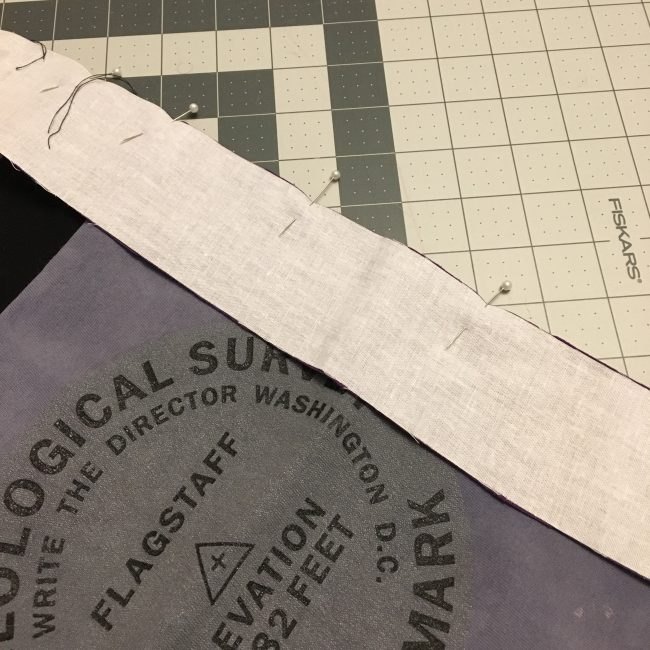
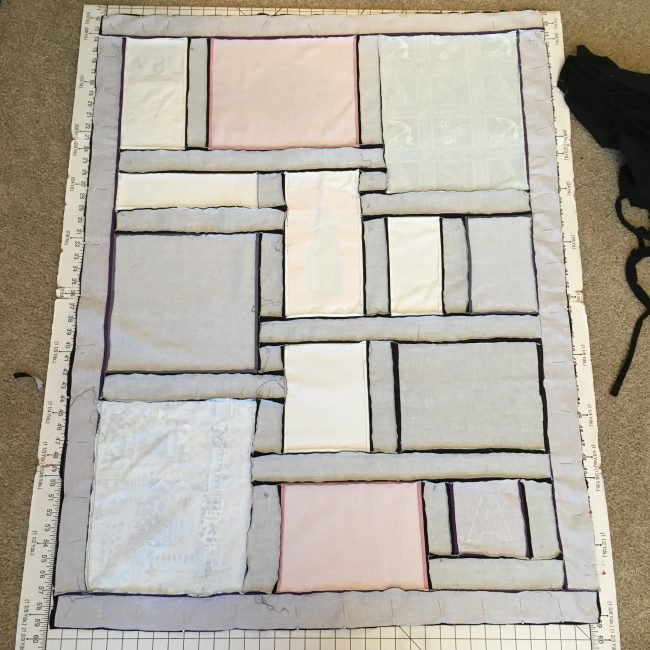
This is what the front and back of one of my blanket looked like once everything was sewn together.
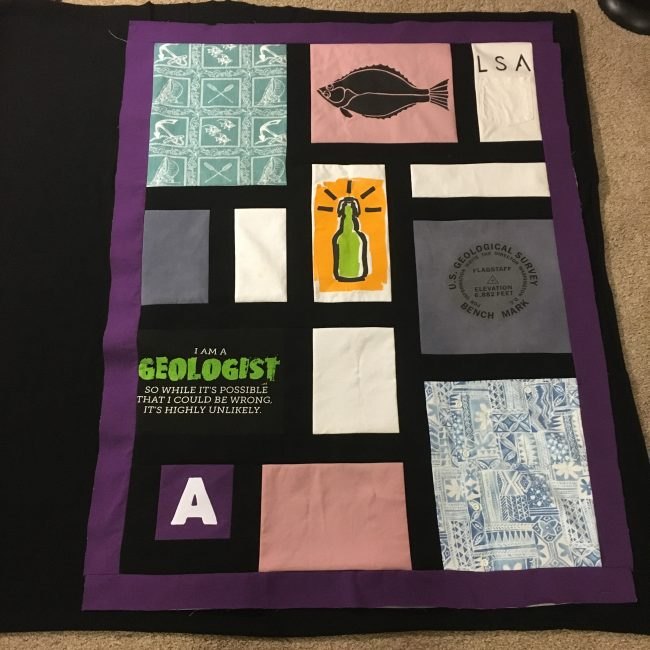
I ended up repressing the seams again so they’d lay even flatter than they did in this image.
5. Sew the front to the back
Since I chose not to use binding and instead sew the front and back together pillow-case style, I laid the two sides together RST and pinned pinned pinned!
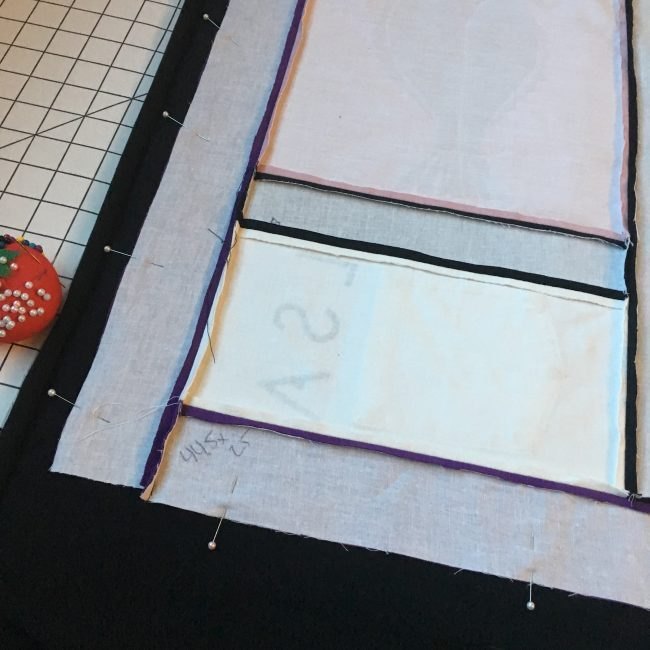
I trimmed the excess black fabric around the edges…
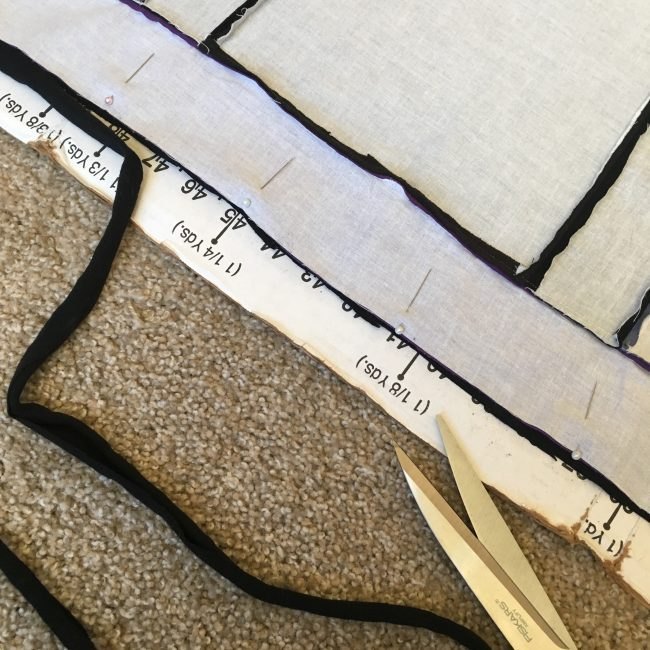
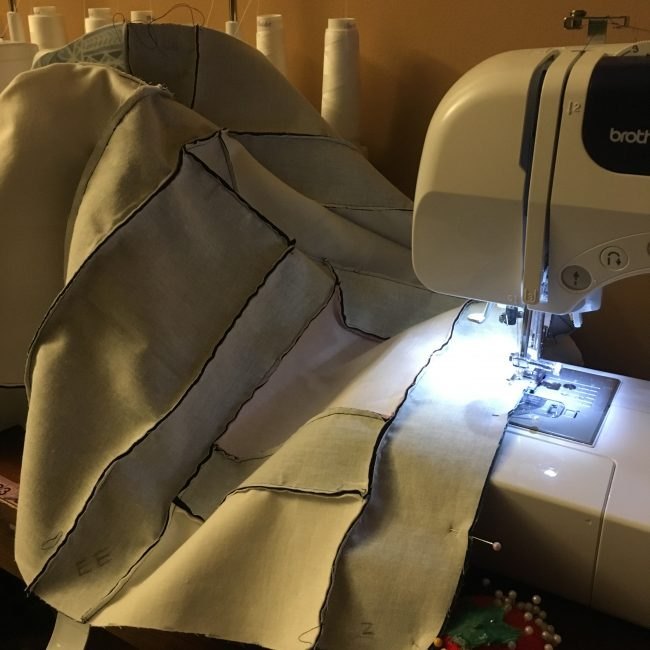
After flipping the two sides, I highly recommend ironing around the edges to prepare for topstitching. I tried to get away without ironing but quickly realized that it was a must. In the image below, the left half of the top edge is ironed while the right side is not. You can see the difference it makes.
6. Finish the Quilt
Topstitch around the edge of the edges of the quilt to secure the top and bottom in place.
Tip: set your stitch length to 3.5mm to help your sewing machine work with the knit.
For the final step ((woohoo!! Final step!!)), I used my embroidery needle and cross stitch/embroidery floss to handstitch small knots in the corners of some of the panels to hold the top and bottom in place as it get used. I don’t want the back sagging with age and use since it doesn’t have interfacing, so the knots serve to stabilize it.
For each knot, I went from the top, through both layers, then back up to the top and knotted. The knots are so small they can barely be seen.
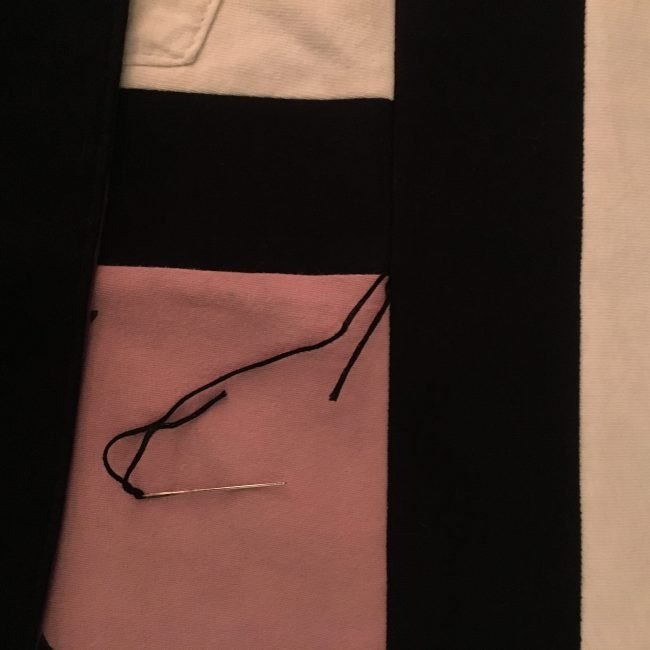
Well, that felt like a marathon, didn’t it? But we’re done!!! And the fruits of my labor… these two happy boys. Apparently, they take their blankets with them everywhere… even on vacation to Great Wolf Lodge! 🙂
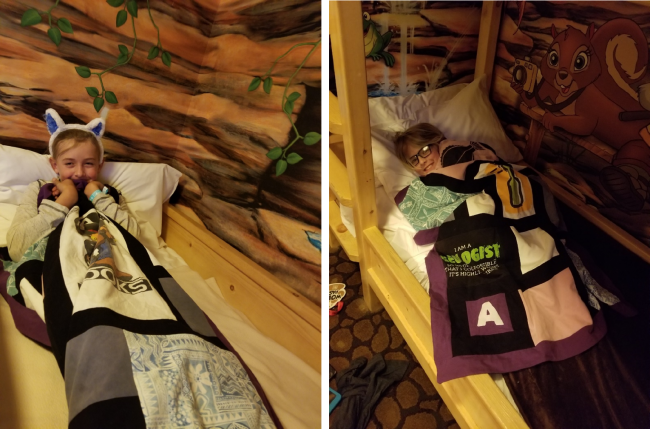
Thanks for sticking with me from start to finish to learn how to make a tshirt quilt, and I hope – as always – you learned something new from my T-Shirt Blanket tutorial. If you enjoyed this tutorial, you’ll likely enjoy our other tutorials.
Once you’ve made it, come share it at our Peekaboo Facebook Group. Until next time
