How to sew Pintucks | Step-by-Step Guide
Today we’re going to learn how to sew pintucks. Have you heard the term Pintucks used in the sewing world and wondered what they are? Pintucks are one of the most beautiful and versatile techniques to add texture, dimension and details to any sewing projects. Let us delve a little deeper into the world of Pintucks today!
What are pintucks?
Pintucks are in the simplest form a series of tiny tucks. A tuck is a fold or pleat in the fabric where the folded edge is either sewn or fastened in place in some form. Tucks have varied uses in the garment construction. Pintucks are small tucks the size of a pinhead, that are largely parallel to each other. They add textured ridges to the fabric. Manipulating these pintucks can give you many options to add the details. They are a decorative element in a lot of applications.
How are Pintucks used?
Pintucks have a vast amount of applicability in the garment construction. It is not only used for decorative purposes, it is also used as a functional detail to adjust the fit of a garment. A pintuck detail added to a skirt can not only add dimension to the skirt, but also is an easy way to reduce the length of the garment without cutting anything out. I will go over in details about the different ways to use the pintucks later on.
How to sew pintucks
Pintucks can either be created manually or using a pintuck foot. The pintuck foot is a special presser foot that can make a true pintuck easily using a twin needle and the foot. The pintucks created manually are folded up in very tiny intervals and sewn into place. We use the pin tucking technique in apparel making often enough and we will see how to create a wider pintuck detail that can be used in different ways.
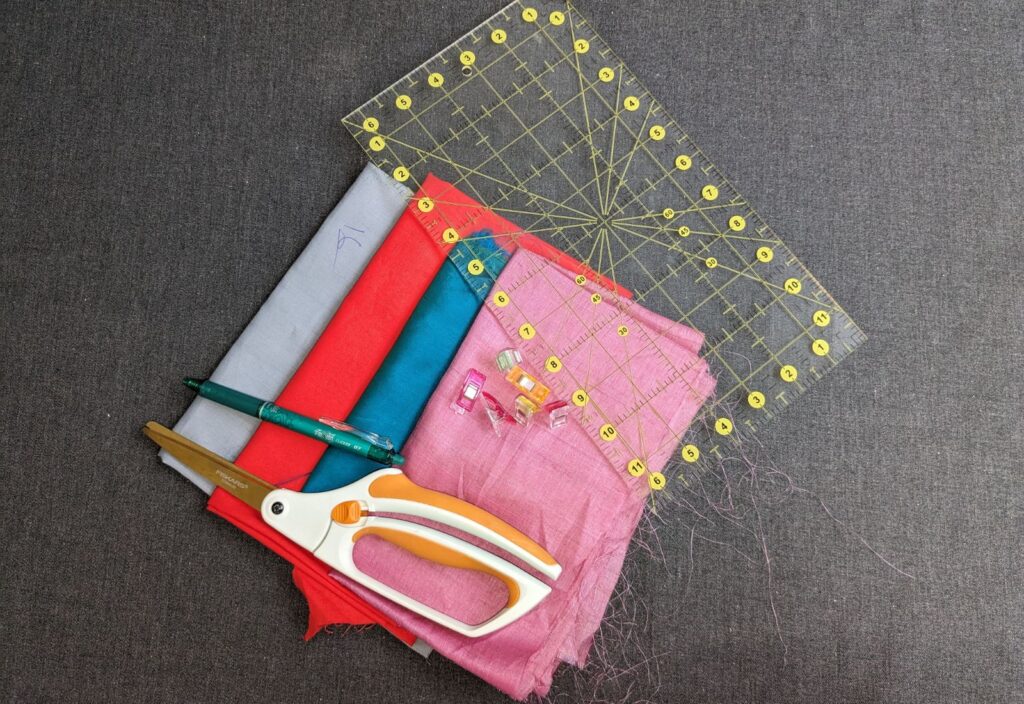 Lets gather our supplies to make these beautiful pintucks. You are going to need an acrylic ruler, some sort of erasable fabric marker, the fabric, the pins or clips to hold the tucks in place while sewing it down and all the usual sewing supplies.
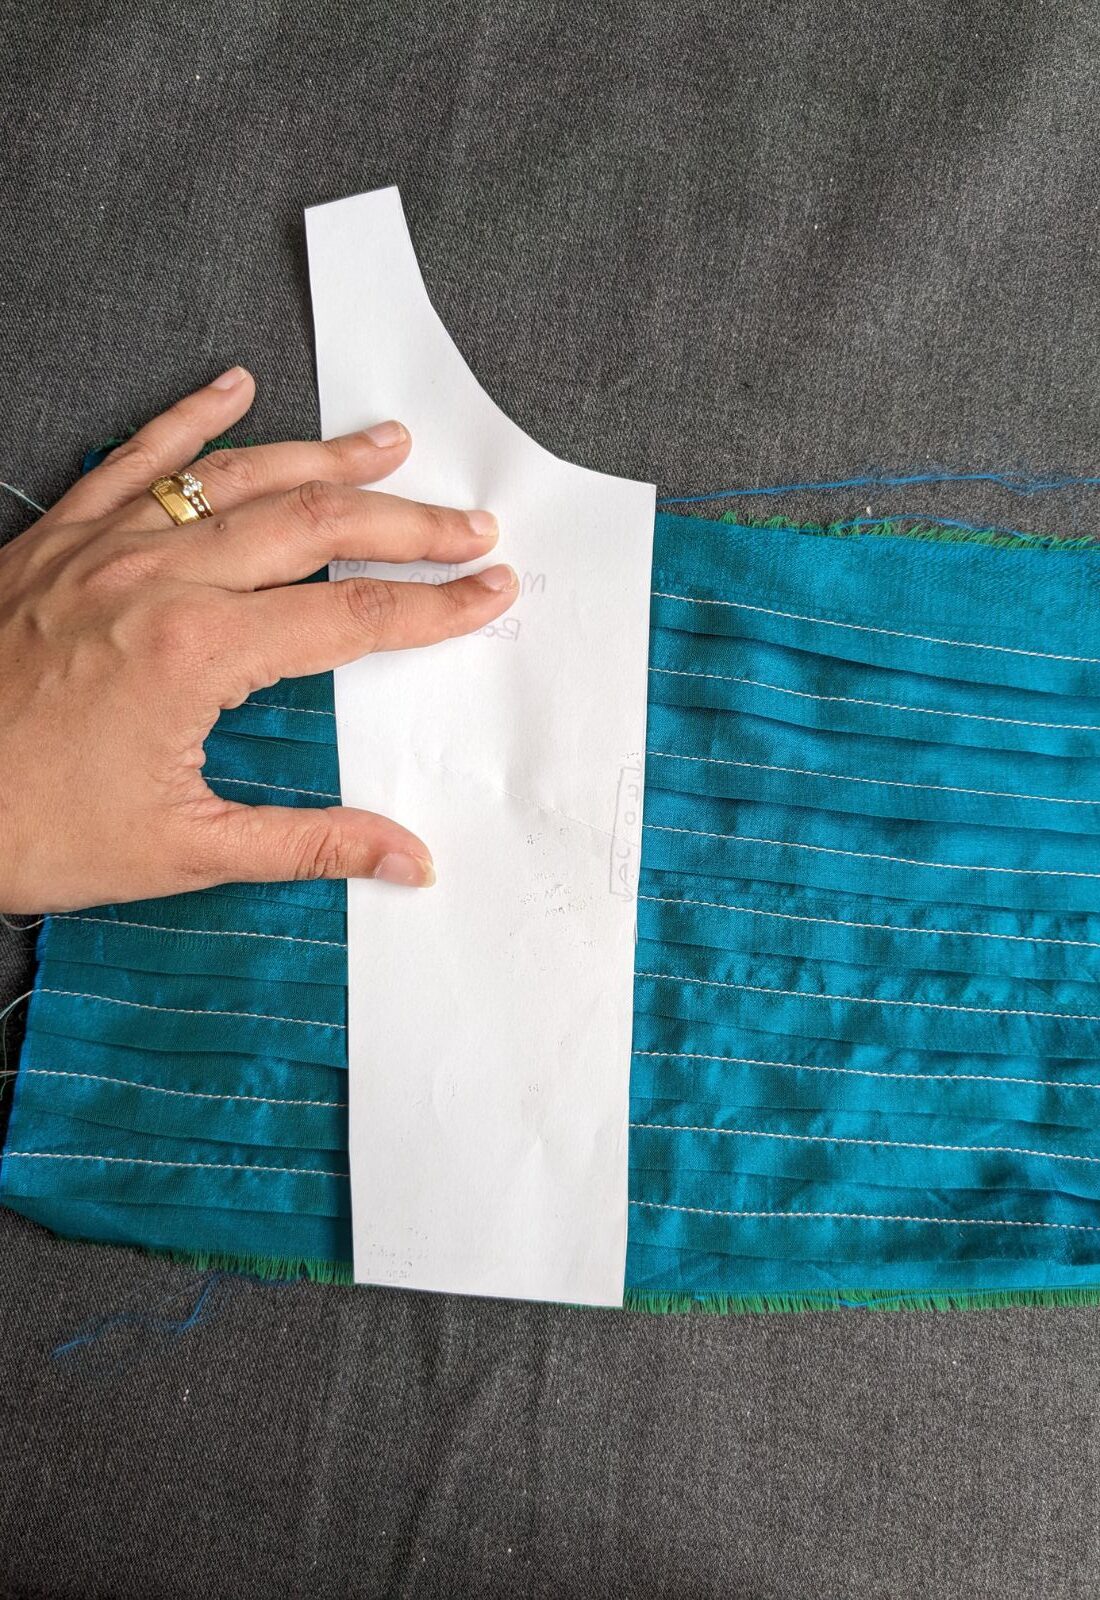
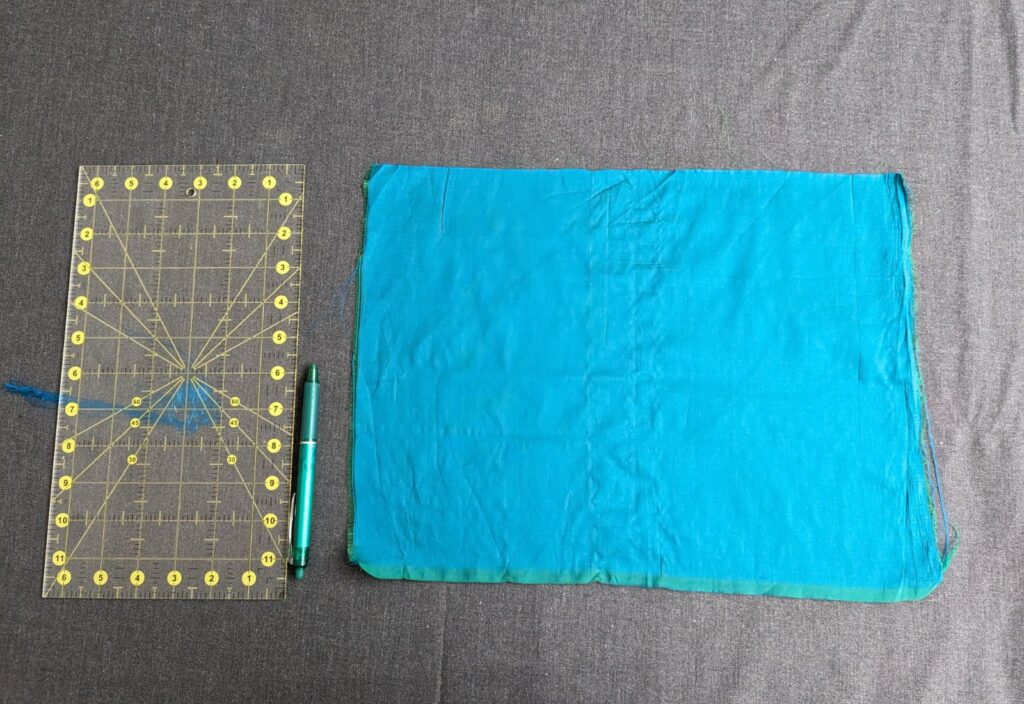 We are going to start with a square or rectangular piece of fabric. Since we are going to be tucking the fabric under to create the pintucks, the finished piece of fabric will be considerably smaller than what we started with. So keep that in mind while you cut out the starting piece. Once we have an idea of how to create the pintucks, we can use it in a lot of different ways and have a better understanding on what to do.
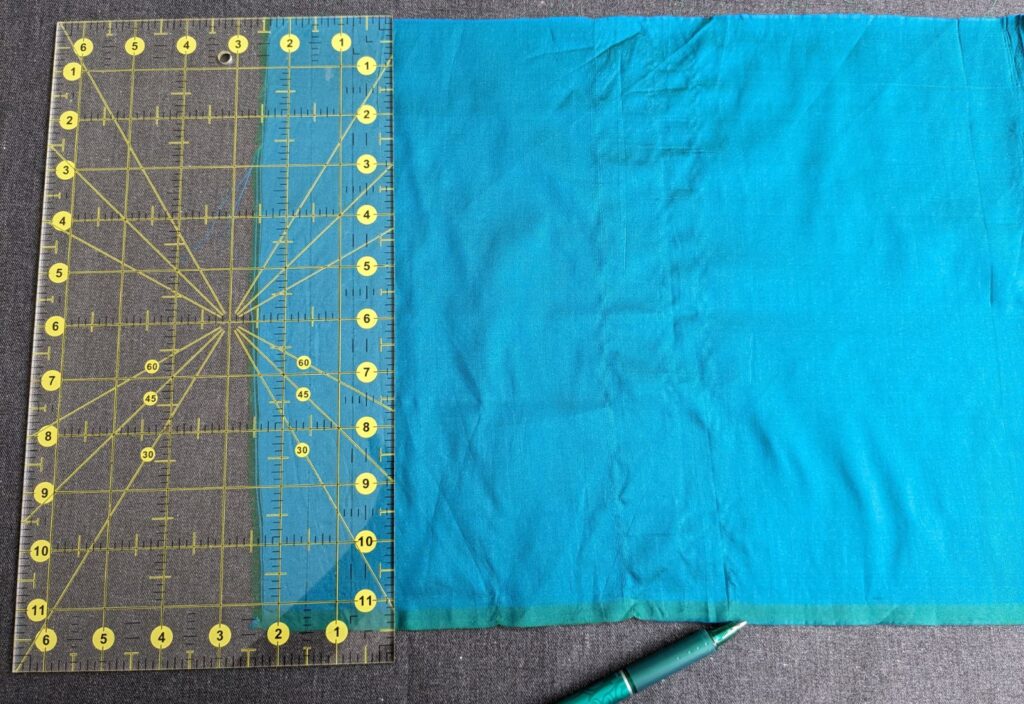
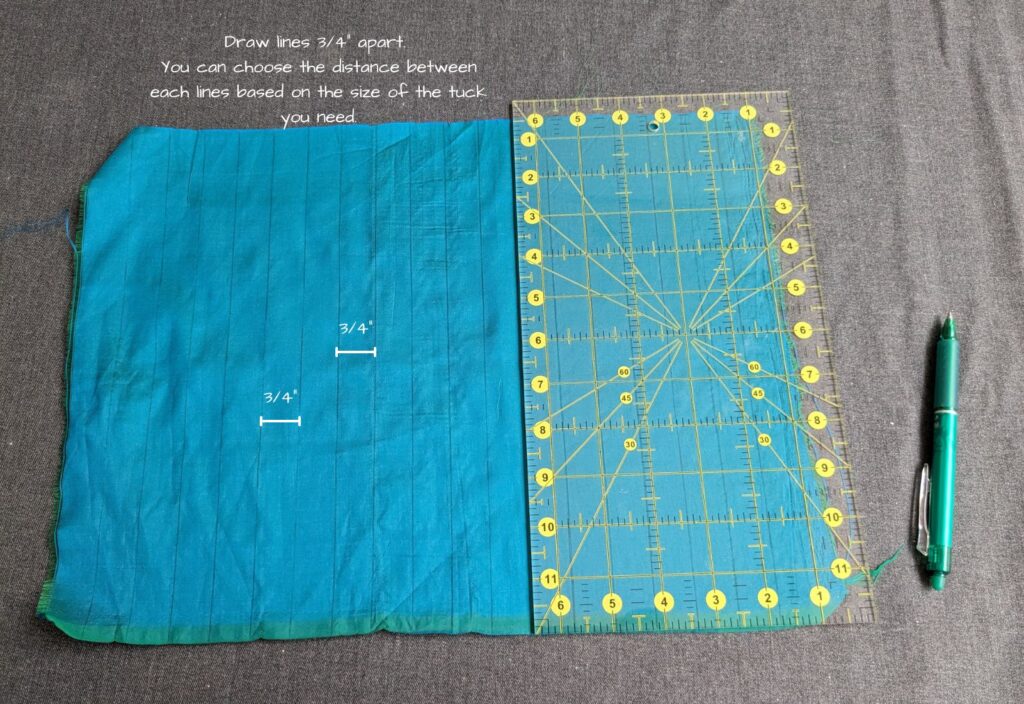 Let us start by marking the guide lines on the fabric with an erasable fabric marker. I am using this Frixion heat erasable pen for marking the lines. Starting from one end, mark lines at 3/4th of an inch increments using the acrylic ruler as a guide all the way across the fabric piece.
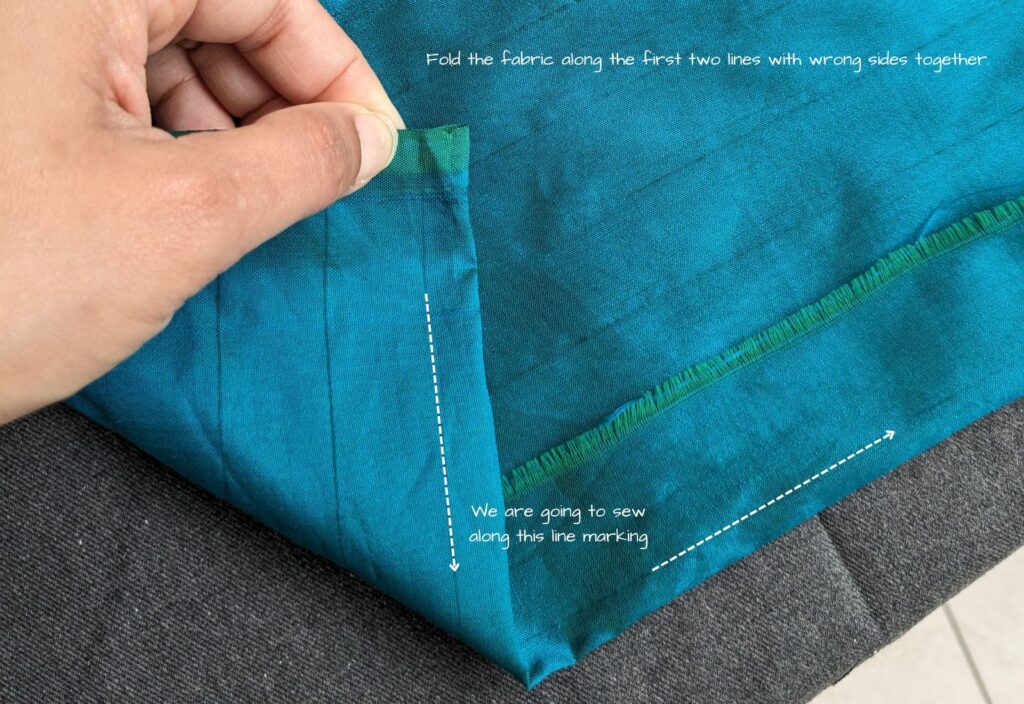
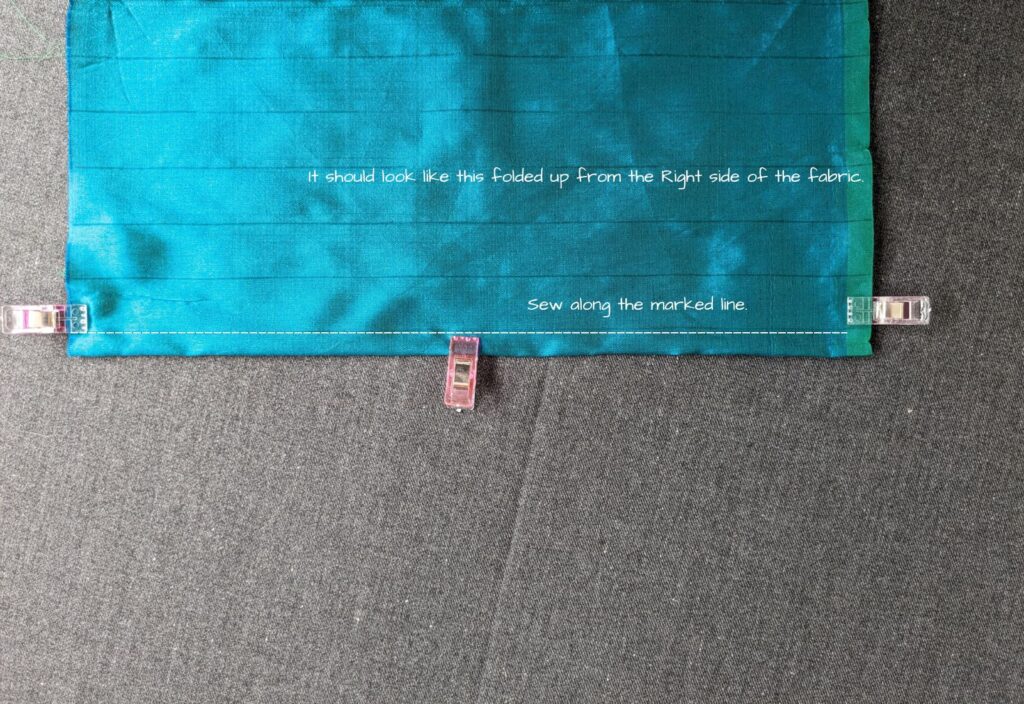
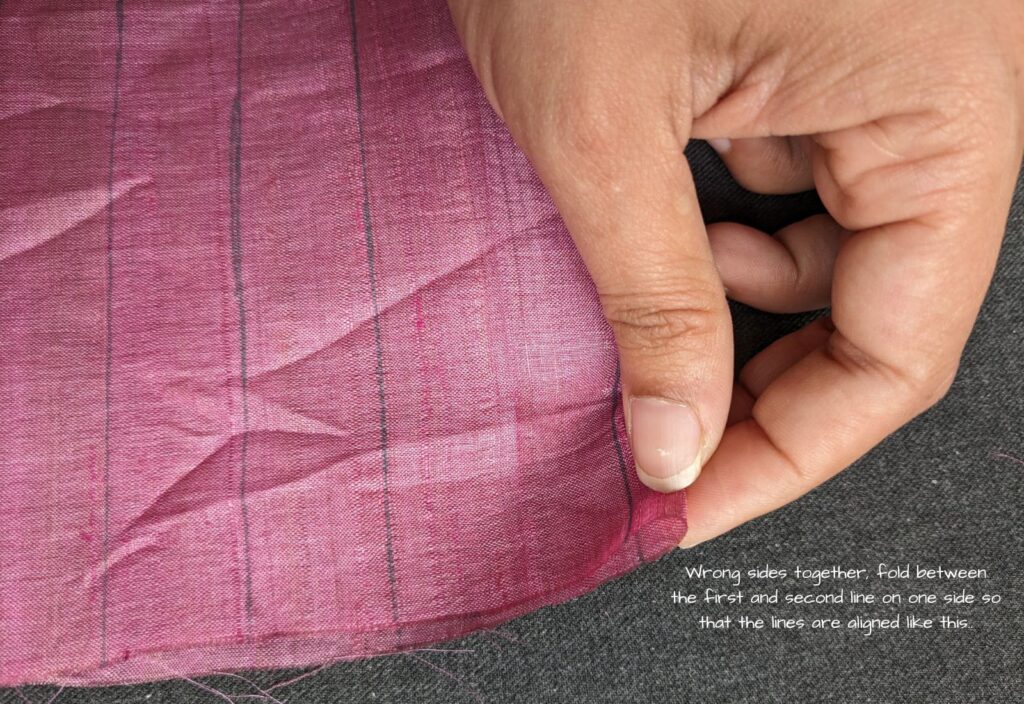
Now fold the fabric wrong sides together so that the first and second lines are aligned together. Basically you are folding along the center of the two consecutive lines. Now sew along the line. We have created the first pin tuck. I prefer to wait until all the pintucks are created to iron since I use a heat erasable pen. But if you would like you can iron down the tuck to your desired direction.
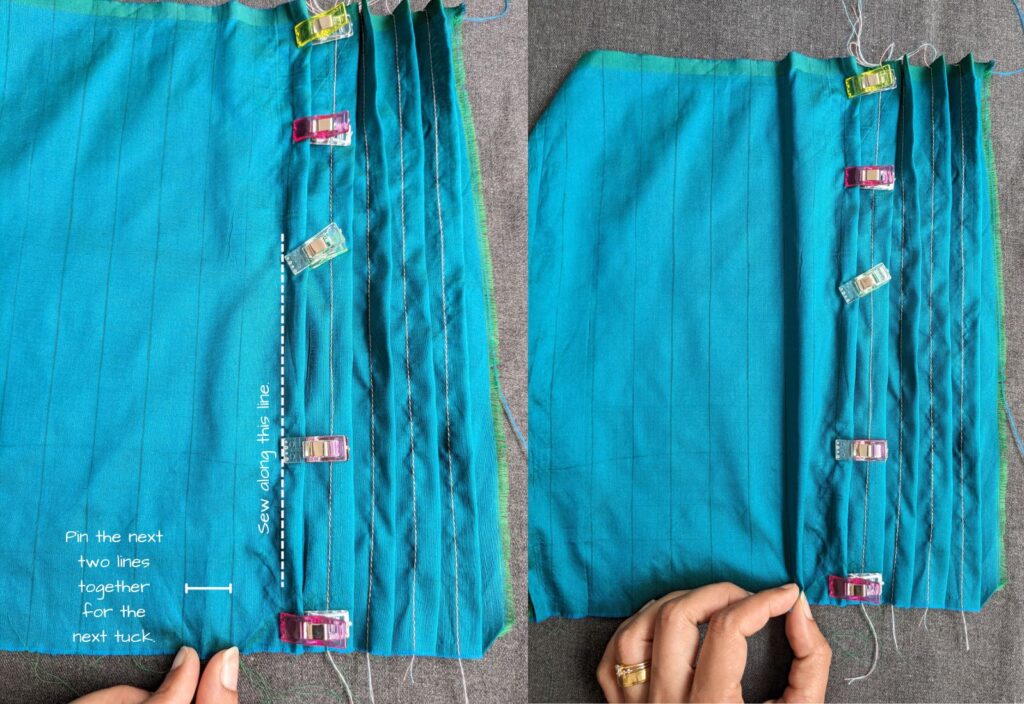 We are going to repeat the above steps for the rest of the lines that we marked in sets of two. So for the second pintuck, we will be folding along the center between lines 3 and 4. And so on until all the tucks are created.
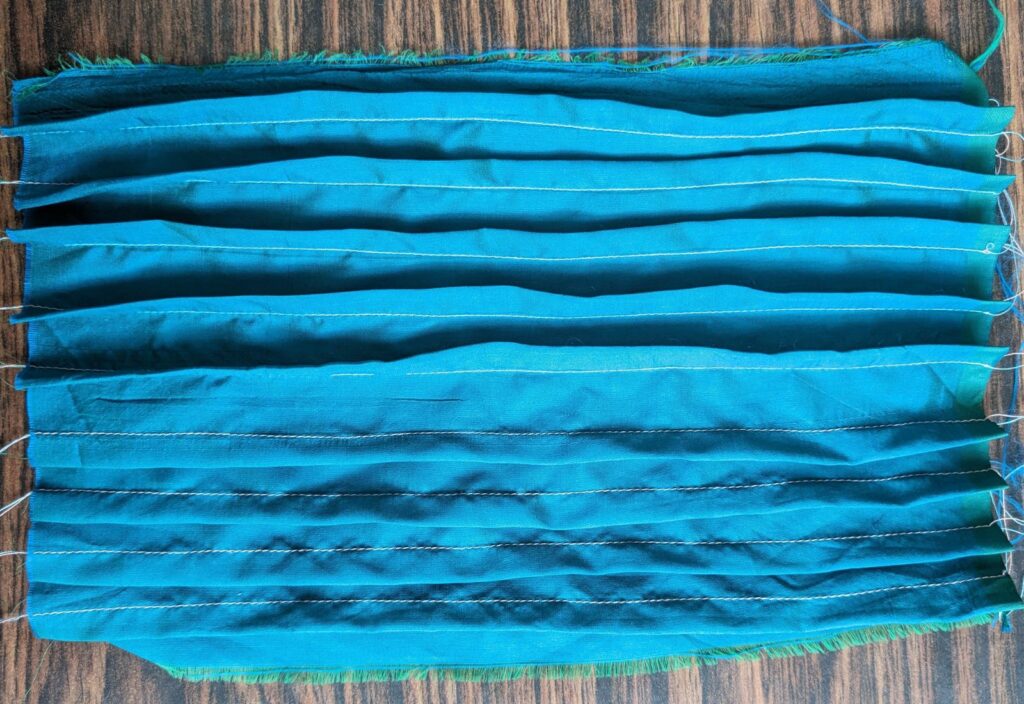
The distance between the two lines determines the size of the pintucks that are created. The farther apart the lines are the bigger the tucks are and the closer the lines are the smaller the tucks are. The above mentioned method will create even and continuous tucks. These are great for adding as bibs for bodices and on skirts. They are also great for pillow cases and other embellishments.
If you want to create a bodice that has pintucks with option to add a lace trim or buttons with button tab, bows or other details like rosettes or beads down the center, you repeat this same process, but instead of starting from the edge of the fabric, we will start marking from the center of the fabric piece. I will quickly run through the steps below.
 We will start with a rectangle or square piece of fabric. Please keep in mind that the fabric piece should be big enough for us to cut out the entire front bodice on fold after creating the pintucks.
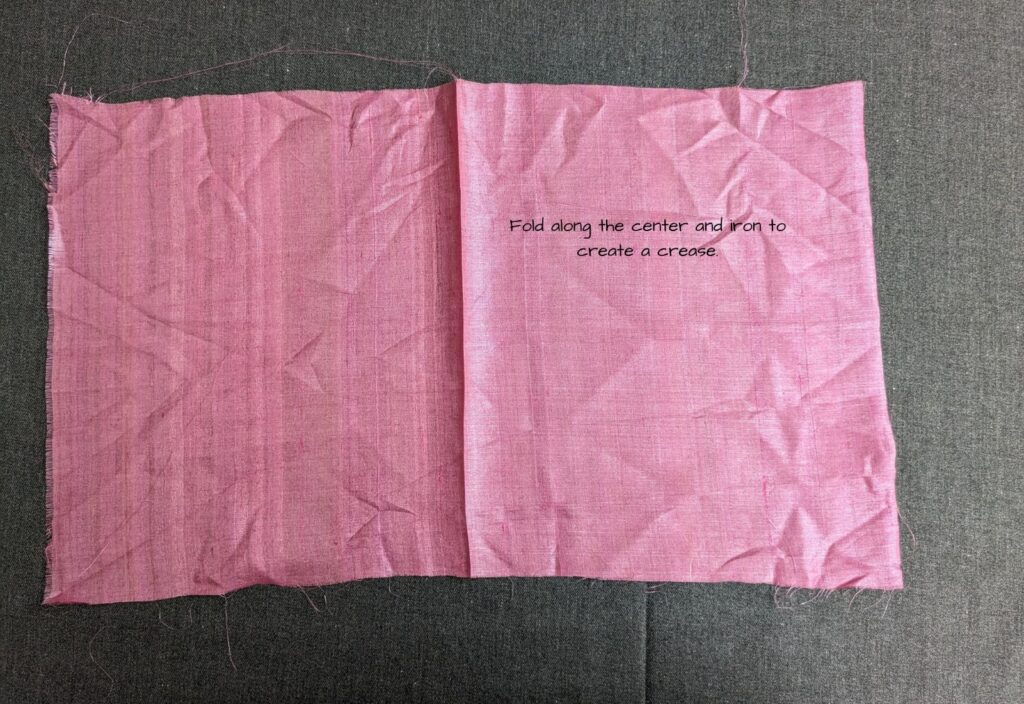 Fold the fabric along the center and iron to create a memory crease at the center point.
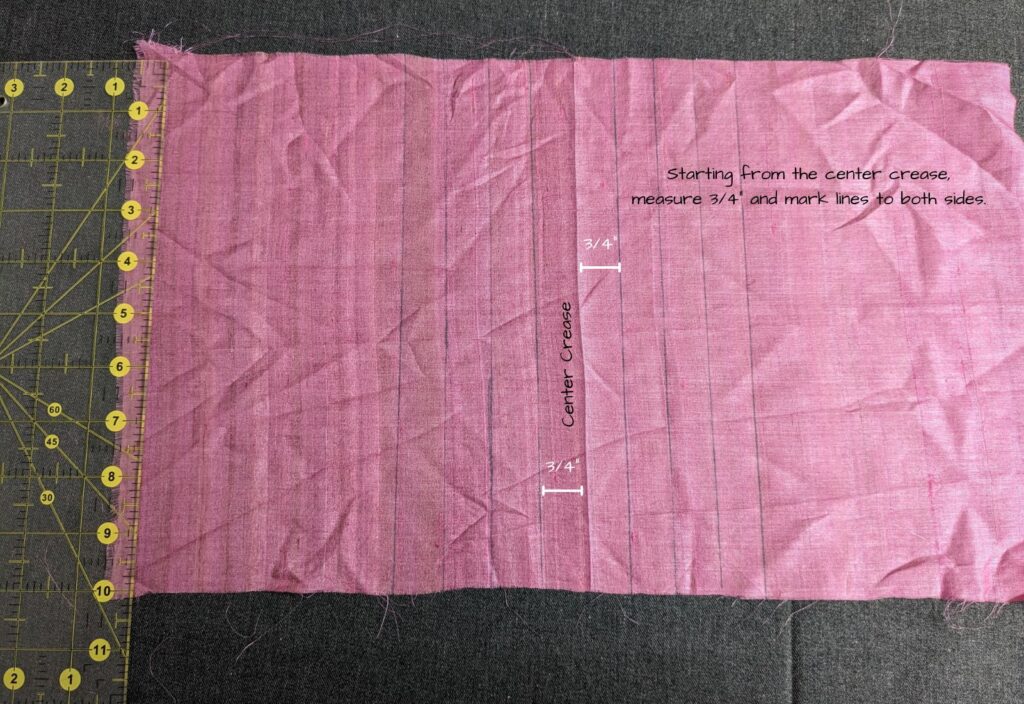 Starting at the center crease we created, mark a line 3/4″ away on one side. Mark a second line 3/4 of an inch away from the first marking and so on. I am marking 4 parallel lines. Now repeat this on the other side, again starting from the center crease.
I am going with a 3/4″ gap between lines for the ease of uniformity across this tutorial. You can choose the line based on the size of the tuck you need. A 3/4″ gap between lines will give you a tuck that is 3/8 of an inch wide tuck. If you use a 1/2″ gap between lines the tuck will be 1/4″ inch wide. You can even use a staggered sizing where the tucks are smaller closer to the center and grows in size as it moves farther away.
 Now we will repeat the same technique we used earlier and sew down the pin tucks with a straight stitch by folding the fabric wrong sides together matching the first and second line markings on one side. And then matching the third and fourth line markings. Repeat this on the other side as well.
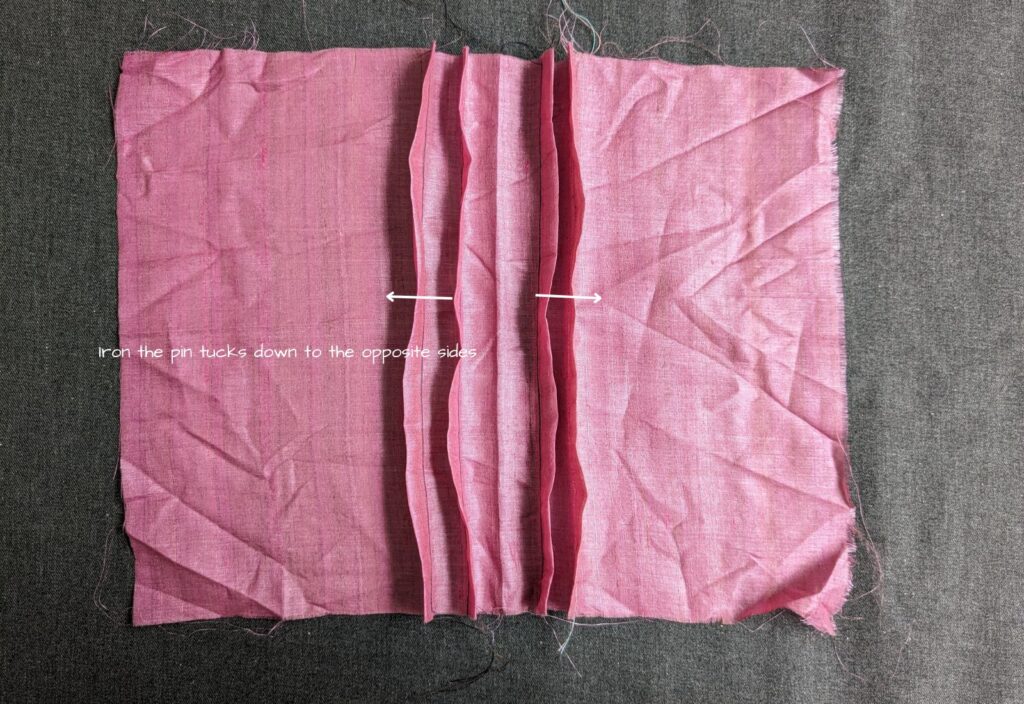
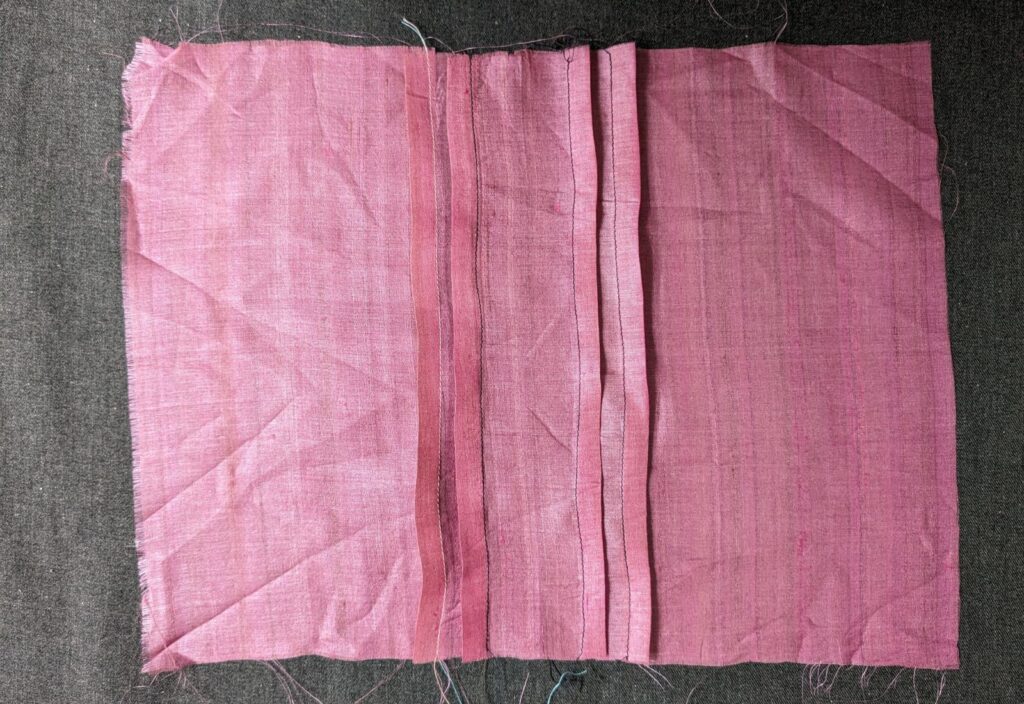 Now iron the pintucks away from the center crease on both sides. This will create a wide gap in the center to add any details that you would like to add.
 If you want to add only tiny details like a small button or so, you can use the first mentioned method and just iron the pintucks away from the center point of choice.
Ways to use pintucks
Now that we know the basics of creating pintucks, let us look through a few of the ways we can use pintucks in our projects to make it extra special.
Bodice of a Dress
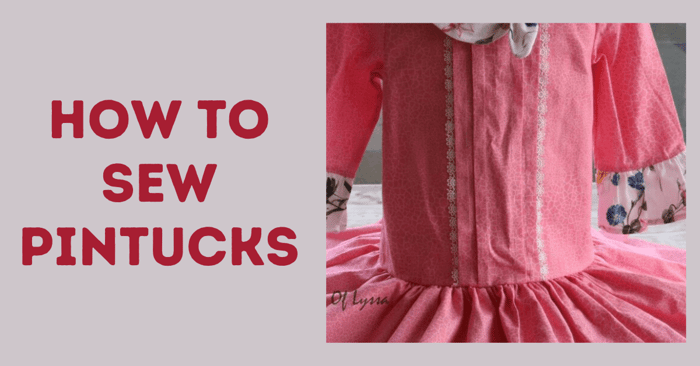
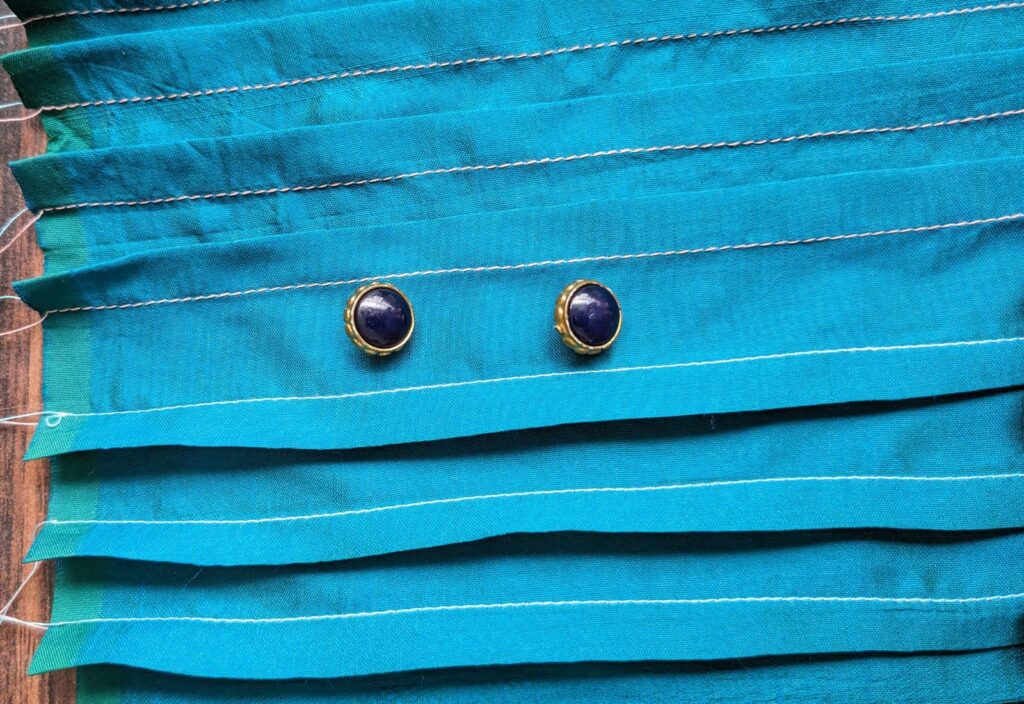
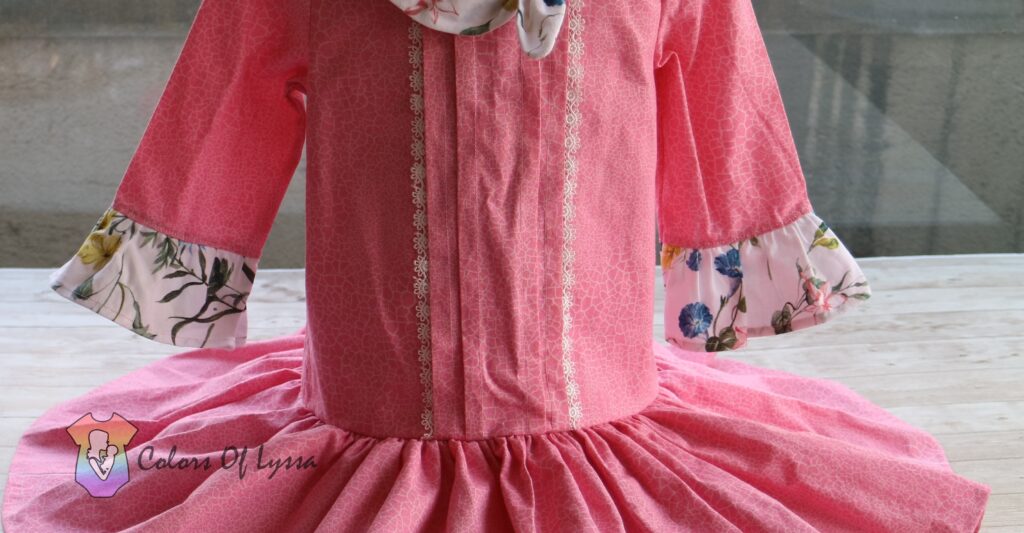 Pintucks are usually used to elevate the bodice and add details. I have used pintucks in many different ways. With the pintucks going down the bodice with buttons along the center and lace or Ric-Rac as trim to each pintucks. To add lace or Ric-racs, place them under the pintuck and stitch it in place in a straight line on the bodice.
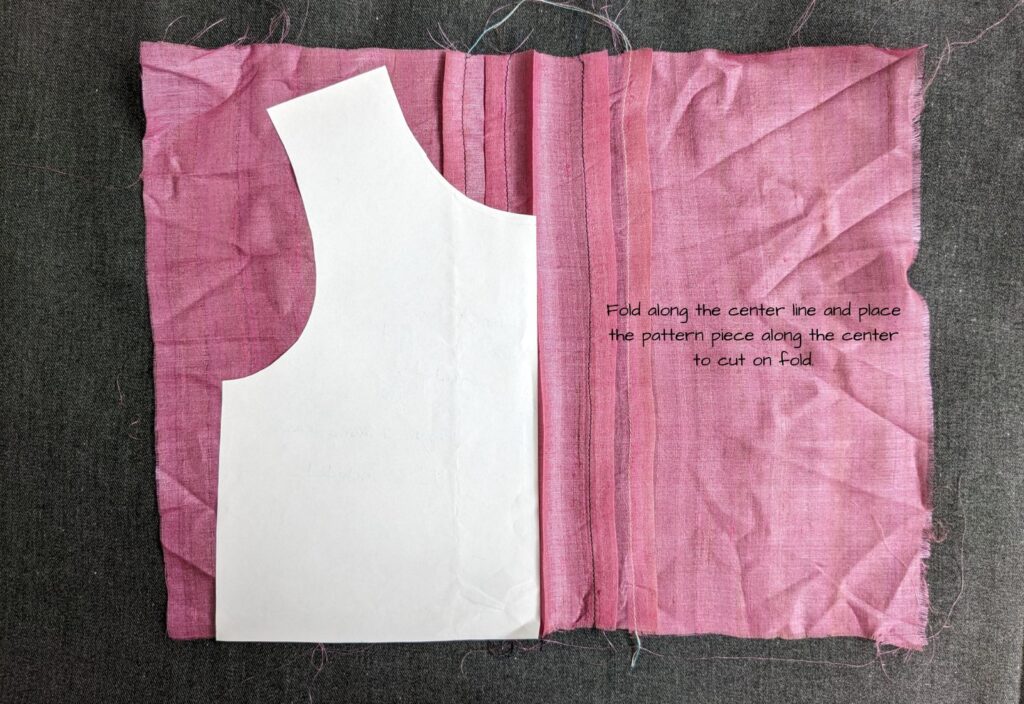
 To use the pintucks as a center panel detail of the bodice, place the bodice center panel on the prepared pintuck fabric on fold and cut as usual. Now if you want to add a little extra texture and detail, you can have the pintucks go diagonal.
 Skirts and Dress Skirt
You can use the same technique to create textures to the skirt. This is also an easy way to reduce the length of the skirt without trimming any length off or having deep hems. You can decide how you want to have the pintucks featured on the dress skirt. If you fold the skirt right sides together instead of the wrong sides together as mentioned in the sewing method, you get the tucks in a different texture. They look amazing as a detail on the skirt as well. I recently untucked two rows of pintucks I added to a dress skirt to reduce the length.
Formal Dress Shirts and Blouses
The pintuck details are used to add an extra detail to the dress shirts used with suits and jackets and other formal blouses. Using this detail usually elevates something from a casual wear to formal or fancy where. I seen them used frequently on little boy rompers.
Pillow Cases & Other Decors
Pillow cases and cushion covers are where I have often seen the pintuck details in my life. The pintucks I have seen on these are more creatively placed. I remember seeing details created by changing the fold direction of some of the pintucks. Pintucks going diagonally across each other, pintucks going in curved directions etc.
Here is a quick example of pintucks created in the diagonal.

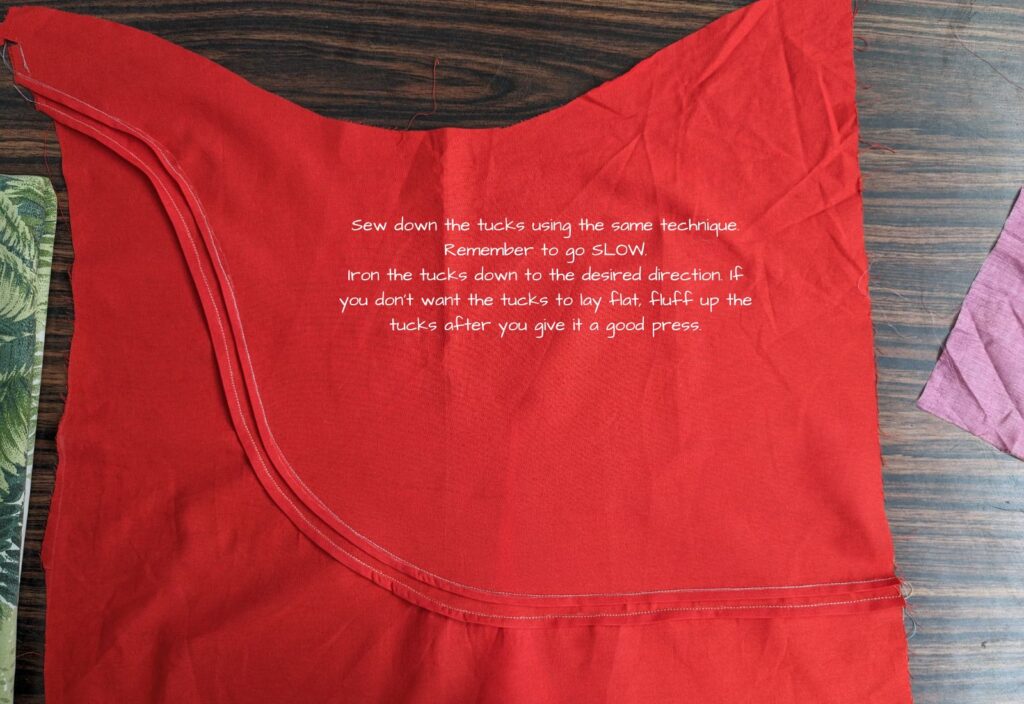
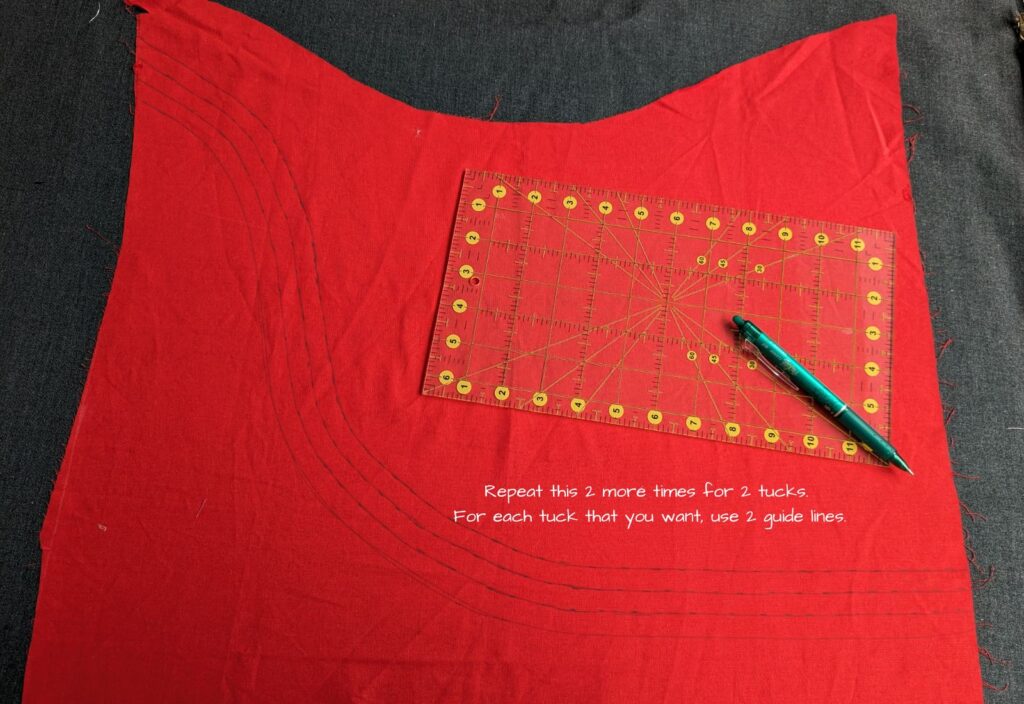 I have started with hand drawing a curve from one end of the fabric to the other. For these tucks I am using a 1/2 inch gap between lines, resulting in a thin 1/4 inch pintucks. Mark a 1/2″ away from the first line and repeat 2 more times for a total of 4 guidelines for 2 tucks. For each tuck that you want, you will draw two lines, a start and end line for the tuck. Once the lines are drawn, repeat the same process and sew the tucks down. Since it is on a curve make sure to go slow and ensure the tucks are even through out.
 You can now use this piece to create whatever you decide to use it for. This can easily be used for a pillow case or even for a swing dress or the center dress panel of the Sugar & Spice Top & Dress Pattern.
Important things to keep in mind while sewing Pintucks
- Be as precise as possible with the spacing between the tucks
- Maintain uniformity between the tucks. It can be either same size or changing size following a pattern.
- Go slow with your sewing machine or serger (overlocker machine) while sewing, especially for the curved tucks
- Use matching thread for both the needle and bobbin threads so that the sewing lines aren’t visible.
Anchors Away dress details, Anchors Away collar detailing, Darcy Romper Bib, Max & Matilda Button up Onesie, Molly School girl blouse are a few of the patterns that are available in the shop where you can easily use the pintuck detailing. If working with knit fabrics, remember to use light interfacing as they tend to stretch.