How to sew a Cape | Using the Super Kid Cape Pattern
It’s summertime! Come learn how to sew a cape….there’s a chance it will keep your little one busy for at least a little while.
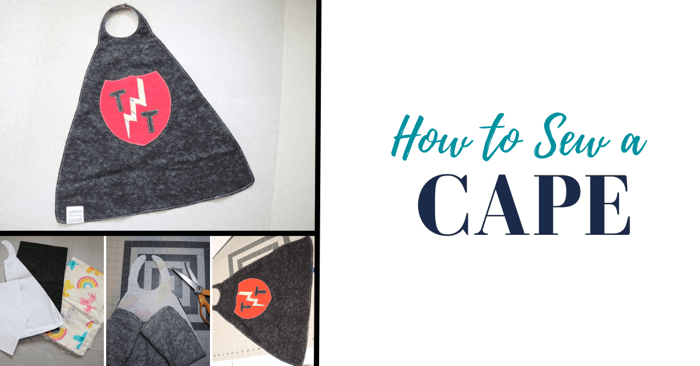
Is there an adventure-loving little one in your life? Are they into superheroes? Whether your little loves are into superheroes or not, no kid I have ever met has been able to resist a good cape. My toddler who has no idea who or what a superhero is brings me blankets or towels so I can make him capes every chance he gets. This meant it was time for me to make him his very own superhero cape! Now you can too – just learn how to sew a simple cape.
The Adventure Cape Pattern
Since this article was first written, we've come out with a comprehensive cape and cloak pattern - the Adventure Cape for kids and adults. The adventure cape includes tons of options, including:
- Capelet, Standard Cape or Full Length Cape
- Hooded cape, Peter Pan Collar, Vampire Collar or No Collar
- Closures: Ribbon, Button, Snap, Frog Closure or Velcro
- Optional Arm Slits (for standard and full lengths)
This is our recommended cape pattern now as you can make a larger cape or use the hood pattern or a variety of other options to make something special. You can sew up about anything with it - wizard, witch, hobbit, devil, favorite superhero, villain and more!
Check it out for more info.

Sewing Up the Super Kid Cape Pattern
Before the Adventure Cape, we came out with and still have a fun, simple, and easy cape pattern for kids - the Super Kid Cape. I have used the Super Kid Cape Pattern from the shop previously to make my older two capes. They were constantly used and has been washed a gazillion times over the years and it still is in very good condition! While the toddler drags it out every time he sees it, they are still too big for him! So I am going to make him one in his size. This pattern comes in a few different sizes, the smallest (XS) fits a 12-24 Mos age range. Now I have an easy tutorial for you. So grab your sewing machine and measure tape and lets get sewing!
You will need the pattern from the shop! This is one of the freebies offered by Amy to the newsletter subscribers and Facebook group members! So if you haven’t already signed up for the newsletter or group, do it now and you will find some amazing free patterns that are available to us! This would also be a great addition to your staple patterns if you are into creating Halloween Costumes. The possibilities are endless!
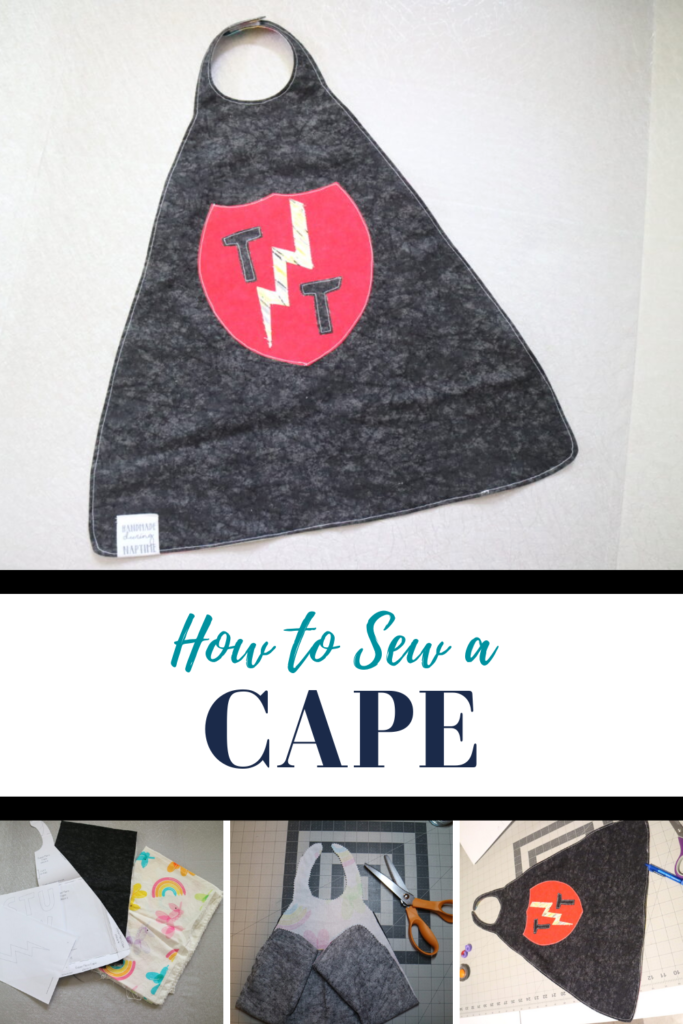
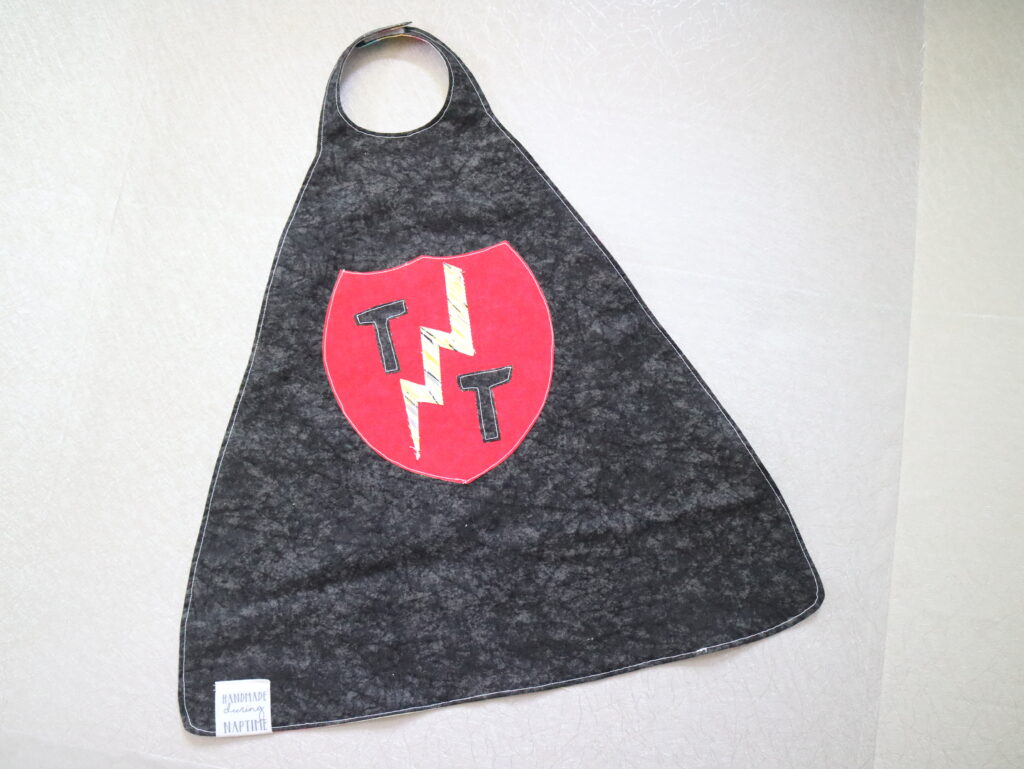
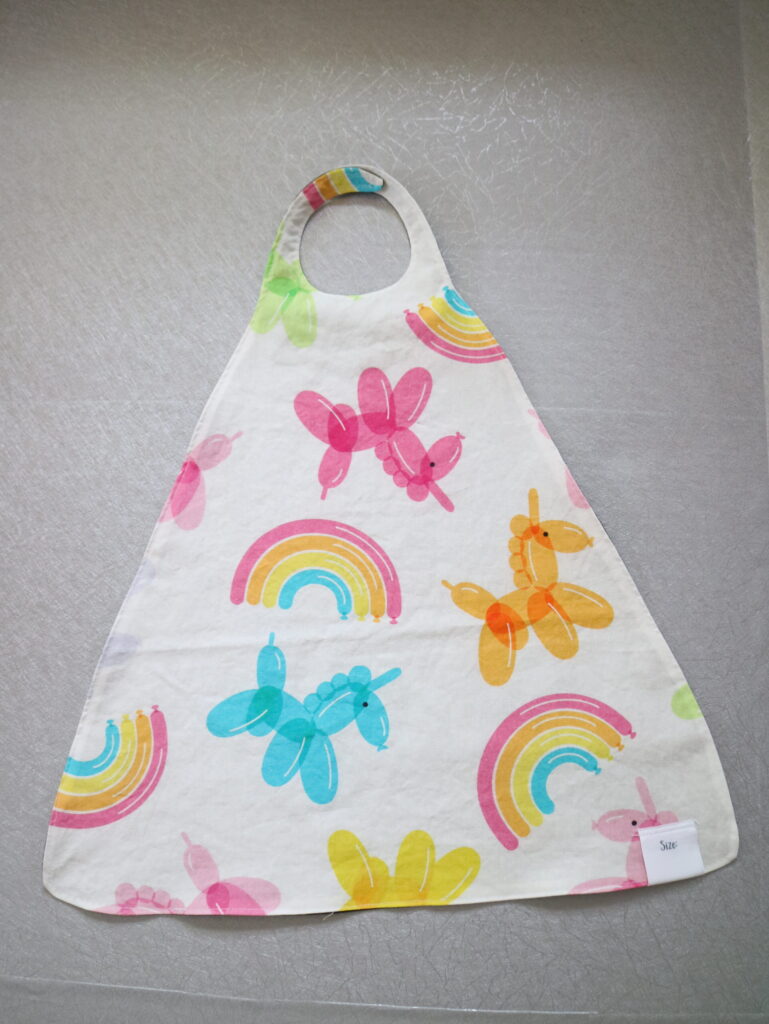
Like I mentioned earlier, I am making the smallest size for my youngest little one. But they also have 3 more sizes for kids all the way upto Size 8-12. I will do something that is a little Super Villain Style on one side and fun and bright on the other. This pattern is finished so that both sides of the cape can be used. So it is a 2 in 1 cape. And this Mommy is letting the world know that this toddler is a Tiny Terror by creating a ‘TT’ applique on the Super Villain side and to balance out the fact that he is actually a sweet kid, I am doing a fun rainbow Balloon Dog print on the other!
The pattern also comes with a lot of Applique templates. There are 7 fun shapes and the full set of alphabets that can be mixed and matched to create a tonne of applique options!
 Best Fabric Types for a Cape
The suggested fabrics for this pattern are lightweight woven for the body of the cape and any scraps of fleece, felt or cottons woven for the applique pieces! You will need interfacing for the applique and Velcro or snaps for the closures.
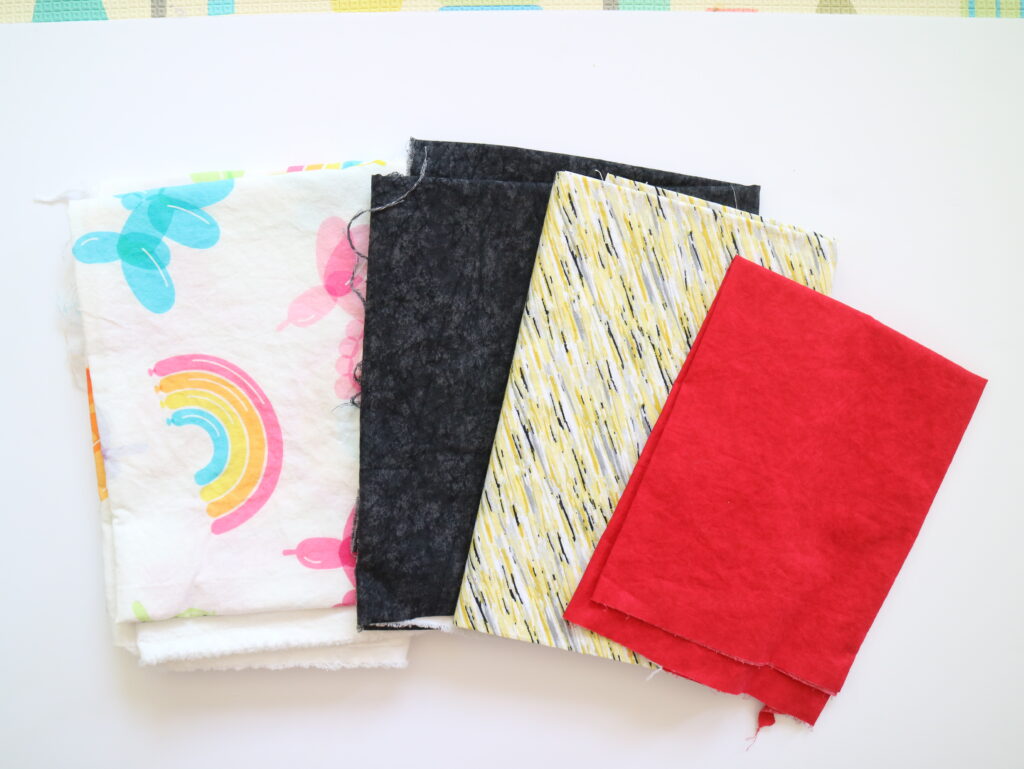
For the body of the cape, I am using these Quilting Cotton fabrics. I used a cozy snuggle flannel fabric when I made the cape for the older two. They work amazingly well and the time I have seen them turn the cape to use them as a quick blanket are countless! It was cute and hilarious and brilliant of them to come up with that idea!
Closures : Please choose your closures based on the child you are sewing the Cape for. You can use snaps or Velcro for the closures. When I made the Cape for my older two they were old enough to undo the snaps themselves and knew of the risks involved while playing with the Cape. I was also able to keep a close eye on them while they played. Now with the toddler, I will be using Velcros! Especially since he is sneaky and loves to test boundaries a little too much – hence the Tiny Terror! Despite the age of the children, if you are using snaps, please be mindful of using snaps that are easy enough to open should the cape get caught or something or gets pulled.
Let us make the DIY Cape!! | How to Sew a Cape
Let us get started!
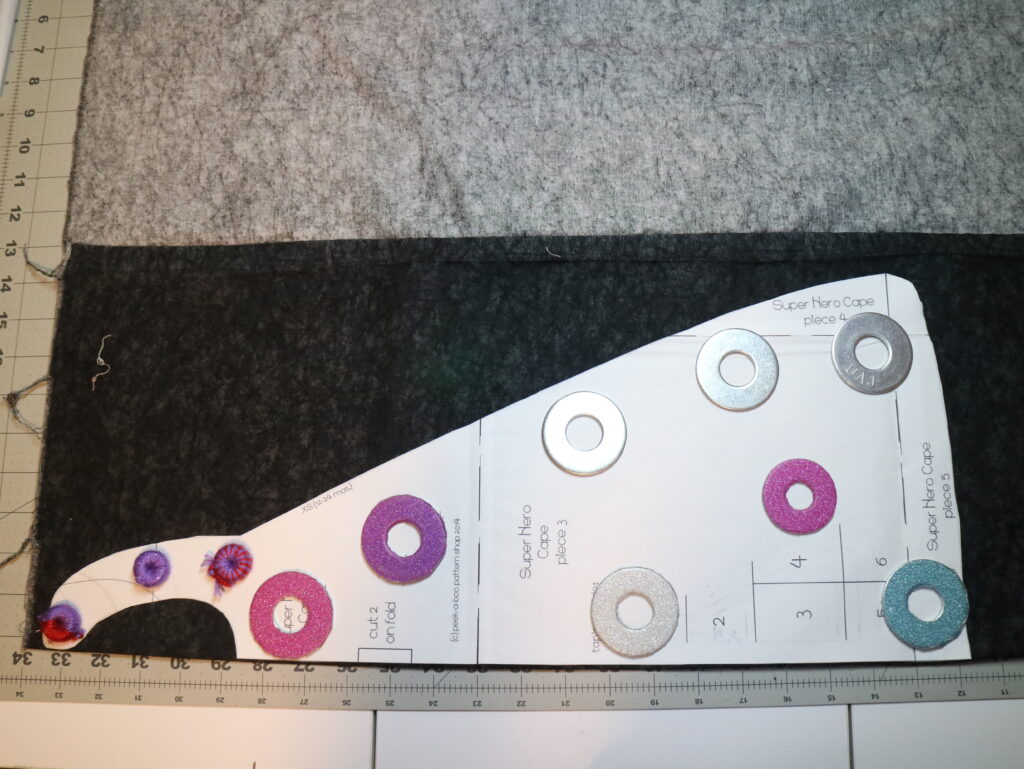
I have the pattern all ready to go in the XS size. The applique all planned out and the fabric ready here. The black fabric is going to be the side that has the applique on it. I will be using the T from the alphabet collection to create two 2 Ts for the Tiny Terror and the lightning bolt.
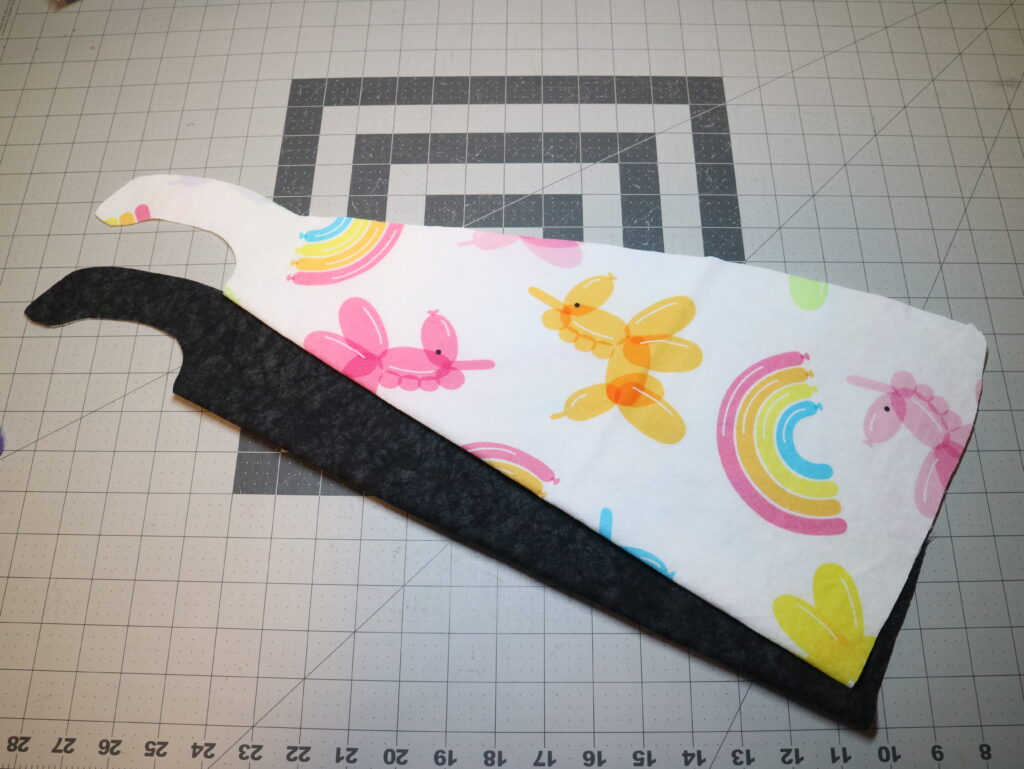
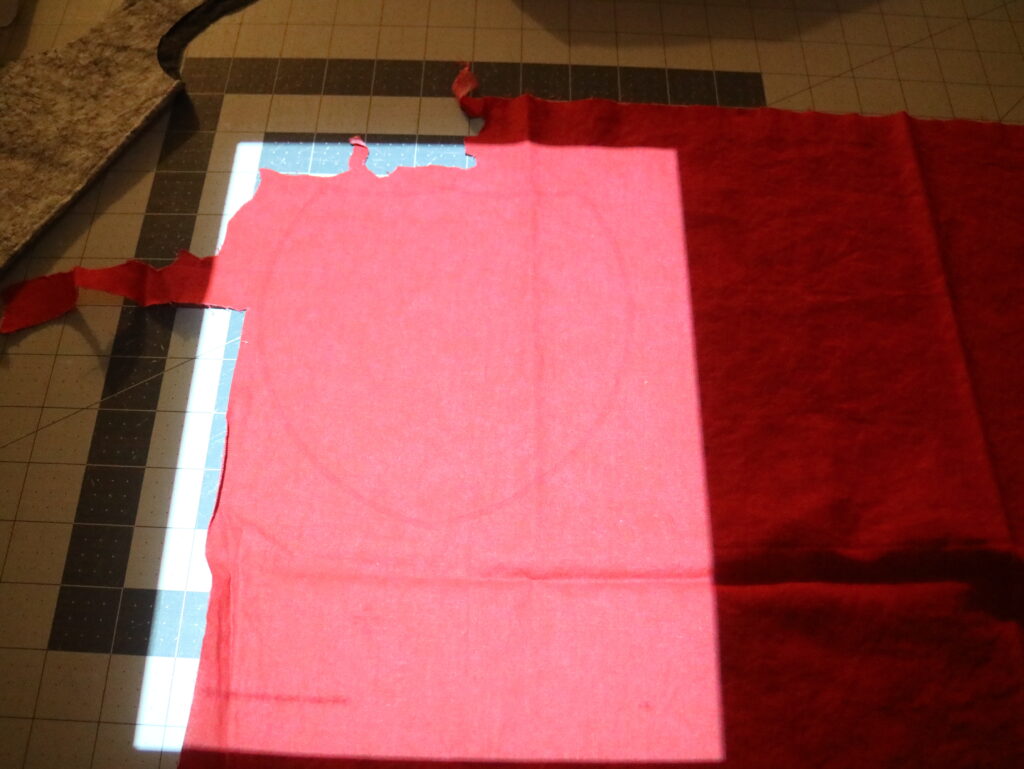
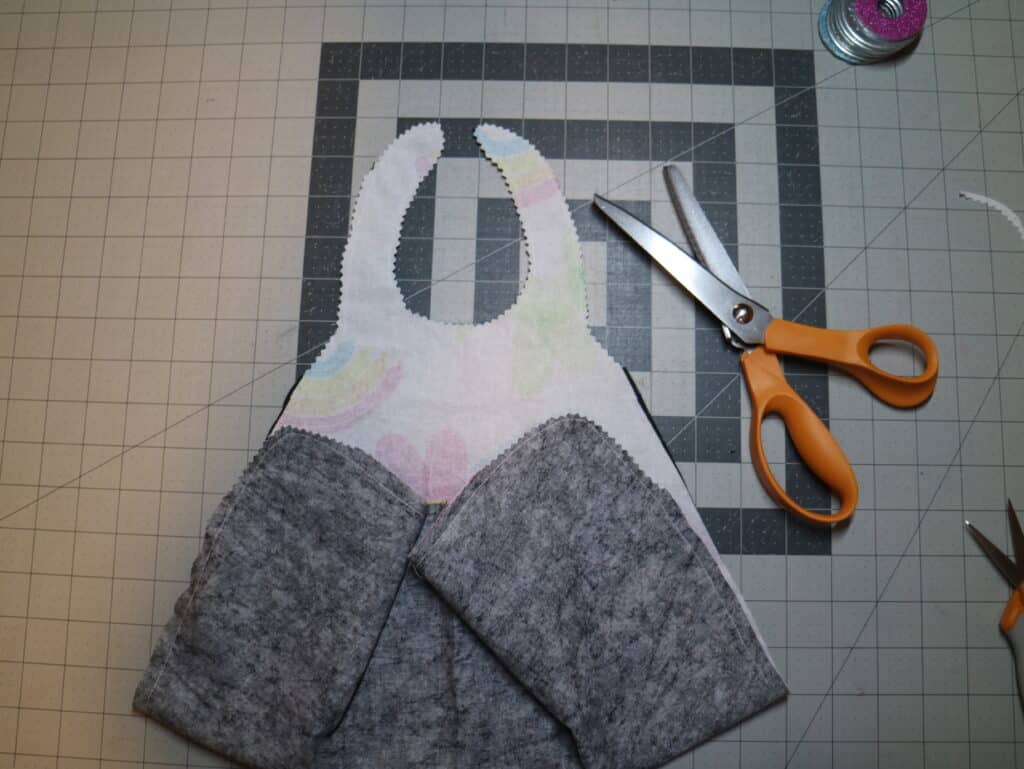
 Place the pattern piece on top of the fabric with the cut on fold mark aligned with the fold line of the fabric. Cut one each of the main and lining. For me that is one on the solid textured black and one of the Rainbows & balloon dogs.
 For the next step, I am going to use my handy projector to size the applique images to the cape. For this I lay the cape down on to my cutting mat opened up and project the applique pieces file on to the cape. I zoom in and out until I find a size that I like for the Ts. Once I have those two cut out on the interfacing I repeat the steps to get a coordinating size for the lightning bolt. Some times I use the paint or a graphic designing app to create a file and the resize the whole file so that the entire applique is a particular size.
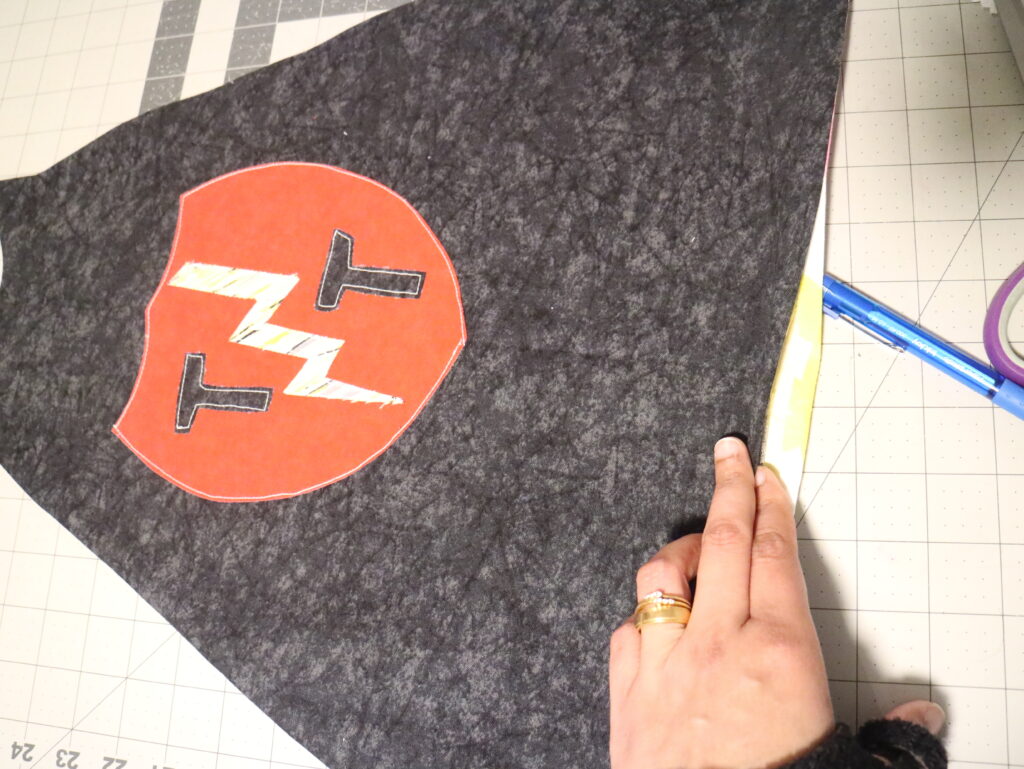
 Initially, my plan was to do the Ts in red and the lightning bolts in yellow, but I decided to change course and add in a base shape. The base shape will be in Red, the letters in black and lightning bolt the same yellow sketch as I initially planned. I resized the letters to fit the shape and cut all the applique pieces. If you are new to applique and need a little bit of help there is a detailed blog post on how to do an applique available.
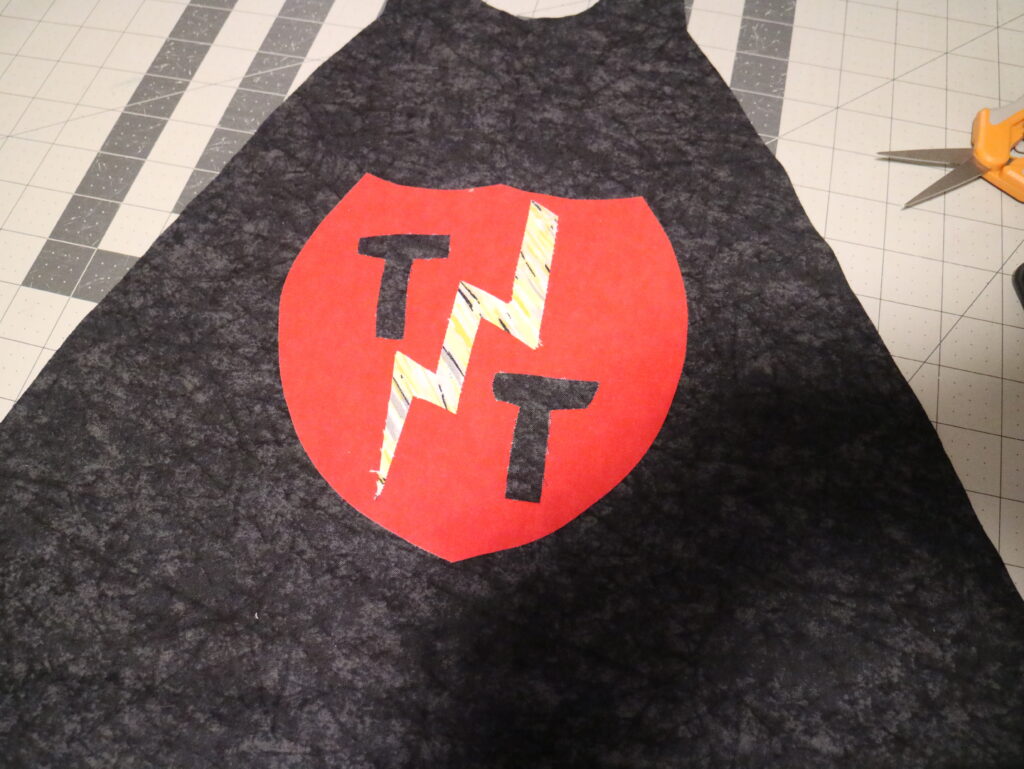 Lets get sewing your cape! When a base shape is available I like to create the applique as a patch. But in this situation as the applique is going on the cape that is fully lined, I will be stacking the applique directly on to the Cape for a little extra stability. I used the double sided Heat n Bond and ironed on the applique pieces to the cape. Then sew around the shapes and letters to secure them. If you are using a woven fabric for the appliques, a zig zag stitch is preferred. I used the straight stitch as I wanted the applique to have a slightly frayed look to keep in theme. After a few wear/washes these will be perfectly frayed for a disheveled look in theme with the Tiny Terror.
 Now that the applique is done, let us place the cape main and lining right sides together. Sew all around the top edges leaving an opening for turning. Don’t forget to back stitch at the starting and ending.
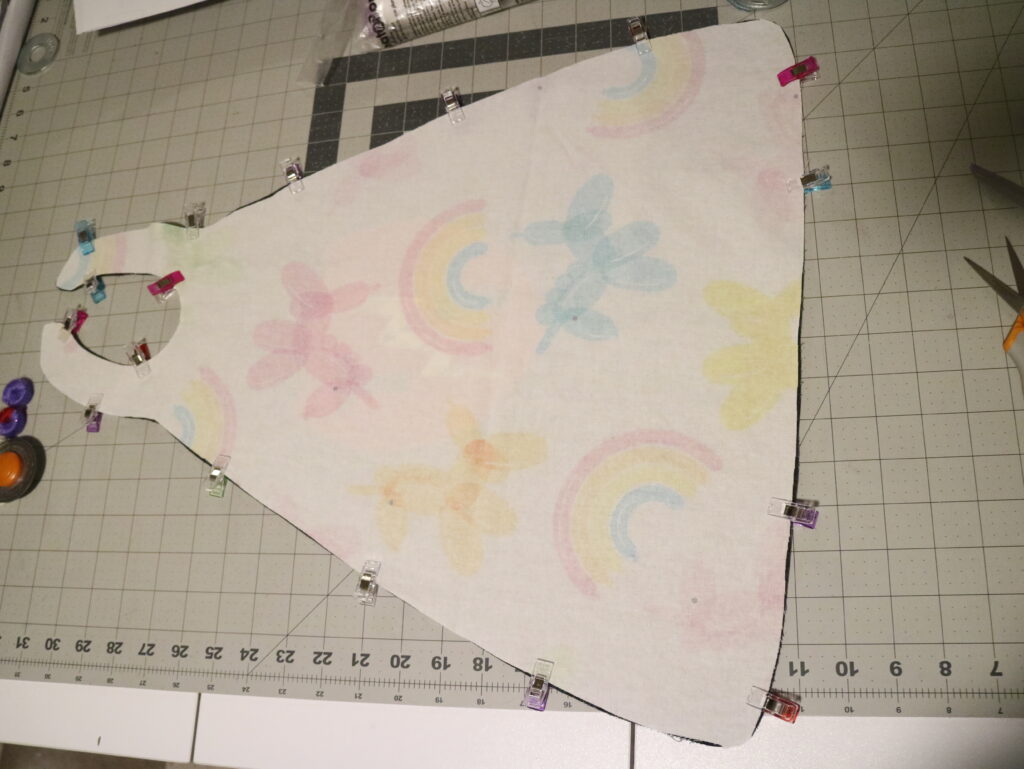
 Let us clip the curves on the cape before turning them right sides out. If you have a pinking shears, use it all around the neckline and at the curves of the cape.
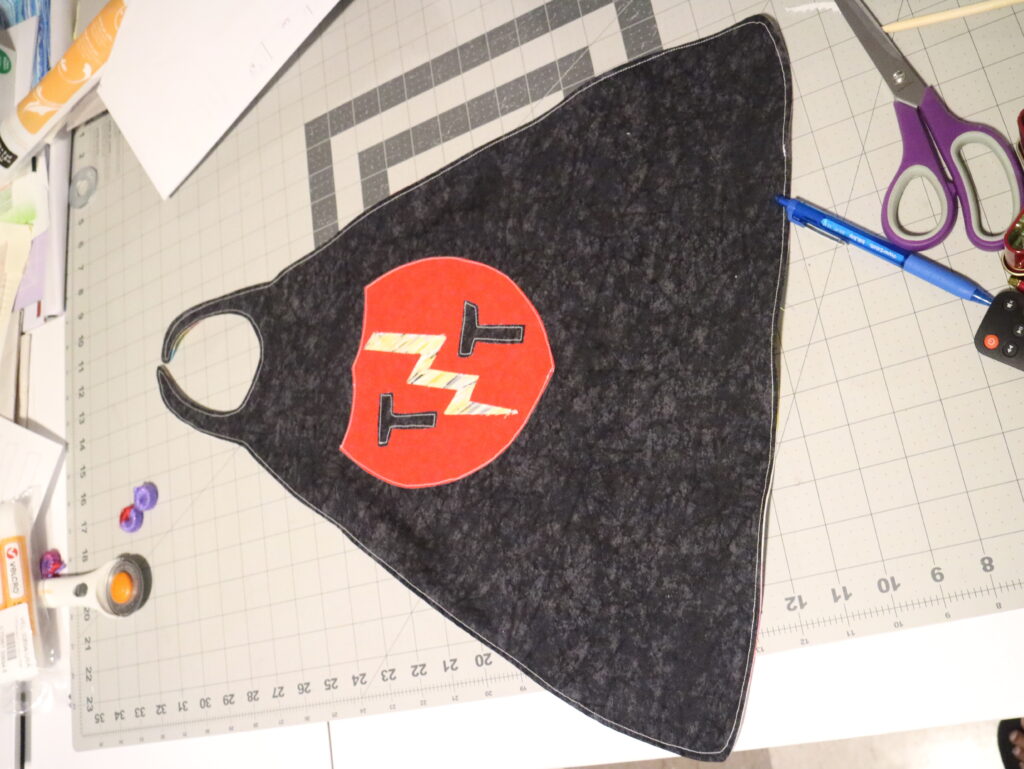
 Turn the cape right sides out through the opening we left. Give the seams a good press making sure to fold the seam allowance from the opening inside.

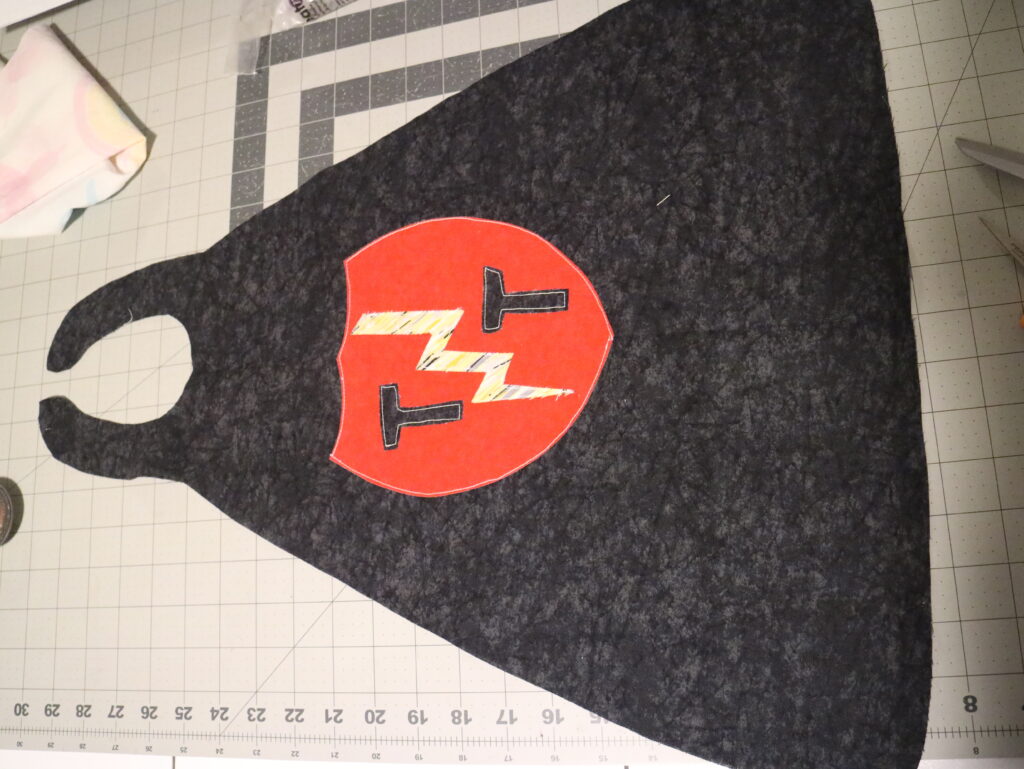
 Now top stitch all around the cape closing the gap we left for turning. The cape is almost ready to go and all it needs is its closure.
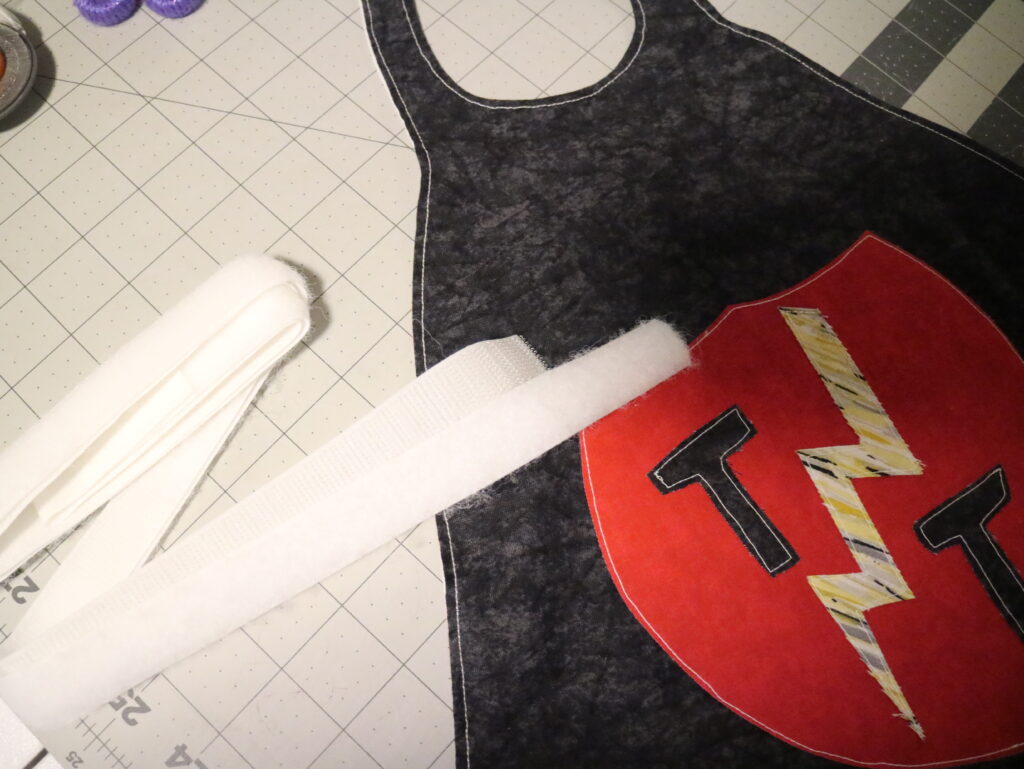
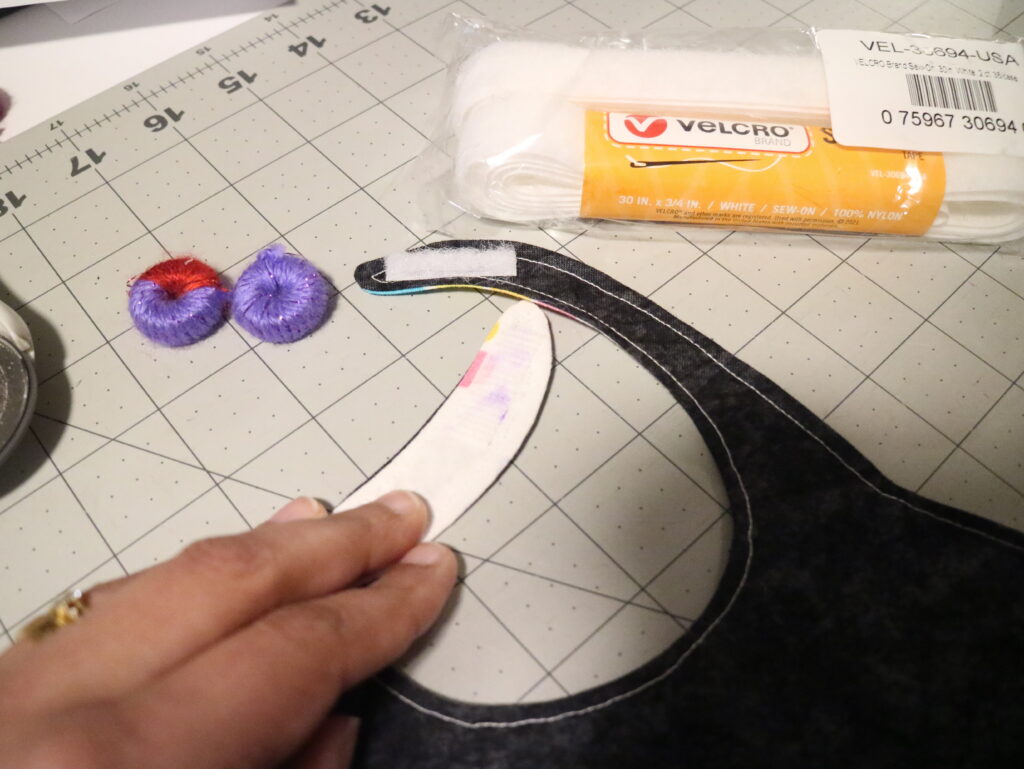
 Choose your closure method and add it to the neck straps making sure one side overlaps the other. I am using velcro as this is the smallest size and I do not want to take any risks. Since this is the smallest size I had to trim the Velcro to fit the neckline. I also used the purple glue stick to hold the velcro pieces in place for easy sewing!
 And there you have it! We are done and the Super Kid, ahem, Super Villain Cape is ready!! I threw in a cute Handmade during naptime tag as well.
 Now we've come to the end of the cape tutorial, I hope you have a good idea of how to sew a cape and can pick out your fabric, get your measuring tape, fire up your sewing machine, and sew up an easy Halloween costume. A super hero cape is about as easy as it gets.
What is the best fabric to use when sewing a cape?
The best outer fabric to use when sewing a cape is a medium to heavyweight fabric that has a good drape. For the Super Kid Cape we recommend lightweight wovens. The Adventure cape can be made of mid-weight knits or woven like satin, stretch velvet, fleece, wool, and more.
I hope you will be making a few fun capes for the dress up box as well. Since this is essentially a fully reversible Super Cape you can have so much fun with this pattern. Don’t forget to check out the other fun play and dress-up pieces you can find in the shop!
Before you leave, make sure to join our Facebook Group or follow us on Instagram or Pinterest. Happy Sewing!