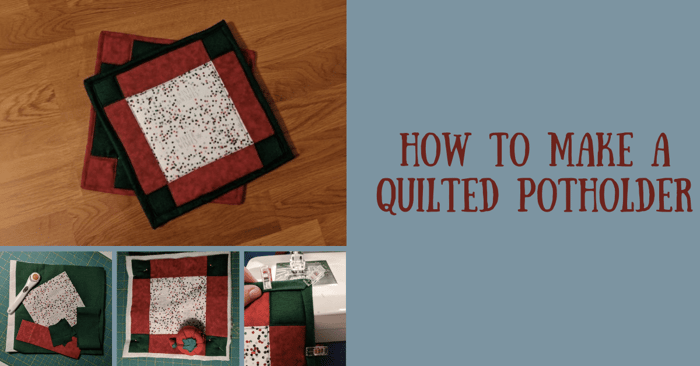
How to Make a Quilted Potholder | DIY Quilted Potholder
Are you tired of burning your hands every time you take a hot dish out of the oven? If so, it's time to learn how to make a quilted potholder. Not only will this DIY project keep your hands safe, but it also makes for a fun and creative activity. In this blog post, we'll walk you through the step-by-step process of making your own quilted potholders. From choosing fabric patterns to sewing techniques, we've got you covered. So grab your sewing machine and let's get started on creating a stylish and practical addition to your kitchen!
Homemade gifts are always special, and quilted potholders can be an excellent choice for Christmas or birthdays. To make these potholders, you don't need any advanced sewing skills, and the materials required are minimal. You can choose your favorite fabric patterns to customize the potholders according to your preference. For the Christmas season, you can opt for festive designs like snowflakes, Christmas trees, or Santa Claus prints to add a touch of holiday cheer to your homemade gift.
How to Make a Quilted Potholder
Potholder Supplies
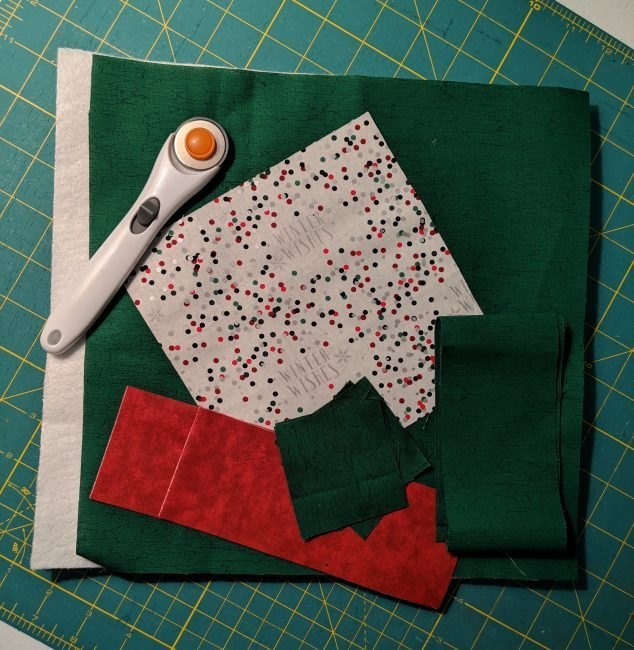
- You will need quilting cotton for the front, back, and binding. I used a 1/2 yard red and green piece of fabric, and 1/4 yard of the Winter Wishes print for my potholders.
- Insulbright batting for the inside. I purchased 1/2 yard of Insulbright. Some others use cotton batting.
For your quilting cotton, come to KnitFabric.com
Cutting the Fabric For Your Quilted Pot holder
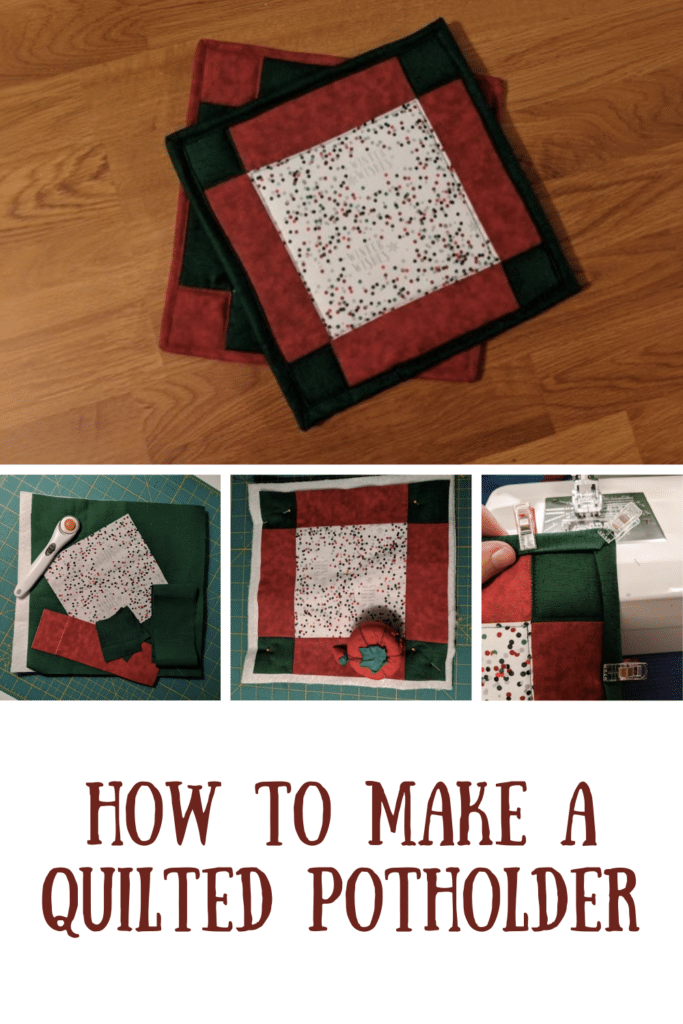
Step 1: I started the quilted potholders by cutting a 6.5-inch square of my white print fabric for the center of my potholder. Then I cut 4 strips of red 2.5 inches by 6.5 inches and 4 squares of green fabric that were 2.5 inches on all sides. Next, I cut a 12.5″ square of green for the back and two 12.5″ squares of Insulbright.
Step 2: My binding was cut at 2.5″ by the width of the fabric for this size potholder. Your binding amount will be different depending on the size of your quilted potholders.
Piecing Together the Potholder
Step 3: First, piece the top of your potholder. I used a 1/4″ seam allowance and sewed each horizontal row together.
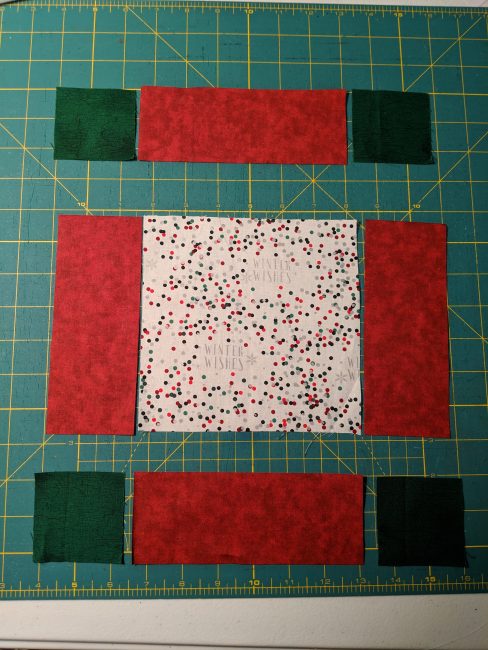
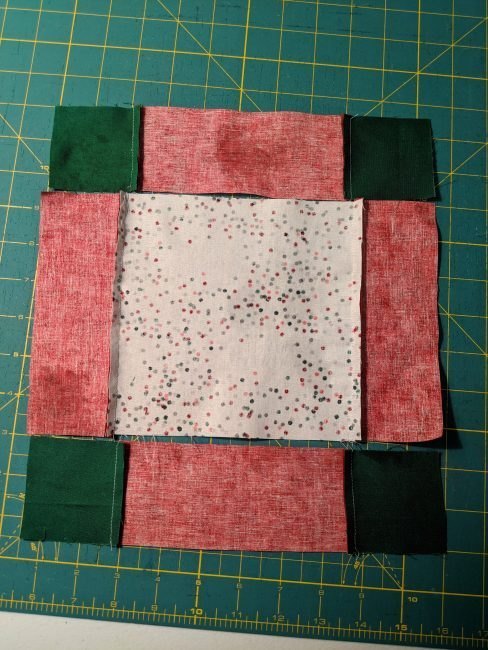
Step 4: After sewing, press the seams in opposite directions as shown and then piece the rows together. Then I like to pin or clip at each seam to make sure they are matched.
Step 5: Next, layer your backing, then two layers of Insulbright, and finally your quilt square. Then pin the layers together.
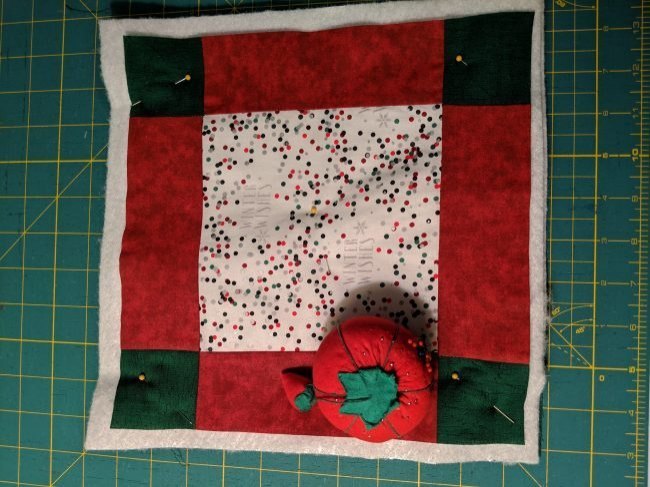
Step 6: After pinning, quilt the layers together using the design of your choice. I chose to quilt around the center square and each corner square.
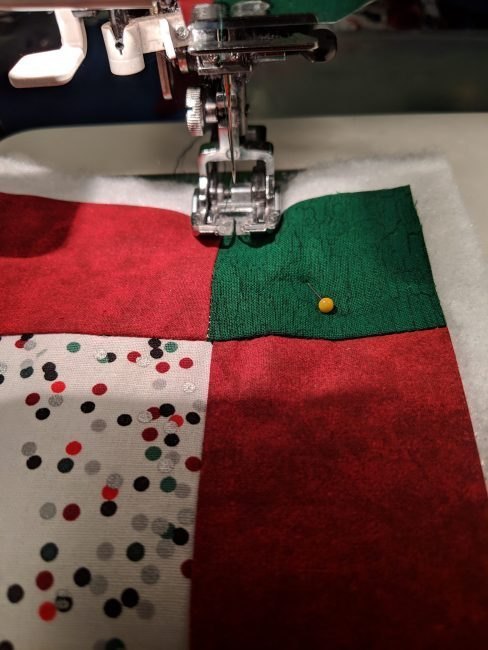
Step 7: After quilting, square up your quilt block. I used my ruler to trim the potholder to be 10.25″ square.
Finishing the Edges of the Quilted Potholders
Step 8: To finish the edges of the quilted potholders, press the binding strip wrong sides together. Pin the binding onto the wrong side of the potholder leaving the first 3-4 inches unsewn.
Step 9: Stitch with a 1/4″ seam allowance stopping 1/4″ before the corner and back stitch.
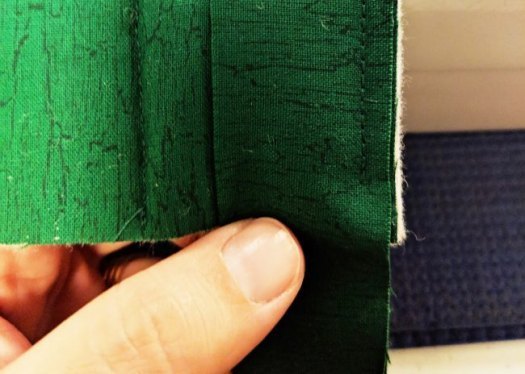
Step 10: Next, fold the binding to the right at a 45-degree angle.
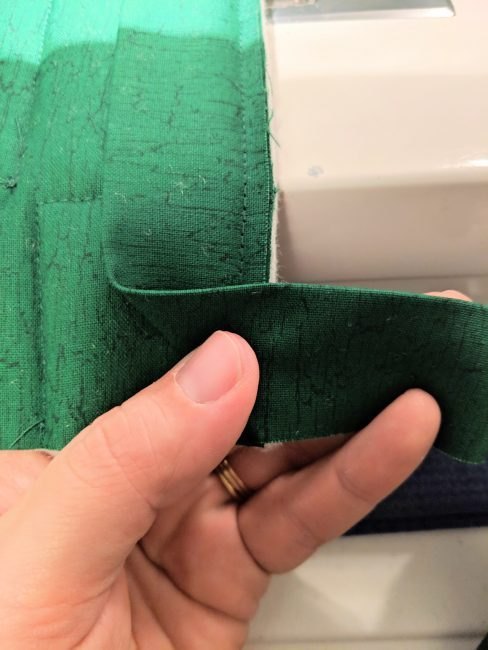
Step 11: Then fold the binding back onto itself even with the right edge of the potholder. Begin stitching 1/4″ from the corner and continue this process for each corner.
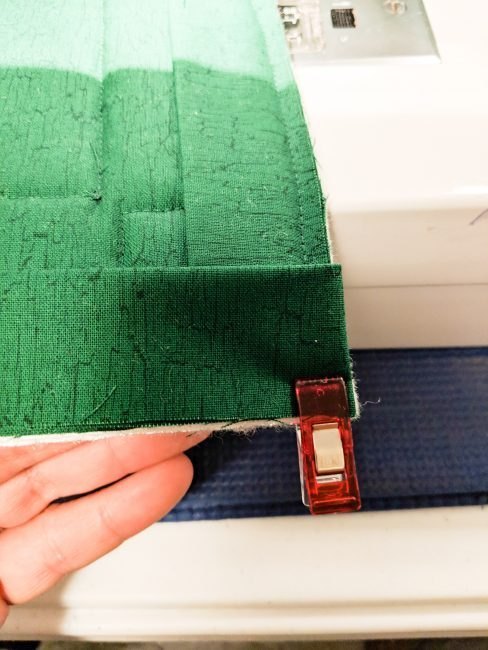
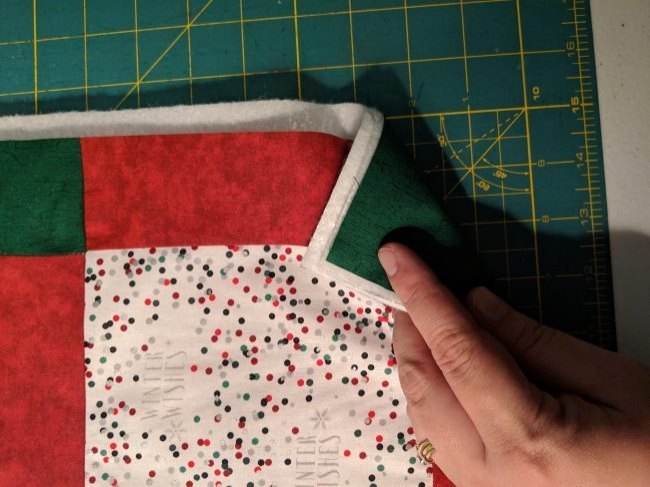
Step 12: When all 4 corners are sewn, fold the beginning end of the binding strip in 1/2″. Then place the final end inside the folded binding to encase the raw edges. Stitch to where to the binding stitching began and backstitch to finish. The folded edge is visible just above my fingers in the below photo.
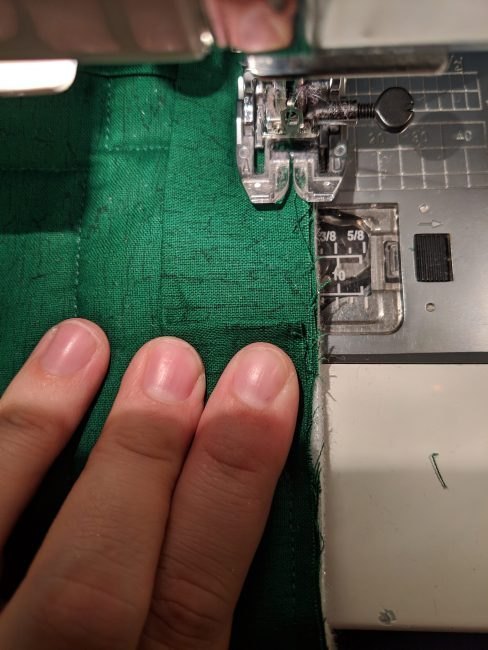
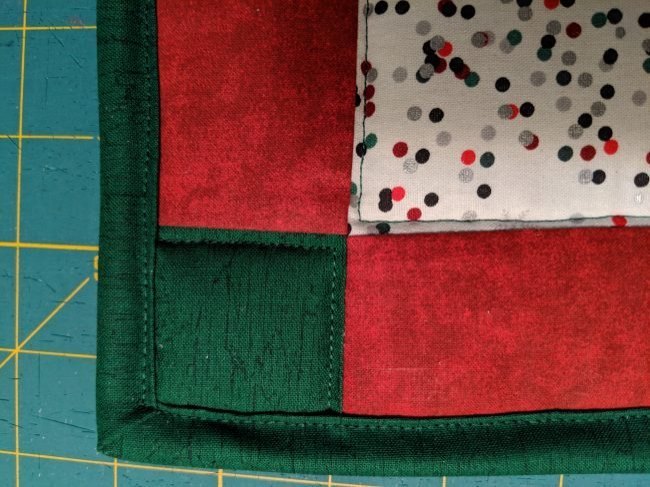
Step 13: Flip the potholder to the right side and fold the binding around encasing the raw edge of the potholder. Topstitch just inside the folded edge of the binding. Fold the corners around to form a 45-degree miter on the front as well.
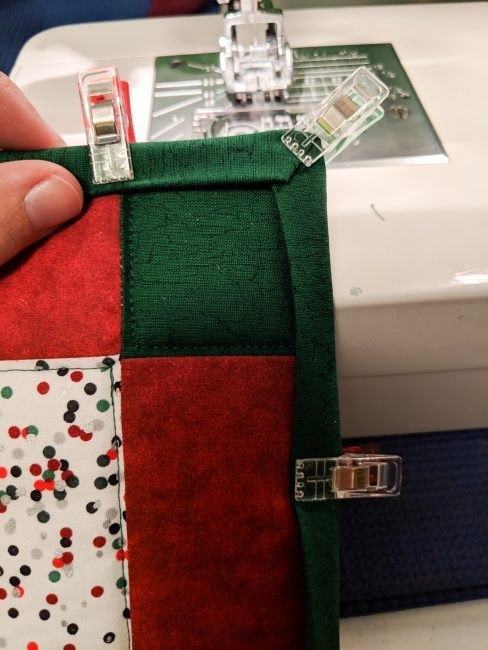
Step 14: Here is the finished view of the front binding sewn with the top stitch.
Now you know how to make a quilted potholder! I can’t wait to see your finished potholders. These would be lovely paired with Genie’s personalized dish towels from the blog last week. Have a wonderful holiday season!
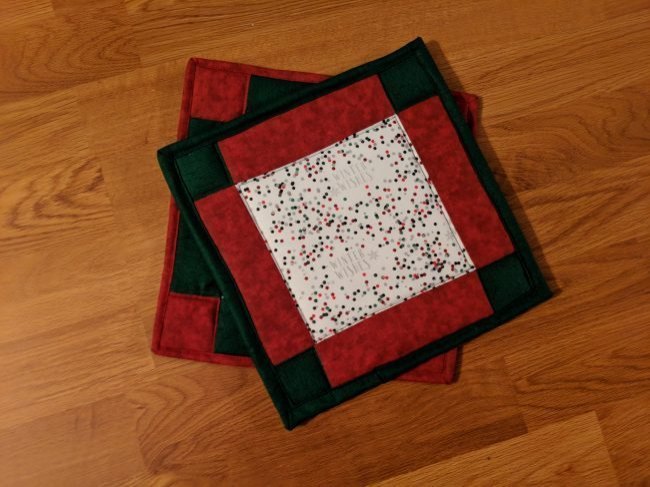
Making a quilted potholder is a fun and creative project that can add a personal touch to your kitchen. By following the steps outlined in this blog, you can create a beautiful and functional potholder that will protect your hands from hot pots and pans. Whether you're an experienced quilter or just starting out, making a quilted potholder is a great way to practice your skills and create something useful. So gather your materials, get creative, and enjoy the process of making your very own quilted potholder.
What are some tips for cutting, piecing, and sewing the fabric together?
When cutting fabric for a quilted potholder, make sure to use a rotary cutter and a self-healing mat to ensure clean, precise cuts. When piecing the fabric together, use a 1/4-inch seam allowance and press the seams open to reduce bulk and make quilting easier.
Thank you for joining us to learn how to make a quilted potholder tutorial. What a perfect project for a beginner. Time to go and make a special pot holder. Before you leave, join our Facebook Group and follow us on Instagram or Pinterest. Merry Christmas and happy sewing!
