DIY Top Gun Costume for Kids | Maverick Leather Jacket & Flightsuit
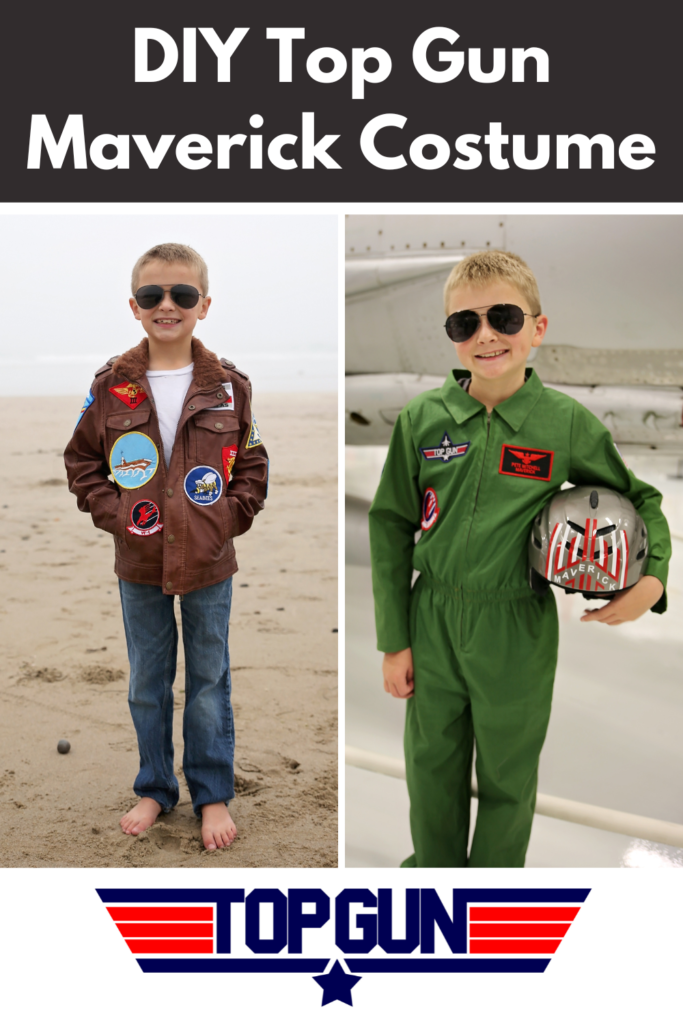
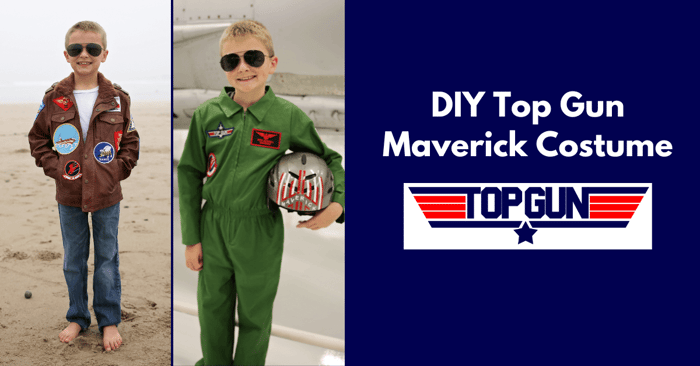
Are you ready to sew a DIY Top Gun Costume? Top Gun: Maverick is one of the best movies our family has seen in a long time, and we weren’t at all surprised when two of our boys requested Top Gun Maverick costumes for Halloween! They decided to both be Maverick, so I made a Top Gun jacket for one kiddo and a Top Gun pilot flight suit for the other. They are both thrilled with their DIY Top Gun costumes and excited to wear them on Halloween!
DIY Top Gun Costume | Maverick Costumes & Tutorials
Maverick Top Gun Leather Jacket Costume
The easier costume is the Top Gun leather jacket, so we’ll start with that.
Top Gun Leather Jacket Costume Materials
To create this Top Gun costume, you’ll need the following items and materials:
- Jeans
- Leather Jacket: Here’s a good option on Amazon or check out your local consignment store, Poshmark, eBay, etc.
- Top Gun Patches: I used this set on Amazon. Here are some other Good Options.
- Aviator Glasses: Lots of choices on Amazon.
- Dog Tags (optional, but kind of fun!)
I chose to use a complete set of patches for the jacket and love how it turned out! But, of course, you could get away with using fewer patches and still have the costume be easily identified as Maverick.
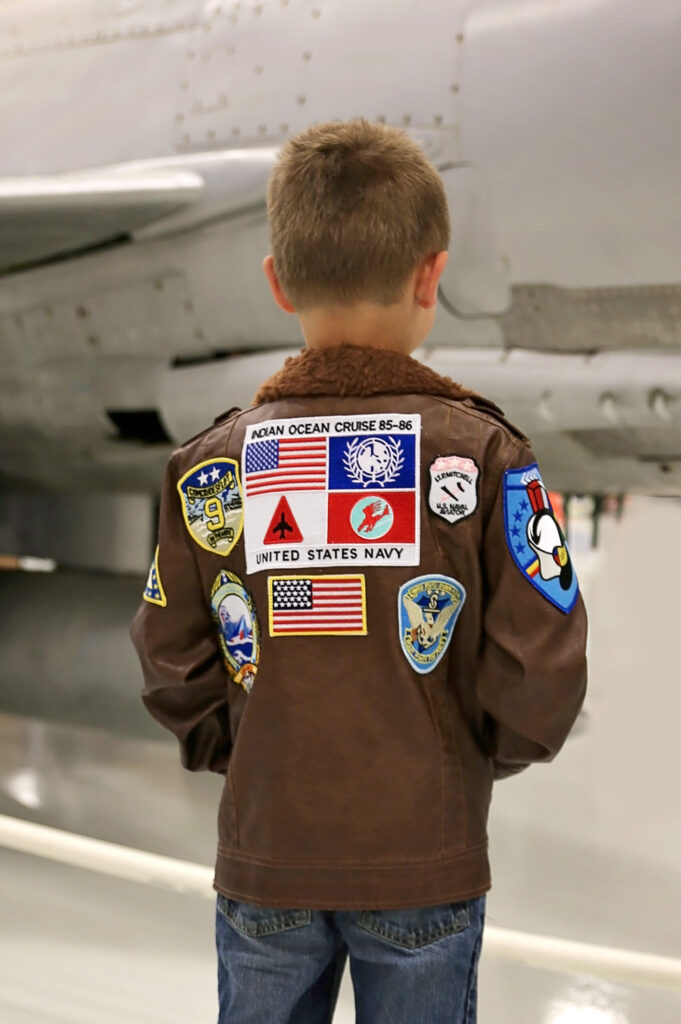
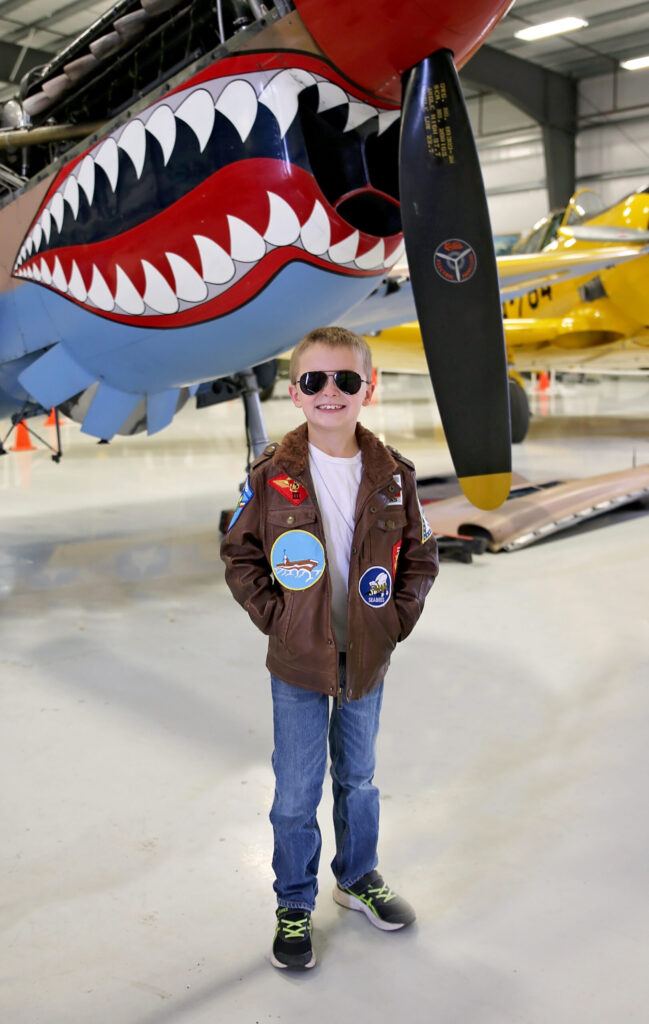
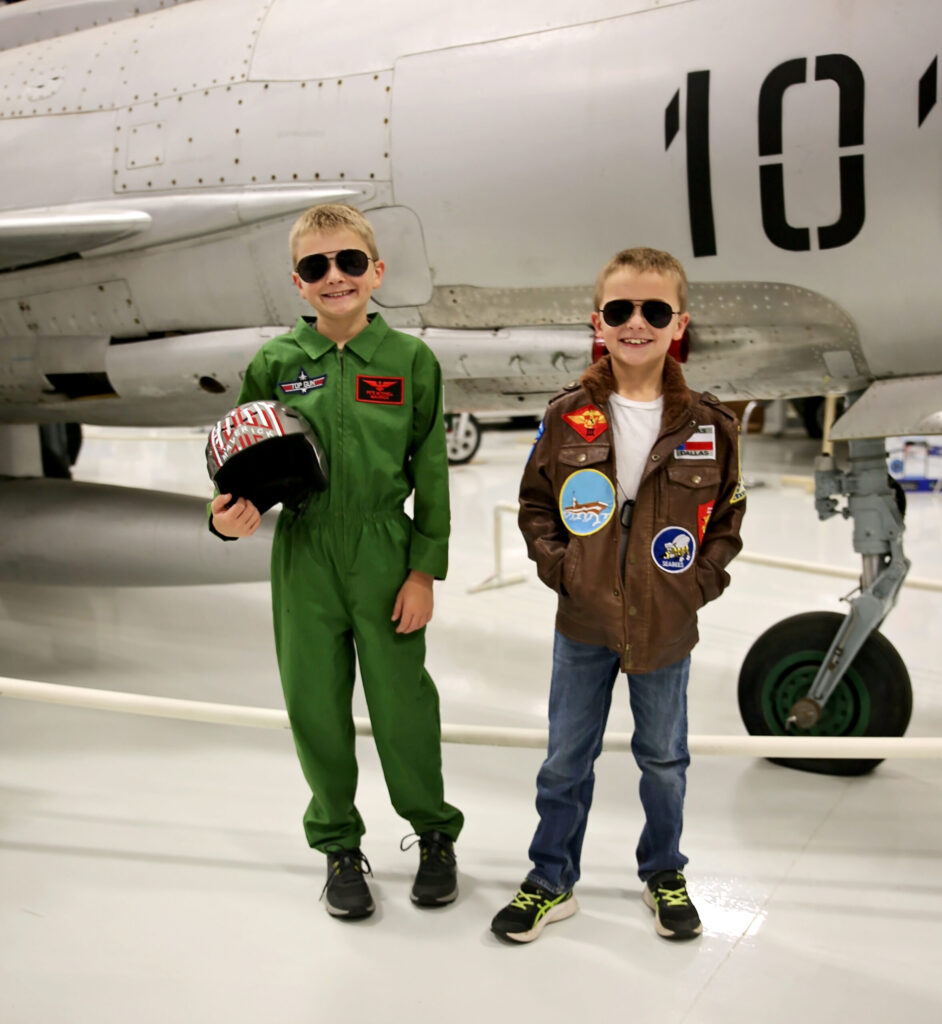
My 8-year-old is thrilled with his Top Gun Maverick costume and very proudly wore it through the air museum and plans to wear it to school all year! I always love it when they can get some bonus mileage out of costumes and use them for daily wear too.
I feel the need, the need for speed!
Top Gun Leather Jacket Instructions
The only part of this costume that requires sewing is attaching the patches to the jacket. You might be able to find a powerful fabric glue to attach them with instead, but I would recommend sewing them on to make sure they are secure.
To start with, I laid all of the patches out to decide where I wanted them. I did change some of these around at the last minute, but this gives you a general idea. It’s not essential to lay them out exactly as shown in the movie, so don’t worry if you need to lay things out a bit differently to work around the pockets, zippers, etc., on your specific jacket.
In the end, it was too difficult to attach patches to the lower sleeve and the lower jacket (without sewing the pocket shut!). I tried connecting it with tacky glue since that’s what I had available, but it didn’t hold well. Look for really strong fabric glue if you decide to go that route.
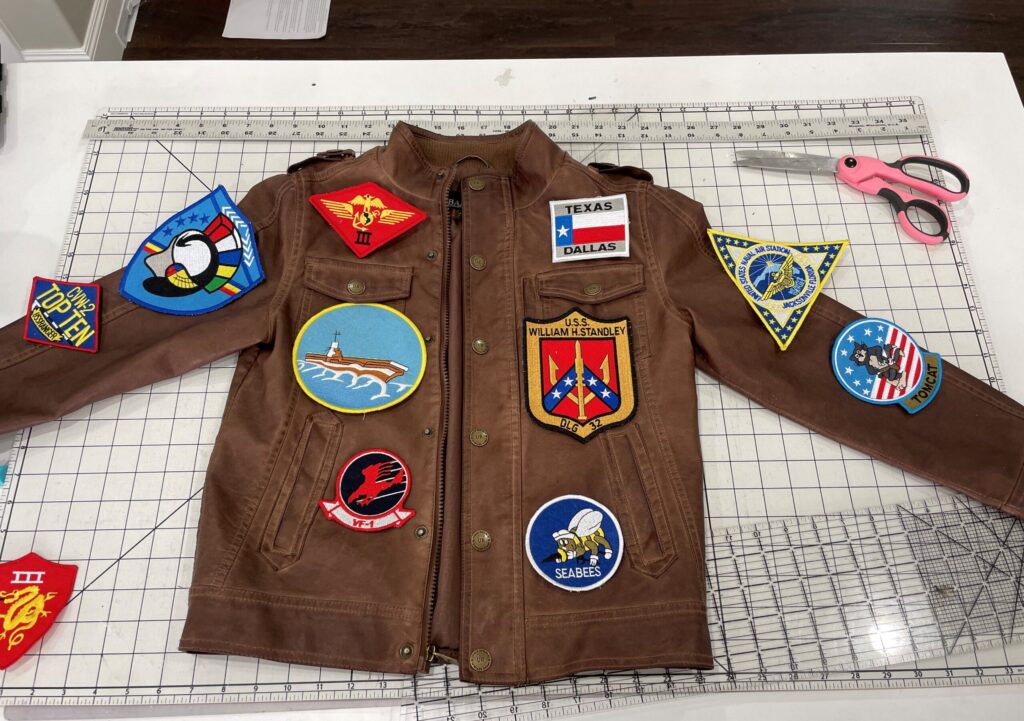
Take a photo of your layout so you don’t forget where you want to attach them, and then start sewing them one at a time. I don’t recommend pinning down more than one at once, or you may accidentally stab yourself with a pin while sewing on other patches- I learned that the hard way!
Make sure you attach the patches with a leather or heavy-duty needle. The patches are pretty thick; when combined with a thick jacket, a standard needle won’t make it through. I used a long (3.5), straight stitch and sewed around each patch’s outside edge. To reduce my thread changes, I sewed the patches in groups of each color (all the red patches, all the blue, etc.).
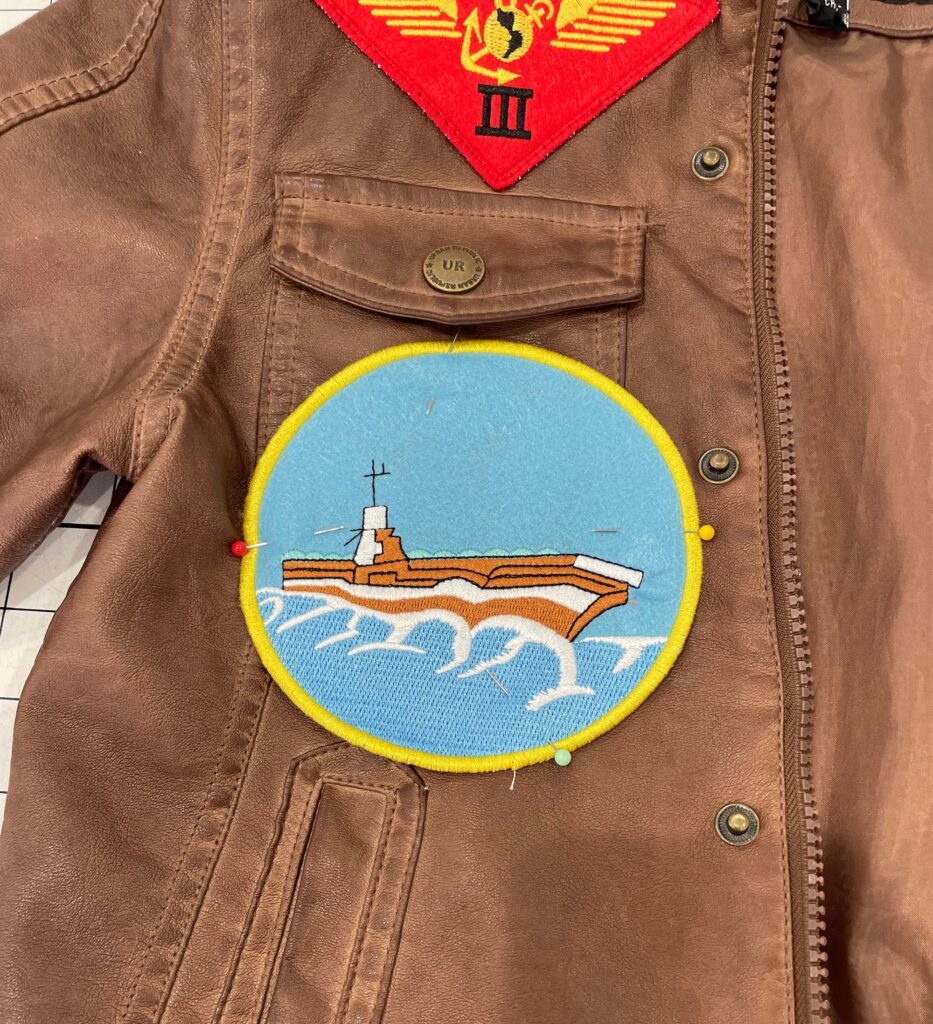
When you pin the patches, check inside to see that the lining is laying smoothly.
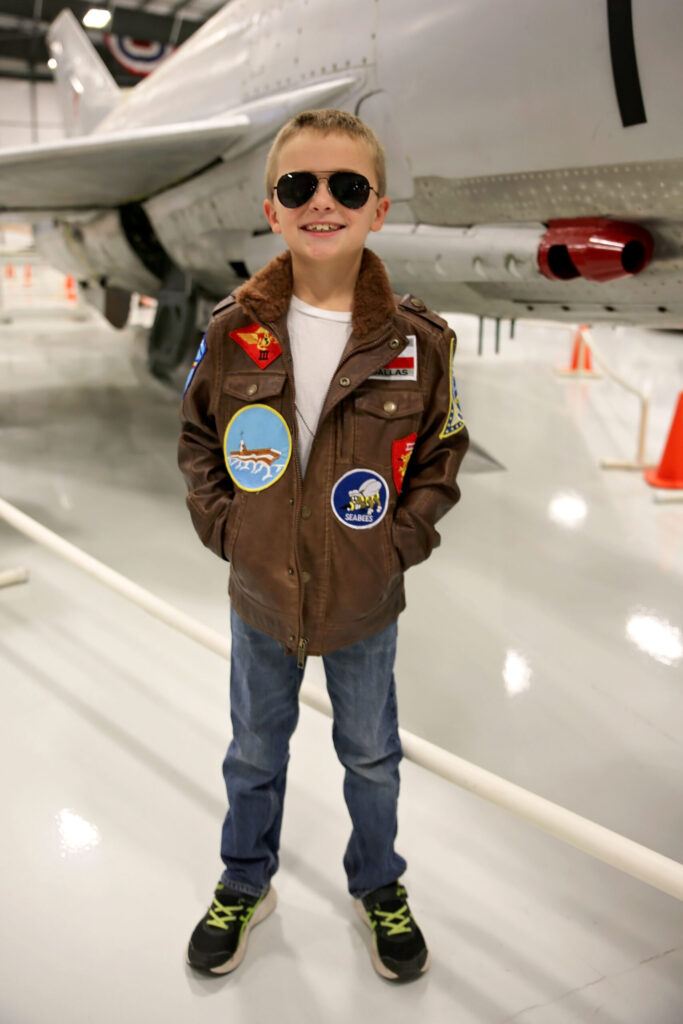
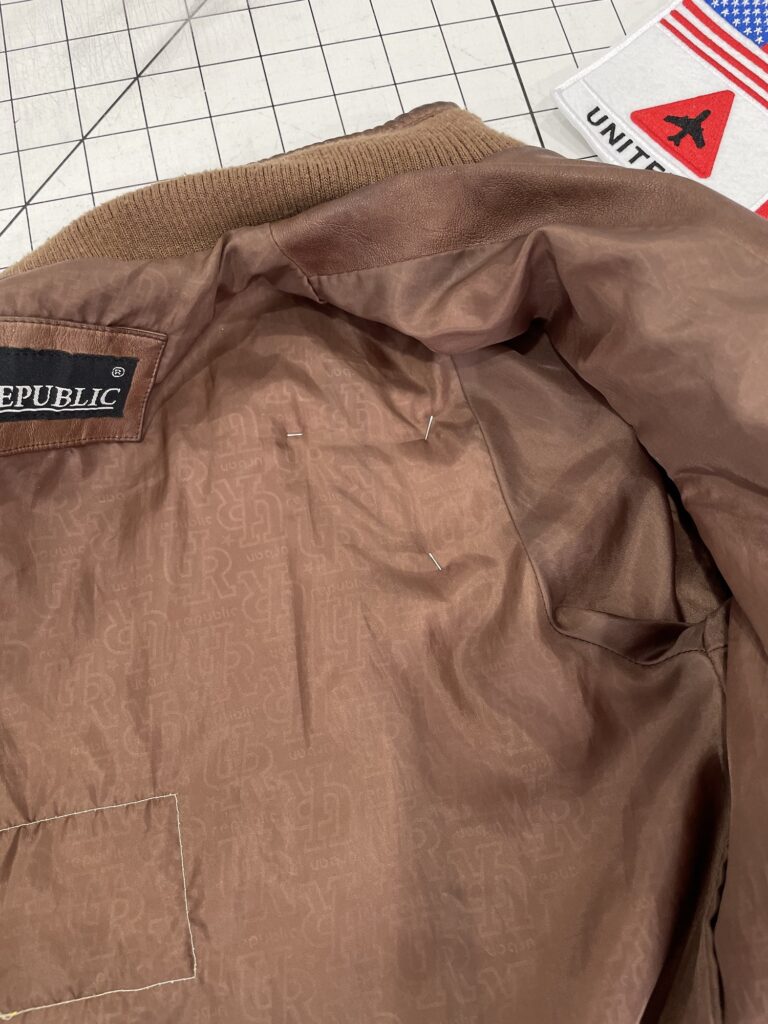 About finished! The jacket I used was repurposed from last year’s Indiana Jones costume. I ended up wrapping a piece of fur around the collar and sewing it to the original rib knit collar turn it into an aviator jacket. Work with what you have!
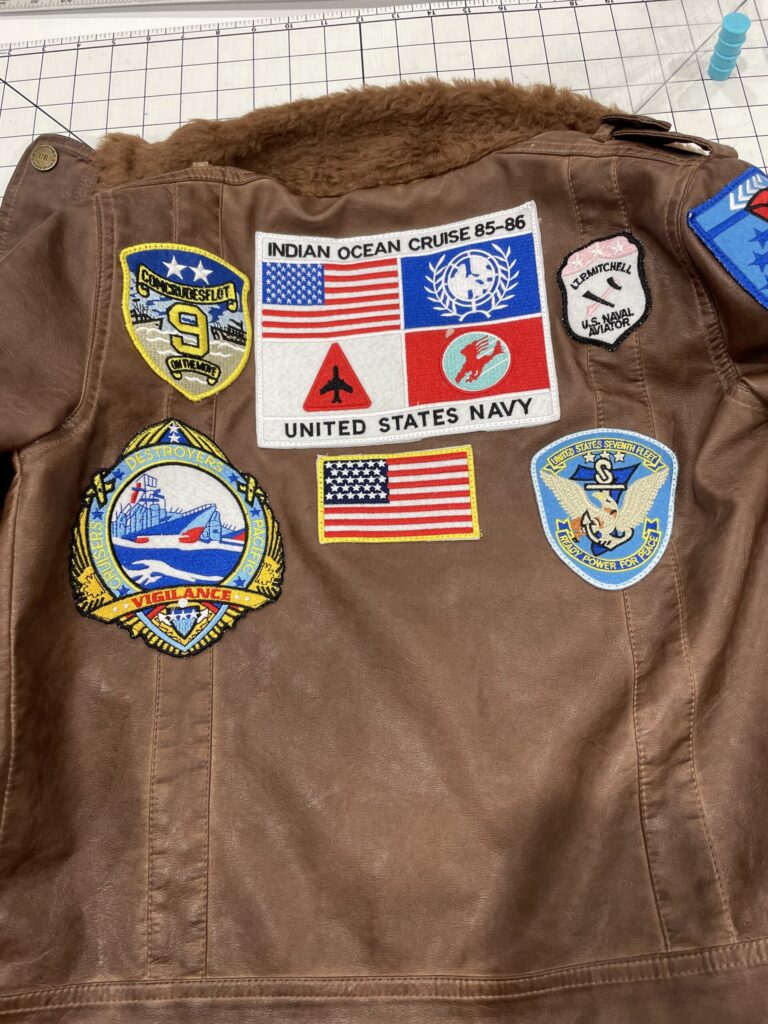 All done! This photo does include the patches that I glued on, and then they fell off the next day. I don’t recommend tacky glue! I thought about getting some stronger glue, but in the end, I decided that it didn’t detract from the finished jacket much to take off a few patches (two on the lower sleeves and the VF-1) on the lower pocket.
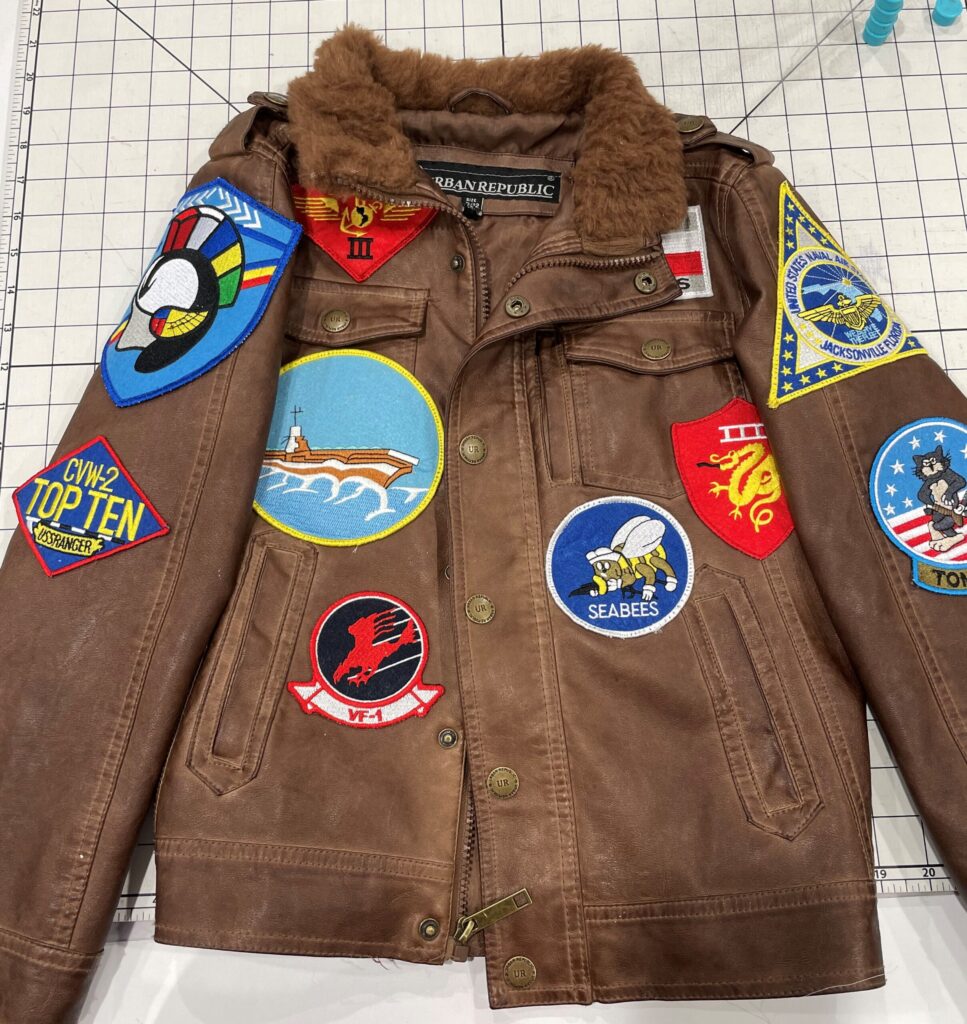 He is thrilled with the finished Top Gun Costume, and I’m so happy with how it turned out! My boys don’t usually agree to themed costumes, so it’s fun to have them coordinating this year. We may need to throw their younger brother in a Hawaiian shirt for some photos, and he can be Goose!
 Top Gun DIY Flight Suit Costume
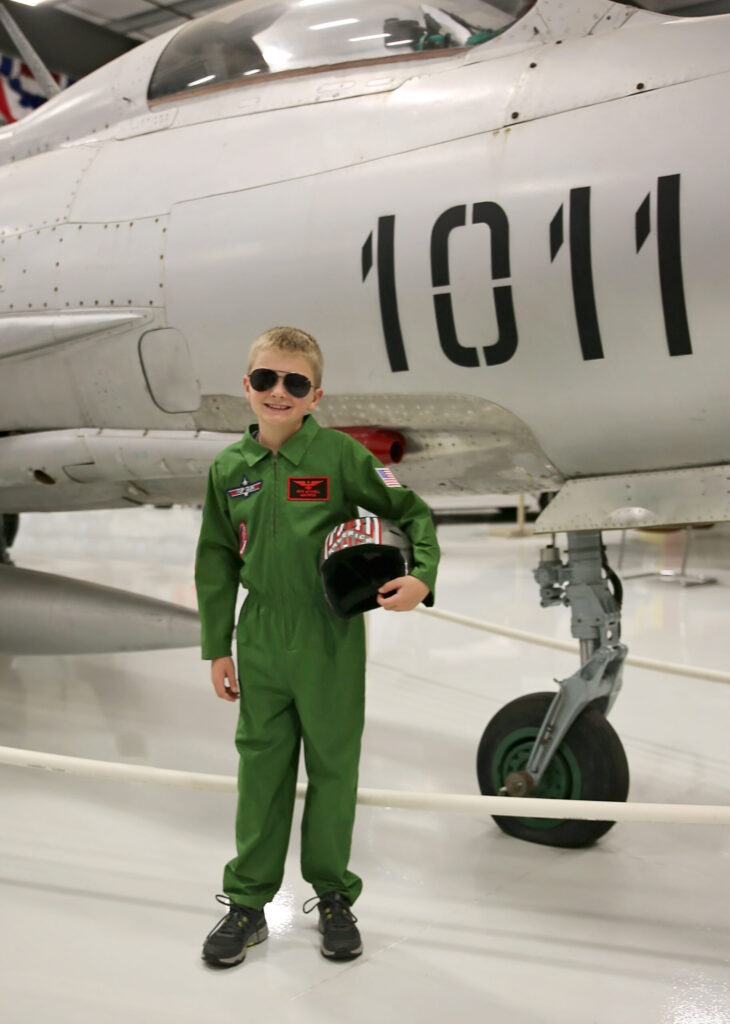
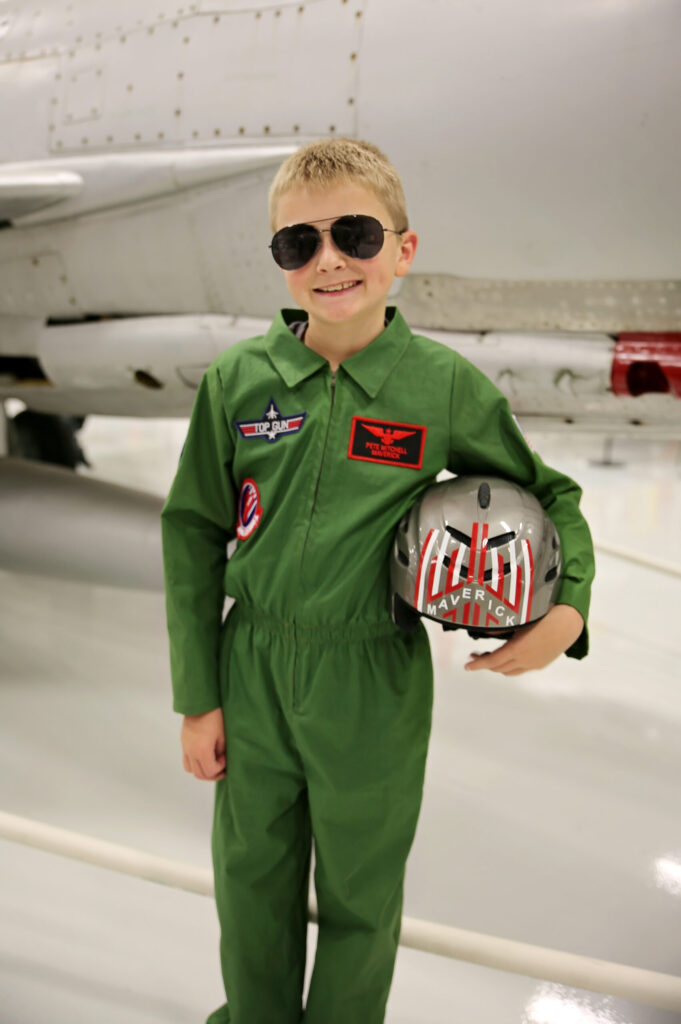
Next up is the DIY Top Gun flight suit costume! The DIY flight suit didn’t take me much longer than attaching all of the patches to the leather jacket. I was able to sew up each costume in one afternoon. My son is especially excited about the Top Gun Maverick helmet, hoping it will hold up for ski season!
Flight Suit Materials
For the DIY Top Gun flight suit costume, you’ll need the following:
- Jumpsuit Pattern: I used the Ultimate Costume Creator, which has many options and includes sizes newborn-12 years.
- Fabric: I used 3 yards of hunter green quilting cotton for this size 10 jumpsuit. Quilting cotton works well since it’s easy to sew and affordable. Look for something dark green or greenish/gray. I wanted something that he wouldn’t be hot in at school and that we’ll have room to layer under for trick-or-treating.
- Patches: These make the costume! I found my patches on Amazon.
- Aviator Glasses: Lots of choices on Amazon.
- Dog Tags (optional, but kind of fun!)
- Ski helmet or similar & vinyl: This is optional, but if you already have a helmet, it is a fun addition to the costume!
- FREE Maverick helmet cut file! Click here to download the .svg file, or use the PNG file below. I kept the design relatively simple and decided only to add the design to the front and not worry about the back and sides.
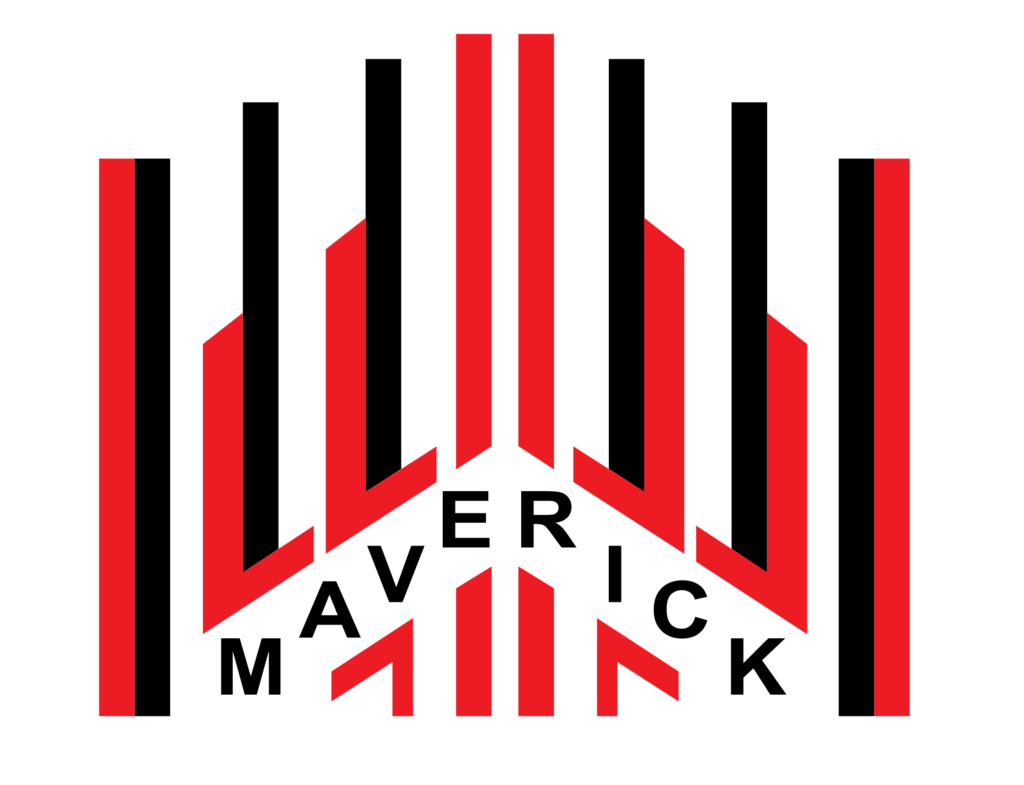 *Please note: This cut file is for personal use only. It may be not be shared, uploaded to other websites, etc.
 Flight Suit Sewing Instructions | Using the Ultimate Costume Creator Pattern
Let’s start with the Top Gun flight suit! Using the Ultimate Costume Creator Pattern as my base, the only change I made was to attach the patches to the sleeves and front of the suit before sewing up the costume by following the pattern tutorial.
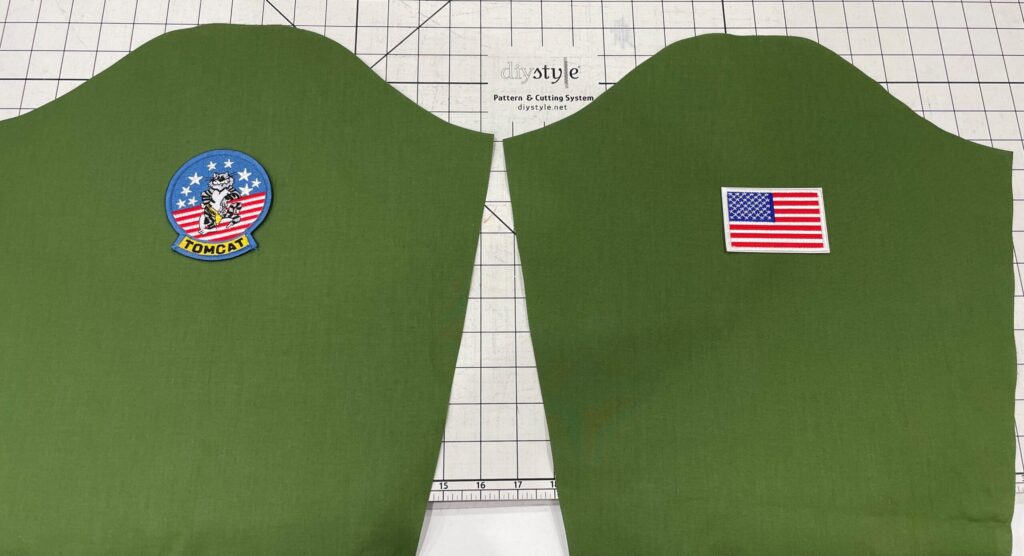
I included one patch on each sleeve and sewed them down with a long, straight stitch and heavy-duty needle.
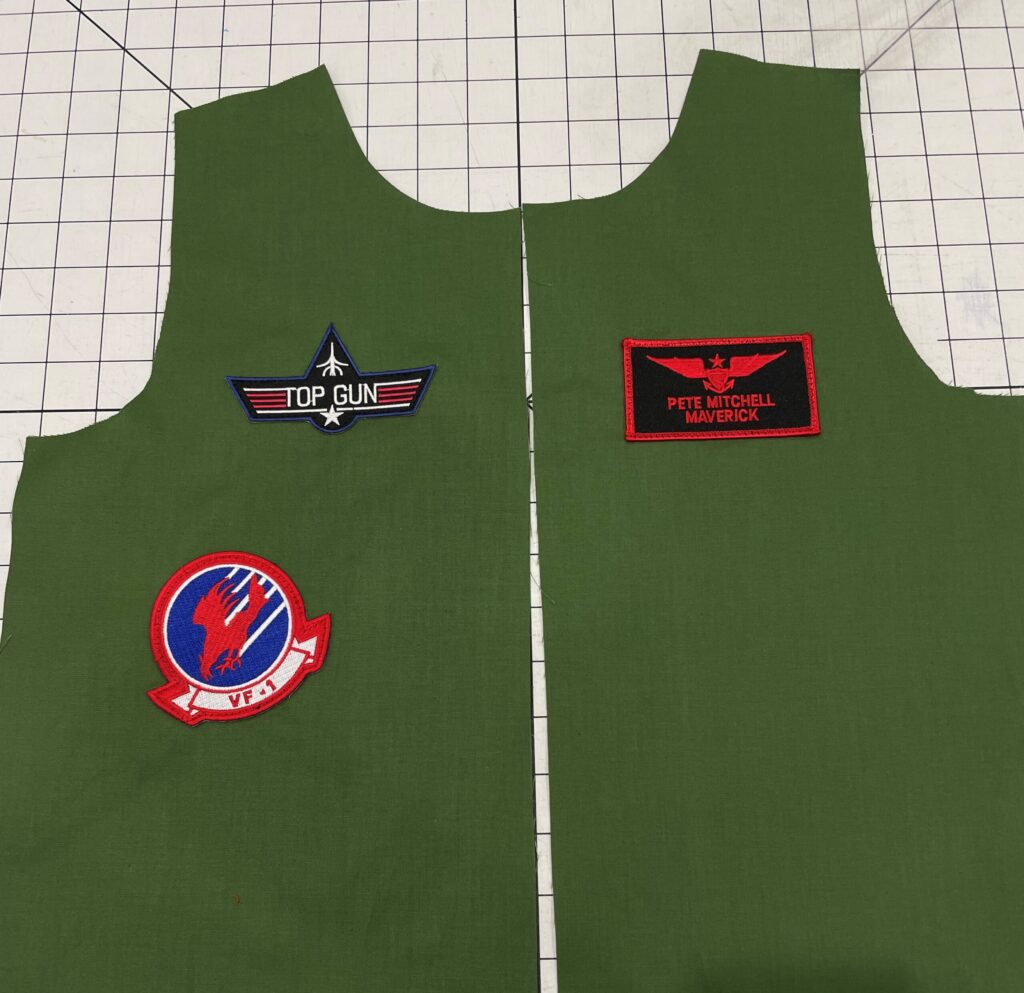
 I added three patches to the front using the same method as the sleeves.
All finished sewing!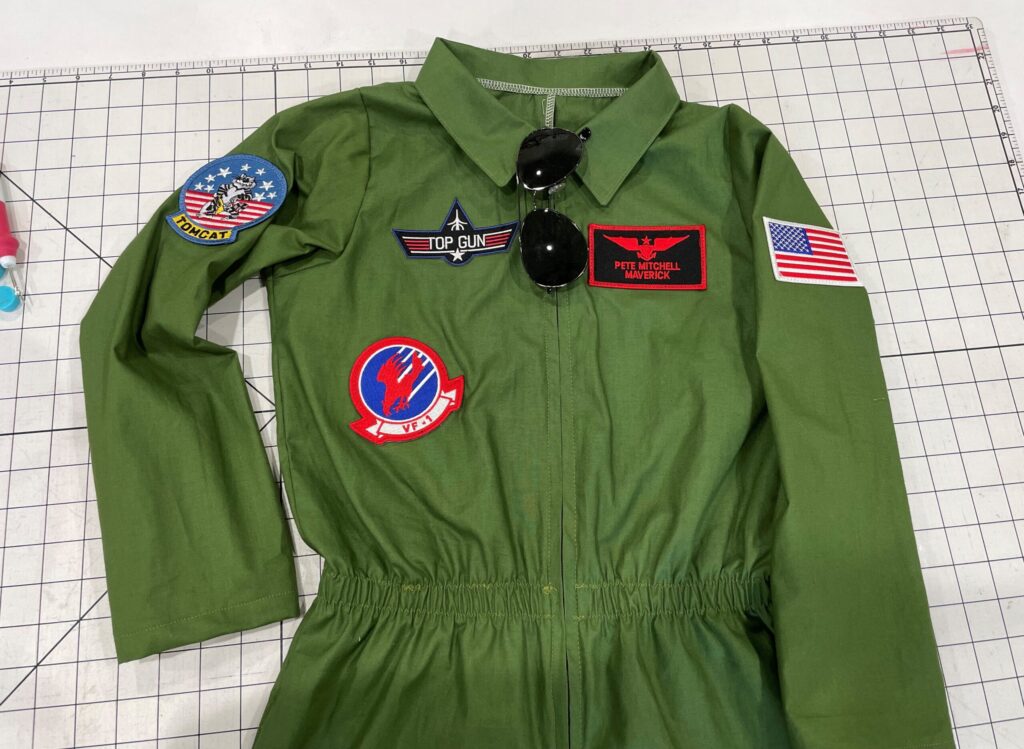
Now for the helmet! If you haven’t grabbed it already, download your free Maverick cut file. If you don’t have a cutter (Silhouette, Cricut, etc.) you could hand-cut the designs, but it might be tricky!
FREE Maverick helmet cut file!
Click here to download the .svg file or click here for a .png file. I kept the design fairly simple and decided to only add the design to the front and not worry about the back and sides.
If you want to be able to remove the vinyl easily after Halloween, you can go with a reasonably lightweight vinyl. If you want to keep it on there long-term, look for a vinyl meant for outdoor applications. I just used what I had in my stash. The red was a bit stickier (maybe a window vinyl), and it seems like it will hold up better. We’ll see if this lasts through a ski season! It will definitely hold up through Halloween, and after that, we can peel it all off if it starts coming up at the edges.
I started by cutting out all the red pieces. Then, trim away your transfer tape between each element, making it easier to stick it to a round helmet.
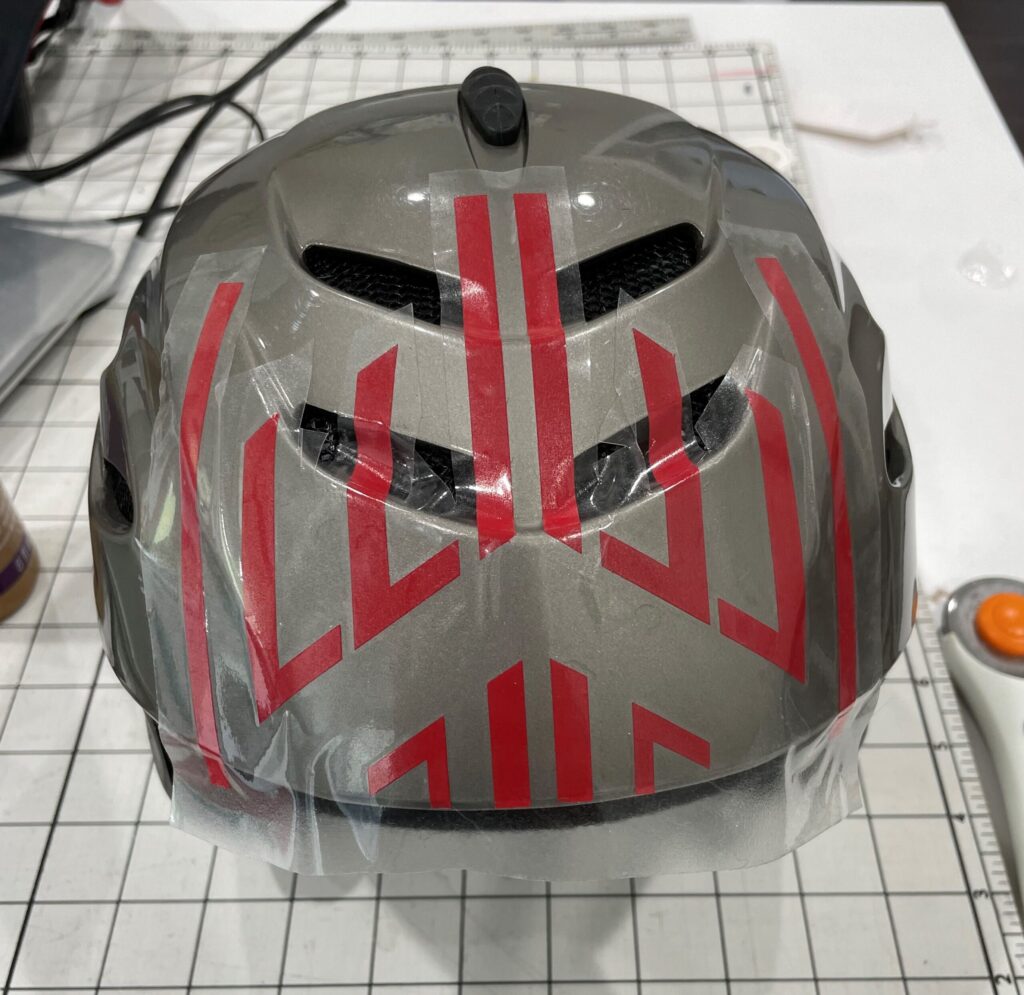
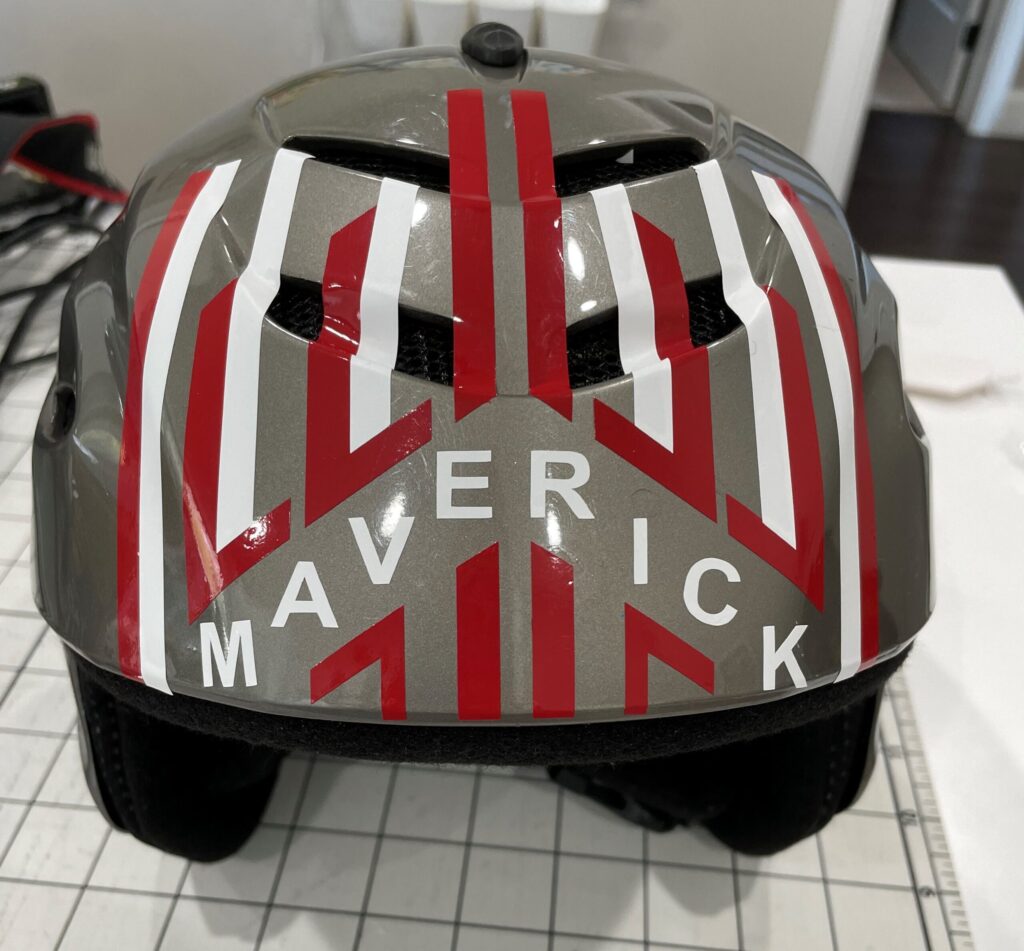
Next, I did the white layer with the white stripes and “Maverick”. If possible, have another adult or older kiddo help you get the vinyl in place before you stick it down. I was able to do the red myself, but it helped to have a second set of hands to get the white layer on.
After I had all the vinyl on the helmet, I trimmed away the small portions going over the helmet vents since they had nothing to stick to. Maverick’s helmet is really a dark navy, but we just used what we had available, and I think it turned out great! Most importantly, my son is thrilled with his Top Gun Maverick helmet, which cost nothing since we used what we already had.
 He’s definitely ready to buzz the tower in his Top Gun flight suit! I hope you enjoyed our DIY Top Gun Costume today! Now you can make the DIY maverick costume with the leather jacket and the DIY flight suit with the Ultimate Costume Creator.
Make sure to come share what you make with us in our Peek-a-Boo Pattern Shop Facebook Group. Also – be sure to check out our other DIY Costume tutorials here at Peek-a-Boo Pages.
