DIY Fourth of July Wreath | Fun Holiday Wreath
I hope you're ready to make a DIY Fourth of July wreath today. You can use the methods in this article to make a wreaths for about time of the year. Let's get started!
Make a DIY Fourth of July Wreath!

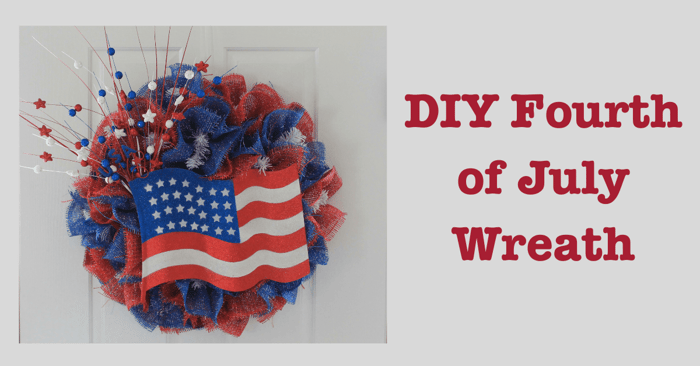
Hi. I'm Bev at Round and Round DIY Wreath Ideas, where I create and share unique DIY wreath tutorials. I am thrilled to be here today to share a DIY 4th of July wreath project of mine - a paper mesh wreath tutorial for Independence Day.
These patriotic colors remind me of long summer nights, fireworks, and cookouts. In this easy wreath tutorial, I will show you how to craft a unique wreath that will make a festive display on your front door!
DIY 4th of July Wreath Materials
You can find the following materials at your local craft store:
- 1 roll of 12" red paper mesh
- 1 roll of 12" blue paper mesh
- 1 work wreath frame or form
- 2 red, white and blue patriotic floral picks
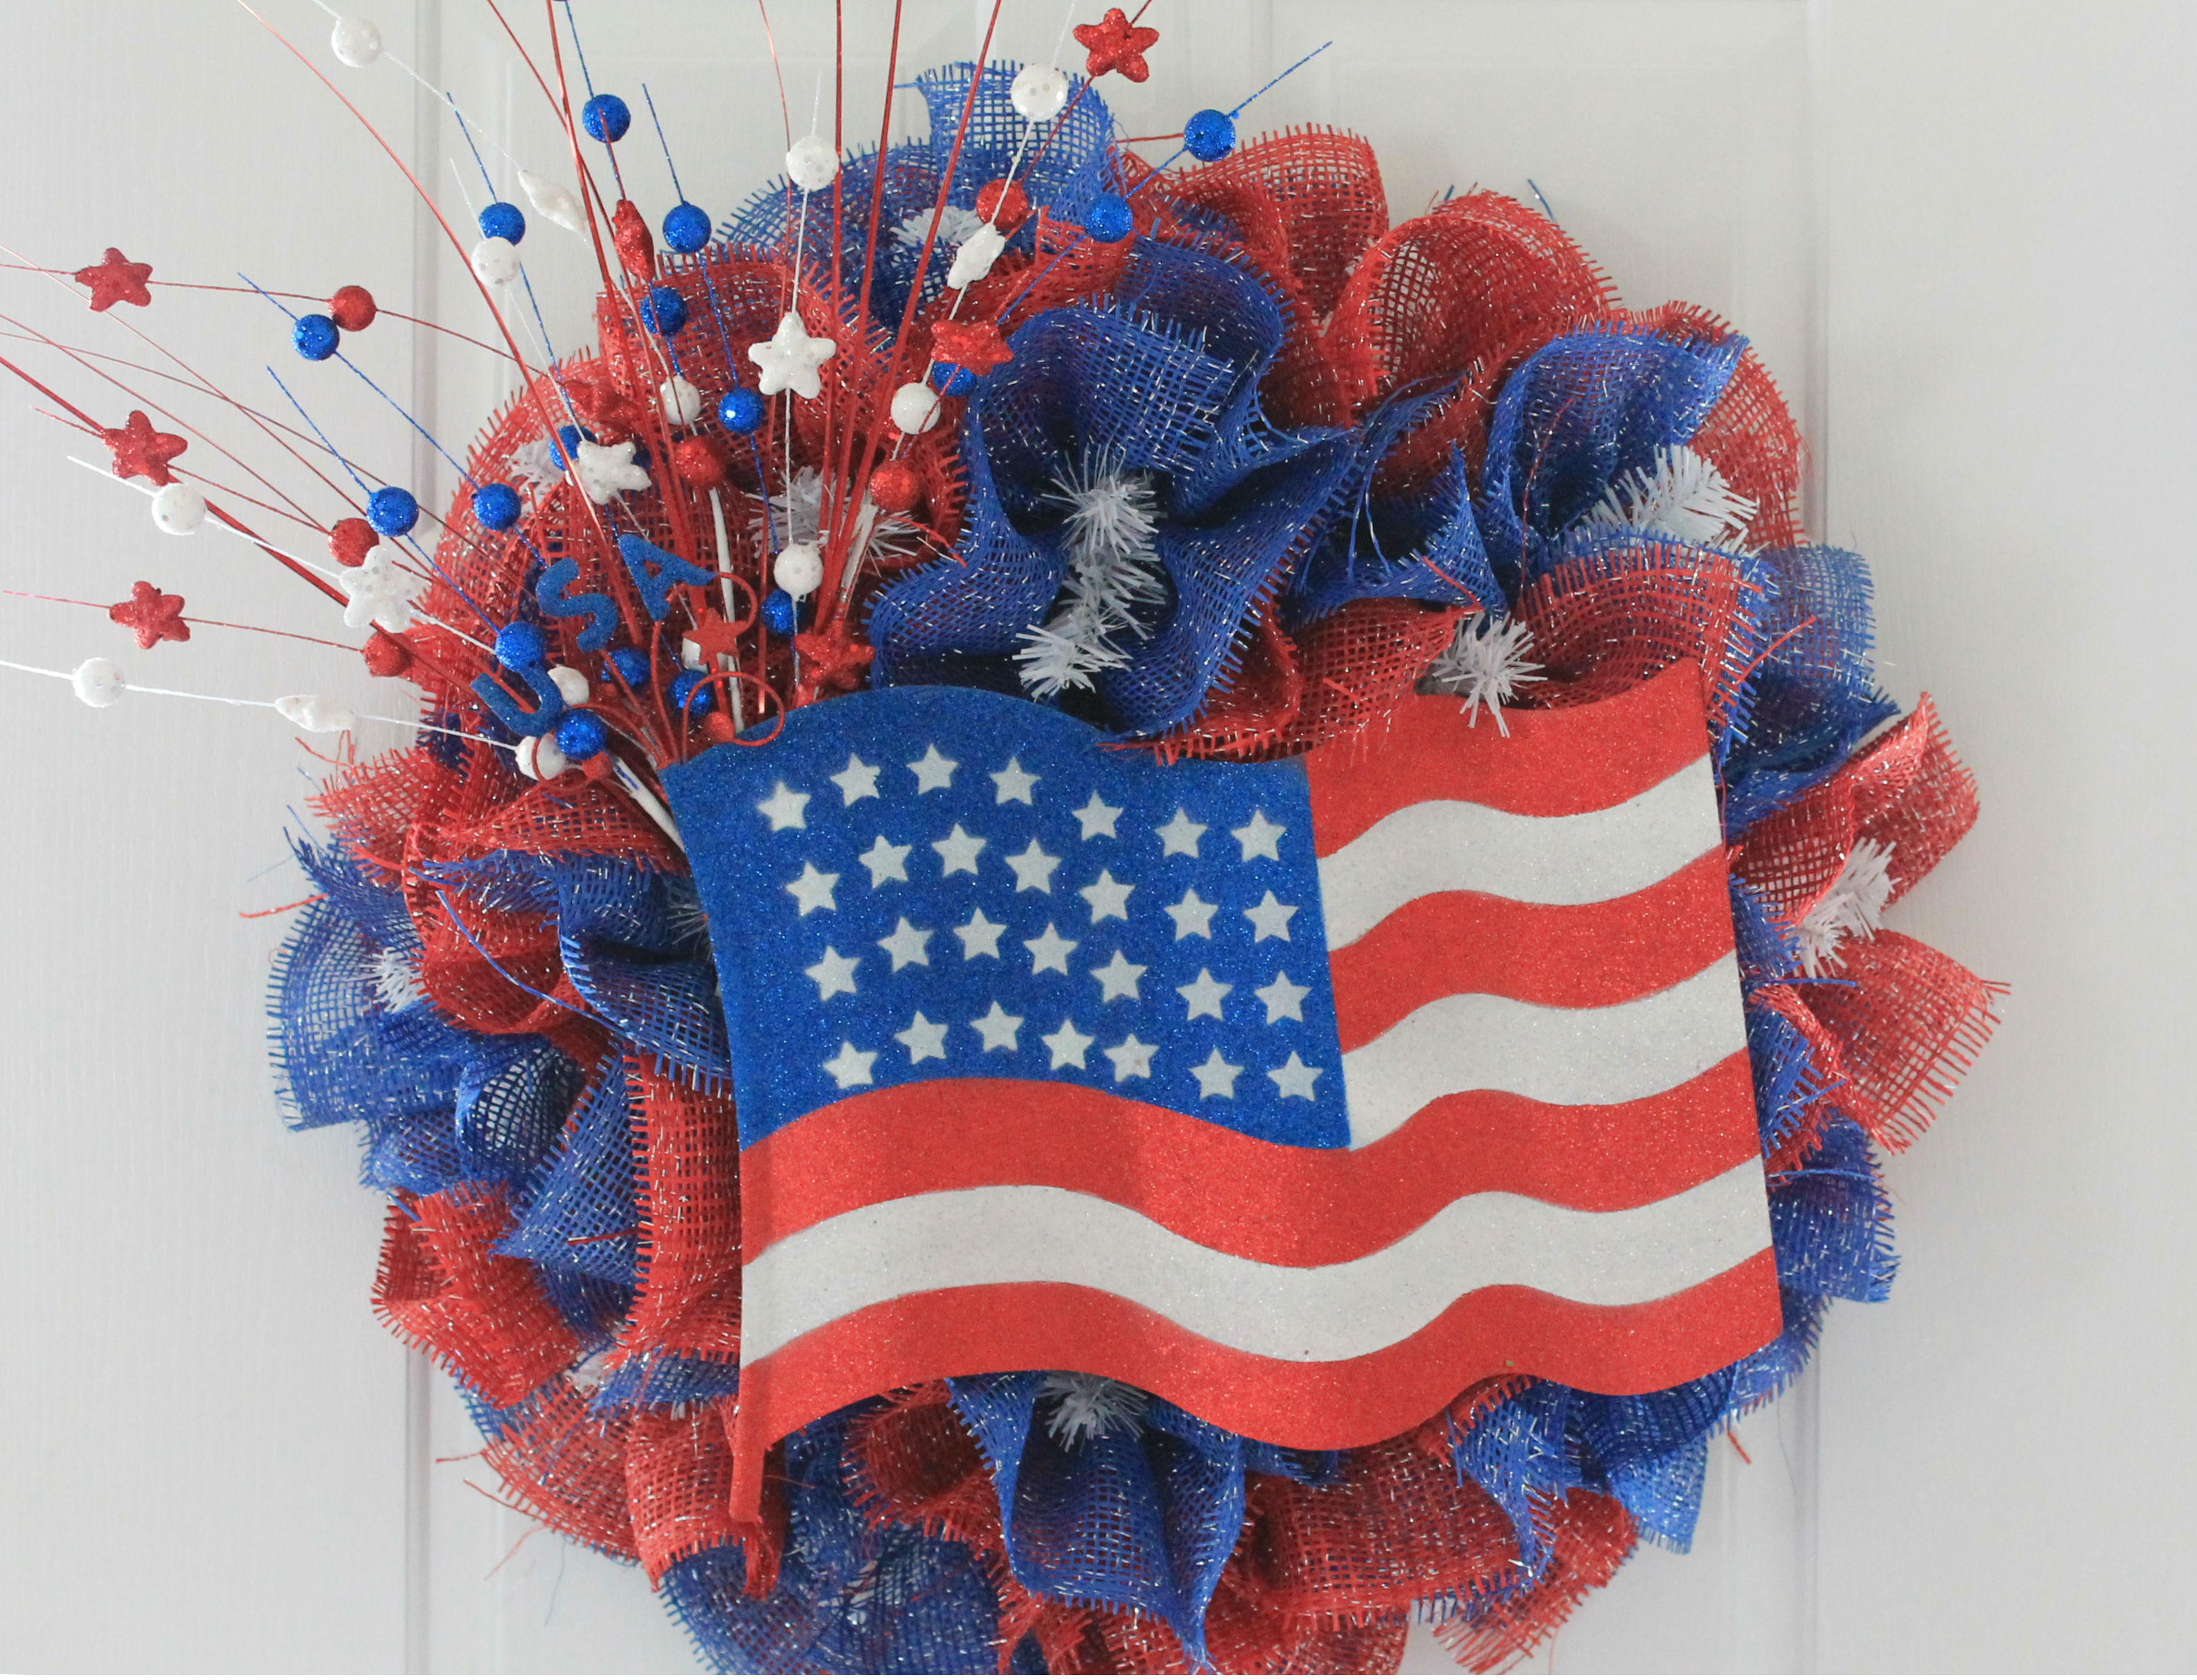
- 1 large metal flag approximately 15" wide
DIY 4th of July Wreath Tutorial

Fourth of July Wreath Step 1: Before you add any mesh to the work wreaths, you will need to cut your paper mesh into pieces. You will need to cut 18 pieces of each color. Each piece should be 12" long.


Fourth of July Wreath Step 2: Adding the mesh to the wreath is simple. Just take a piece of the cut mesh and pinch the cut edges together to make a bow show. Place the piece of mesh in the wire twigs on the work wreath and twist the twigs around it to hold it in place. I started on the inside ring to make it easier.


Fourth of July Wreath Step 3: Next take a piece of the blue color paper mesh and pinch the cut edges together. Add this piece over the top of the one you just added.

Fourth of July Wreath Step 4: Repeat this process around the inside and outside rings of the work wreath. Each time alternate the colors. For example red over blue then blue over red. Once you have added mesh pieces to every twig, fluff the mesh making sure that both colors are visible and evenly displayed throughout your wreaths.

Fourth of July Wreath Step 5: The wreath already looks fun and full, but we aren't quite finished! To complete your red, white and blue masterpiece you will also need to add the festive flag and fun floral picks.

First add the flag to the wreath. To do this, run a piece of floral wire through the hanger on the back of the wreath. Take the wire and insert it down through the mesh to the back of the wreath. Wrap the wire around the wire frame or form of the work wreath.


Next cut your floral sprigs into 2 smaller pieces.

Using hot glue to hold them in place, stick the ends of the picks down into the mesh behind the flag. I arranged mine behind the stars on the corner of the flag. This made it look as if fireworks were shooting from the flag. Make sure to fan out the picks to give it a fuller look.

And now your patriotic DIY 4th of July wreath is ready to hang just in time for the Fourth Of July. Thank you to Amy for having me and thanks to you guys for following along! Best of luck crafting and happy Independence Day!
Bev
Thanks for taking a look through Bev's amazing tutorial. Of course, you could use her method with mesh and floral to make amazing wreaths for summer, fall, spring, Christmas, or anytime of the year.
Before you leave today, make sure to join our Facebook Group and follow us on Instagram. Happy Sewing!