How to Make Baby Shorts from Sleeves | Sewing Tutorial
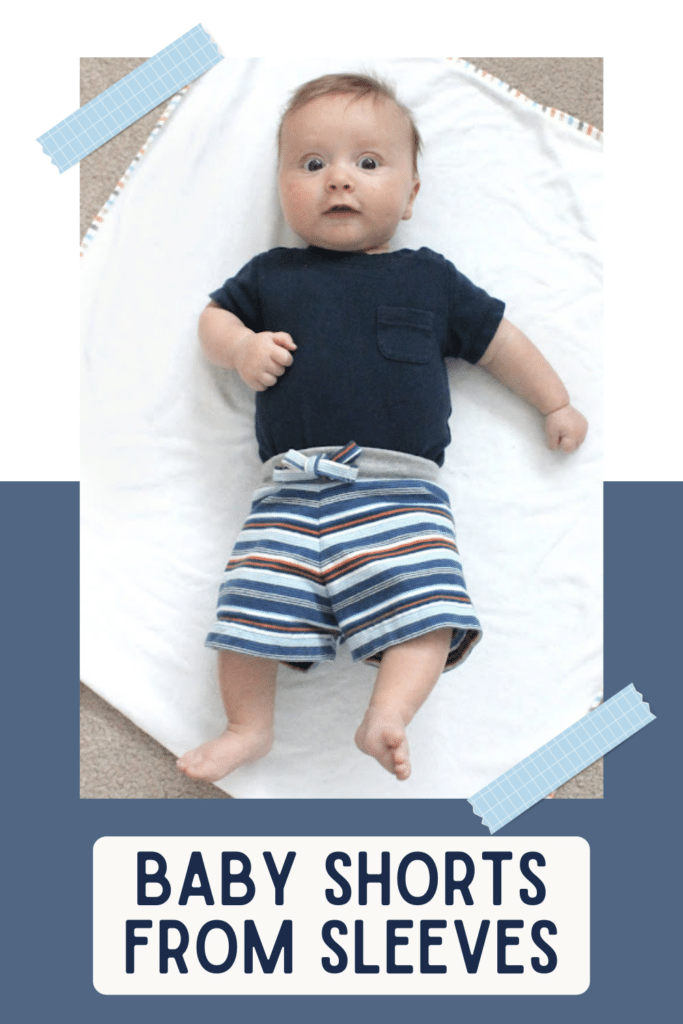
Want to learn how to make baby shorts from sleeves? I was about to throw the top half of a re-purposed tee away when I realized the sleeves were the perfect shape to turn into some shorts for little man!
Baby Shorts From Sleeves
The inseam of the sleeve becomes the inseam of the shorts and you can use the sleeve hem as the shorts hem so most of the work is already done- a perfect project for a busy mom!
I used a boys size large shirt and it was the perfect size for a pair of 3-6 months shorts for little man. Adult size shirts would probably work great for making shorts in toddler sizes.
And since they're made from a t-shirt they're soft and cozy. Perfect for little baby bums
Grab a tee and let's get started!
Step 1: Fold a pair of shorts that fit well in half and lay them on top of the sleeve with the hem of the shorts lined up with the sleeve hem and the side seam lined up with the top edge of the sleeve- ideally the inseam of the shorts should be close to matching up with the inseam of the sleeve.
Now all you need to do is make a sloped cut up for the crotch seam. My sleeves were pretty short so I opted to do a separate waistband and cut the sleeve off 1/2" higher than the waistband on my model shorts.
Step 2: If you want to add a little pocket on back now is the easiest time to do that. I just cut a little rectangle and folded down the top edge and topstitched. Then I folded the side and bottom edges in and topstitched it right to the shorts.
Step 3: With right sides together slide one shorts leg inside the leg and sew up the crotch seam. Since we're working with knits you'll want to use a serger or a ball point needle and a narrow zig zag stitch.
Step 4: For my waistband I cut a rectangle of jersey knit (you could also use scraps from another tee) about 3" high and about 1" shorter than little man's waist measurement. I wanted to add a drawstring (completely optional) so I found the middle of the waistband and sewed a buttonhole on either side- remember the waistband is going to be folded in half next so they should be on the bottom half of the waistband.
***tip- make sure you add interfacing before sewing the buttonholes or your machine will eat the fabric
Step 5: With right sides together sew the 2 short ends of the waistband together and then fold the waistband in half so wrong sides are together and the long edges meet up.
Step 6: For my drawstring I cut off the t-shirt hem and folded it in half and topstitched together along the long edge. Next I folded the 2 short ends over and stitched them down. You could definitely just use any scrap of fabric through or use a piece of cord (***If you use a drawstring make sure you baby is supervised- it could present a strangulation hazard if removed from the shorts. Do NOT use for sleepwear)
Step 7: Next slide the waistband on top of the shorts so all of the raw edges are lined up. The buttonholes should be centered at the front seam and be face down against the shorts. The seam in the waistband should line up with the back seam of the shorts- you will probably need to stretch the waistband a bit. Sew the waistband to the top of the shorts
Step 8: Slide the drawstring through and your finished! Now go make a bunch more pairs because they were so quick:)
I hope you enjoyed this tutorial. Before you leave, make sure to join our Facebook Group and follow us on Instagram. Happy Sewing!


