Using a Projector for Sewing Patterns
If you’ve read my other blog posts you know how much I LOVE my projector. Projectors for sewing patterns have really taken off, and you will find it more and more common for pattern designers (including our patterns at, Peek-a-Boo Pattern Shop) to offer projector sewing patterns.
But why am I obsessed with my projector for sewing so much? Are projectors worth the hype? Is it a huge undertaking to set up and use a projector? Is a projector a good option for you? I hope to answer these questions below!
Projector for Sewing Patterns Summary
A brief summary of the benefits of projectors before I dive deep on why I love my projector:
- Projectors save time
- Projectors save space
- Projectors save money
- Projectors allow for better pattern matching + Panel placement
- Projectors allow for easy to grade patterns
I’ll also talk a little bit about the process of setting up a projector and share some great resources!
What is a projector pattern? Do I Need a Specific Projector File for the Sewing Pattern?
A projector pattern is very similar to an A0 format pattern, only instead of getting it printed on one giant sheet of paper, you project the pattern directly onto your garment. It replaces paper patterns with a projected image of the pattern directly to your cutting table. Then you can use your scissors or rotary cutter and some fabric weights to cut the fabric directly on the mat without using a paper pattern.
You’ll notice that around 2/3 of the sewing patterns at Peek-a-Boo Pattern Shop have a projector file included in the pattern. So you’ll be ready to start sewing when you purchase your sewing patterns.
Why are Projector Sewing Patterns Becoming More Popular?
A Projector Saves Time
You don’t have to print patterns when you use a projector. That means 0% of your sewing time is used in pattern assembly. Instead, you get directly to cutting your fabric. Switching between sizes is just a click of a button, so it’s barely any extra effort to cut out multiple sizes at a time when using your sewing projector.
Pattern assembly + cutting out fabric used to be my least favorite part about sewing. It was so time consuming and I found it really annoying. Now I love cutting out my fabric and am able to get a stack of garments cut in no time! This reason alone was a good enough reason for me to upgrade to a projector!
Projectors Save Space
As mentioned, you don’t have to print patterns, so you don’t need to worry about storage for all your paper pdf sewing patterns! I have all my patterns organized in a file on my computer for easy access. AND not only do I save space not needing to store all my paper patterns, I also don’t need such a massive supply of printer paper, ink, and tape on hand.
They Save Money
The upfront cost of a projector might be a little intimidating. A mini projector (new) can cost you anything from $60 to $600 for some of the higher end models. Ultra short throw projectors can cost you a lot more than that. Plus you probably want to mount your projector somehow. HOWEVER, you are saving money on printer paper, printer ink, tape and/or glue, tracing paper, binders + sleeves (or however you were storing your patterns), plus, even if sewing is just a hobby for you, time is still valuable, and you are saving loads there.
Better Pattern Match + Panel Placement
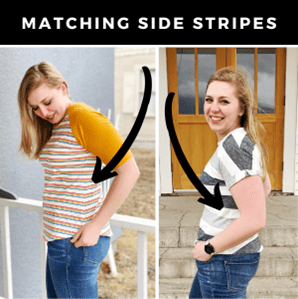
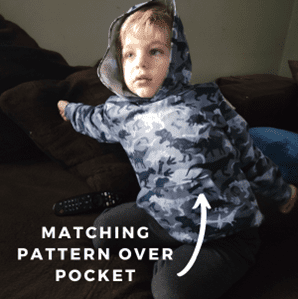
Projecting the pattern onto your fabric means that you aren’t covering up any part of the fabric. Matching the fabric pattern across multiple pieces of the garment becomes much more achievable. You also no longer have to guess if your panel placement is just right, you can see exactly where the graphic is on the garment piece.

Easy to Grade Patterns
You can literally see through the pattern pieces you are projecting. When grading from one size to the next you can see all your size lines and the fabric at the same time, making it easy to see where your transitions need to be. If you need to add length to a torso or want to do custom color blocking there are programs (I like Illustrator, or Inkscape is free!) that let you manipulate the pattern a bit as well.
Where do I Learn About Projectors for Sewing?
Now you know why I love my projector, and you might be wondering, ‘where do I start?’ There is an AMAZING Facebook group, Projectors for Sewing, that is an incredible resource. They have projector purchasing guides, calibration charts, visual guides, top tips, and is a great place for any questions you might have on this topic. This FB group was essential for me when I was starting up! They have so many valuable resources and an amazing community. I’m linking below two things I think are extra important if you are interested in a projector.
The Research
The Absolute Basics by Projectors for Sewing
Help setting up your own projector
Projectors for Sewing Setup and Calibration Guide
Which Type of Projector Should I Use | Ultra Short Throw, Short Throw, or Mini
There are lots of different types of projectors available – many with features that go far beyond what you would need for a sewing projector. For instance, you can spend thousands of dollars on a high-definition projector for a home movie theatre. For sewing, there are a couple types of different projectors available and popular for use: short throw or ultra short throw projectors and mini projectors.
Ultra Short Throw Projectors or Short Throw Projectors
An ultra short throw projector is not mounted to the ceiling and is typically used if your limited on space or need something portable. They’re useful if you don’t want to mount to the ceiling, if your cutting space is cramped or next to a wall, or if you don’t have a dedicated sewing space and have to move around often. One downside is that if you’re constantly moving your projector around then you’ll spend a lot more time getting it calibrated correctly.
They are definitely more expensive projectors. The Epson EB-595Wi is a popular ultra short throw option for some sewists. While it can run thousands of dollars new you can often find good deals for used ones on Ebay if you need to go the ultra short throw route.
Another option, is a short throw projector. They are is typically mounted to the ceiling or a wall. The benefit of a short throw projector is it doesn’t need as much space as a mini projector. You don’t need to have a large distance (around 62″ for a mini projector) between your projector and sewing mat. They can create good images at a shorter distance of around 1.5′ from lense to cutting mat. Optoma makes popular short throw projectors – although models like the ML1050ST+ can run around $770 at the time of this writing.
Mini Projector
The less expensive option, and the most popular option through our Facebook group, is using a mini projector. A mini projector typically costs much less (around $60 to $200) and gives clear images. The downside is that it will need to be mounted. The upside of mounting a projector is that you won’t need to continually calibrate it. I know Amy uses a mini projector and that’s what I’ve used as well. Now we’ll get into the tips and tricks to setting up a new mini sewing projector.
Projector Setup Tips
I was lucky enough to have VANKYO projectors reach out to me to test one of their projectors for sewing. Since I was trading out projectors, I snapped a few pictures to show you some set-up tips. Your space most likely looks different than mine, and don’t worry if my set up wouldn’t work for you, there are so many different options for mounting and using a projector, again, head to the Projectors for Sewing FB group to see more options! I’ve seen them mounted on shelves, tripods, shower rods, computer stands, with mirrors, permanent set ups, set ups that get taken down when they aren’t in use……there is a solution for every sewing space!
My previous projector (Bomaker is the brand) is no longer available, and I had this mount previously. This setup was great and I had almost no complaints. The mount was a lot cheaper, but the quality was also cheaper. My projector didn’t want to stay in place. However, there are things you can do to make the most of whatever equipment you have. Here is my old set up for reference:

This is my current projector with this mount. This mount was further from the ceiling (meaning my projector was closer to the table, which means the projected area is smaller), but the projected area is still as large as my cutting mat. Plus this mount is much sturdier, I’m more confident in it! The VANKYO projector is smaller + lighter, and has a brighter projection light.
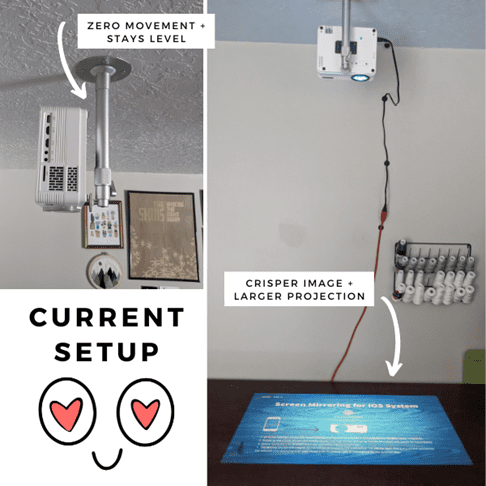
Both projectors can connect to my computer with wi-fi, so I only need a power cable connected. (Also, despite what the picture shows, the white projector also works with PC and Android systems!)
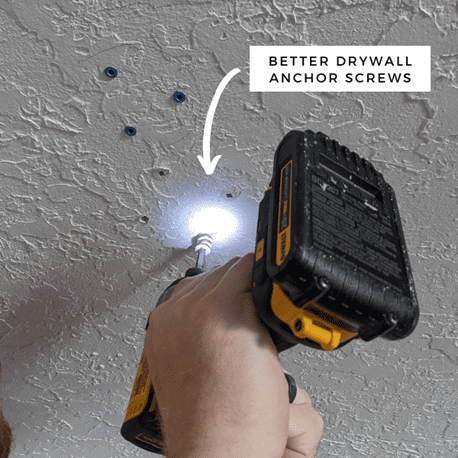
Some advice, the drywall anchor screws that came with both mounts (and pretty much anything else we have ever bought that came with drywall anchor screws) were complete junk. I did not trust them to hold. We got some better, heavier duty, drywall anchors.
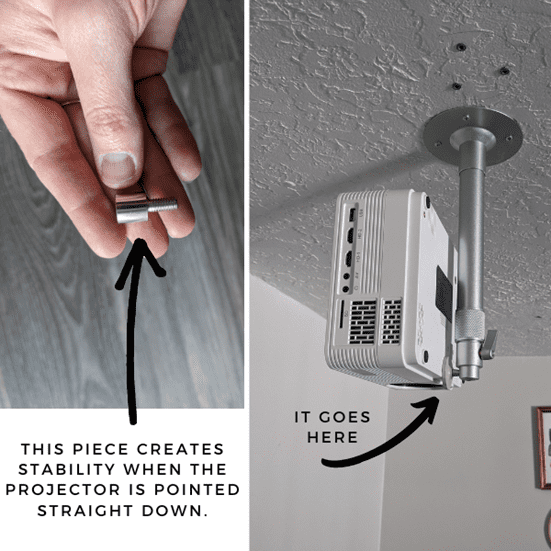
Also be sure to follow mounting instructions to have the most secure set up. This little piece almost got missed, and creates much more stability and security while keeping the projector in place.
Once the projector had power, I changed the input to “screen mirroring” (with the remote! Don’t worry if you can’t reach the buttons) and followed the instructions to connect to the computer. Super easy! I projected Projectors for Sewing’s Calibration Tool (also available in metric) onto my cutting mat (that has a grid). I leveled the projector, adjusted the keystone, and changed the zoom on the computer, until the projected lines matched closely my cutting mat. This took maybe 5 minutes.
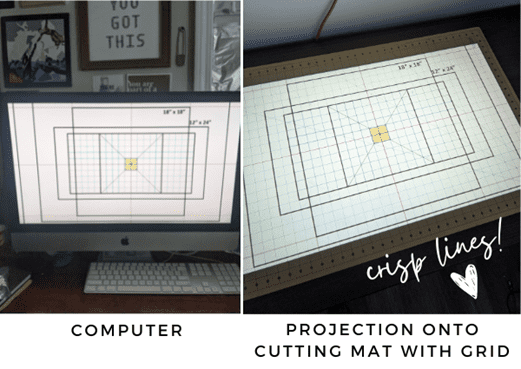
Notice I said my lines matched closely. Mine were actually pretty spot on and I was really pleased, but my old projector set up wasn’t quite as perfect. Being off by 1/4” on the 20” x 30” box on the calibration tool is still over 99% accurate. I feel like knits especially are really forgiving to sew with and I didn’t want to obsess over being slightly off. Also, my lines on my old projector were a little fuzzy and wide (partly due to a bow in the table, before I got a sturdier table for my sewing table!) and I had to make some educated guesses on the best spots to cut. I cut garments like that for 2 years and still had great completed projects. There is a margin of error here that is just fine, so don’t stress out if your calibration guide isn’t exact.
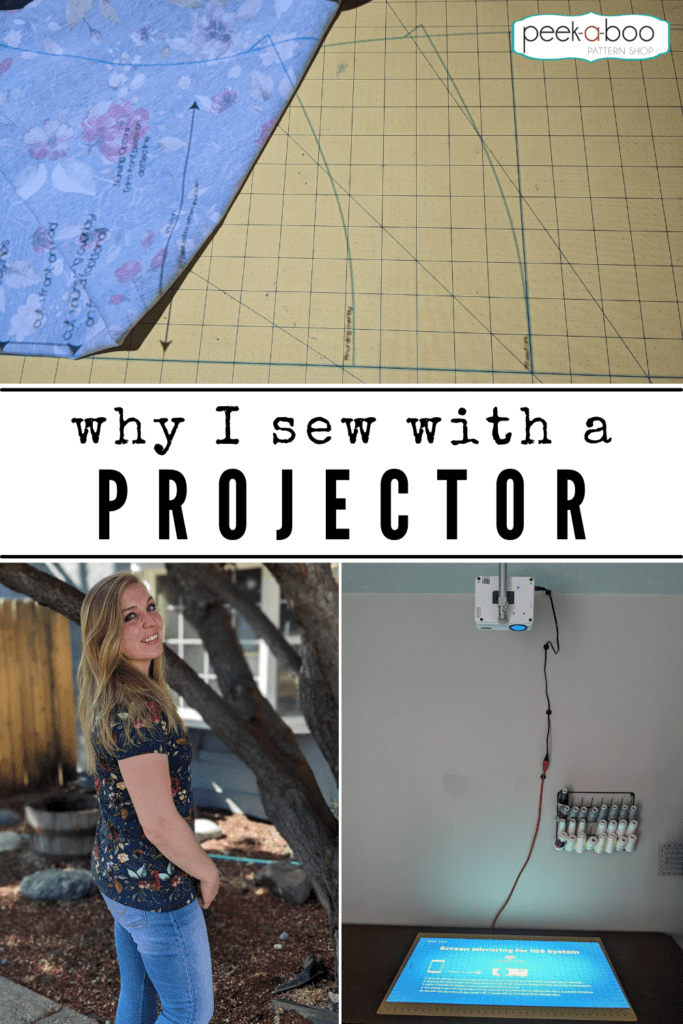
To really get the full experience of my new setup I decided I had to sew something up really quick (for science!). I’ve had this Custom Enchanted Rose (from sister company KnitFabric.com) on my shelf for a while, just begging to be used. My go-to shirt for myself is the Women’s Essential Tee with a v-neck. I love the fit and it’s a fast sew! Before I start cutting I always check the 2” calibration square on the projected pattern, to make sure the zoom is right. A few tricks I use when cutting with the projector:
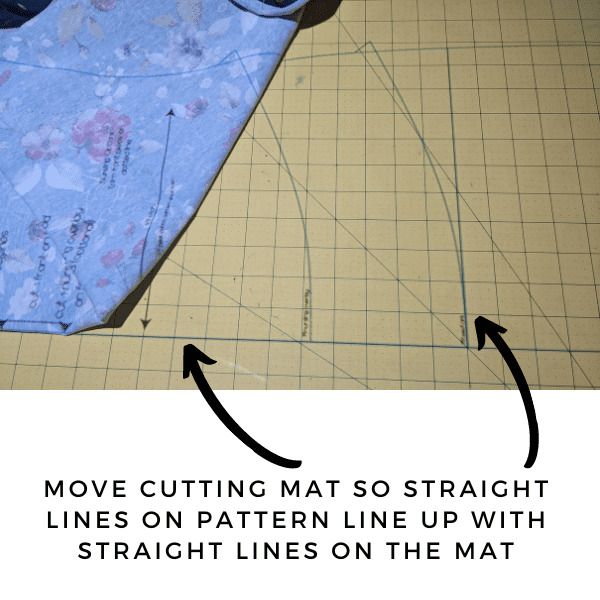
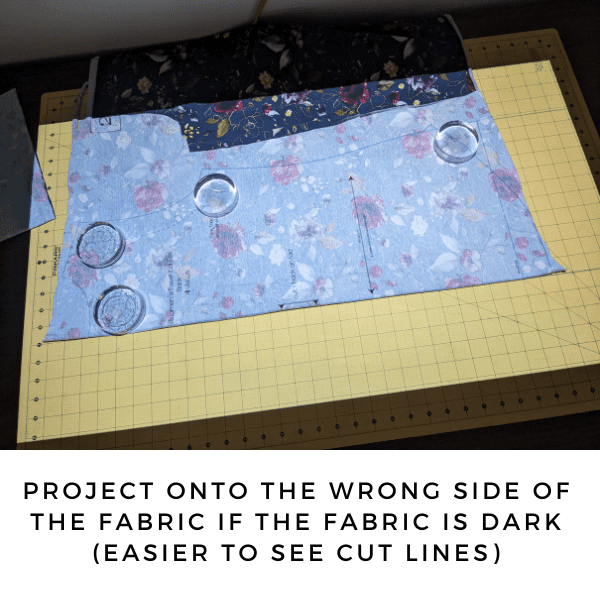
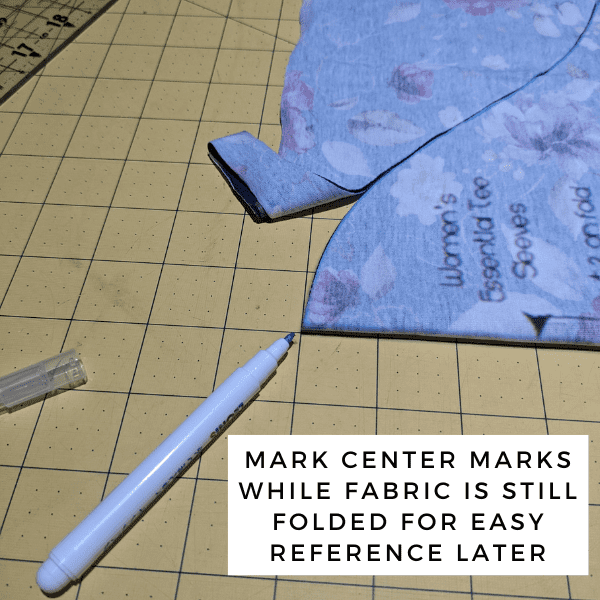
I find fabric weights really helpful to keep the fabric from moving around while I cut. I like these glass ones because I can see through them, but tuna or soup cans, washers, clean rocks, small books…… really anything slightly heavy and not too tall work!
From pulling my uncut fabric off my shelf to wearing the shirt (including sewing a v-neck!) took me right around 30 minutes. Definitely a great use of my time!
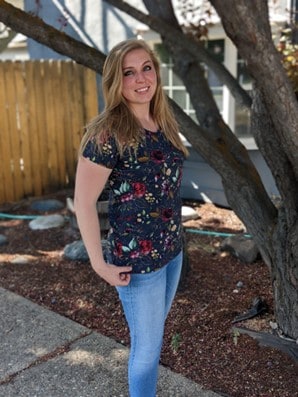
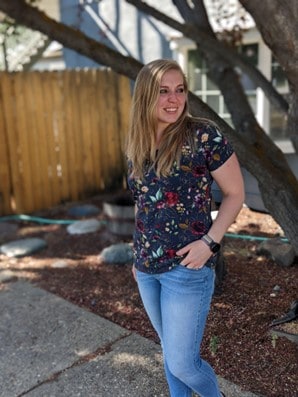
This is why I sew with a projector, and why I will never go back!! Hopefully I’ve helped you understand the hype of the projector and answered some questions. Again, I’ll give a shoutout to Vanykyo Projectors and encourage you to go visit their Sewing Projector Website. On their website they go into detail about how to choose the right projector for sewing, proper mounting and set-up, and the unique value that their projectors provide. Check them out HERE.
What else do you want to read about on the blog?? Tag me (Heather Rae Isaacson) in the Peek-a-Book Facebook group with ideas! Happy Sewing 🙂
Thank you Heather for this amazing article on using a projector for sewing patterns. This is the way of the future. Using a projector has saved me so much time! If you want more info, just search through our Peek-a-Boo Pattern Shop Facebook Group and you’ll see lots of posts on people using their projector for sewing patterns.
If you enjoyed this article then we have another new article on Top 10 Sergers for Sewing Clothes.
