Learn How To Thread a Bobbin in 7 Easy Steps
Today we’ll learn how to thread a bobbin. This is a fairly simple task but it’s one that we sewers tend to dread for some odd reason. Of course, you can buy ones that come already wound with thread, but threading your own will certainly allow for more color choices and will probably save you some money too.
When I was very new to sewing, I would hand wind my bobbins because I had absolutely no idea how to do it on the machine. Looking back I cannot believe all the time I must have wasted doing that! Today I’m going to share a step-by-step tutorial on how to thread a bobbin to ensure you have the knowledge and confidence on how to thread a bobbin with ease every time (and don’t end up like me, wasting time hand winding bobbins.)
What is a Bobbin and How Does it Work?
Starting at the very basics, what even is a bobbin? It is a small spool, typically metal or plastic, that holds the lower thread for a sewing machine. A sewing machine needs two sets of threads working together to create a permanent stitch. The upper thread is threaded through the top part of the machine and is the stitch visible from the right side of the fabric, while the lower thread is on the bottom of the machine (wound on a bobbin) and is the stitch visible from the wrong side of the fabric. It is important to consult the sewing machine manual for specific instructions on how to properly wind and insert the bobbin for a happy sewing experience.
Whether it’s a drop-in or front-loading bobbin, the bobbin case is where it sits inside of the machine. The case has a small hook on it that creates a loop with the bobbin thread. When the needle brings the upper thread down into the machine, it interlocks with this loop of the lower thread. With the upper and lower threads looped around each other, the stitch is secured and won’t easily unravel. It is important to note that the right of the case is where the tension is adjusted for the bobbin thread.
Selecting the Right Bobbin for Your Machine
Most sewing machines will come with a handful of bobbins, but many sewers quickly discover they want even more than that. When it comes to purchasing additional bobbins for your machine, it is essential that you get the correct type for your machine.
Bobbins vary in material, size, and shape and different makes and models of machines will each take a specific type. You can check your machine’s manual on what type of bobbin it requires. You can also go to your machine manufacturers website, it’s usually fairly easy to look up your machine model there where you can then read which type you need. It is essential that you make sure you have the correct bobbin as even though a bobbin may “work”, it may cause tension issues or cause the stitches to be somewhat off if it’s not the right bobbin type for your machine.
Learning the Machine Parts for Bobbin Winding
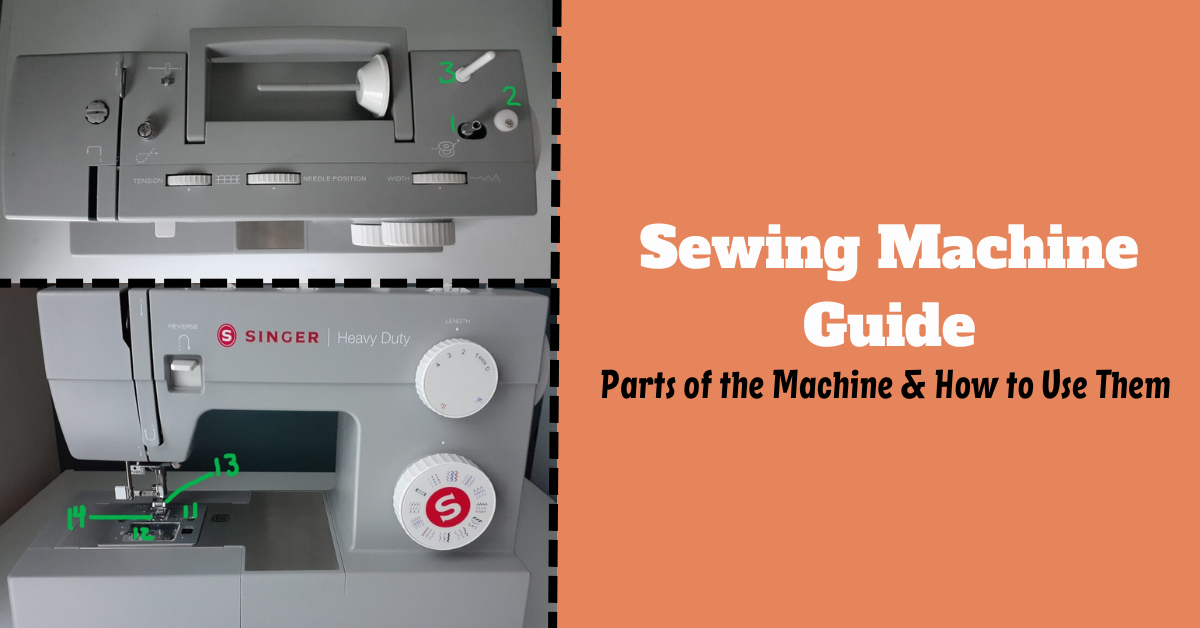
You'll need to familiarize yourself with a few machine parts to learn how to thread a bobbin. You can check out the top of your machine - it probably looks similar to this. My machine is a Singer, but the Janome and Brother are similar.

You can see in the image above the four main parts used in winding a bobbin, the spool pin, thread guide, tension disc, and winder. In the step-by-step, I’ll explain how to use each of these parts, but for a brief explanation of each, the spool pin holds the spool of thread that will be wound onto the bobbin, the thread guide keeps the thread on its path, and prevents tangles, the tension disc will also guide the thread and ensure that it is not wound too tightly or too loosely, and the winder is what spins the bobbin allowing the thread to be wrapped around it.
How to thread a bobbin on a sewing machine?
To thread a bobbin on a sewing machine, start by placing the thread onto the spool pin and threading it through the bobbin winder's tension disc. Then, wind the thread around the bobbin a few times and place it on the bobbin winder spindle. Finally, engage the bobbin winder and let it fill with thread.
Step-by-Step Tutorial: How to Thread a Bobbin
With all of that being said, let’s get down to the how-to with a step-by-step guide:
Step 1: Place the Thread Spool Onto the Spool Pin
Once you’ve chosen the thread that you would like to wind your bobbin with, place it onto the machine’s spool pin. You will want the spool to be placed, so it spins counterclockwise as the thread comes off for both upright and horizontal spool pins. You may use a spool cap to help keep the spool of thread from sliding off the spool pin. It is important to wind the bobbin the right way to ensure proper tension and avoid any issues while sewing.

Step 2: Slide Thread Through the Thread Guide
The second step in threading a bobbin is to slide the thread through the thread guide. The thread guide is typically located above or next to the bobbin winder on your sewing machine. Start by holding the end of the thread and guiding it through the thread guide from top to bottom or left to right, depending on your machine's design. Make sure that the thread is securely in place and can move freely through the guide without any obstructions. This step is crucial for ensuring that the bobbin is properly threaded and will feed smoothly during sewing. Once you have successfully threaded the thread through the guide, you can move on to the next step in preparing your bobbin for use.

Step 3: Wrap the Thread Clockwise (for this machine) Around the Tension Disc
A sewing machine has multiple tension discs, the one used in bobbin winding is typically a small metal disc that sits on top of the machine. The purpose of this tension disc is to feed the thread evenly onto the bobbin, ensuring it is not wound too loosely or too tightly.
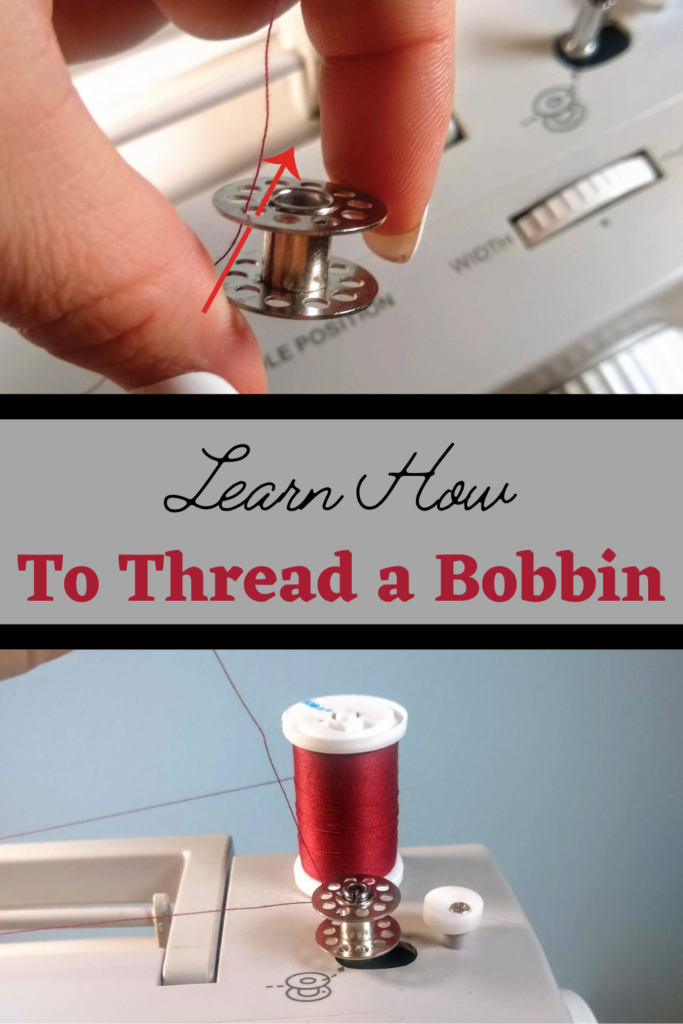
Again, most machines will have a visual to show which way to wrap your thread around the tension disc. I’ve used different machines that have you wrap it in different directions, but the machine I’m using here has you wrap the thread in a clockwise direction, starting from the top right of the tension disc. I’ve circled the machine’s visual in the image below to show the direction I’ve wrapped the thread around the tension disc.

Step 4: Thread Bobbin
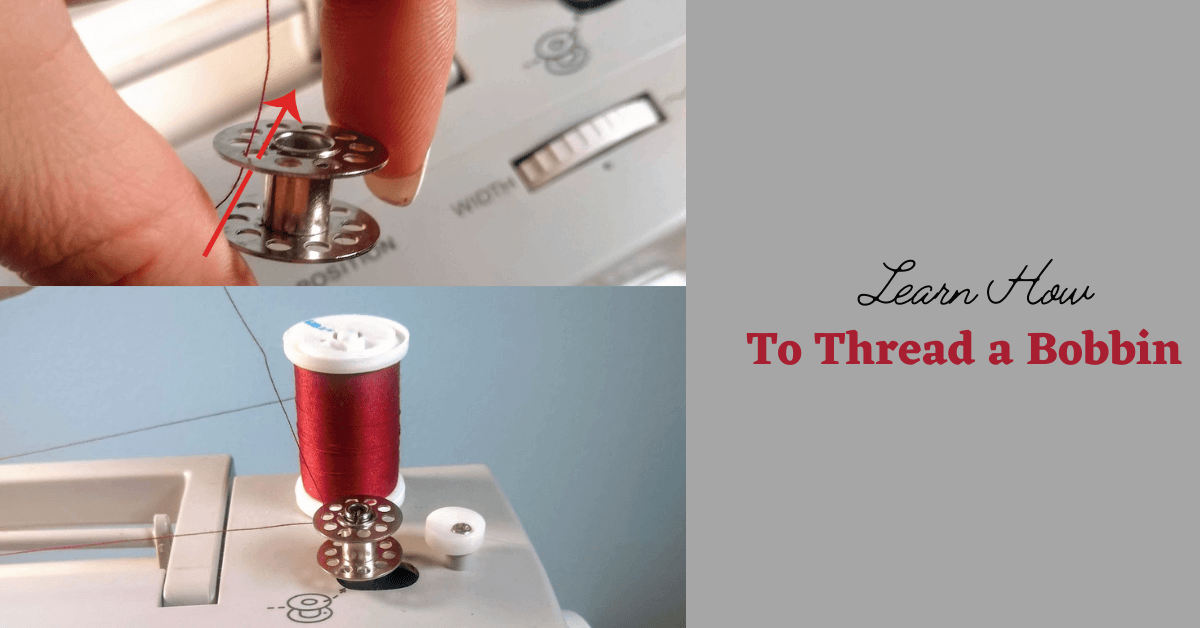
Thread the bobbin by running the thread up and through a hole on the bobbin’s flat surface with your right hand. Threading from the inside to the outside will allow the thread to wrap around it when winding properly. Don't forget to use a pair of scissors to cut the thread once it's wound onto the bobbin.

Step 5: Place Bobbin on the Bobbin Winder
Place the bobbin onto the winder so that the thread tail comes off the top of the properly wound bobbin.
 Step 6: Engage the Bobbin Winder
 Step 6: Engage the Bobbin Winder
Push the bobbin winder from left to right. Doing so will engage the winder so that it spins when the foot pedal is pressed, achieving the fastest speed. This also disengages the needle and the handwheel, so they are not needlessly running while the bobbin is being wound.

Step 7: Wind The Bobbin
While holding the thread tail up, gently press down on the foot pedal to wind the bobbin with wind thread. Once the thread has wrapped around it a few times you may stop to cut the thread tail. Once that thread tail is snipped, continue to press the foot pedal until the bobbin is about ¾ of the way full of thread. (Many machines will automatically stop winding once it reaches this point.)

You have now successfully wound a bobbin! To remove it from the winder, simply snip the thread from the spool, slide the winder back to the left, and pop the it off.
Tips on How to Thread a Bobbin: Winding
Here are a few tips on winding your bobbin:
- Wind multiple bobbins at a time for longer projects: This way, when it eventually runs out, you won’t have to unthread your machine to wind another.
- Purchase organizing cases: There are many different types of containers created for organizing bobbins, they are typically fairly affordable and, in my opinion, are worth the purchase.
- Label your stored bobbins: For those of you with multiple machines which require different types of bobbins, make sure to stay organized when storing your bobbins. If all of the different types of bobbins are stored together without any way of knowing which is for what machine, you run the risk of using the wrong one, which can certainly lead to machine or stitching issues.
I hope you enjoyed our tutorial today. Whether you are sewing clothing or quilting, learning how to thread your sewing machine is critical to success.
If you've mastered the art of winding a bobbin, the next step is to thread your sewing machine. If you're new to sewing, the process of threading a sewing machine can feel overwhelming. However, with the right guidance, it can be an easy task to accomplish. In my recent article on "How to Thread a Sewing Machine," I provide an in-depth step-by-step guide that covers everything from loading a bobbin for both top and front-loading machines to threading the needle correctly. Armed with this information, you will feel confident and ready to tackle your next sewing project with ease!
Thank you for joining us today to learn how to thread a bobbin. Before you leave, make sure to join our Facebook Group to get help in all your sewing projects.