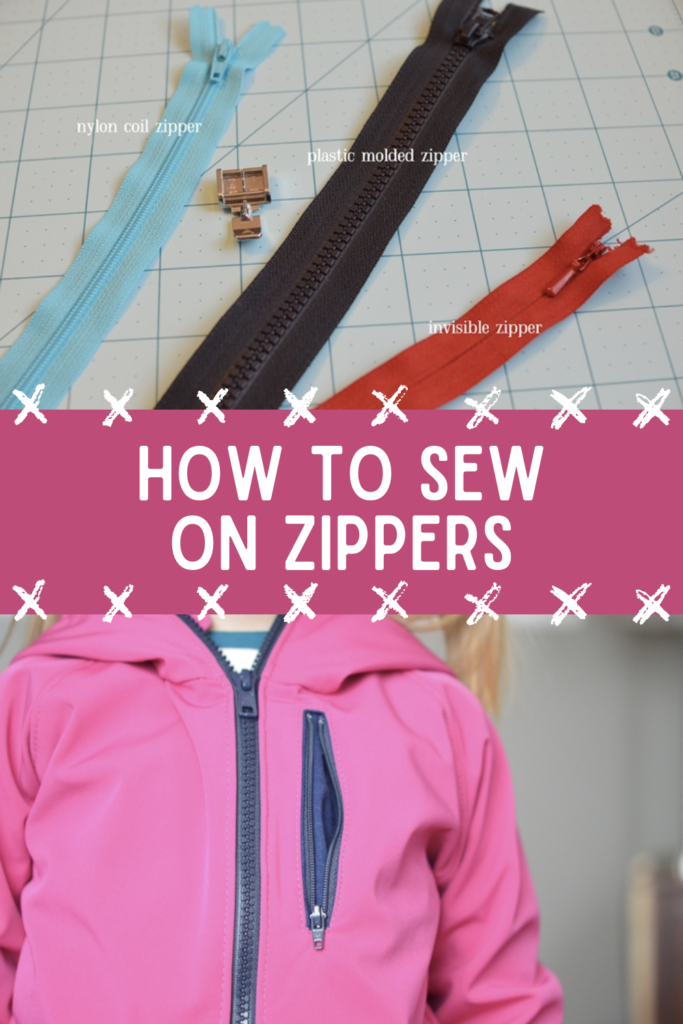
How to Sew a Zipper (Step-by-Step with Photos)
Table of Contents
Learning how to sew a zipper is one of the most useful skills you can pick up as a sewist. It opens the door to jackets, hoodies, dresses, and dozens of other projects that need a clean closure. The good news? It's not nearly as hard as it looks.
In this guide, we'll cover the three main types of zippers, show you exactly how a zipper foot works, and walk you step-by-step through sewing a zipper into a jacket — with a trick for lining up seams perfectly. We'll also cover invisible zippers and how to shorten a zipper that's too long.
Quick Steps to Sew a Zipper
To sew a zipper into clothing, follow these steps:
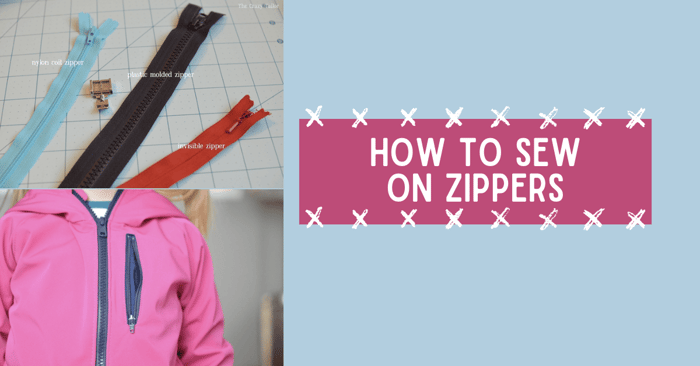
- Choose the right zipper — use a separating zipper for jackets, a coil zipper for skirts/pockets, or an invisible zipper for dresses.
- Attach your zipper foot — this lets you stitch close to the teeth without sewing over them.
- Pin or baste the zipper to one side of the fabric, right sides together, aligning the teeth with the fabric edge.
- Sew the first side using a straight stitch close to the zipper teeth.
- Attach the second side — zip it up, mark where your seams need to match, then pin and sew.
- Test the zipper to make sure it opens and closes smoothly with everything lined up.
Keep reading for the full photo tutorial, zipper types explained, and pro tips for getting it right the first time.
Types of Zippers and When to Use Each
Before you start sewing, you need the right zipper for the job. Here are the three types you'll use most often in garment sewing:
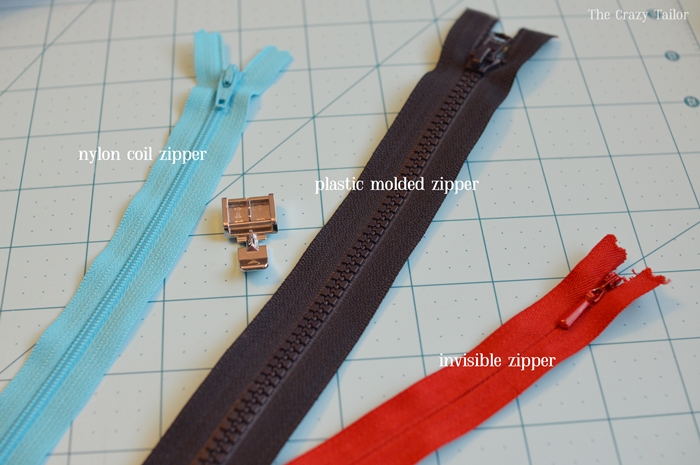
Nylon Coil Zippers
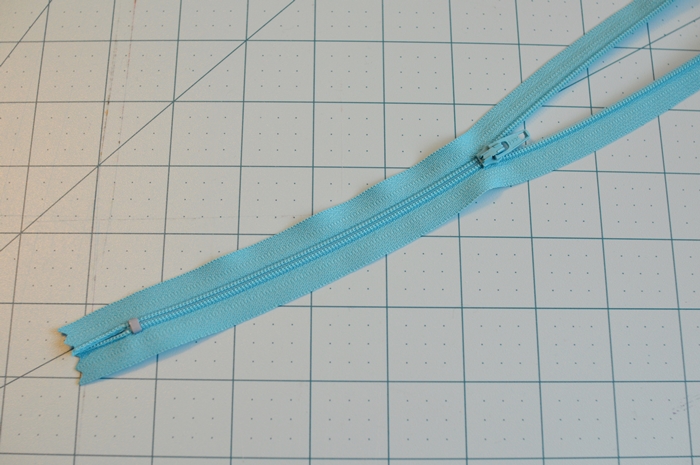
These are the best zippers for beginners. The teeth are a continuous nylon coil running down the tape, making them lightweight and flexible. The one shown here is close-ended and non-separating — see that small metal clamp at the bottom? That means the two sides stay connected, so you wouldn't use this type for a jacket.
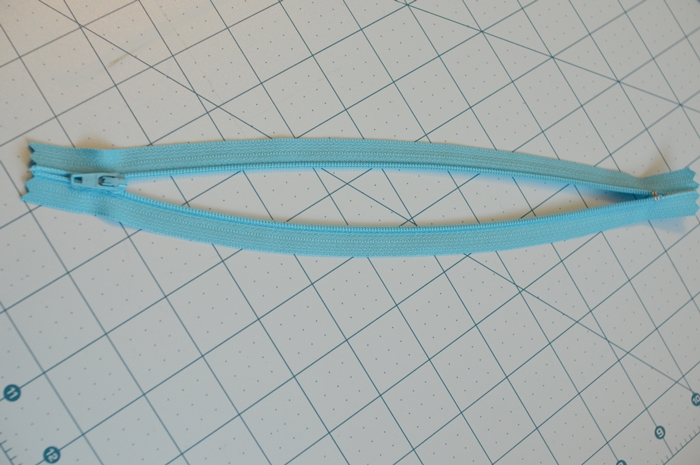
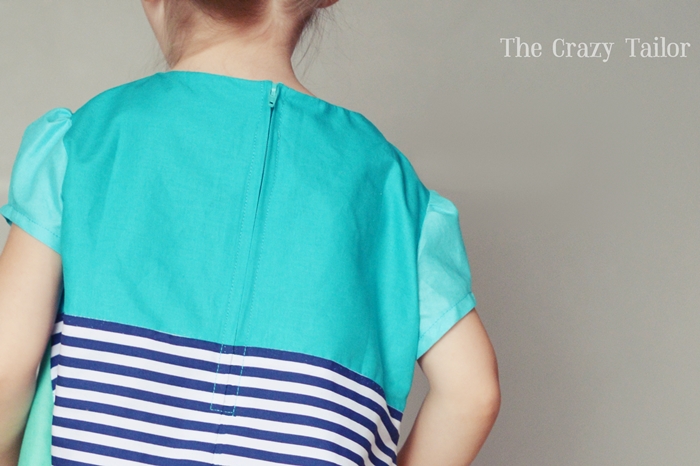
Nylon coil zippers are great for dresses with a bodice zipper, pants, skirts, jacket pockets, and half-zip pullovers. They're usually installed as a centered zipper, though some patterns use a lapped seam. Here's what a centered coil zipper looks like sewn in:
You can also find nylon coil zippers in a separating version (sometimes called a jacket zipper) for use in lightweight outerwear.
Molded Plastic (Separating) Zippers
These are chunkier and more durable. You'll use molded plastic separating zippers in outerwear, hoodies, snow pants, and other heavy-duty garments. The two halves separate completely at the bottom, making them easy to put on and take off.

Some molded plastic zippers come with two pulls so you can unzip from the top and the bottom — handy for sitting down in a long coat. You can also find reversible separating plastic zippers, which are perfect for reversible jackets.
Invisible Zippers
Invisible zippers are designed to disappear into the seam when sewn correctly — all you see is the pull tab. They're the standard choice for adult skirts and dresses. We'll cover how to sew one further down in this guide.
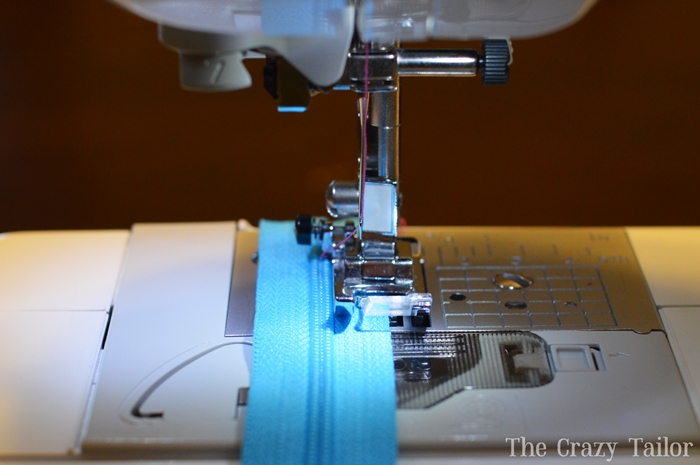
How to Use a Zipper Foot
A zipper foot is essential for sewing zippers well. It's narrow on one side, which lets your needle stitch right next to the zipper teeth without the foot riding over them. Most sewing machines include a zipper foot in the accessory box.
Here's what a zipper foot looks like (note: this one is upside down in the photo — that's what happens when you sew late at night!):
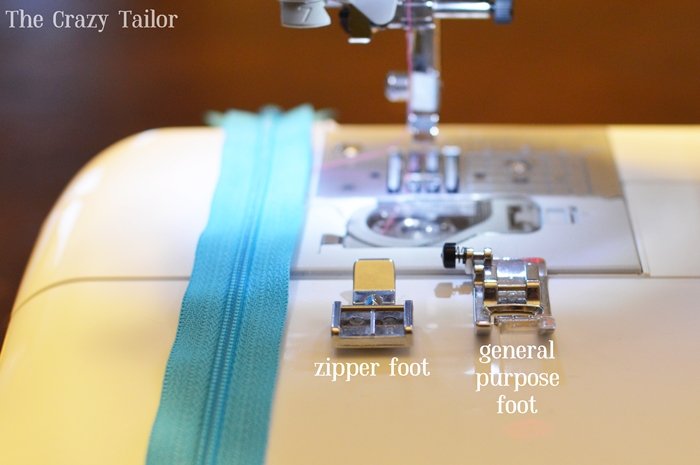
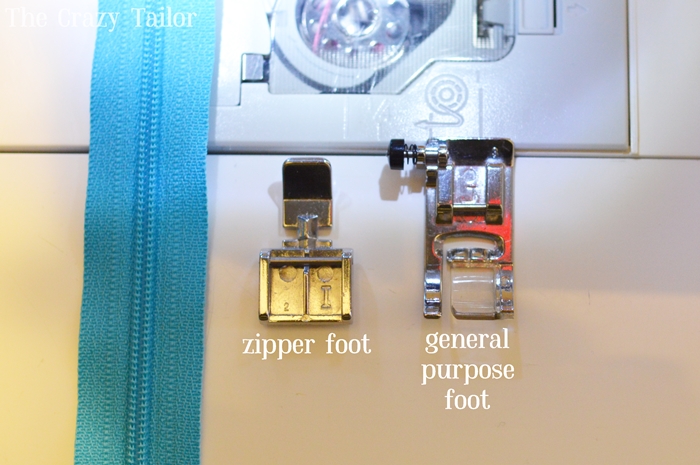
The foot has two sides. Which side you use depends on which side of the zipper you're sewing — attach the foot so the narrow edge is next to the teeth. And always double-check that your needle clears the foot before you start stitching (ask me how I know...).
Here's how the zipper foot positions your needle right next to the teeth:
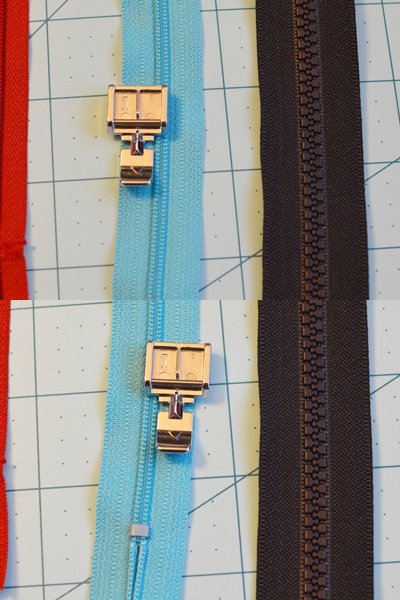
Compare that to a regular general-purpose foot — it pushes your needle too far from the teeth, giving you sloppy stitching:
💡 Pro Tip: If you're sewing an invisible zipper, you'll want an invisible zipper foot instead — it has grooves on the bottom that uncurl the zipper coil as you sew. A regular zipper foot works for all other zipper types.
How to Sew a Zipper Into a Jacket (Step-by-Step)
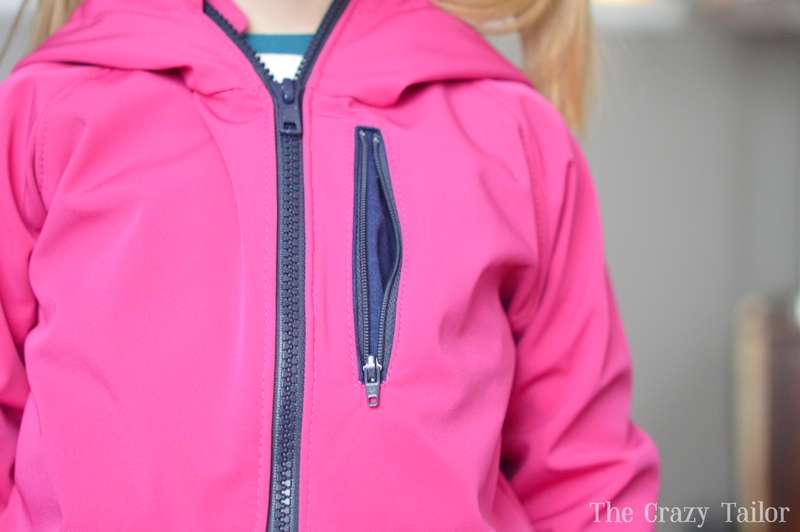
Now for the main event. We'll walk through sewing a separating zipper into a jacket — and I'll show you a trick for getting your pockets, seams, and details to line up perfectly on both sides. This technique works for hoodies, jackets, and any garment with a front separating zipper.
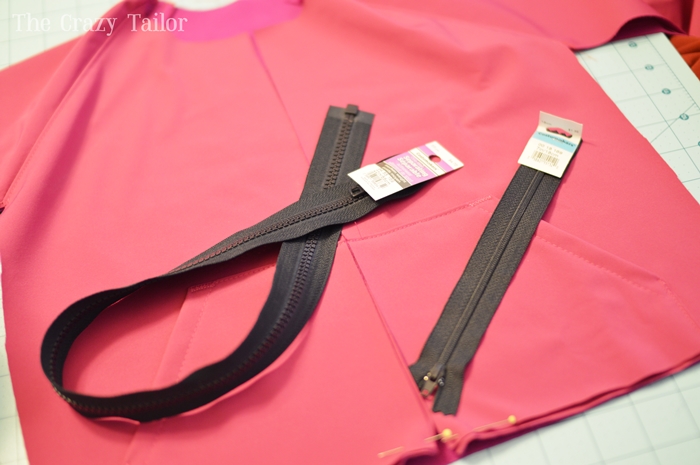
Step 1: Prepare Your Fabric and Zipper
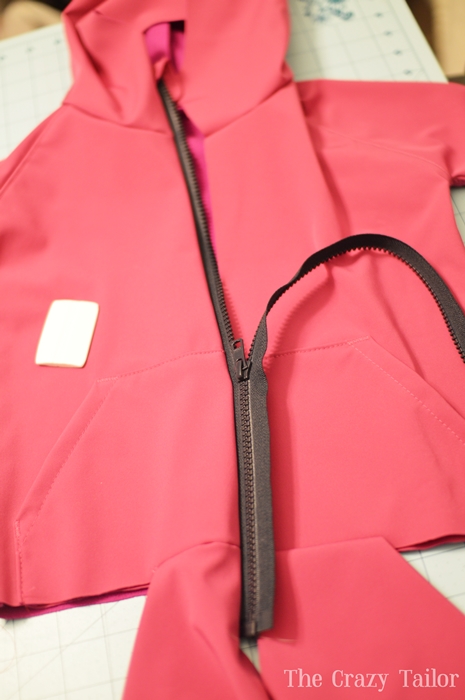
For this tutorial I'm using a mashed-up High Five Hoodie with Grand Slam sleeves and a Downton Duffle hood. I have both a molded plastic zipper and a nylon zipper on hand — both are longer than I need, which we'll fix in a moment.
Steps 2–4: Pin and Sew the First Side
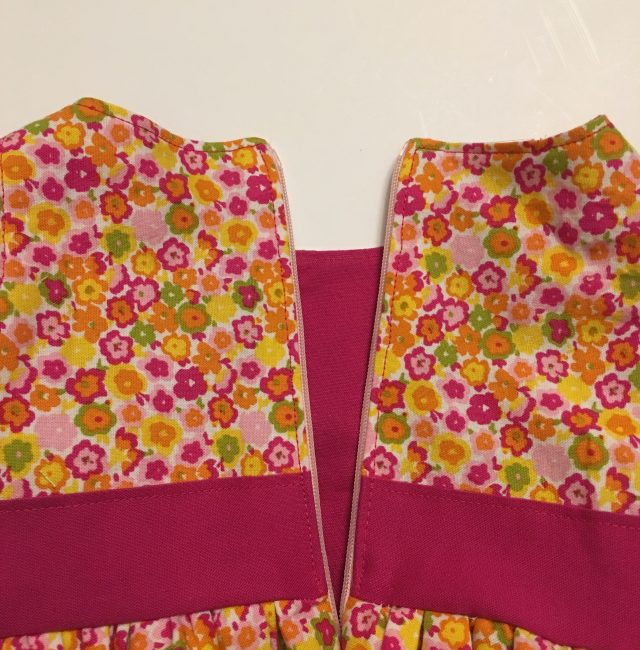
Step 2: Identify the seams that need to match across the zipper. On this hoodie there are three key seams — the hood attachment, the yoke, and the kangaroo pocket:

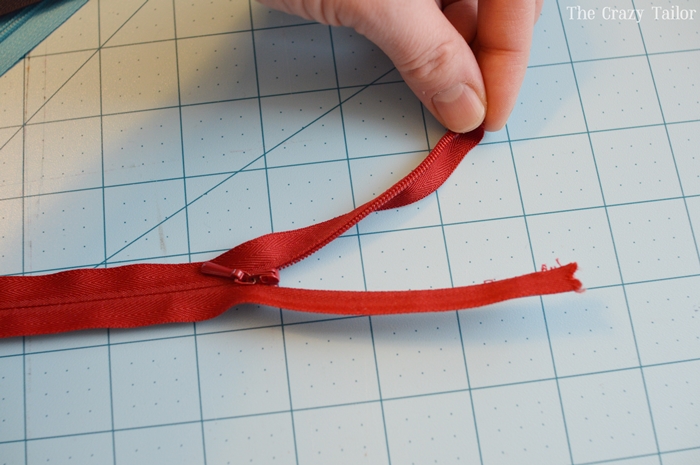
Step 3: If your zipper is too long, mark where it needs to stop and pull off the extra teeth with needle-nosed pliers. (We have a full section on how to shorten a zipper below.)
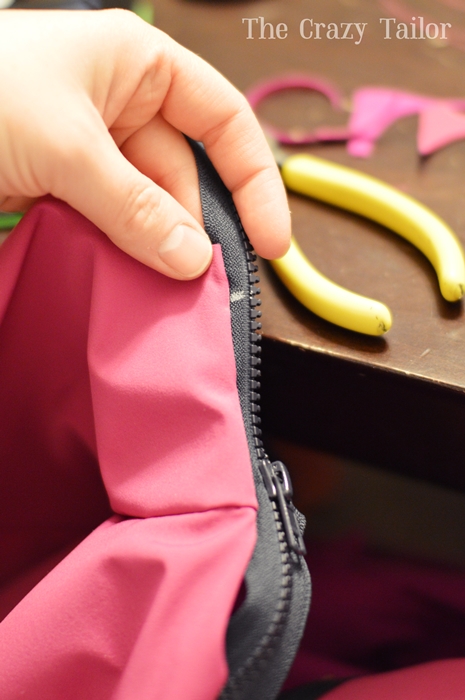
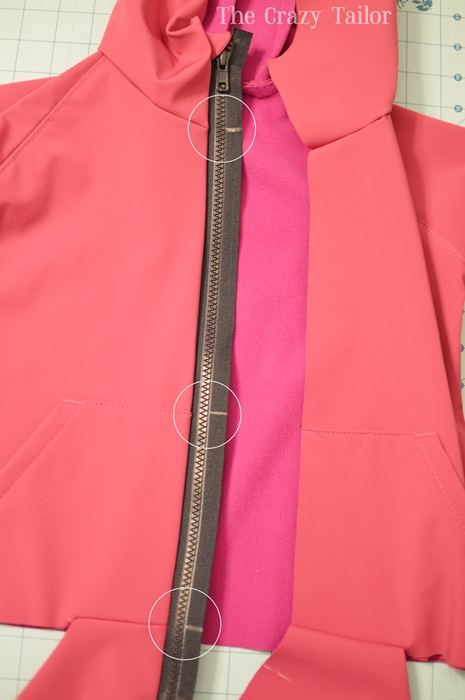
Step 4: Pin or baste the zipper to one side of the jacket, right sides together, aligning the zipper teeth with the fabric edge. Sew it in place with your zipper foot.
💡 Pro Tip: Basting is worth the extra time. Use a long stitch length to temporarily hold the zipper, then sew your final seam right next to it. You can pull the basting out after. This prevents shifting — especially on knit fabric.
Steps 5–8: Match Your Seams and Sew the Second Side
This is the trick that keeps everything lined up perfectly.
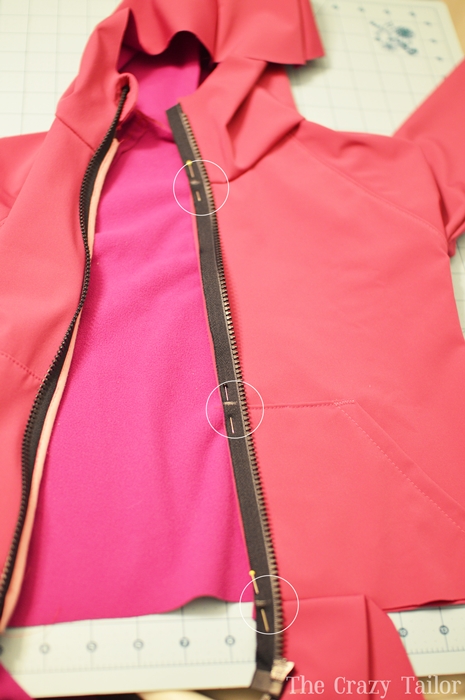
Step 5: Zip up the sewn side to the unsewn side of the jacket. This is just temporary so you can see where the seams fall:
Step 6: With the jacket still zipped, use chalk or an erasable fabric marker to mark exactly where each seam falls on the unsewn zipper tape:
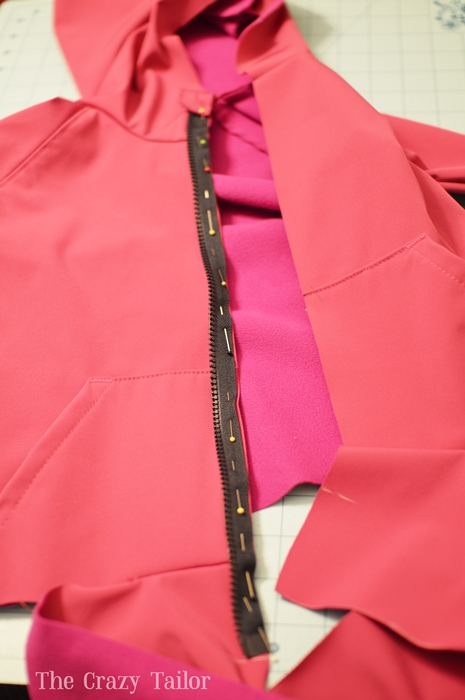
Step 7: Unzip, then use your chalk marks to pin the zipper to the second side. Pin at each seam mark first, then fill in pins between them:
Step 8: Zip it up one more time to check that everything lines up. Make any adjustments, then sew the second side. Here's the result — perfectly matched seams:
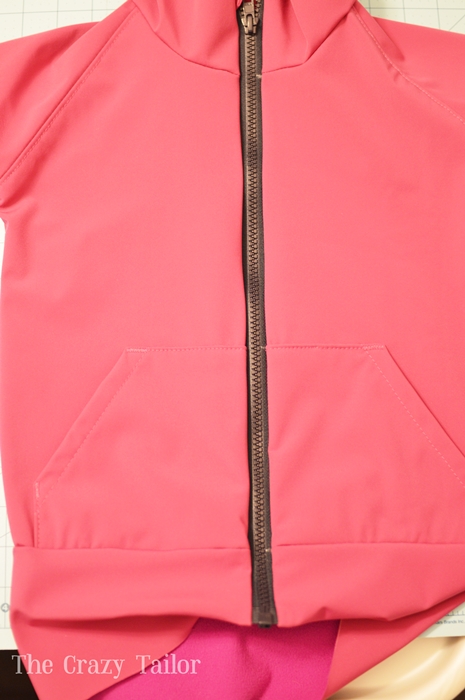
And here's the completed hoodie mash-up with the zipper installed:
How to Sew an Invisible Zipper
An invisible zipper hides completely inside the seam — when sewn correctly, you can only see the pull tab. They're the standard closure for formal dresses and skirts. Here's a quick overview:
- Prepare: Press your fabric to remove wrinkles and mark zipper placement on the wrong side of the fabric.
- Attach the zipper foot: Use a regular zipper foot (or an invisible zipper foot if you have one — it makes this much easier). Open the zipper fully.
- Sew the first side: Align one side of the zipper tape with the raw edge of your fabric, right sides together. Pin and sew with a straight stitch, stopping about an inch from the bottom.
- Sew the second side: Repeat for the other side of the zipper tape. Close the zipper and pin the remaining seam allowances together. Sew across to close the seam below the zipper.
- Press: Press the seams open and you're done.
We have a full detailed tutorial with photos here: How to Sew an Invisible Zipper (Complete Tutorial)
💡 Pro Tip: Before sewing an invisible zipper, press the zipper teeth open with a warm iron. This unrolls the coil and makes it much easier to get your stitching right next to the teeth for a truly invisible result.
How to Shorten a Zipper
Can't find the exact zipper length you need? No problem — you can shorten any zipper in a few minutes. Here's how to do it by hand:
- Measure and mark: Measure from the top of the zipper to your desired length. Mark that spot with chalk — this is where your new zipper stop will go.
- Create a new stop: Thread a hand needle, knot the end, and start stitching at your mark. Push the needle from the bottom of the zipper tape to the top, as close to the teeth as possible. Loop the thread over the teeth and back through, creating tight wraps. Repeat 12–15 times to build a solid stop.
- Tie off: Flip the zipper over and slide the needle under the new stop along the teeth to secure. Knot and trim.
- Cut the excess: Cut the zipper tape at least ½" below the new stop.
Machine method: You can also create the stop with your sewing machine. Just zigzag stitch back and forth across the teeth at your marked line several times to create a strong bar tack, then cut the excess below.

That's everything you need to know about sewing zippers! Once you've practiced on a project or two, it becomes second nature. If you have questions, come join us in the Peek-a-Boo Pattern Shop Facebook Group — we'd love to see what you're making and help with any zipper challenges.
Ready to put your new zipper skills to work? Try the High Five Hoodie or the Downton Duffle Coat — both are perfect zipper practice projects. And visit KnitFabric.com for your apparel fabric needs.
Frequently Asked Questions
What type of zipper should I use for my project?
Use a separating zipper (molded plastic or nylon coil) for jackets, hoodies, and coats that open all the way. Use a non-separating coil zipper for skirts, pants, pockets, and half-zip pullovers. Use an invisible zipper for dresses and skirts where you don't want the zipper to show. Your sewing pattern will usually specify the type and length needed.
Do I need a zipper foot to sew a zipper?
Yes, a zipper foot is strongly recommended. A regular presser foot positions the needle too far from the zipper teeth, resulting in uneven stitching. A zipper foot lets you sew right next to the teeth for a clean, professional finish. Most sewing machines come with one in the accessory box. For invisible zippers, an invisible zipper foot with grooves is even better.
Which side of the zipper foot do I use?
It depends on which side of the zipper you're sewing. Attach the foot so the narrow edge sits next to the zipper teeth and the foot body is on the opposite side. When you sew the other side of the zipper, switch the foot to the other position. Always make sure your needle clears the foot before starting.
How do I keep seams aligned when sewing a jacket zipper?
Sew the zipper to one side first, then zip it up temporarily against the unsewn side. Use chalk to mark where each seam falls on the loose zipper tape. Unzip, pin at each chalk mark first, then fill in pins between. Test by zipping up again before sewing the final seam. This ensures pockets, yokes, and other details line up across the zipper.
Can I shorten a zipper that's too long?
Yes. For a coil zipper, hand-sew or zigzag stitch a new stop at your desired length by wrapping thread tightly around the teeth 12–15 times, then cut the excess tape ½ inch below the stop. For a molded plastic zipper, you can pull the extra teeth off with needle-nosed pliers before creating your new stop.
Can I sew a zipper into knit fabric?
Absolutely — many patterns like the High Five Hoodie and Downton Duffle use zippers with knit fabrics. The key is to stabilize the zipper area with a strip of lightweight fusible interfacing or clear elastic along the seam line. This prevents the knit from stretching while you sew and keeps the zipper lying flat.
Should I pin or baste my zipper before sewing?
Either works, but basting is more reliable, especially for beginners or when working with slippery or stretchy fabrics. Use a long stitch length to temporarily hold the zipper in place, then sew your permanent seam right next to the basting. Pull the basting stitches out when you're done. Pinning is faster but the fabric can shift under the presser foot.
What's the difference between a centered and lapped zipper?
A centered zipper has two equal fabric flaps covering the teeth, with visible stitching lines on both sides — this is the most common method for back zippers in dresses and skirts. A lapped zipper has one fabric flap that folds over to cover the teeth, with stitching visible on only one side. Lapped zippers are sometimes used on side seams and in pants.