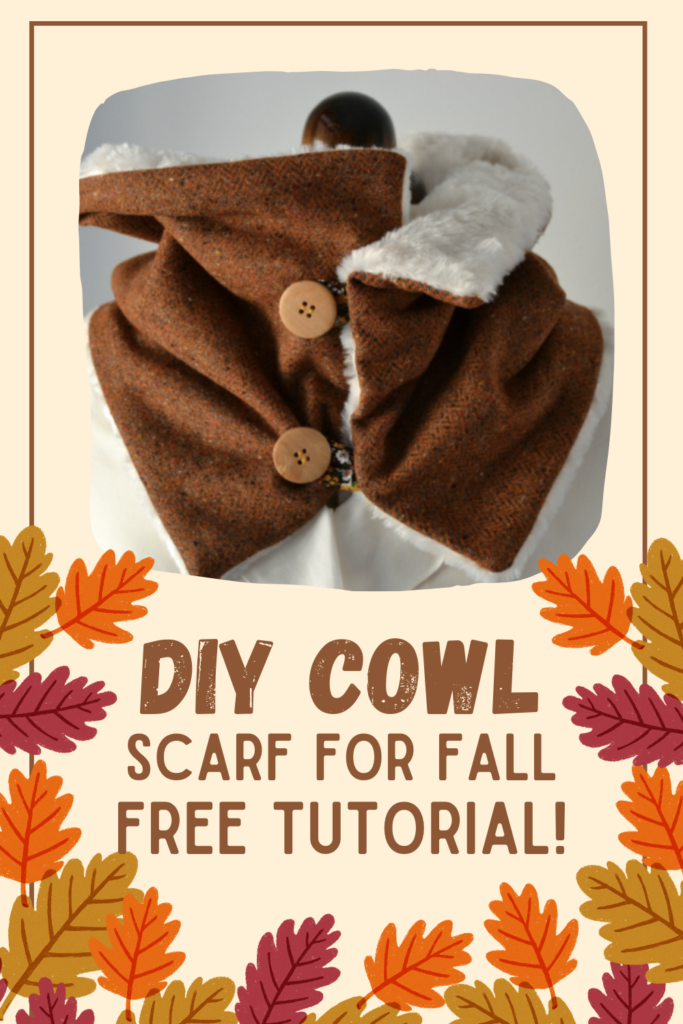
How to Sew a Cowl Scarf in 5 Easy Steps
Are you looking for a fun and easy sewing project to tackle this weekend? Look no further than our tutorial on how to sew a cowl scarf! Not only will it keep you warm during the chilly months, but you'll also have the satisfaction of saying "I made this myself!" In this blog post, we have broken down the process into five simple steps that even beginners can follow. We'll cover everything from gathering your materials to variations you can try with this pattern. So grab your favorite fabric and let's get started on making your very own cowl scarf!
Gathering Your Supplies
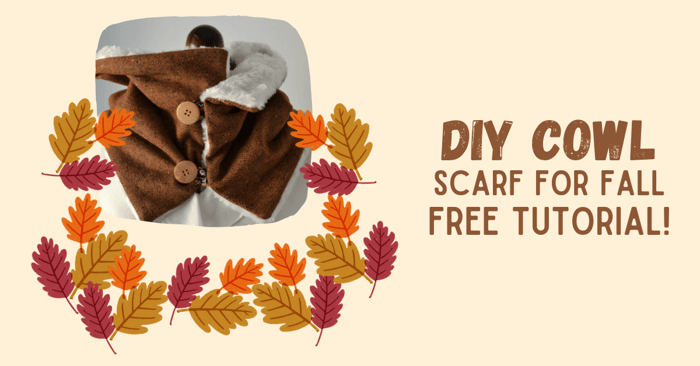
This DIY Cowl Scarf is perfect for making use of all those (big-ish) scraps of fabric laying around.
- Two different fabrics for your scarf:
Outside of the Scarf: wollen fabric, quilting cotton, cotton lawn, shirting, poplin, double gauze, medium weight knit.
Inside of the Scarf: flannel, fleece, faux sherpa, sweatshirt fleece.
- 1 extra large button or 2 large buttons or 3-4 medium size buttons.
- Bias tape (or you can use a fabric scrap to create the button loops).
Choosing the perfect fabric is essential for this project, especially if you're aiming for a cozy and cuddly cowl scarf to keep you warm in the cold climate. Ensuring that your sewing machine and tools are in top condition will make the entire process a smooth and enjoyable experience for sewers of all levels. Equally important is finding a clear and detailed sewing tutorial to guide you through each step. Before diving into your project, take a moment to peek at the wrong side of the fabric and make sure everything looks perfectly aligned. Understanding the seam allowance will ensure that your cowl scarf turns out just right.
Deciding on the Size of Your DIY Cowl Scarf
When sewing a cowl scarf, deciding on the dimensions for the perfect fit is crucial. Consider the fabric's stretch and the desired snugness to determine the scarf's width. Additionally, select the right fabric length by taking into account the fabric width, stitch allowance, and double gauze. Make sure the width of the cowl scarf matches the pattern width, and factor in the fabric stretch for comfortable wear. Adjust the scarf's length based on the recipient's neck size and the climate, ensuring they stay warm and cozy during the winter months.
The 5-Step Guide on How to Sew a Cowl Scarf
Cutting the fabric to the correct dimensions initiates the cowl scarf project. Ensuring the fabric edges are properly aligned prepares the fabric for sewing.
Scarf Step 1: Cut two 31” (width) x 13” (length) rectangles (one of each fabric). 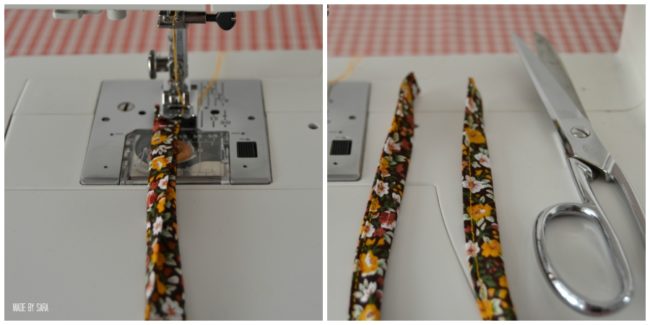
Scarf Step 2: Fold the bias tape in half and stitch along the long edge. Cut the strip in two smaller strips.
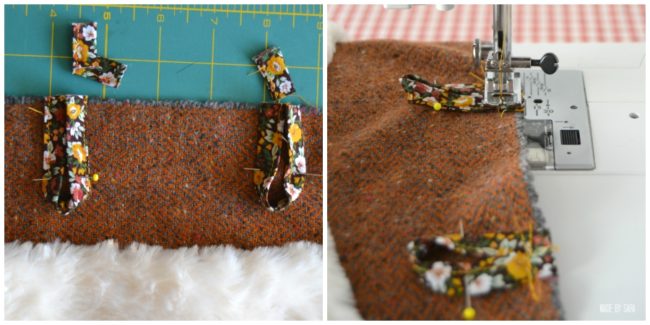
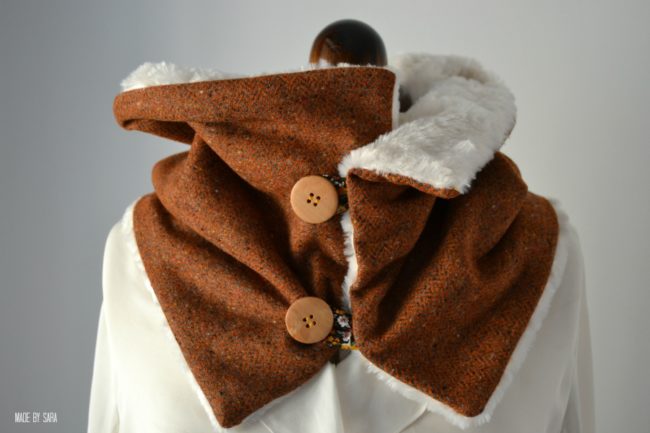
Scarf Step 3: Fold them in half to create loops according to your button’s width plus 3/4”. Cut the excess, if necessary. Place them on one of the short ends (at about 4” and 8)”) making sure to line up the ends of the loops with the edge of the fabric. Baste them to keep them in place.
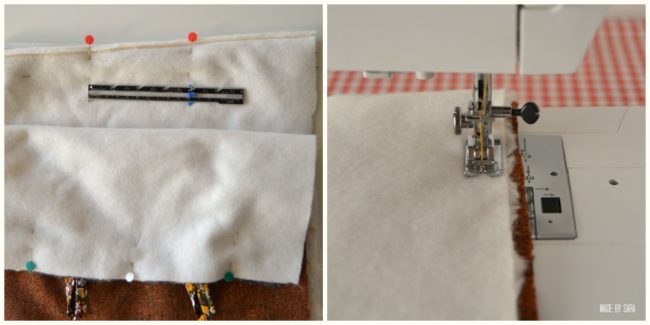
Scarf Step 4: Place both rectangles right sides together (RST). Stitch all around with a 1/2” S.A. leaving an opening of about 3-4 inches (so you can turn it right side out (RSO)). Clip the corners. Turn RSO making sure all corners are neat. Press.
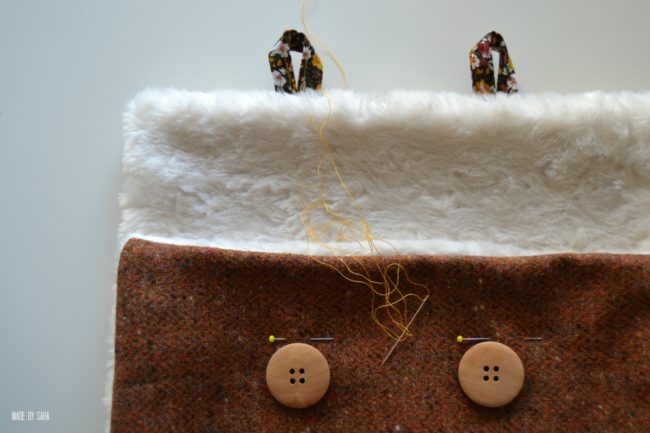
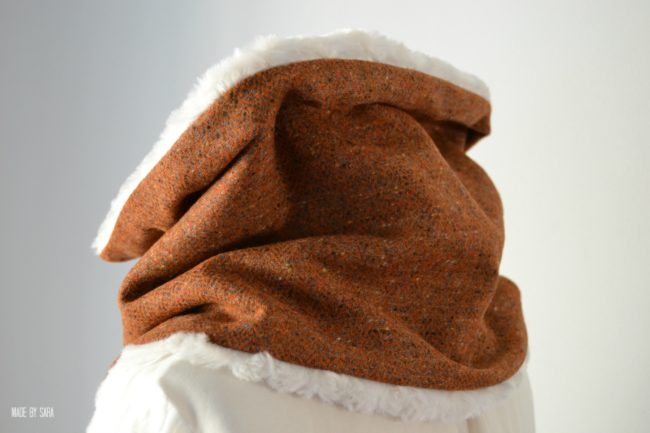
Scarf Step 5: Close the gap by either hand sewing with a slip stitch or top stitching at 1/4”. Sew your buttons in place, about 1 1/2” from the edge.
What Are Some Variations You Can Try With This Pattern?
Explore different possibilities with this pattern to make your cowl scarf unique. Customize the length and width according to your preferences. Get creative with fabrics like wool, fleece, or faux fur. Add personal touches with fringe, tassels, or buttons. Experiment with different draping styles for versatile looks.
Conclusion
Thank you for joining us to learn how to sew a cowl scarf. This DIY Cowl Scarf is also perfect for all those Christmas gifts! Wait, did I just mention the “C” word in September? Well, if you are anything like me, with a big family and lots of friends, you’d better start making your Christmas presents soon… 🙂 These neck warmers area such an easy project for winter or autumn and a great way to use up some comfy cozy scraps you have laying around.
In just 5 easy steps, you can create a cozy and stylish cowl scarf to keep you warm throughout the winter. By gathering the necessary supplies and understanding the pattern, you'll be well-prepared to begin sewing. Follow the 5-step guide, from cutting out the fabric to finishing the edges, and you'll have a beautiful cowl scarf in no time. Plus, once you've mastered the basic pattern, feel free to get creative and try out different variations to make your scarf truly unique. Whether you're a beginner or an experienced sewer, this project is a fun and rewarding way to showcase your skills.
Don’t forget to visit Peek-a-Boo’s Facebook group and share your makings there! Grab your supplies and start sewing today!
