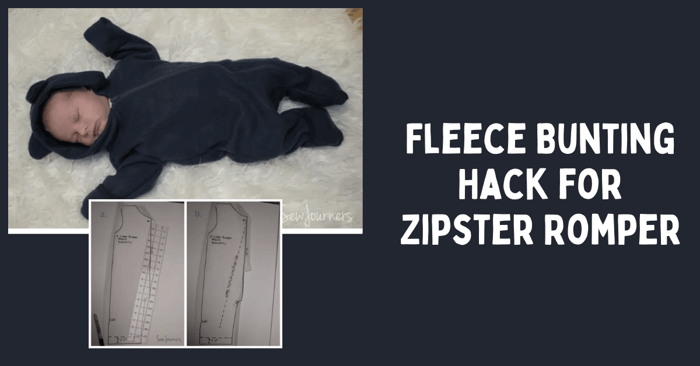
DIY Bunting Hack for Zipster Romper
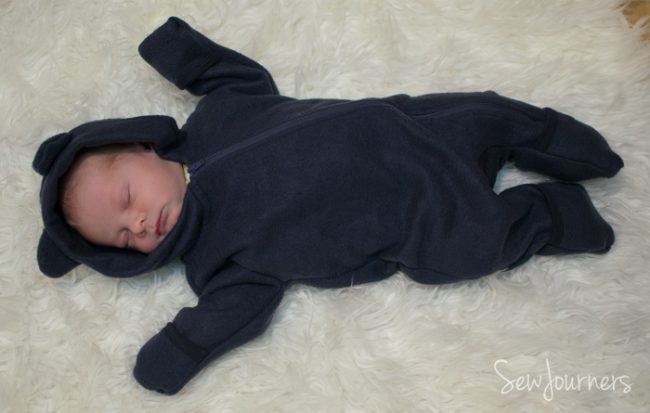
Today, we're going to sew a DIY Bunting from fleece. Wintertime ads a new level of complicated to getting the kids out of the house. Today I want to share with you how to sew a winter fleece bunting using the Zipster Romper.
DIY Bunting | How to Make a Fleece Baby Bunting
We had one of these buntings in ready-to-wear from a popular sports clothing manufacturer that we used for both my girls and it was perfect for our needs. Fleece bunting allows you to quickly bundle your little ones up so they stay warm and cozy for those quick trips outdoors. It is also low-bulk, making it car seat friendly* if you are diligent to make sure your individual fit is correct. Our newest addition would be too small for the one we already own so my top baby prep item was to make him a similar one. The Zipster Romper was the perfect base pattern for it.
*Please use your own judgement if you make this for your child to wear in the car seat. You will want to make sure you follow all car seat safety guidelines and are comfortable with the fit yourself. The Car Seat Lady has some tips here.
DIY Bunting Hacks in this Tutorial:
One of the things that is so handy about the fleece bunting is that it's super quick to take on and off. This is why I wanted a slanted zipper that goes down the leg. The other hack is to add fold over mitt cuffs to keep little hands and feet warm too. I will cover each of these in this tutorial along with a how-to on the cute animal ears..
Cutting Guide Changes:
- Omit cuffs, snap placket and facing, and kangaroo pocket
- Alter romper front and sleeves per tutorial
- Cut mitt cuffs and bindings for hands and feet per tutorial (I used cotton lycra for the binding)
- Zipper length will need to be longer and use the corresponding length on the pattern chart for cutting the zipper guard
- Cut a zipper facing 2"x3". I used fleece but a lighter weight matching fabric would be ideal.
Alter front bunting and sleeve pattern piece
1. Remove center seam allowance: We will cut the front piece on the fold just like the back so first step is to eliminate the seam allowance. Bring the center cut line in 1/2".
2. Add length at the bottom of the leg and sleeve. Since we will be omitting the cuffs we need to add that length back. To determine by how much I folded the cuff pattern piece in half and measured the length. Then I subtracted the seam allowance twice to account for both the sleeve and the cuff seam allowance since we will be banding the end and not needing a seam allowance. To save you on the math for the sleeves nb-6mo add 1/4", 9-18mo add 1/2", 2t-4t add 3/4". For the legs nb-12mo add 1", 18mo-4t add 1.5". This will get you back to the original intended pattern length. Add more for finger/toe room if desired, keeping in mind that when the mitt cuff is not in use you still want this to rest at the wrists/ankles.
3. Draw the new zipper cut line. First I made a few marks to my pattern. I measured 5/8" down from the neck since the pattern has you start the zipper there. I marked the inseam seam allowance so I made sure to stay clear of that. I also marked where the mitt cuff will come up to when folded over for reference.
3a. Take your ruler starting 5/8" down from the center neck and slant so it goes into the leg opening at an angle you like.
3b. Draw your zipper line as far down as you wish to go. This will be the length of the zipper you need to use. Mine was 16". NOTE: This is drawn on the right side of the pattern because that is the way the pattern faces, but we will actually cut the zipper opening out on the other side.
Cut fold-over mitt cuffs and binding
1. To create the pattern pieces for the fold-over mitt cuffs lay tracing paper over the leg pattern piece and trace the bottom 3.5" (ignore that my picture shows 4"). Do the same for the sleeves tracing the bottom 3". You may opt for more in the larger sizes. This pattern piece will not be square so mark accordingly and cut 2 mirrored of each.
2. Cut two bindings for the sleeve mitts and two for the foot mitts. Cut them 1.5" by the same width of the sleeve and foot mitt cuff pattern pieces you just drafted. Also cut 2 sleeve opening bindings and two ankle opening bindings. Cut them 1.5" by the same width as the original sleeve/ankle cuff pattern pieces that we omitted.
Assembling the Fleece DIY Bunting
Now we're ready to get started with the DIY Bunting!
Zipper Installment
1. After cutting out the front bunting on the fold, open it up right side facing you and lay the pattern piece on the right side (your right, wearers left, fig. a) it will be upside down but you should be able to see through it. If not, no worries because to draw the zipper cut line you need to fold along the zipper cut line on your pattern piece (fig. b) so you can trace that line with chalk or a fabric marking pen unto the fabric (fig. c).
2. Take your zipper facing and place it over the bottom of your zipper line so it extends past it by about 1/2" (fig. a). Draw the line again on top of the facing so you can see it. Pin the facing in place and sew 1/4" along one side of the marked line. When you reach the bottom (without going past) lift your presser foot and turn the fabric 90 degrees to sew across the bottom for 1/2". Then turn again and sew up the other side 1/4" from the marked line. (fig. b) Now cut along the marked zipper line cutting straight down from the center for 5/8" and then following your slanted line. Stop 1/4" before reaching the bottom of the line, and cut a "Y" shape towards the corners of the box you sewed being sure not to cut into the stitches. (fig. c) Flip the facing to the wrong side of the fabric (fig. d) and press. Now you have encased your raw edges along the base of the zipper. (fig. e)
3. Lay your zipper RST on the right side of the zipper cut line. Using your zipper foot, baste in place 1/4" from the edge, stitching in the ditch along the facing.
4. When you get towards the bottom of the facing pull all the garment on the left side down and under to the right side (fig. a,b) so it is out of the way and you can turn and stitch across the bottom of the zipper (fig. c,d). You are stitching essentially on top of your facing seam.
5. Now lay the left zipper down and repeat the process (fig. a,b) overlapping the previous stitching at the base of the zipper (fig c). Check that your zipper lines up evenly and there aren't any puckers. (fig. d) If you are happy with it then stitch over your basted stitches with real ones.
6. Follow steps 5 and 6 from the original pattern to attach the zipper guard. Then starting on the left side, topstitch around the zipper using scant of a ¼” seam allowance to make sure you catch the zipper tape. Pass the zipper 1.4”, lift the presser foot and pull the zipper guard out of the way as you turn the fabric. Continue topstitching across the bottom and then up the other side.
Mitt Cuffs:
1. Take your mitt cuff binding and lay it RST across the top edge of the cuff. Sew in place. (fig. a) Fold the binding up and press, then fold the top edge to the wrong side 1/4" and press. (fig. b) Fold that over the seam allowance and pin in place. (fig. c) Topstitch. Repeat for both mitt and foot cuffs.
2. Take your mitt cuff and lay it in place along the folded sleeve to use as a cutting guide. Cut the fold of the sleeves just past the height of your sleeve mitts.
3. Place the mitts RST on mirrored sides of the sleeves. This will have the wrong side of your mitt showing when not in use, but the right side showing when it is folded over.
Baste in place along side edges. You can also baste the bottom (not shown) to reduce confusion when installing the binding.
4. Fold the sleeves in half RST, sew a dart along the center opening you just made, starting at the base of the sleeve with a scant ¼” seam allowance and reducing the seam allowance until you reach the end of the opening. Then sew off the edge of the sleeve and tie off your thread tails instead of backstitching.
NOTE: When you attach the sleeves at step 20 of the original pattern be sure the mitt cuffs are on the back side.
5. Follow a similar process for the foot cuffs. We don't need to make a dart since we have side seams on both sides so simply place the cuffs on the BACK bunting body and baste in place along the sides and the bottom. Treat this as one piece when assembling the body in steps 21 and 23 of the original pattern.
6. Sew short ends of sleeve opening bindings together. Pull around sleeves RST and pin. Make sure you have the mitt cuff and the back sleeve together as one piece (If you basted the bottom of the cuff then this won't be confusing). Sew in place.
7. Turn the sleeve inside out and pull the binding out (fig. a) Then as we did with the previous binding fold it to the wrong side 1/4" and then fold it over the seam allowance (fig. b) and topstitch using a stretch stitch, double needle or cover stitch (fig. c). Complete this for the other sleeve and both feet bindings.
Mitt cuffs are done! If you want to add animal ears to the hood that is really easy.
Animal Ears
Adding animal ears is super quick but you have to do a little free-handing.
Draw a half circle or pointed ear if you wish. Make them slightly larger than you want to account for seam allowances. Cut out four. (fig. a) Sew together in pairs. I sewed wrong sides together so they would be a little fuzzier than the rest of the bunting. Clip corners and turn. (fig. b) After step 24 in the original pattern baste the ears to the hood where you want them. (fig. c) Then continue to step 25 leaving the ears sandwiched in between. (fig. d) See wasn't that easy?
I hope you enjoyed the baby bunting today! Make sure to come visit us in the Peek-a-Boo Pattern Shop Facebook Group to get answers to your sewing questions and share what you make.


