
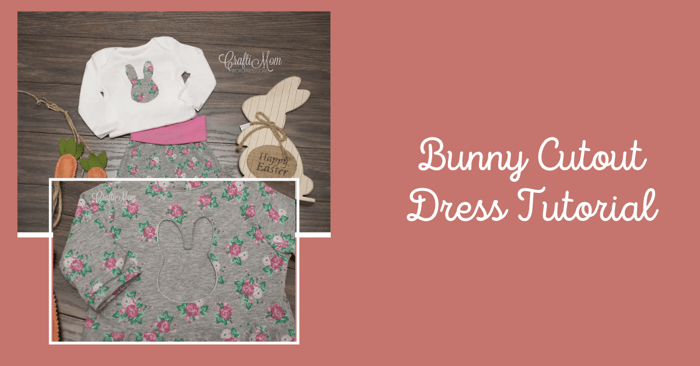
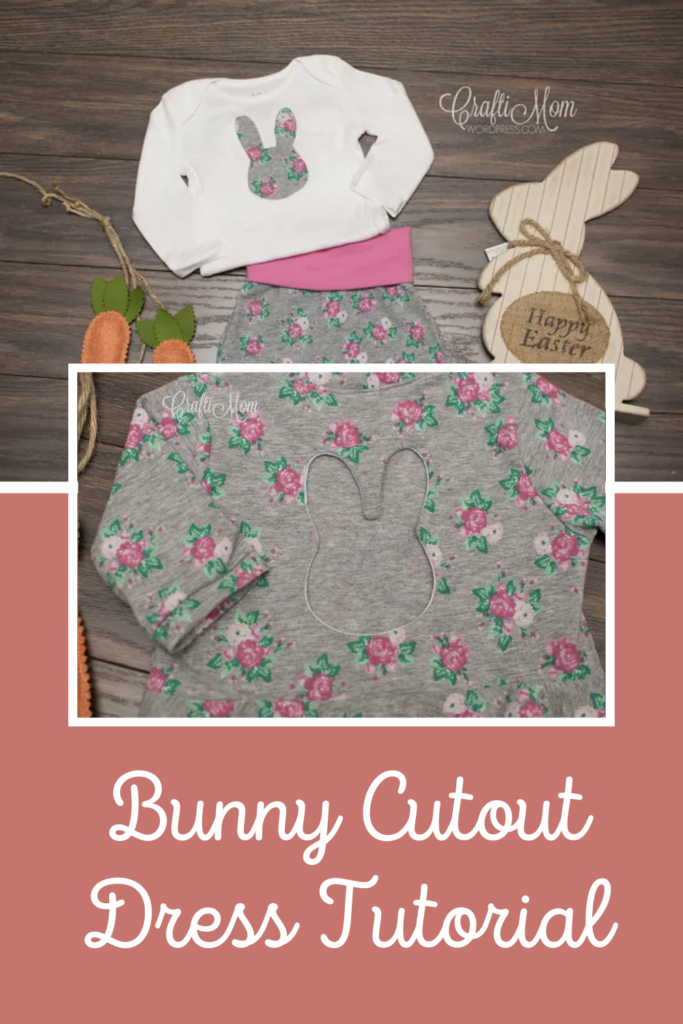
Bunny Cutout Dress Tutorial
Hi it's CraftiMom again and today I am showing you a fun bunny cutout to add to your little girl's Easter dress this year. I will say, that I love the frilly, over-the-top girly dresses for holidays, but I also know that kids love to play and I want them to be comfortable too.
Bunny Cutout Dress Tutorial
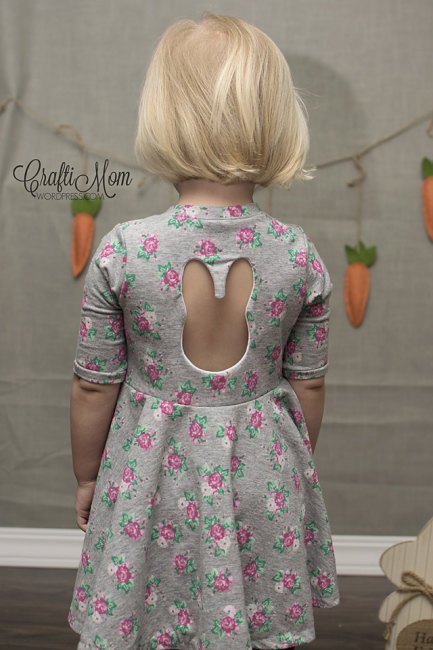
So I decided to make a knit dress to change into after church while hanging out with family and eating too much ham. I thought it would be fun to add a little bunny cutout on the back of the Gloria. I will show you how I did it and provide the template so that you can also get the same look, be it with the Gloria Party Dress Pattern, or another knit bodice dress.
I used the Gloria Party Dress with the circle skirt add-on that can be found here. Below I will show you how I added the cut out to the back bodice and then you can sew up your own Gloria or knit dress for your favorite little girl this Easter.
Start by printing off the Bunny Template and choosing the correct size. Cut this out and set aside. You could also trace this onto freezer paper which will make it easy later to use as a sewing guide.
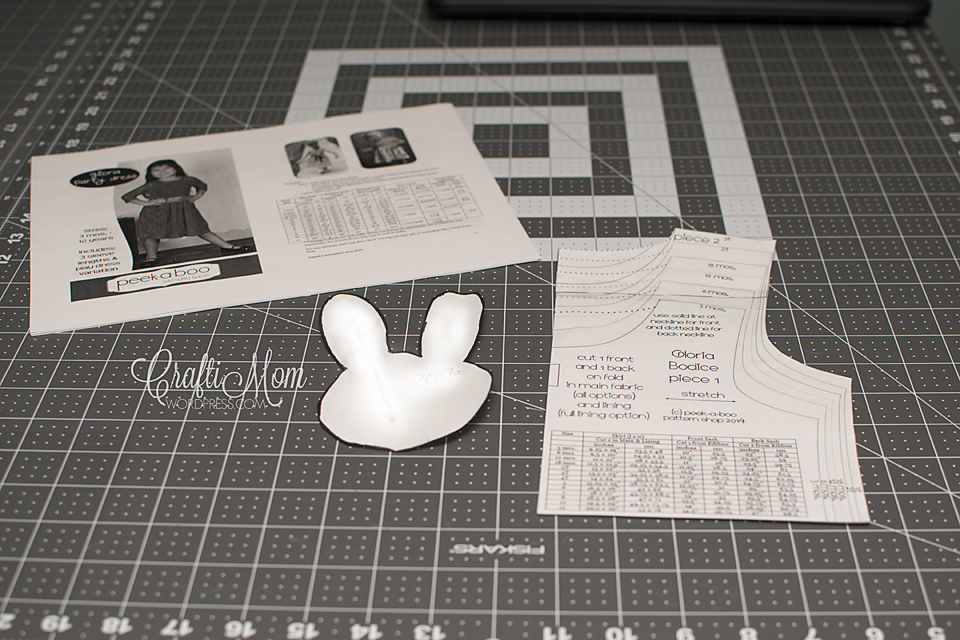
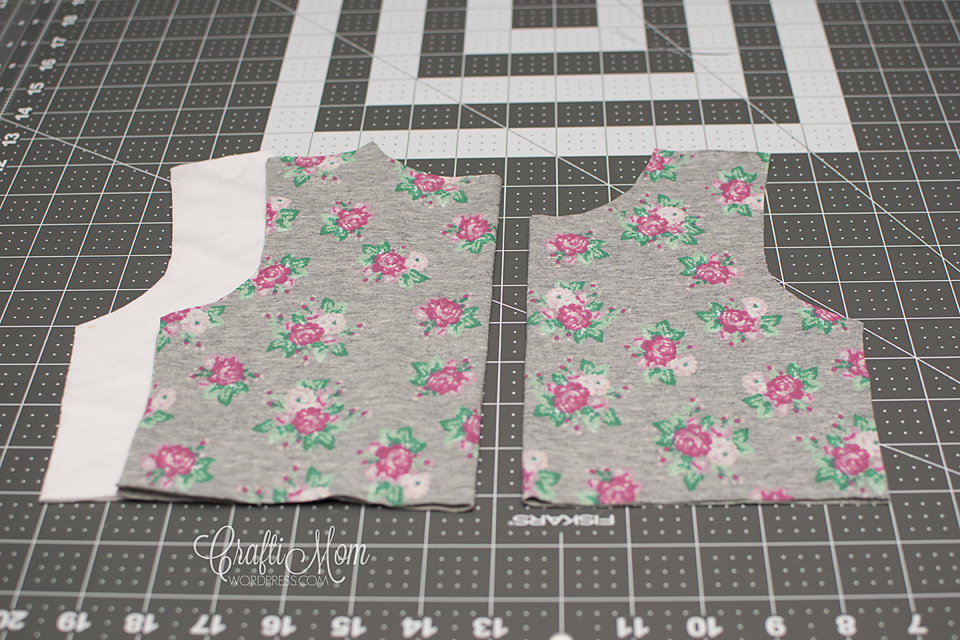
Cut out the back bodice as instructed, then cut out a second with a lining fabric. You can choose to use the same as the main fabric, or use a different fabric as I did here.

Then cut out 1 front bodice and the rest of the pattern pieces per the instructions. For the bodice, you will now have 2 back bodice pieces and 1 front.
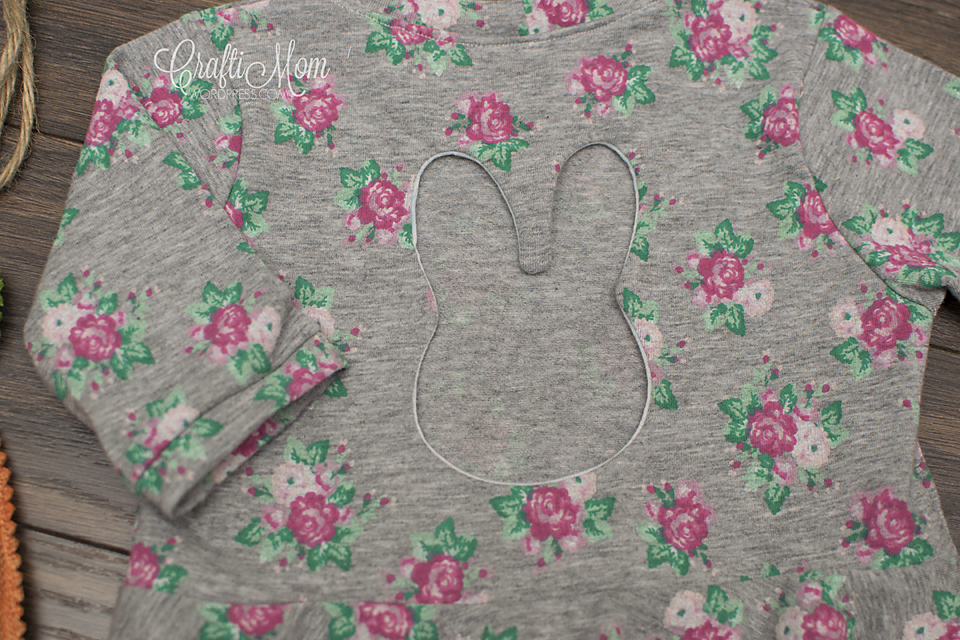
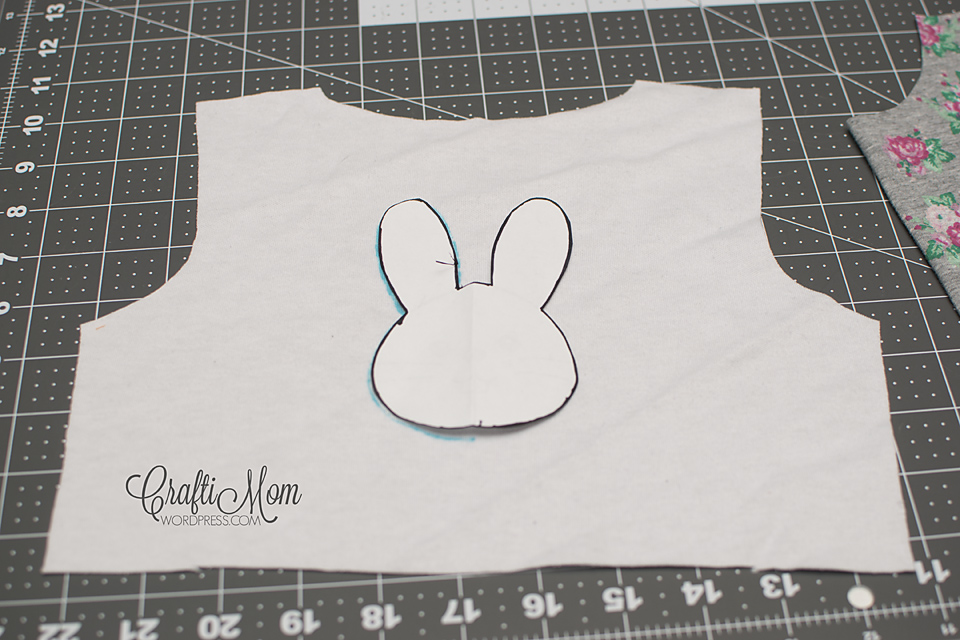
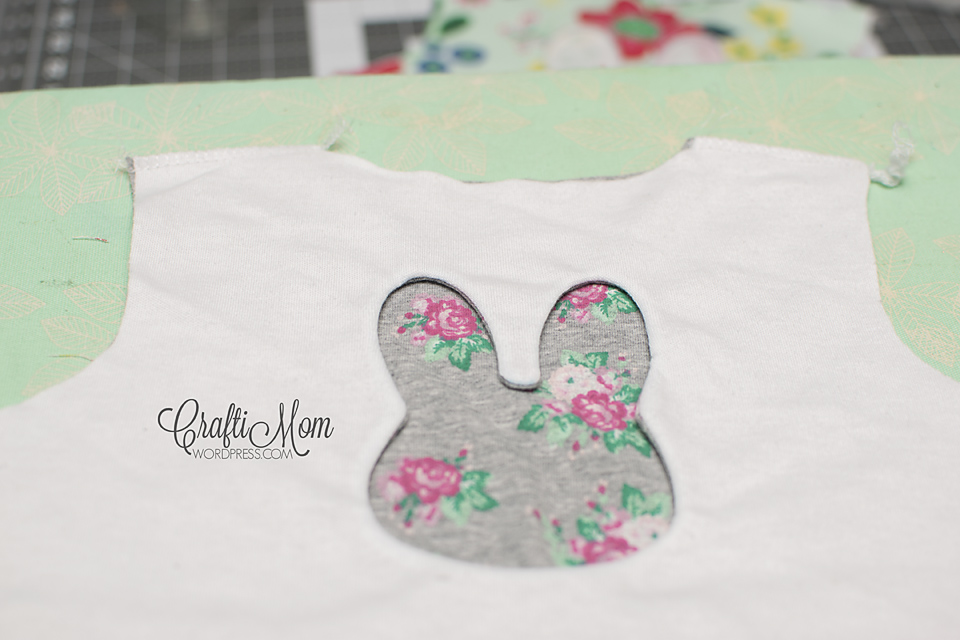
Start by finding the center of your lining bodice piece and the center of the bunny piece. Press the fabric to mark or use a washable marker if you prefer. Use the template to trace the bunny shape on the the wrong side of the lining piece. This is where the freezer paper template would come in if you chose to go that route. Just lightly press with paper on to the fabric, shiny side down and you don't need to trace and then stitch right around the edge.
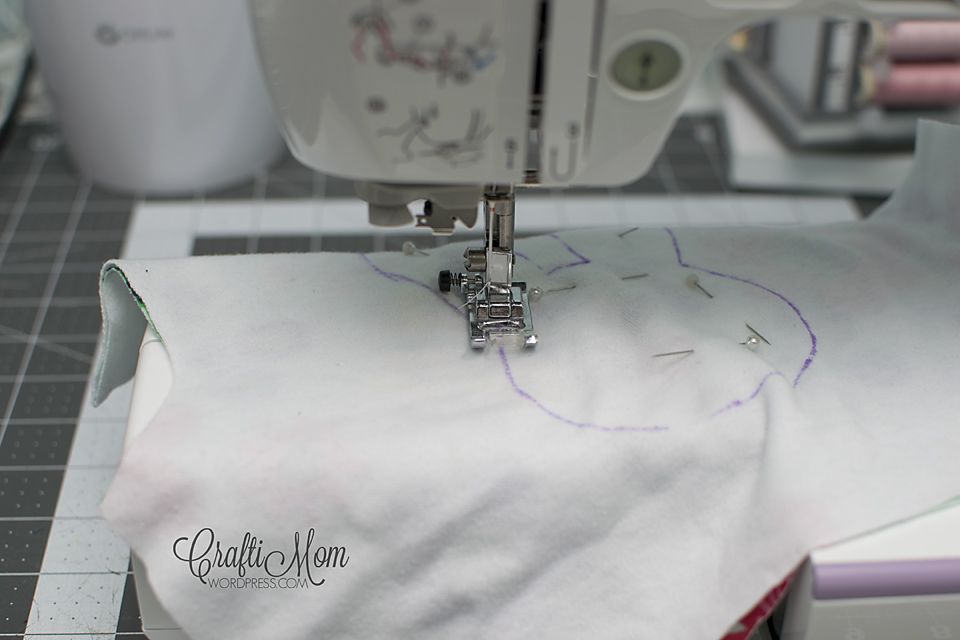
Place your back bodice pieces together and pin to hold in place.

Head over to your sewing machine and stitch around the cutout. I used a straight stitch, but if you are worried about stretching and popping stitches, you could certainly use a knit stitch.

Now carefully cut inside the bunny close to your stitches, but not through them. Cut neatly, there is a bonus at the end for the extra fabric...
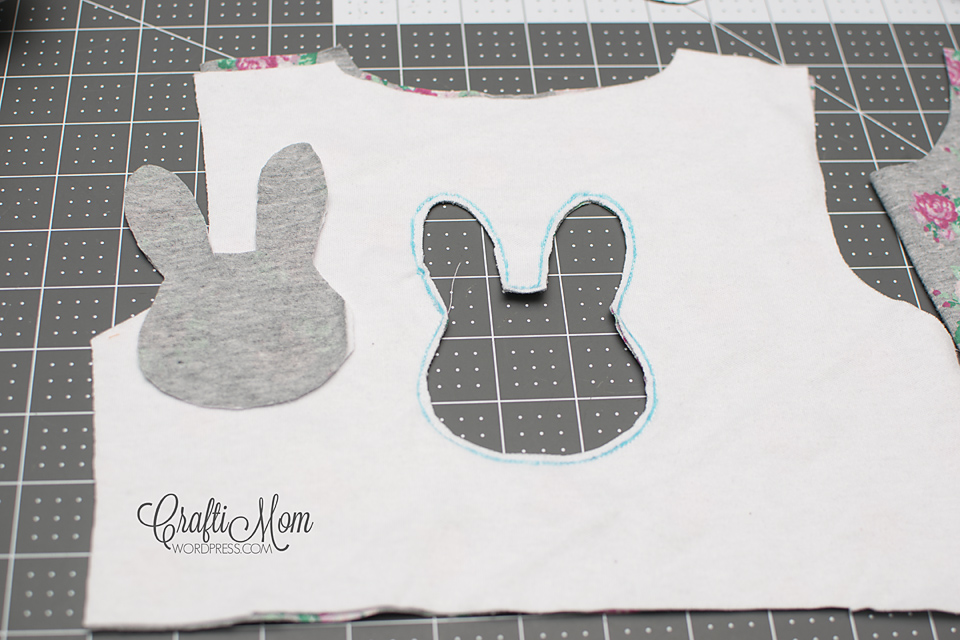
Now take the lining fabric and fold it towards the center hole. You will be turning the fabric wrong sides together by pulling the fabric through the center cutout.

Press along the seams of the bunny and continue with the pattern as written.
You will be treating both layers of the back bodice as one piece. Sew the front and back bodice right sides together, then attach the sleeves right sides together. Your piece should now look like this. (side seams are not sewn yet.)

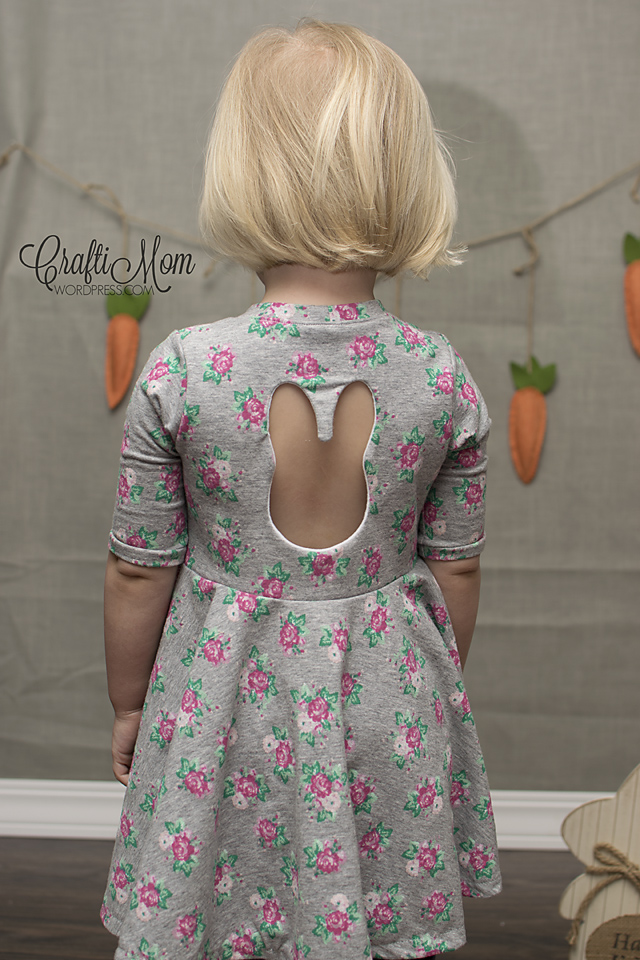
How cute is that! I also realize after taking these pictures, that my Little Bitty as I call her isn't so bitty anymore, ans I think she finally needs to go up a size!
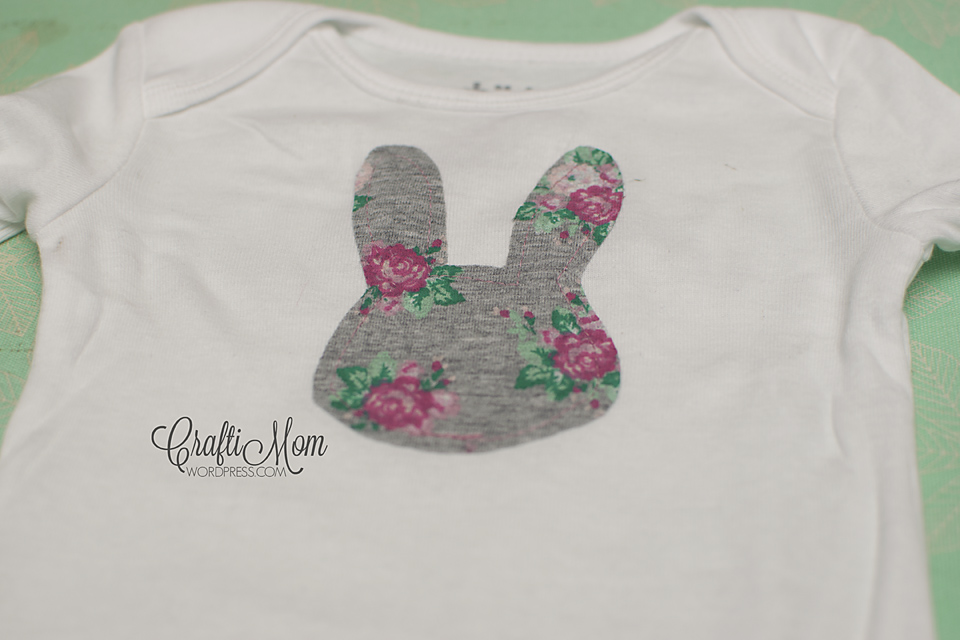
Now remember that bunny cutout I said to set aside? Why waste it! Use a little heat n bond lite on the back and add it to a plain bodysuit or any other shirt, and ta-da! you have super cute coordinating sibling outfits!

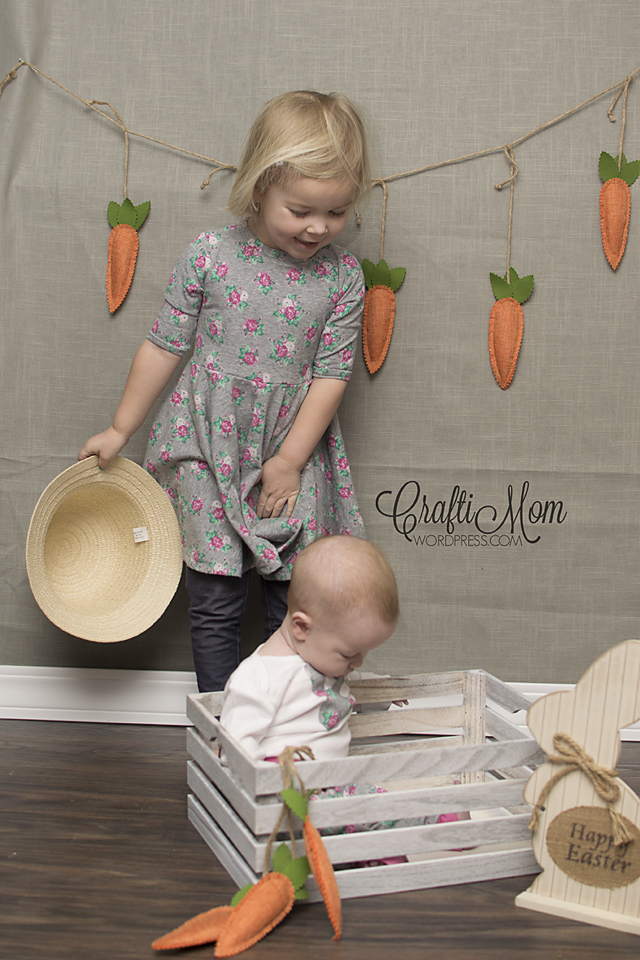
Sew up a pair of Junior Joggers and stick an adorable baby in it and admire your work!

I tried getting a cute little photo of them both together...
Thank you for sewing with us today. Before you leave, make sure to join our Facebook Group and follow us on Instagram. Happy Sewing!